Re-Winding a Warp
Weaving requires attention and care. It never pays to get distracted while warping! And I talk a lot about checking each section before moving onto the next. Let my share why.
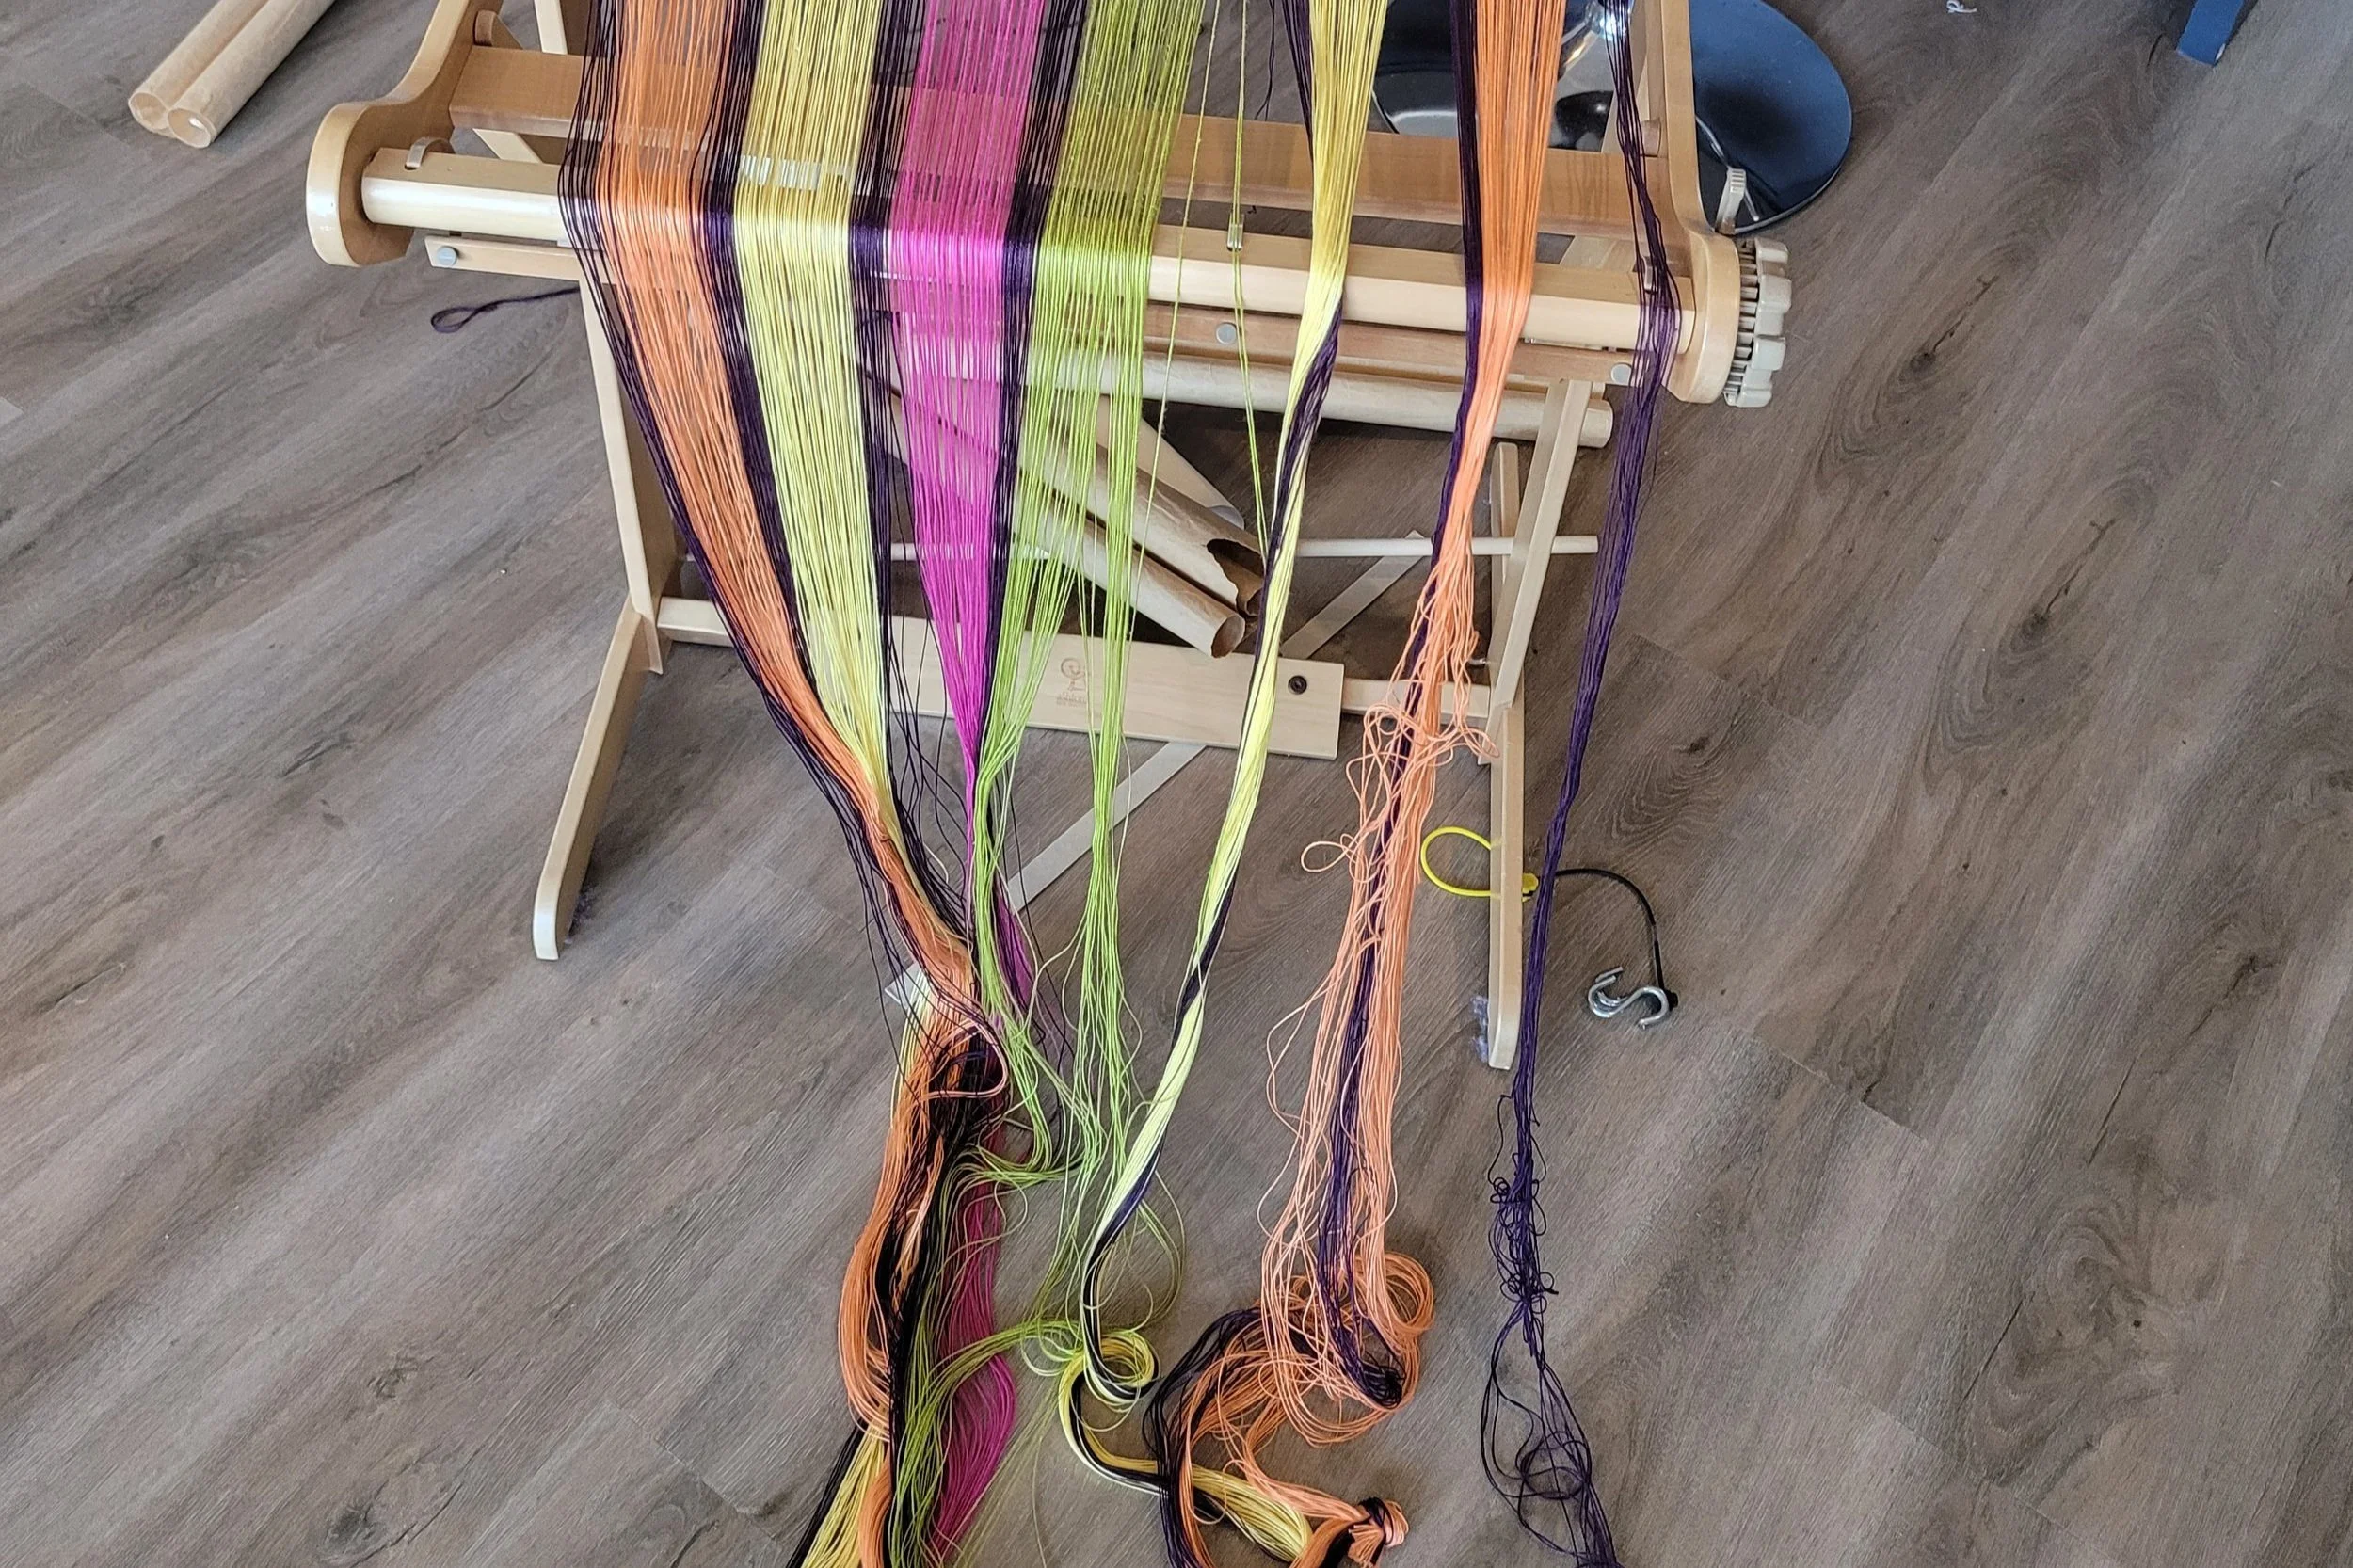
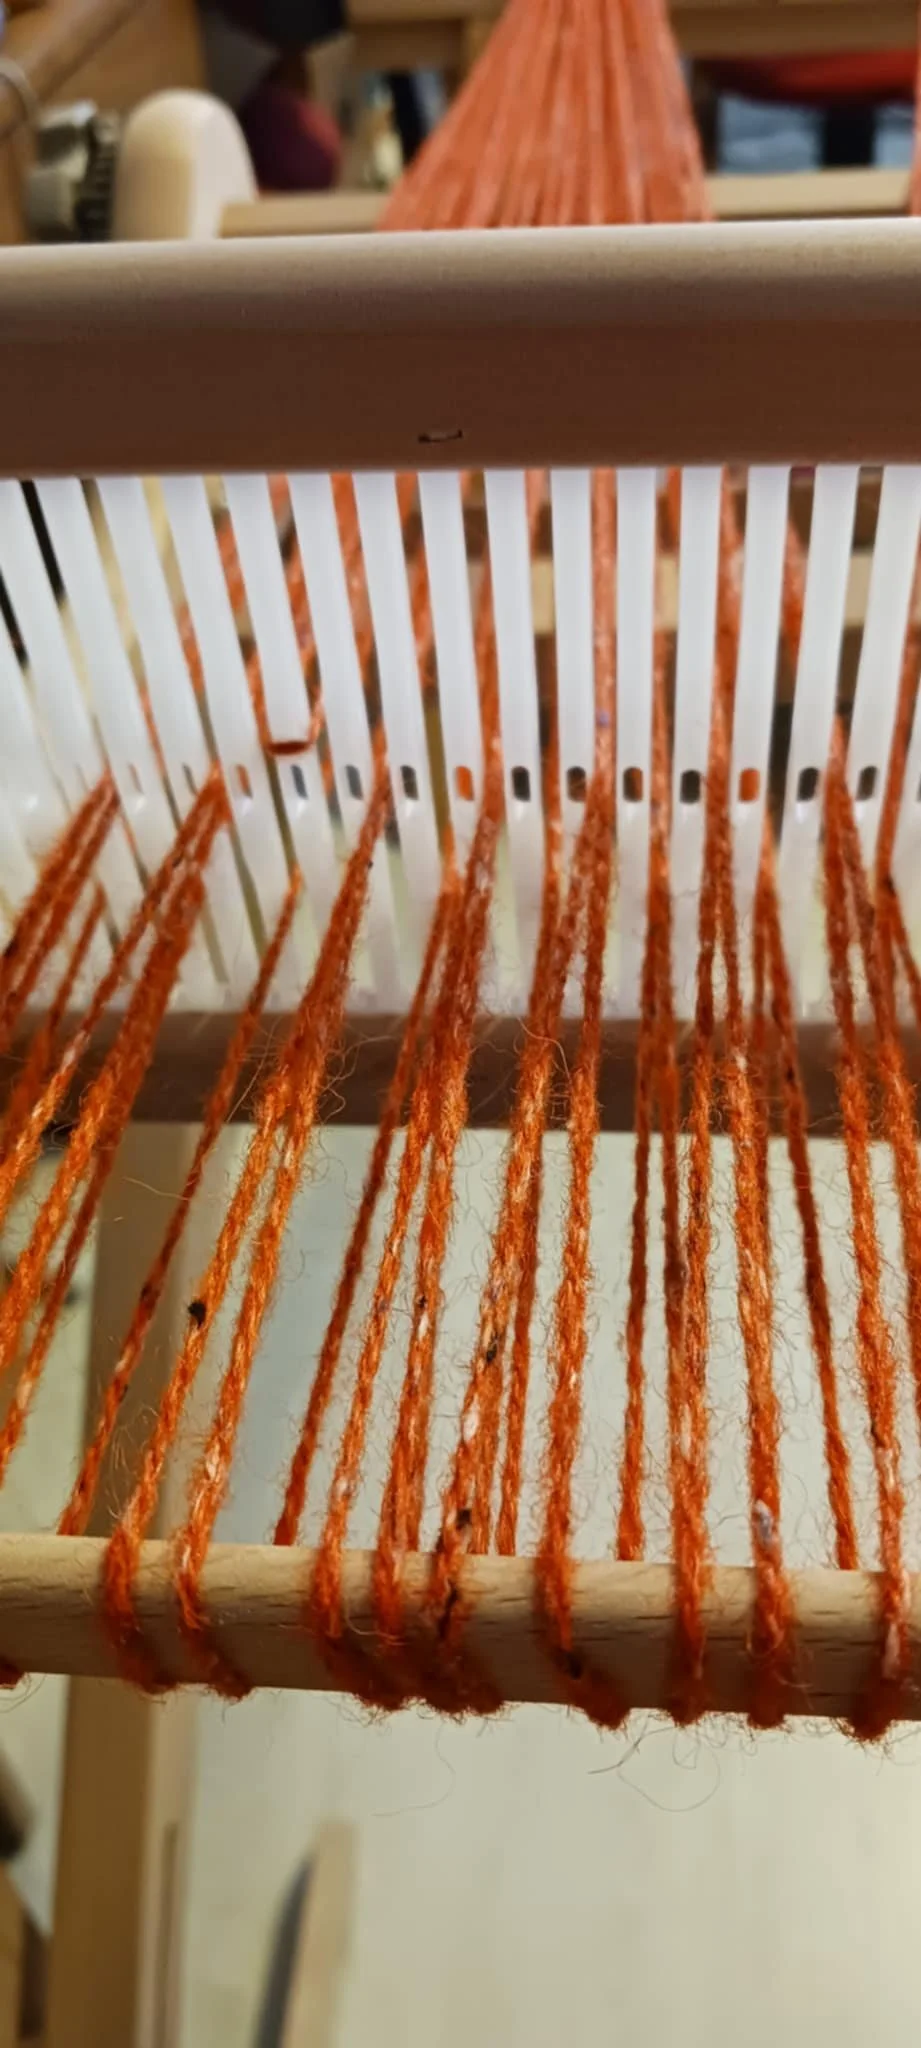
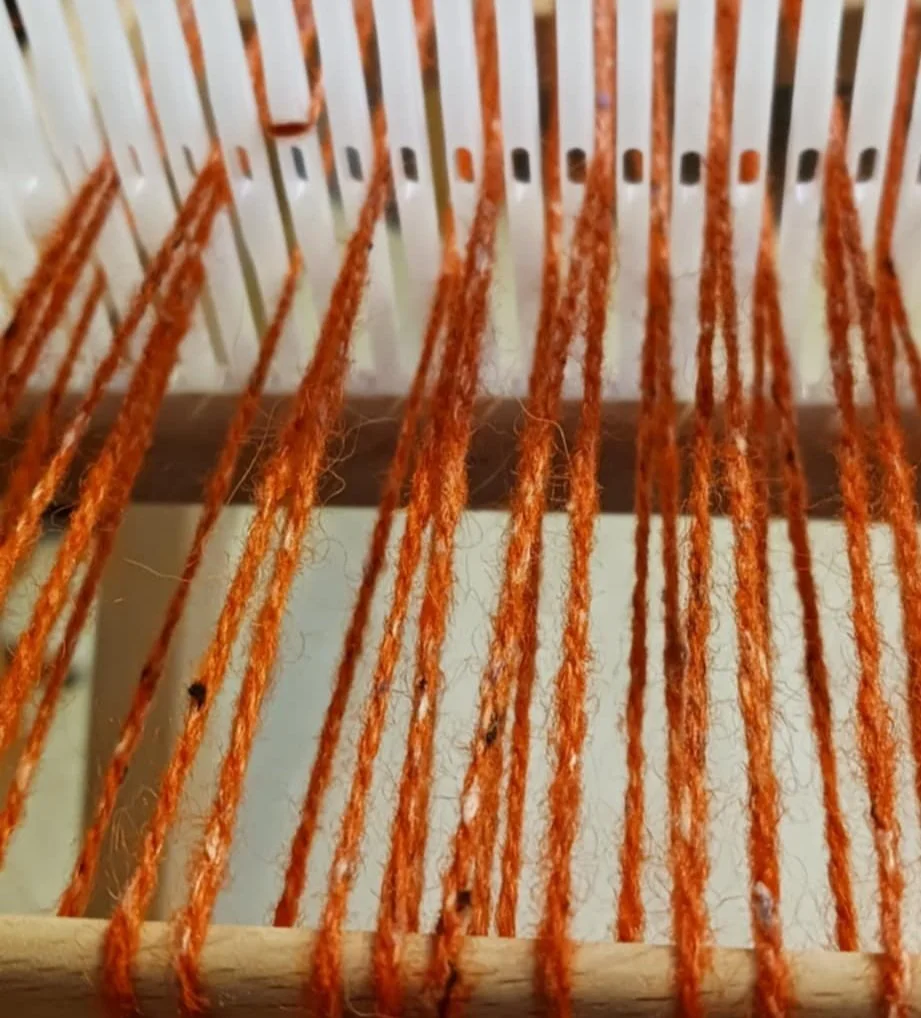
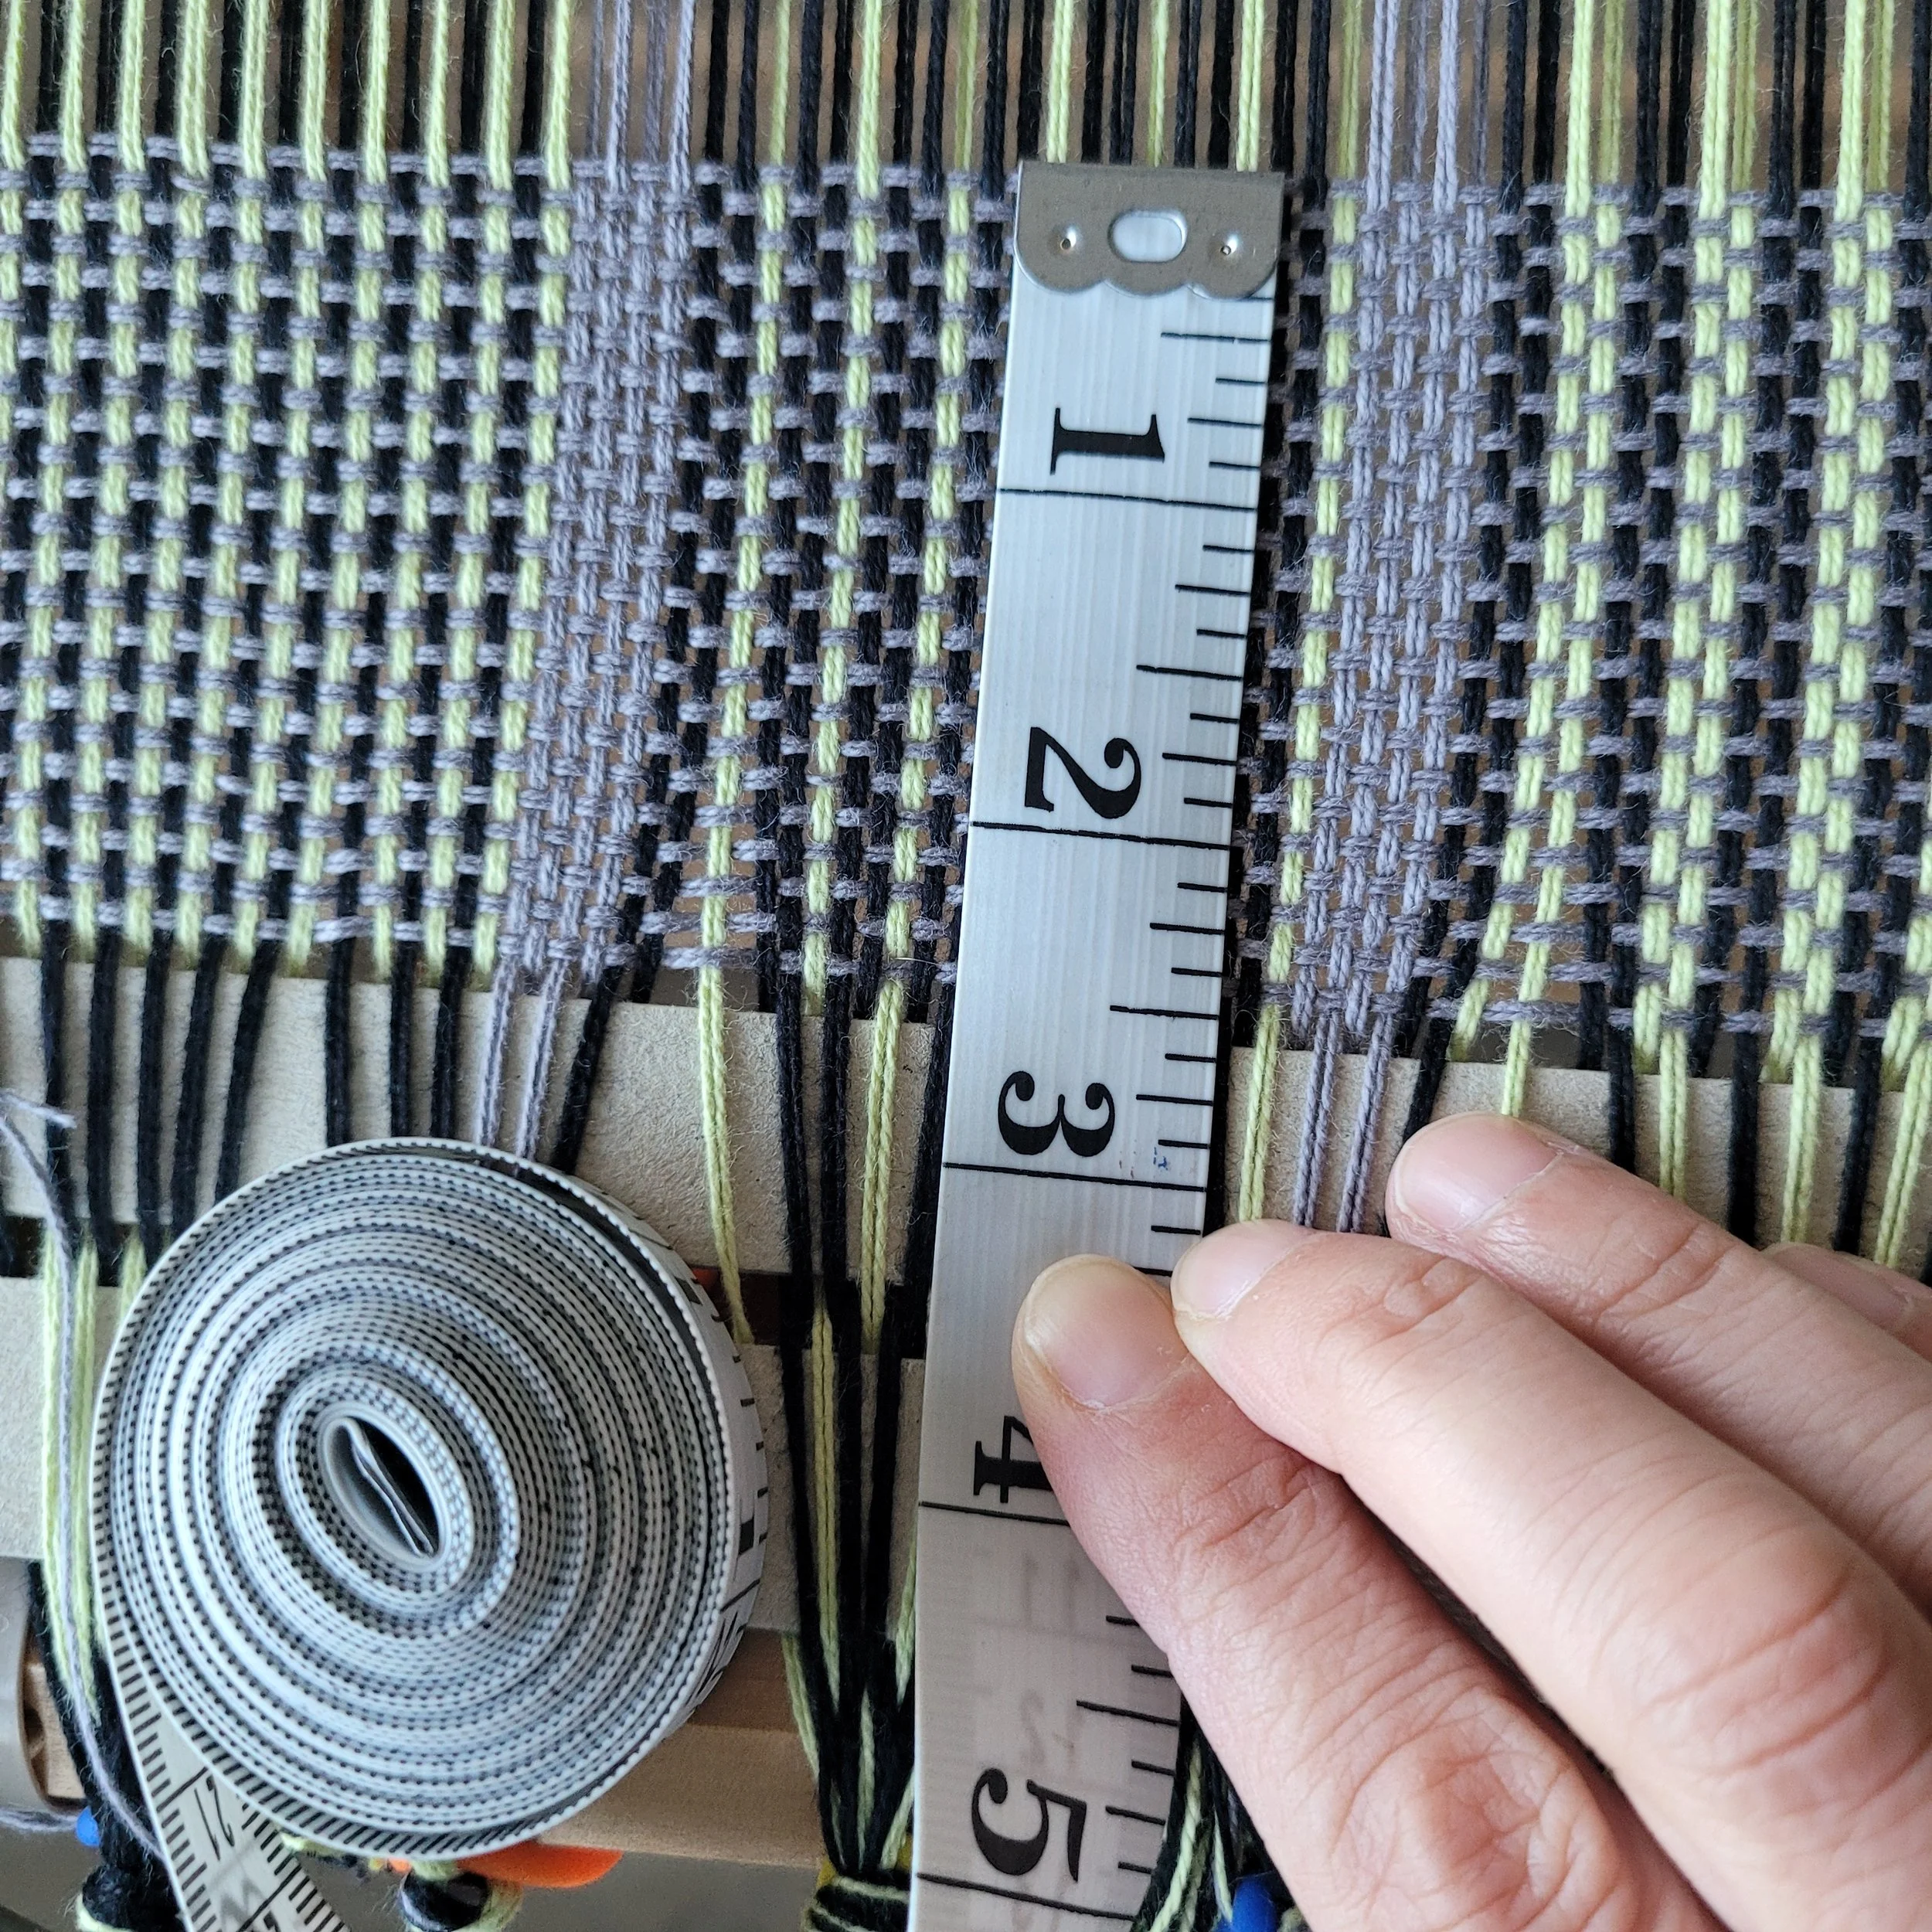
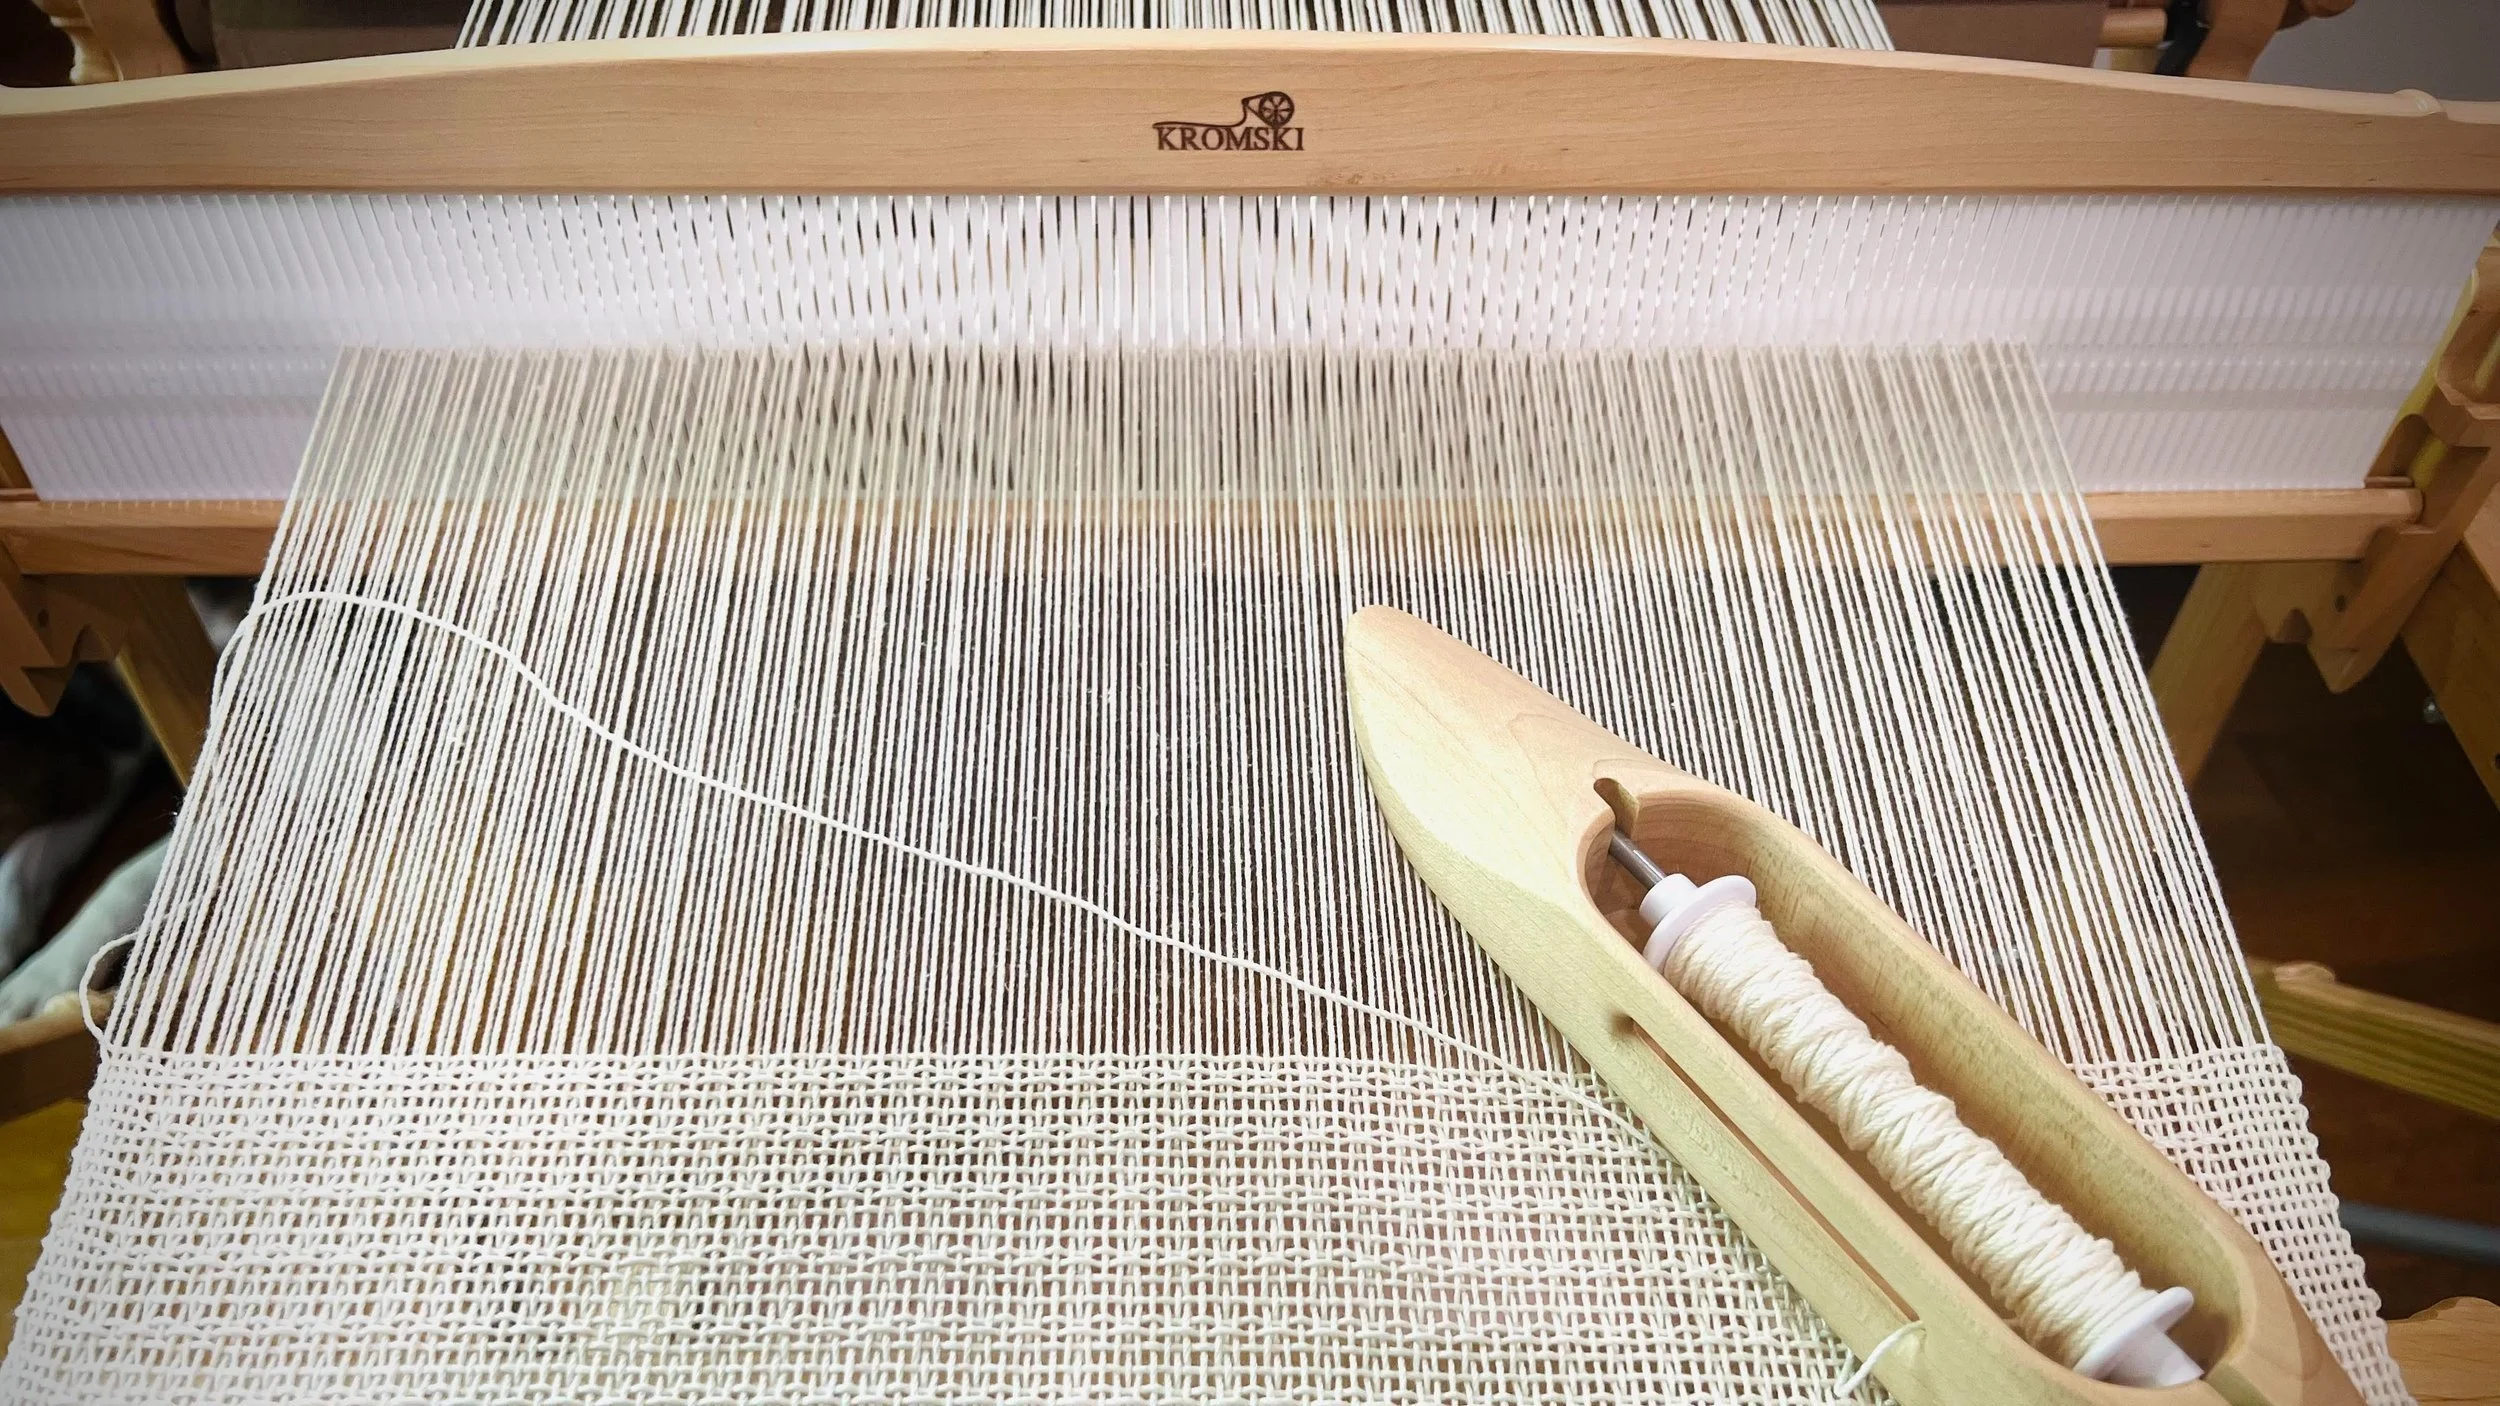
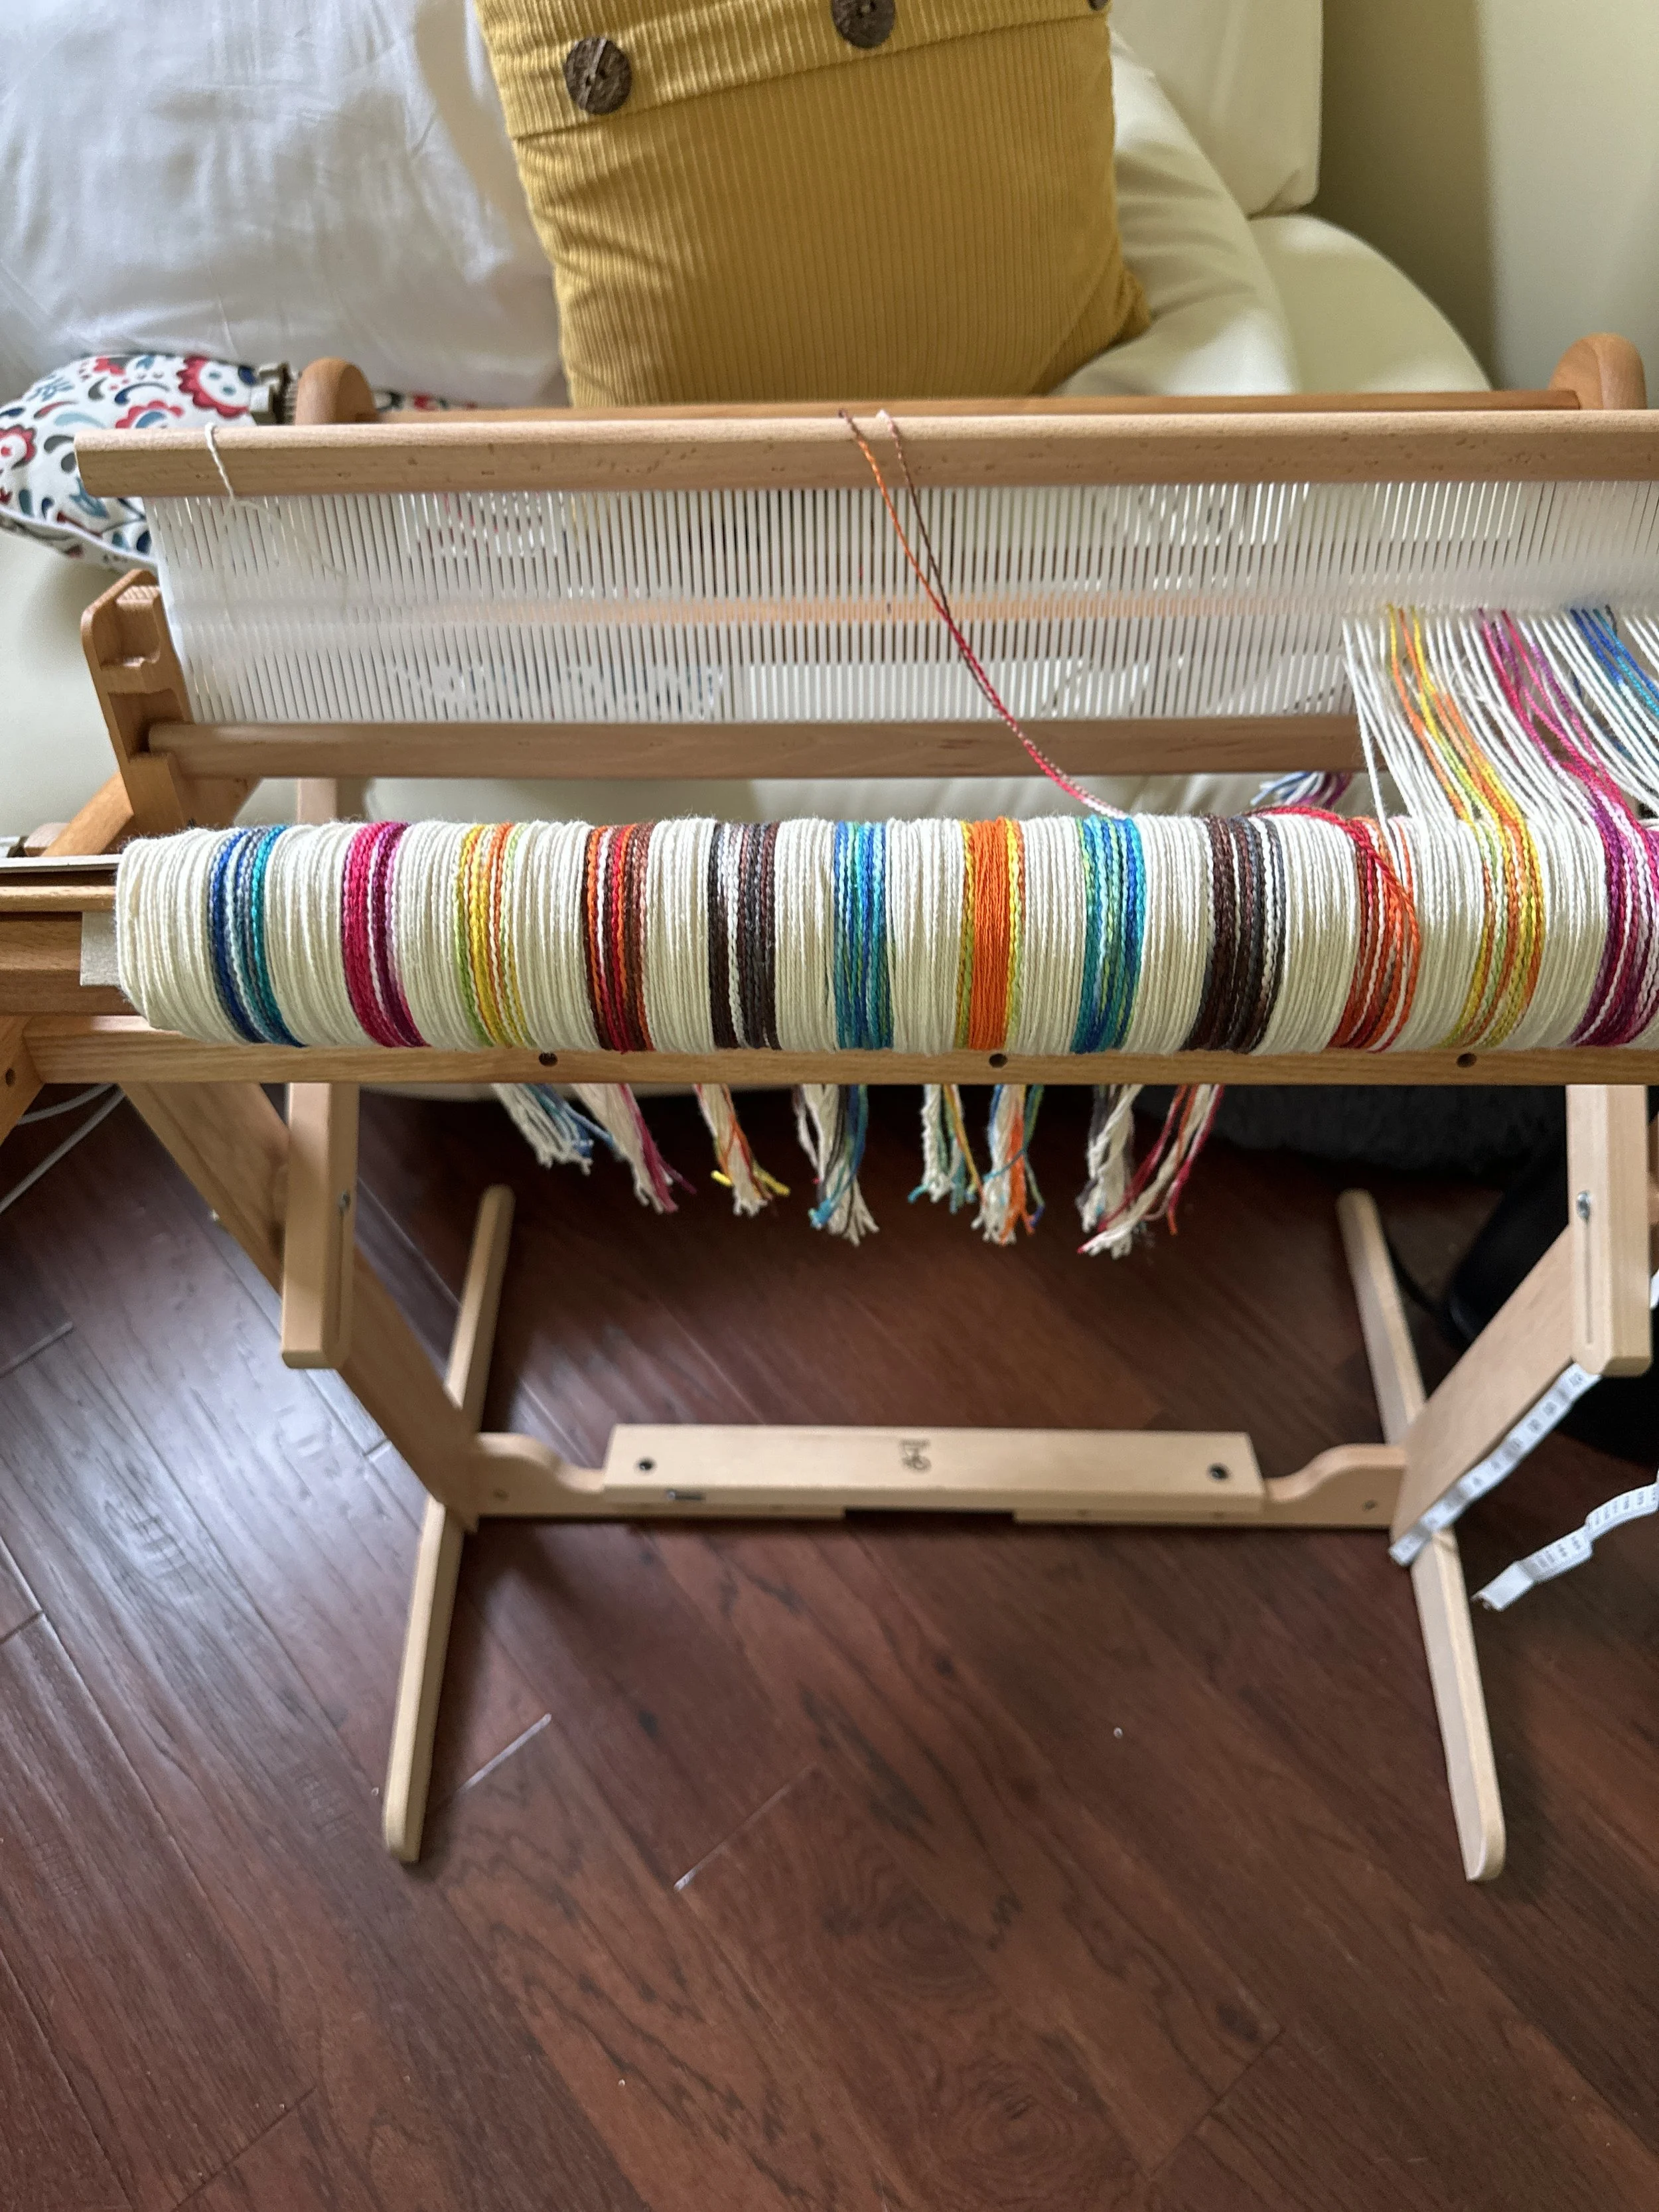
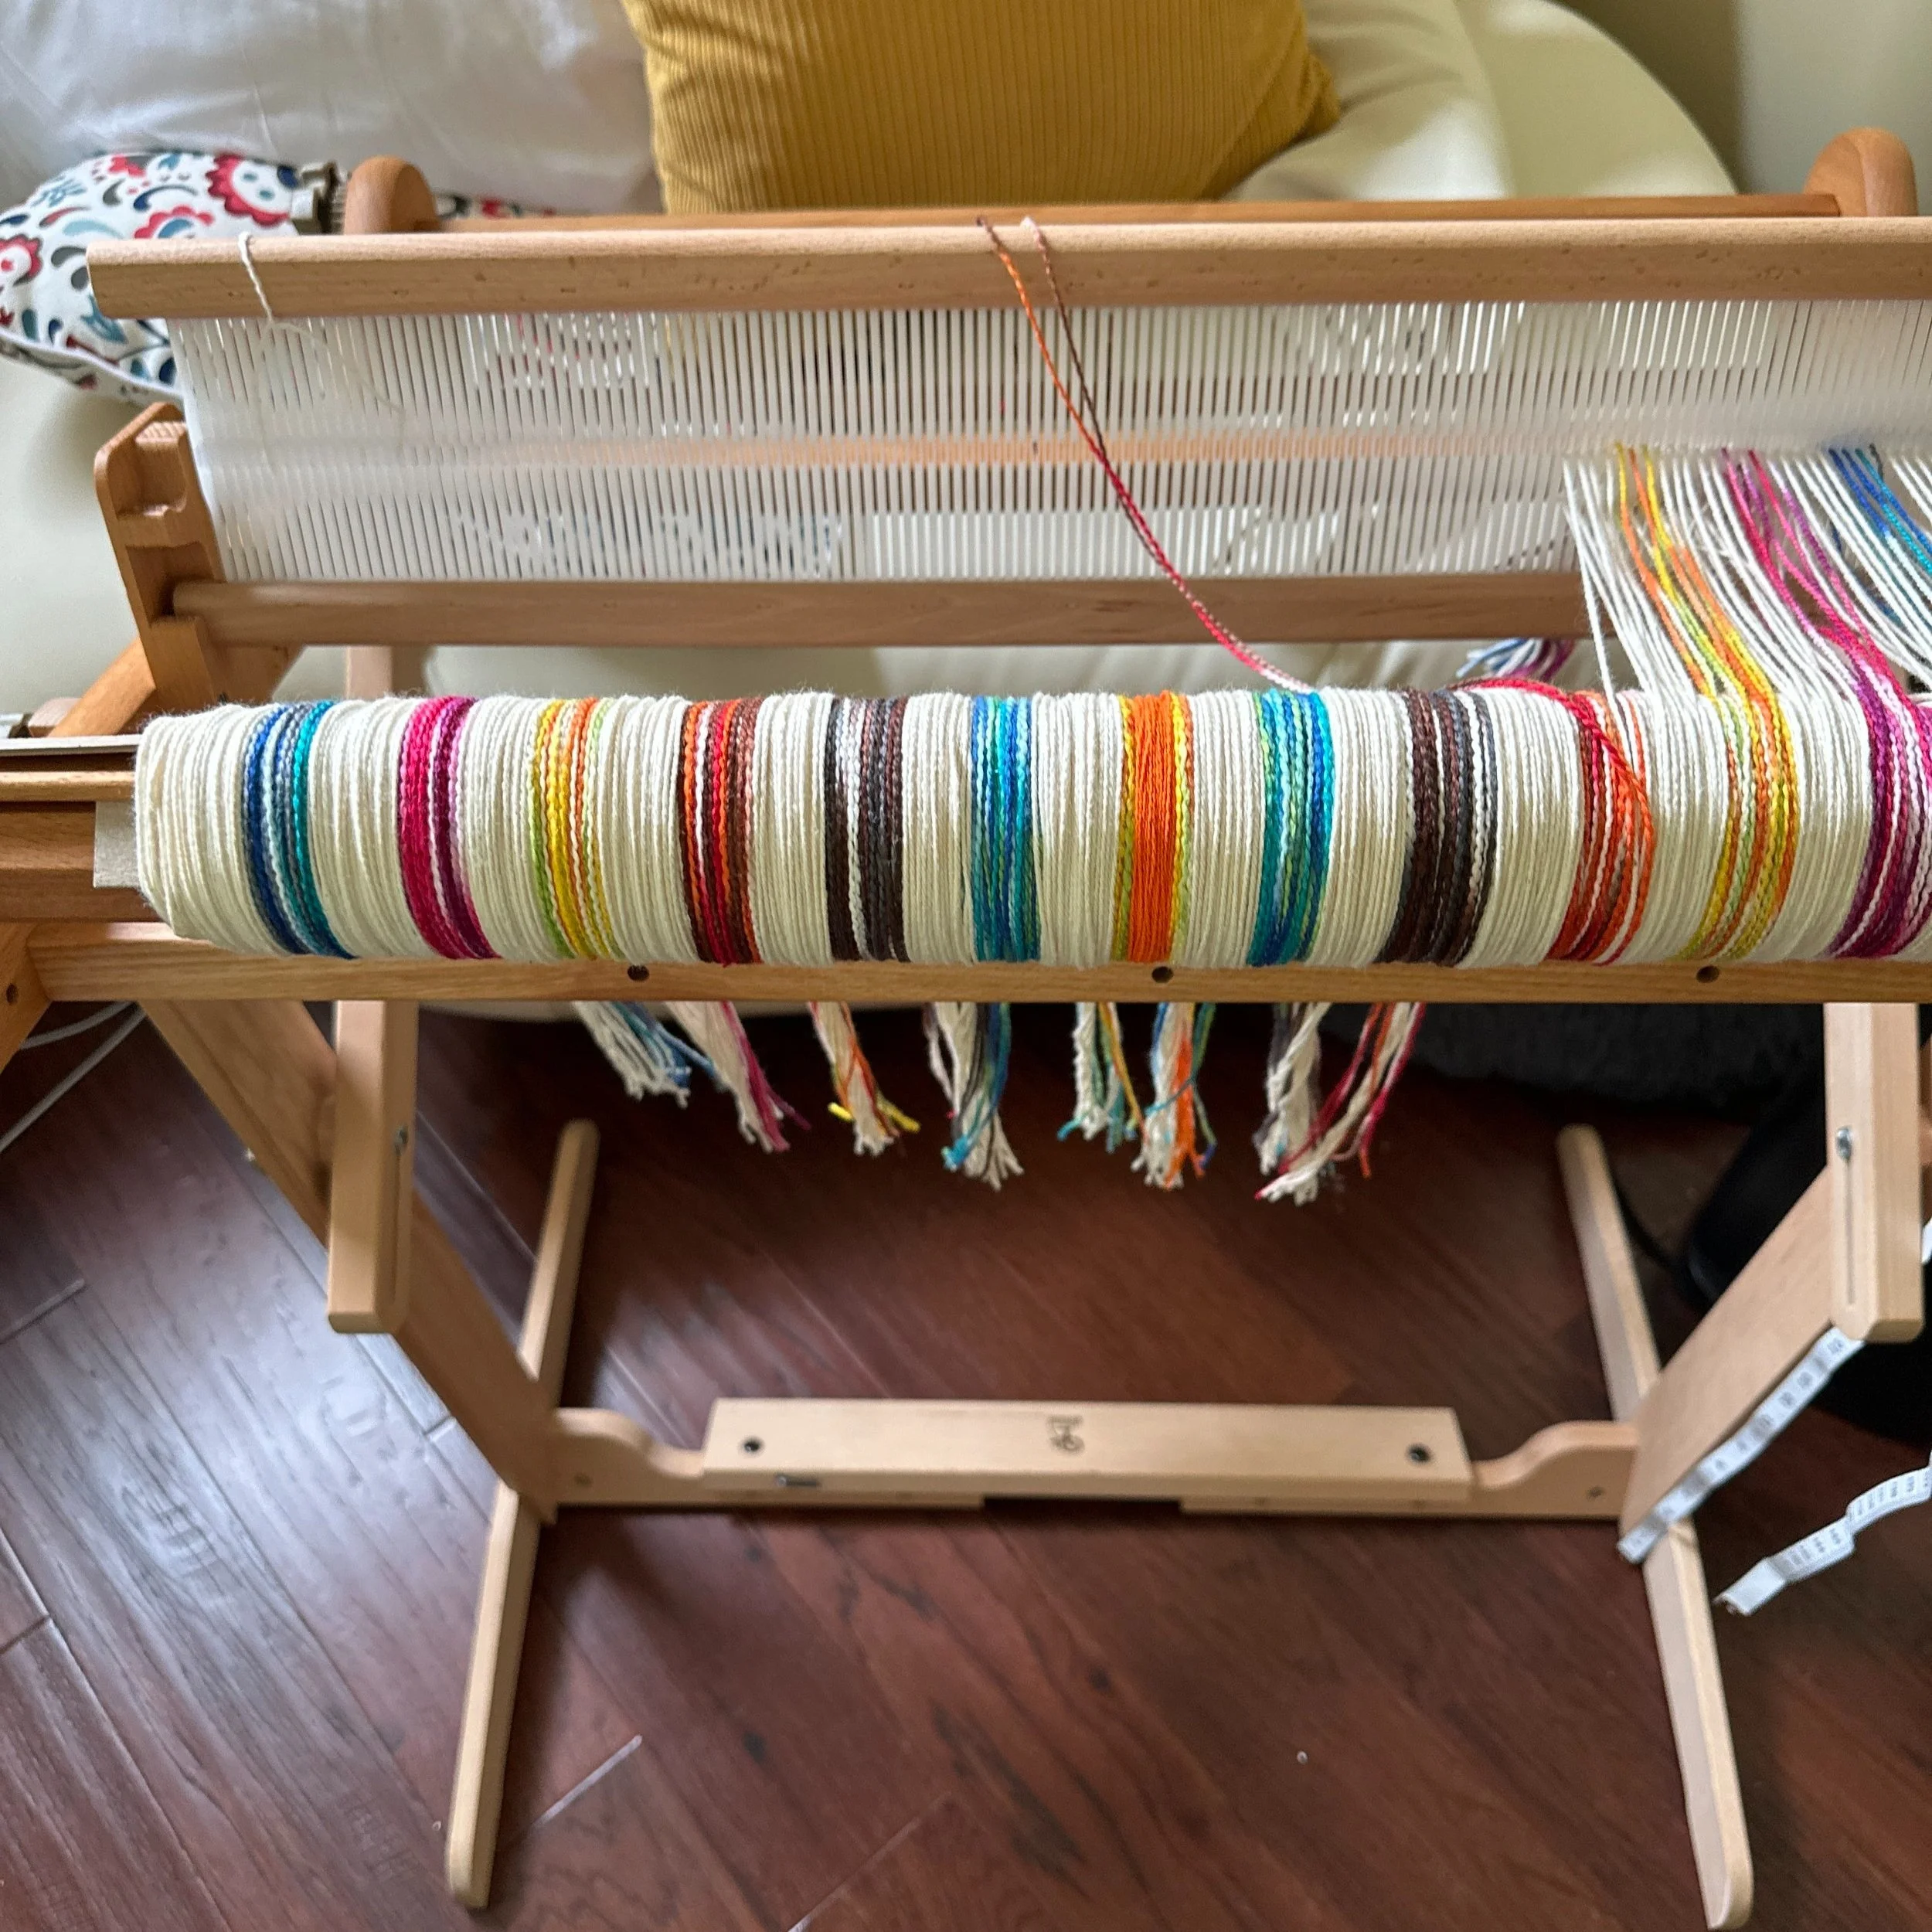
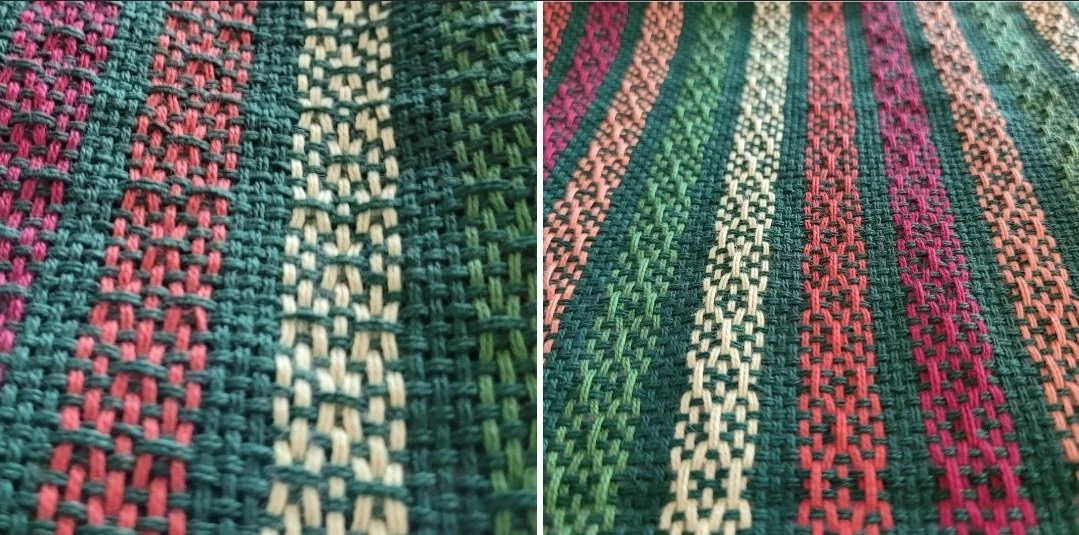
Weaving requires attention and care. It never pays to get distracted while warping! And I talk a lot about checking each section before moving onto the next. Let me share why. Take a look at the picture above. See that wider purple stipe smack dab in the middle? That was where I got distracted. I’m not sure if I forgot to count or forgot how many ends I was supposed to have. And it really doesn’t matter because the result was the same: with that wide stripe, I was not going to have enough slots and holes to warp the pattern. And I didn’t realize the mistake until I was well past it!
I stepped back for a moment to consider my options:
I could unwind and fix the mistake.
I could continue warping and winding, then toss the extra ends off the back, move everything over, then add the final ends and hang them off the back of the loom with s-hooks.
I went with Option 2 for a variety of reasons. First, this is a 2-heddle project; that means that each slot contains 4 ends. That seemed quite complicated to unwind and very time-consuming. Second, I’ve thrown ends off the back any number of times without problem, and added so many extra ends in that it doesn’t even seem a challenge anymore.
So, problem solved, on my way! I wound, moved everything over and added 12 extra ends (3 slots) to the loom with s-hooks. Honestly, things looked good and I was confident I’d have no trouble.
And then I started weaving. May I just say that 12 ends, on the edge of a warp, tied on with s-hooks, does not make for consistent or even tension? It started ok, but as I continued to weave the selvedge edge got worse and worse. I added extra hooks, extra weights and even wrapped the ends around a dowel like an extra warp beam. Nothing helped and weaving was not fun. After about 8” I gave up and decided to cut the work off and rewind the warp.
Here’s a step-by-step guide in case you ever need to do this!
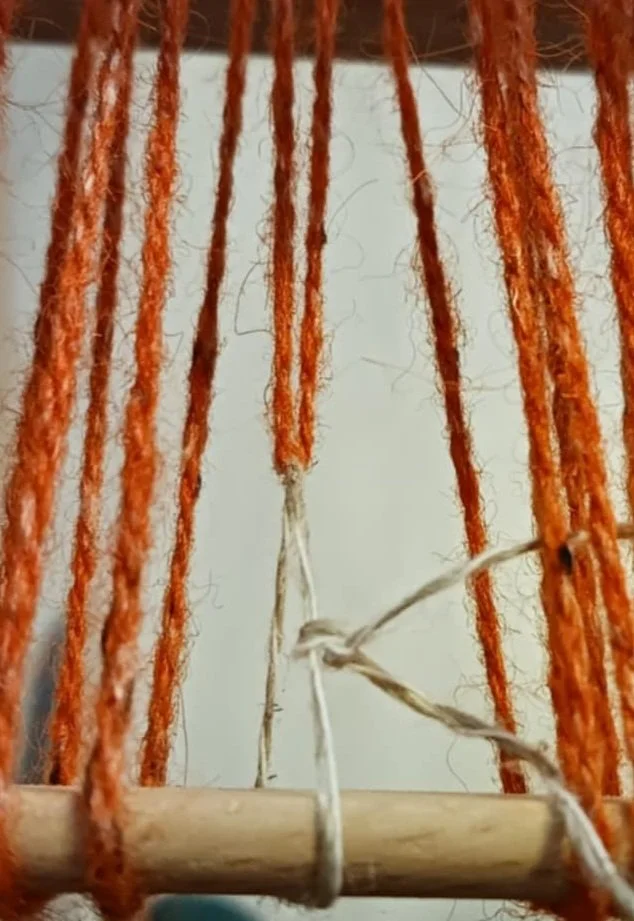
Before cutting off the work, wind the woven cloth and warp far enough forward so that when you cut, the threads do not slip out of the heddle. Cut in small sections, and tie slip knots as you go. Since I had 2-heddles threaded, I really did not want to come unthreaded!
After cutting the warp and tying the slip knots, remove the woven section from the loom.
Begin unwinding the warp. I unlocked the cog and using both hands, gently pulled the warp forward. I had to unwind the full warp since I was going to add ends to the back warping stick. However, if you are unwinding to fix tension issues, you do not need to unwind the full warp. Leave at least 1 full turn on the back beam. This will hold all the warp ends so they cannot slip. If you have unwound fully, since the ends have been cut, and are no longer under tension, it is super easy for you to pull a thread or two or ten making the warp ends uneven. If you must unwind all the way, a length of painter’s tape across the warp and the back warping stick will keep everything in place.
At this point I tied my extra ends onto the back warping stick and removed the extra ends from the middle.
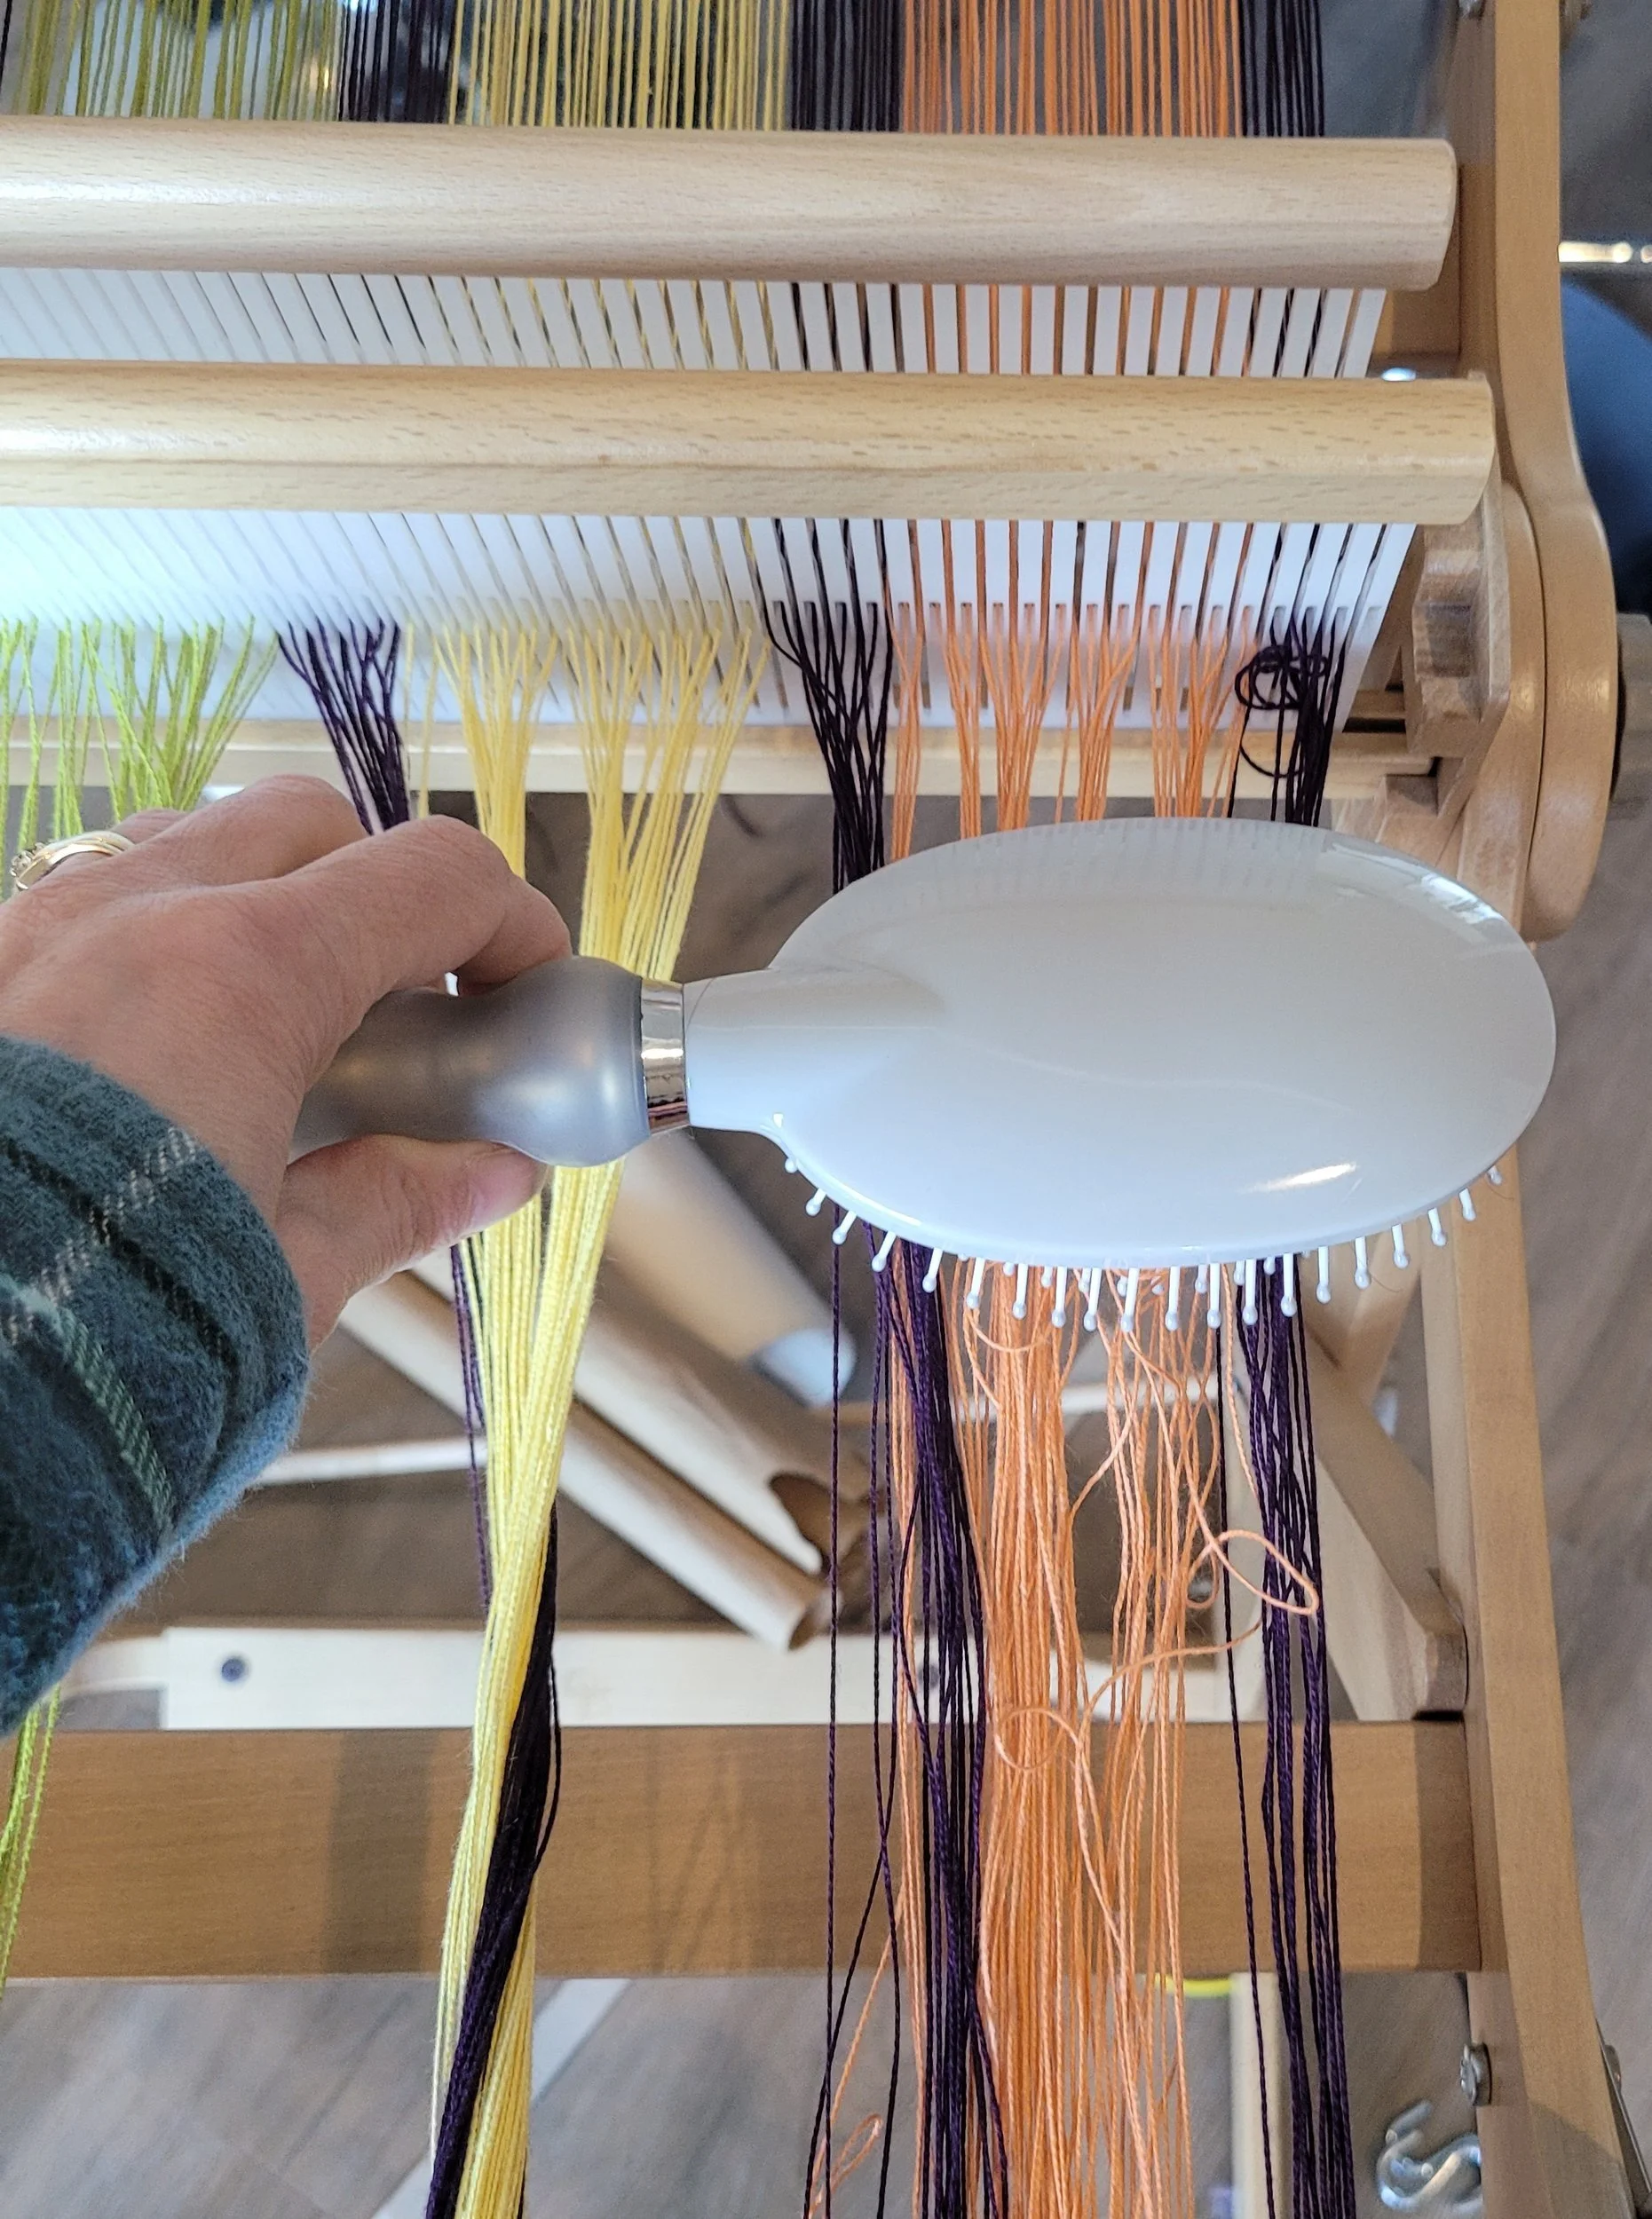
Then I began to wind the warp again using crank and yank. Cotton under tension doesn’t tangle. Cotton left to hang loose can get quite tangled! Don’t stress too much, it looks far worse than it is! This is one of the few times I broke my rule about brushing the warp. I did, however, remember that what I do to one bundle I must do to all the bundles. So each bundle got gently brushed to remove tangles near the reed (I didn’t brush the whole length, just the length that would be woven in with the next crank).
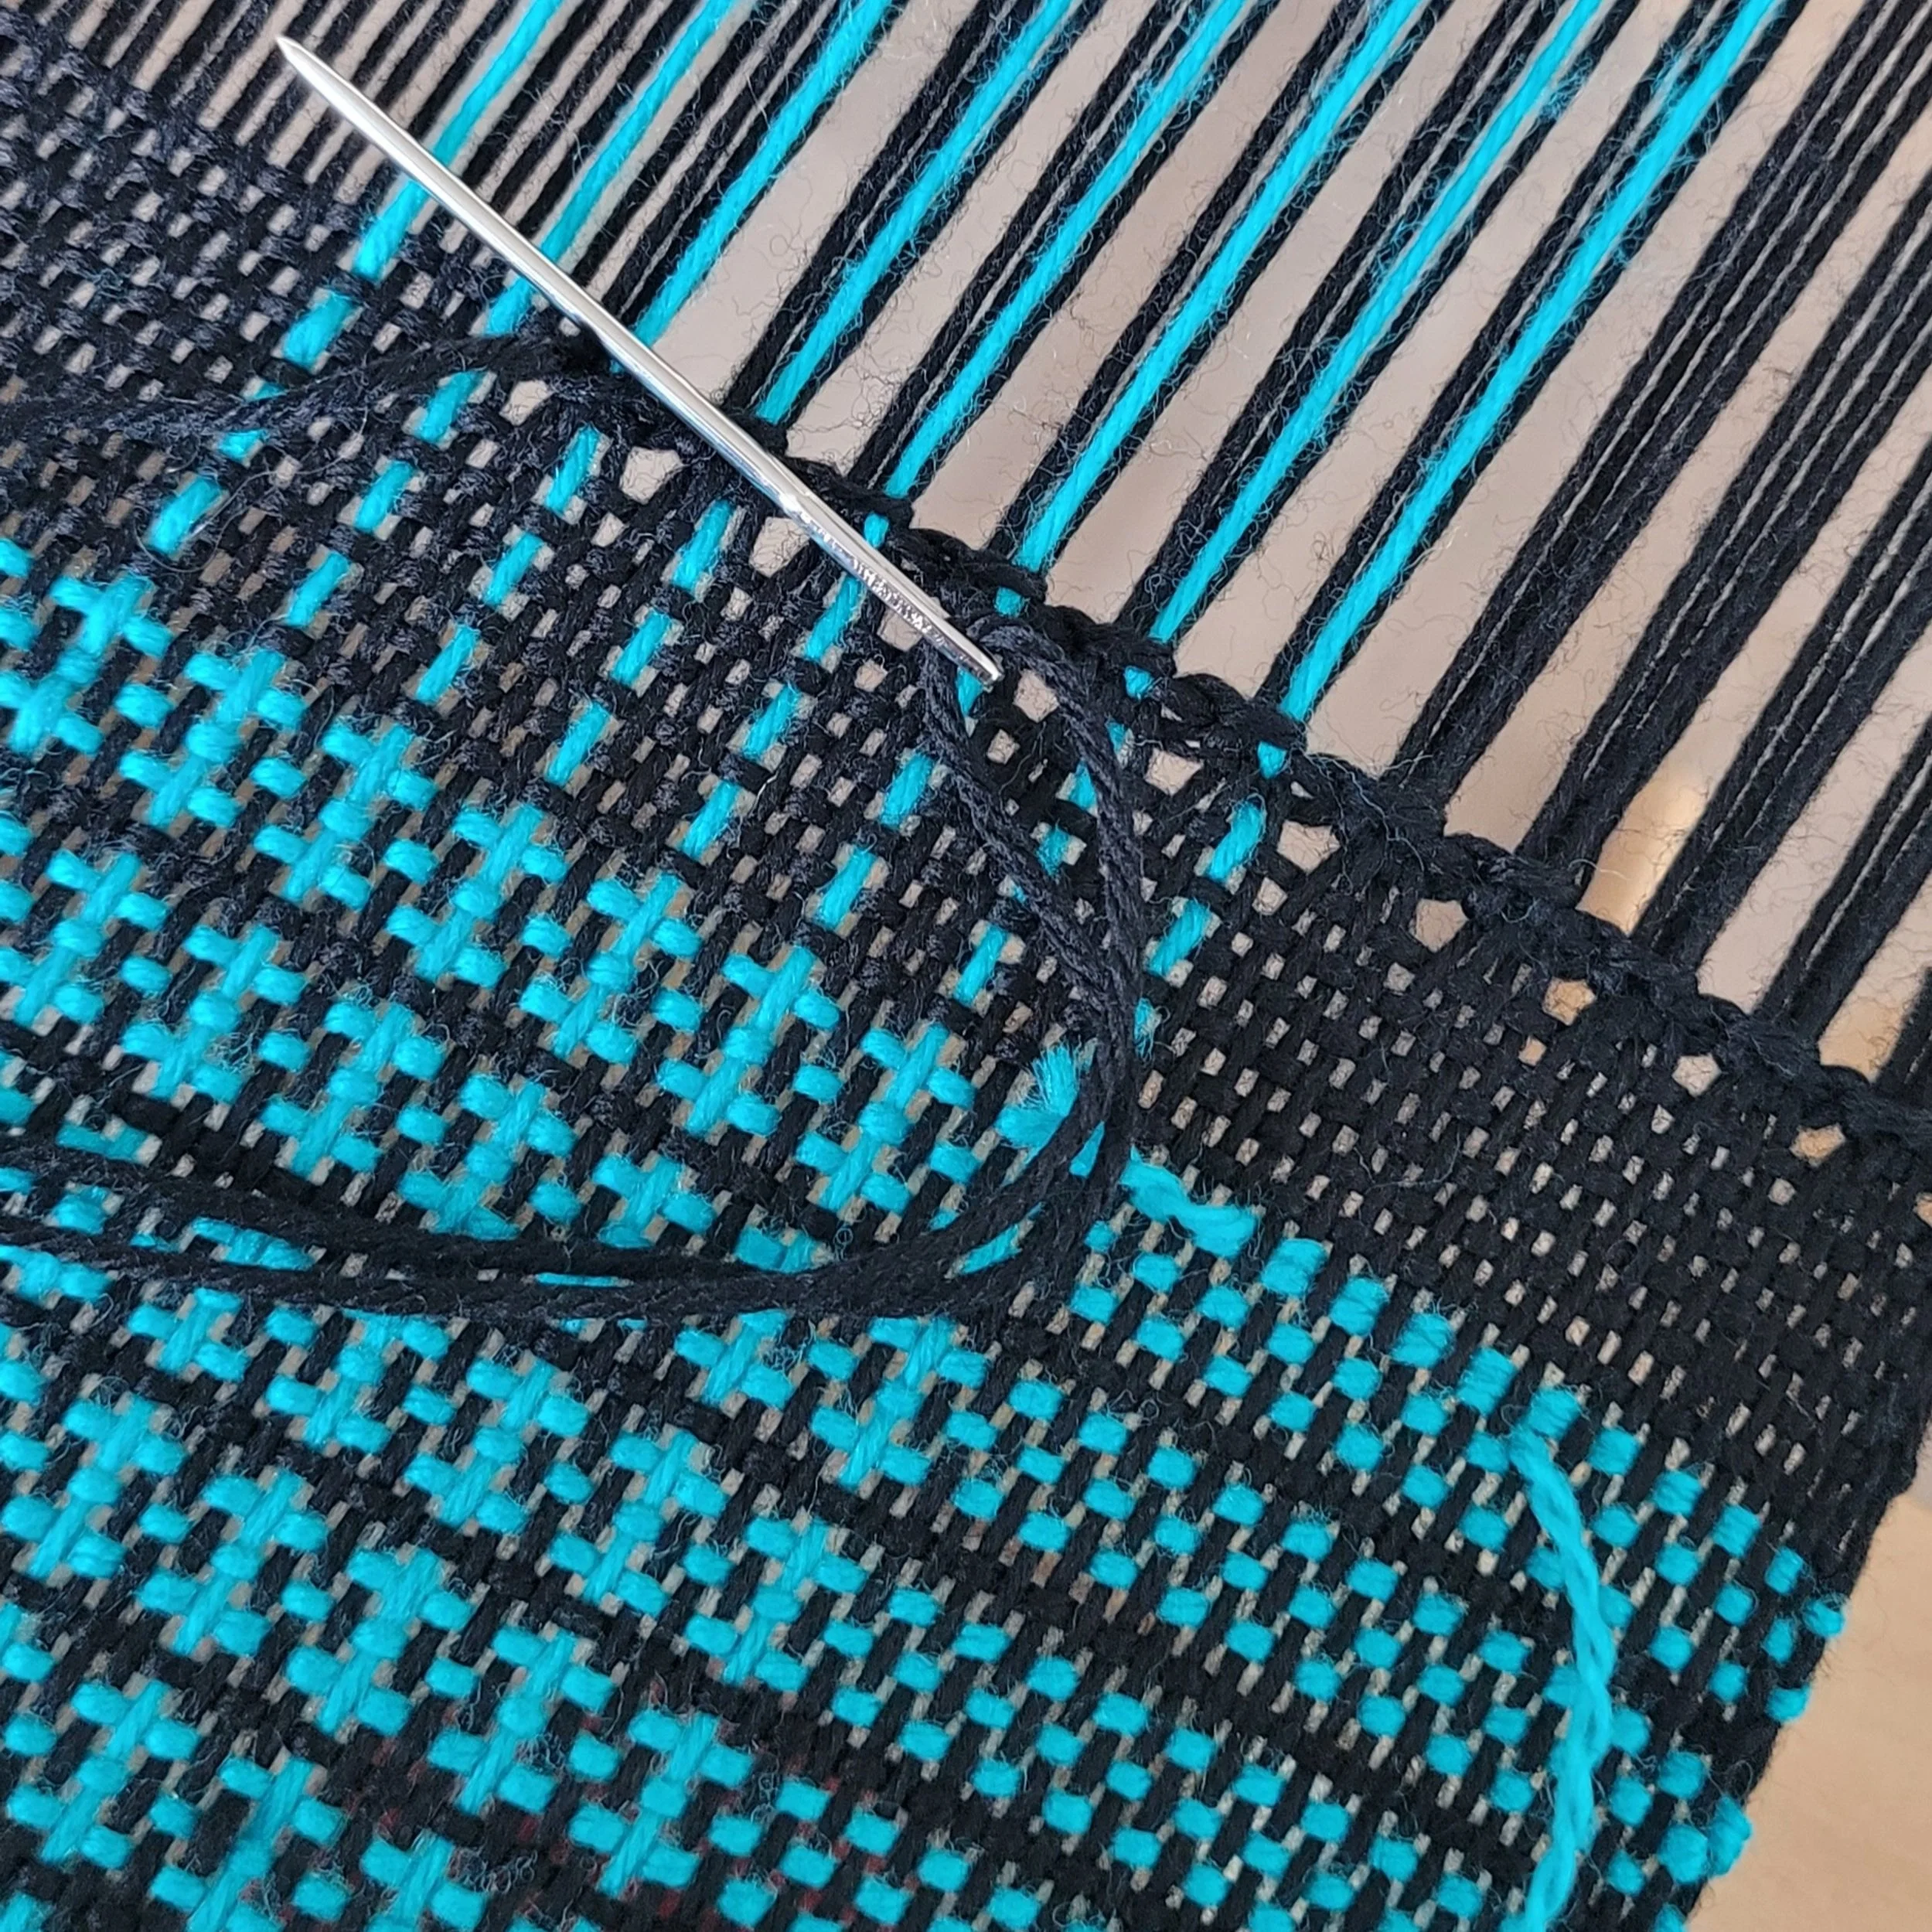
Thankfully, everything went surprisingly smoothly! I had one length that slipped when warp was unwound which resulted in a super-long end and a too-short end when it came to tying on. I trimmed the long end and tied an extra length to the short end so I could tie it on. After passing the knot in weaving, I untied it and wove the end in.
After all of that, and some distance from the project, I realized that the best solution would have been to continue warping and add the extra ends into the reed in the last colour block. So, in the last block, orange, the final three slots would contain 4 orange ends and 4 purple ends each. After winding I could then toss the extra ends in the middle off the back, move everything over, and have room for the purple borders! *Hindsight!*
And here I am, ready to tie on again!
Adapting Pattern: Changing from 4/8 to 2/8
I write a lot of towel patterns. For most of them I use 2/8 cotton (for my US friends, that is the same as 8/2). I love using 2/8 doubled, and in case you are wondering why, here’s a blog post that tells it all! But what if you prefer 4/8? Or what if, as in a recent pattern and class, the pattern gives you the option of using either?
Here are some simple guidelines about switching back and forth.
Switching from 4/8 to 2/8 Doubled
This is straightforward! If the pattern calls for 10 slots of 4/8, warp 10 slots and 10 holes of 2/8 doubled.
💡 Why? Because 10 slots of 4/8 = 20 ends total (one from each slot moves into a hole). So, by warping both slots and holes with 2/8, you’re keeping the full 20 ends.
Switching from 2/8 to 4/8
This takes a little more planning—especially if there are color changes in the warp.
✔ If all color blocks have an even number of ends, switching to 4/8 is easy! Just replace each slot and hole in the pattern with a single slot (since each slot in 4/8 = 2 ends).
✔ If you have odd-numbered color changes, things get trickier. You’ll need to:
Cut and tie color changes at the warping peg (I’ll explain this in a moment).
OR
Rearrange ends after winding the warp
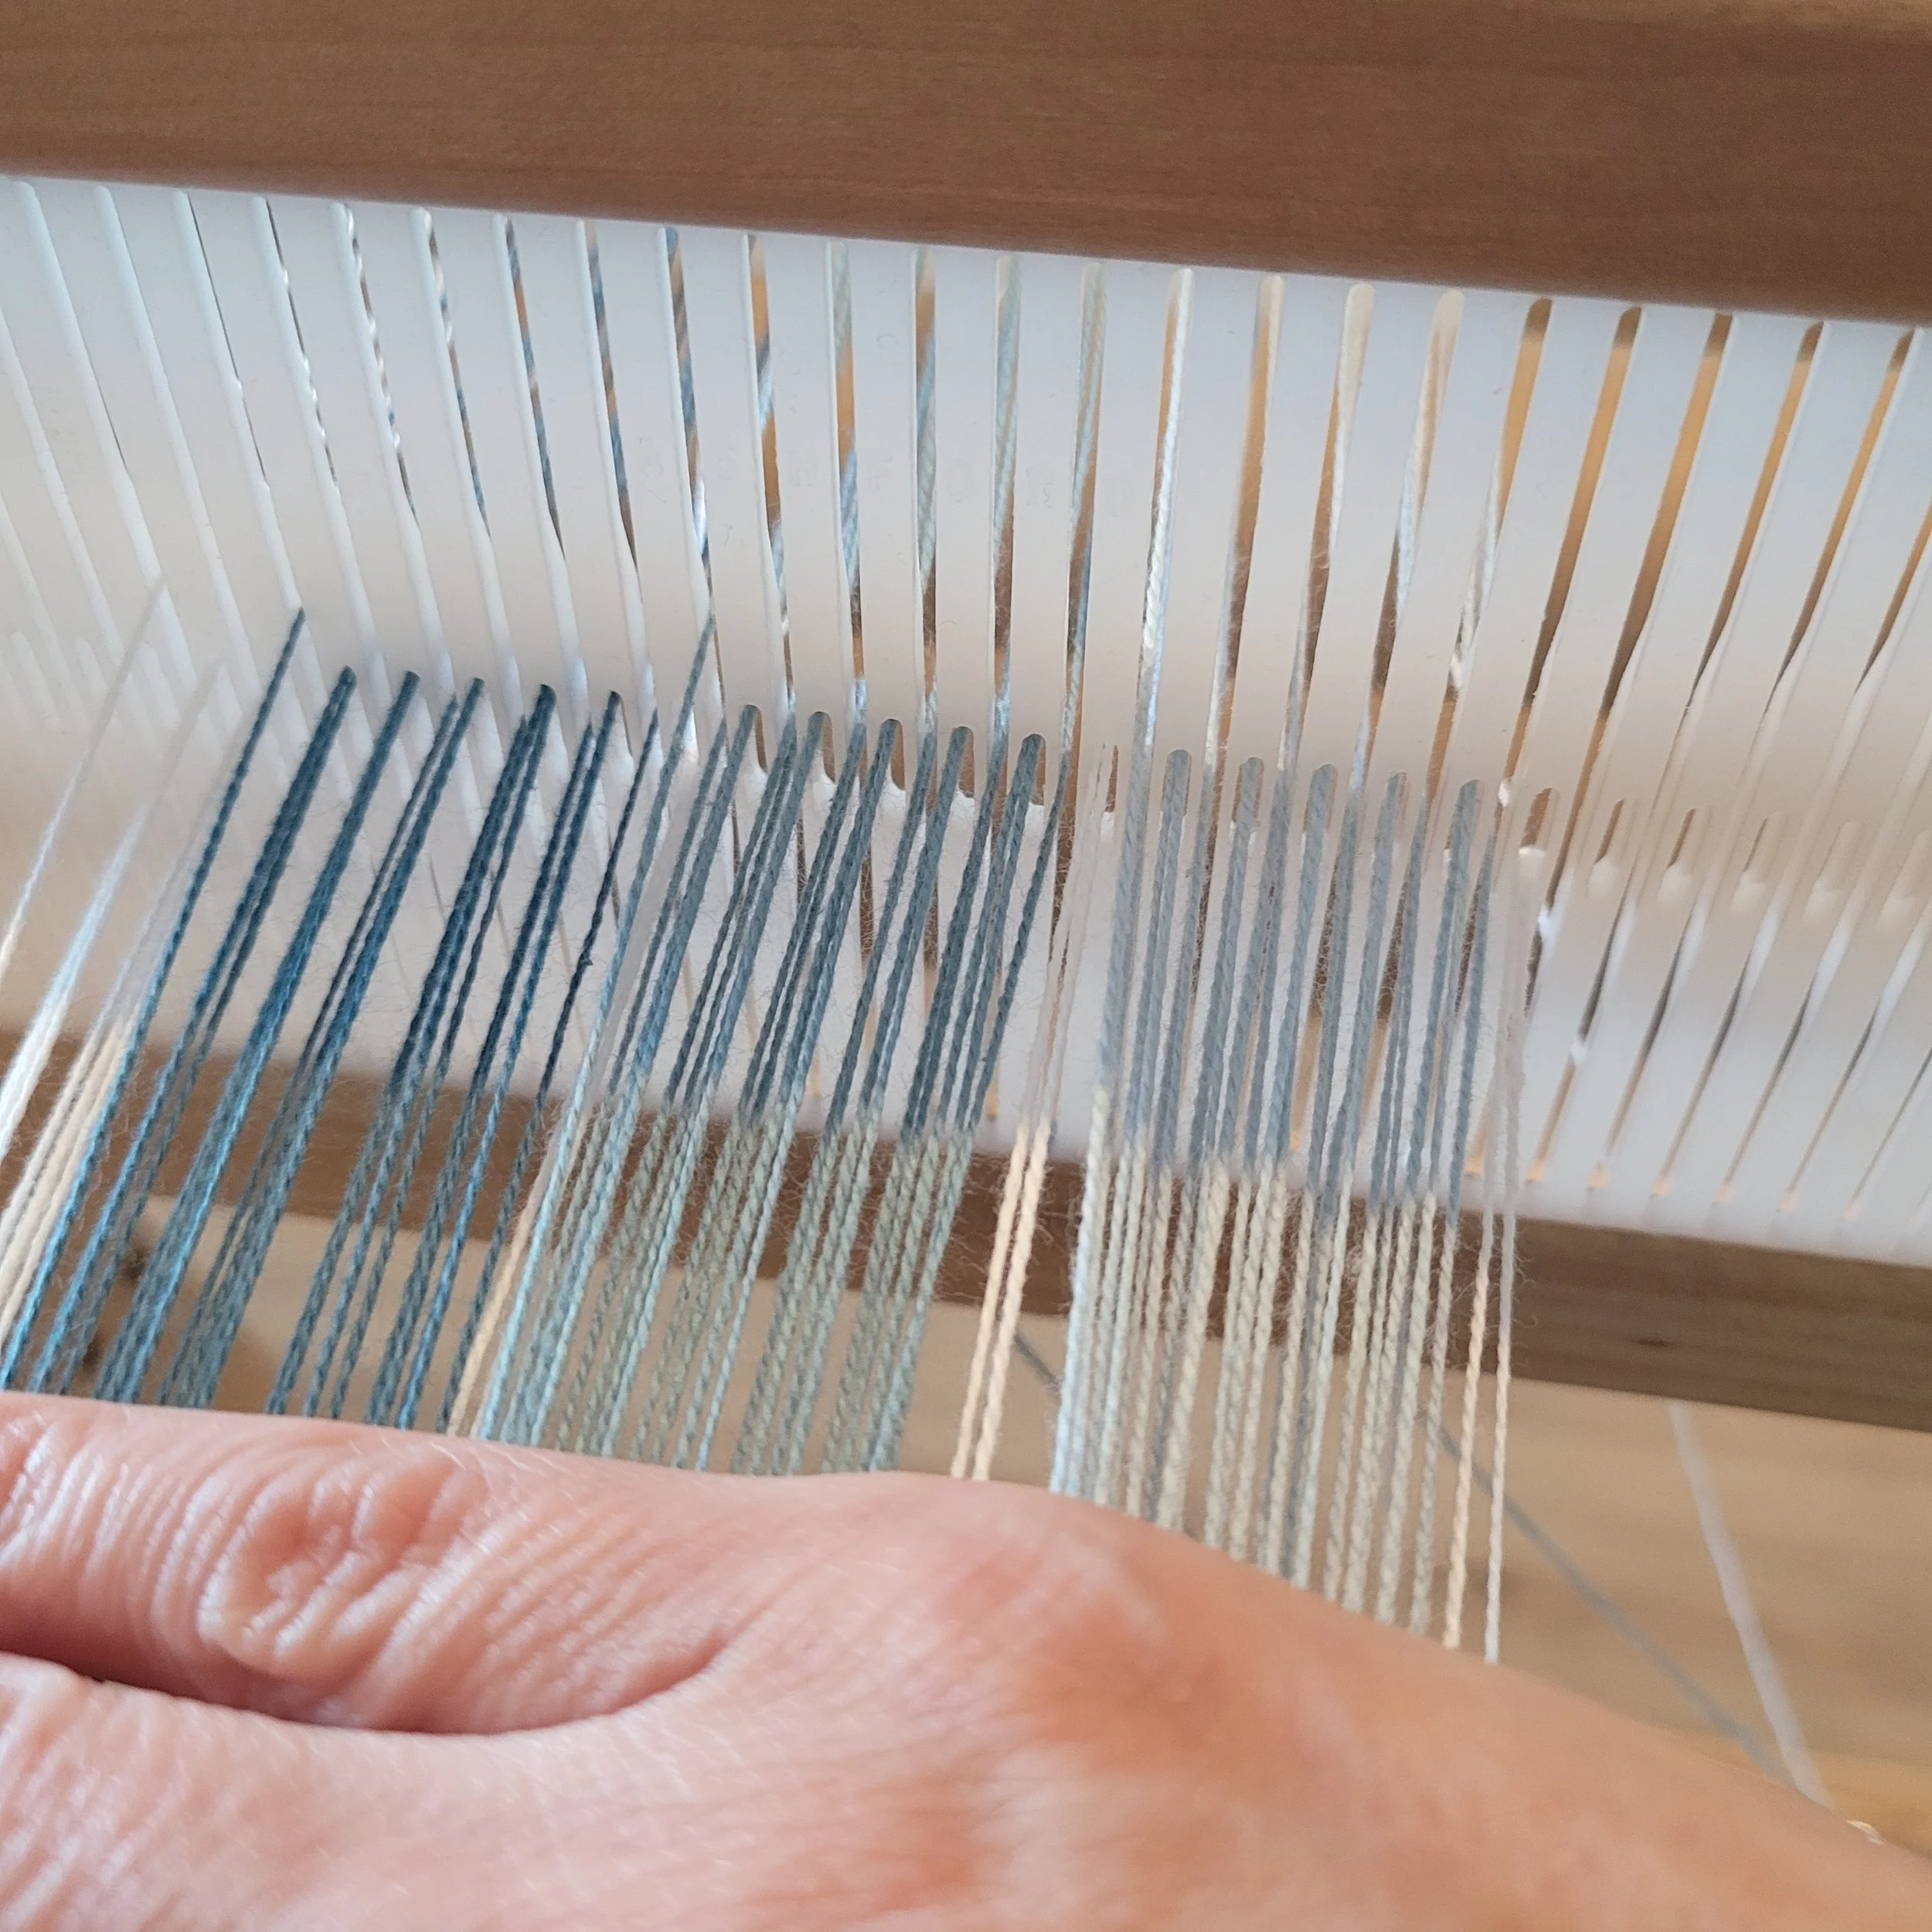
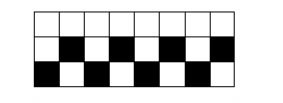
Look at the picture below. It uses 2/8 cotton warping the slots and the holes. The top row are slots and the bottom row are holes.
If I wanted to switch to 4/8, here’s how I’d adjust:
Warp (1 slot black, 1 slot green) five times.
Warp 2 slots grey.
Let’s look at this next example. Looking at the list, we can see that we have multiple colour changes and many of them are odd numbers.
As mentioned above, I have 2 choices, I can cut and tie at the colour changes, OR I can rearrange ends after winding.
Let’s look at cutting and tying.
Step 1: Warp 3 slots with Mauve Fonce. Cut the Mauve Fonce at the peg (this leaves a single end in the 3rd slot)
Step 2: Thread the end of the Naturel through the same slot as the single end of Mauve Fonce and and tie the 2 ends together at the peg.
Step 3: Pull the Naturel through the next slot and cut at the peg (leaving a single end of Naturel in this slot)
Step 4: Thread the end of the Mauve Fonce through the same slot as the single end of Naturel and and tie the 2 ends together at the peg.
Continue in this manner until the section is completed. It’s all pretty tedious (but very doable).
Alternatively, you can calculate the total number of ends for each colour and warp in a way that eliminates cutting & tying but does require rearranging of threads after winding.
For this example:
Mauve Fonce = 20 ends (10 slots)
Naturel = 11 ends (5.5 slots)
Warp:
*2 slots Mauve Fonce,
1 slot Naturel,
3 slots Mauve Fonce,
1 slot Naturel, repeat from * once more
then warp 2 more slots Naturel.
After winding you will need to rearrange the ends, and toss the extra Naturel off the back of the loom. Again, doable, but challenging.
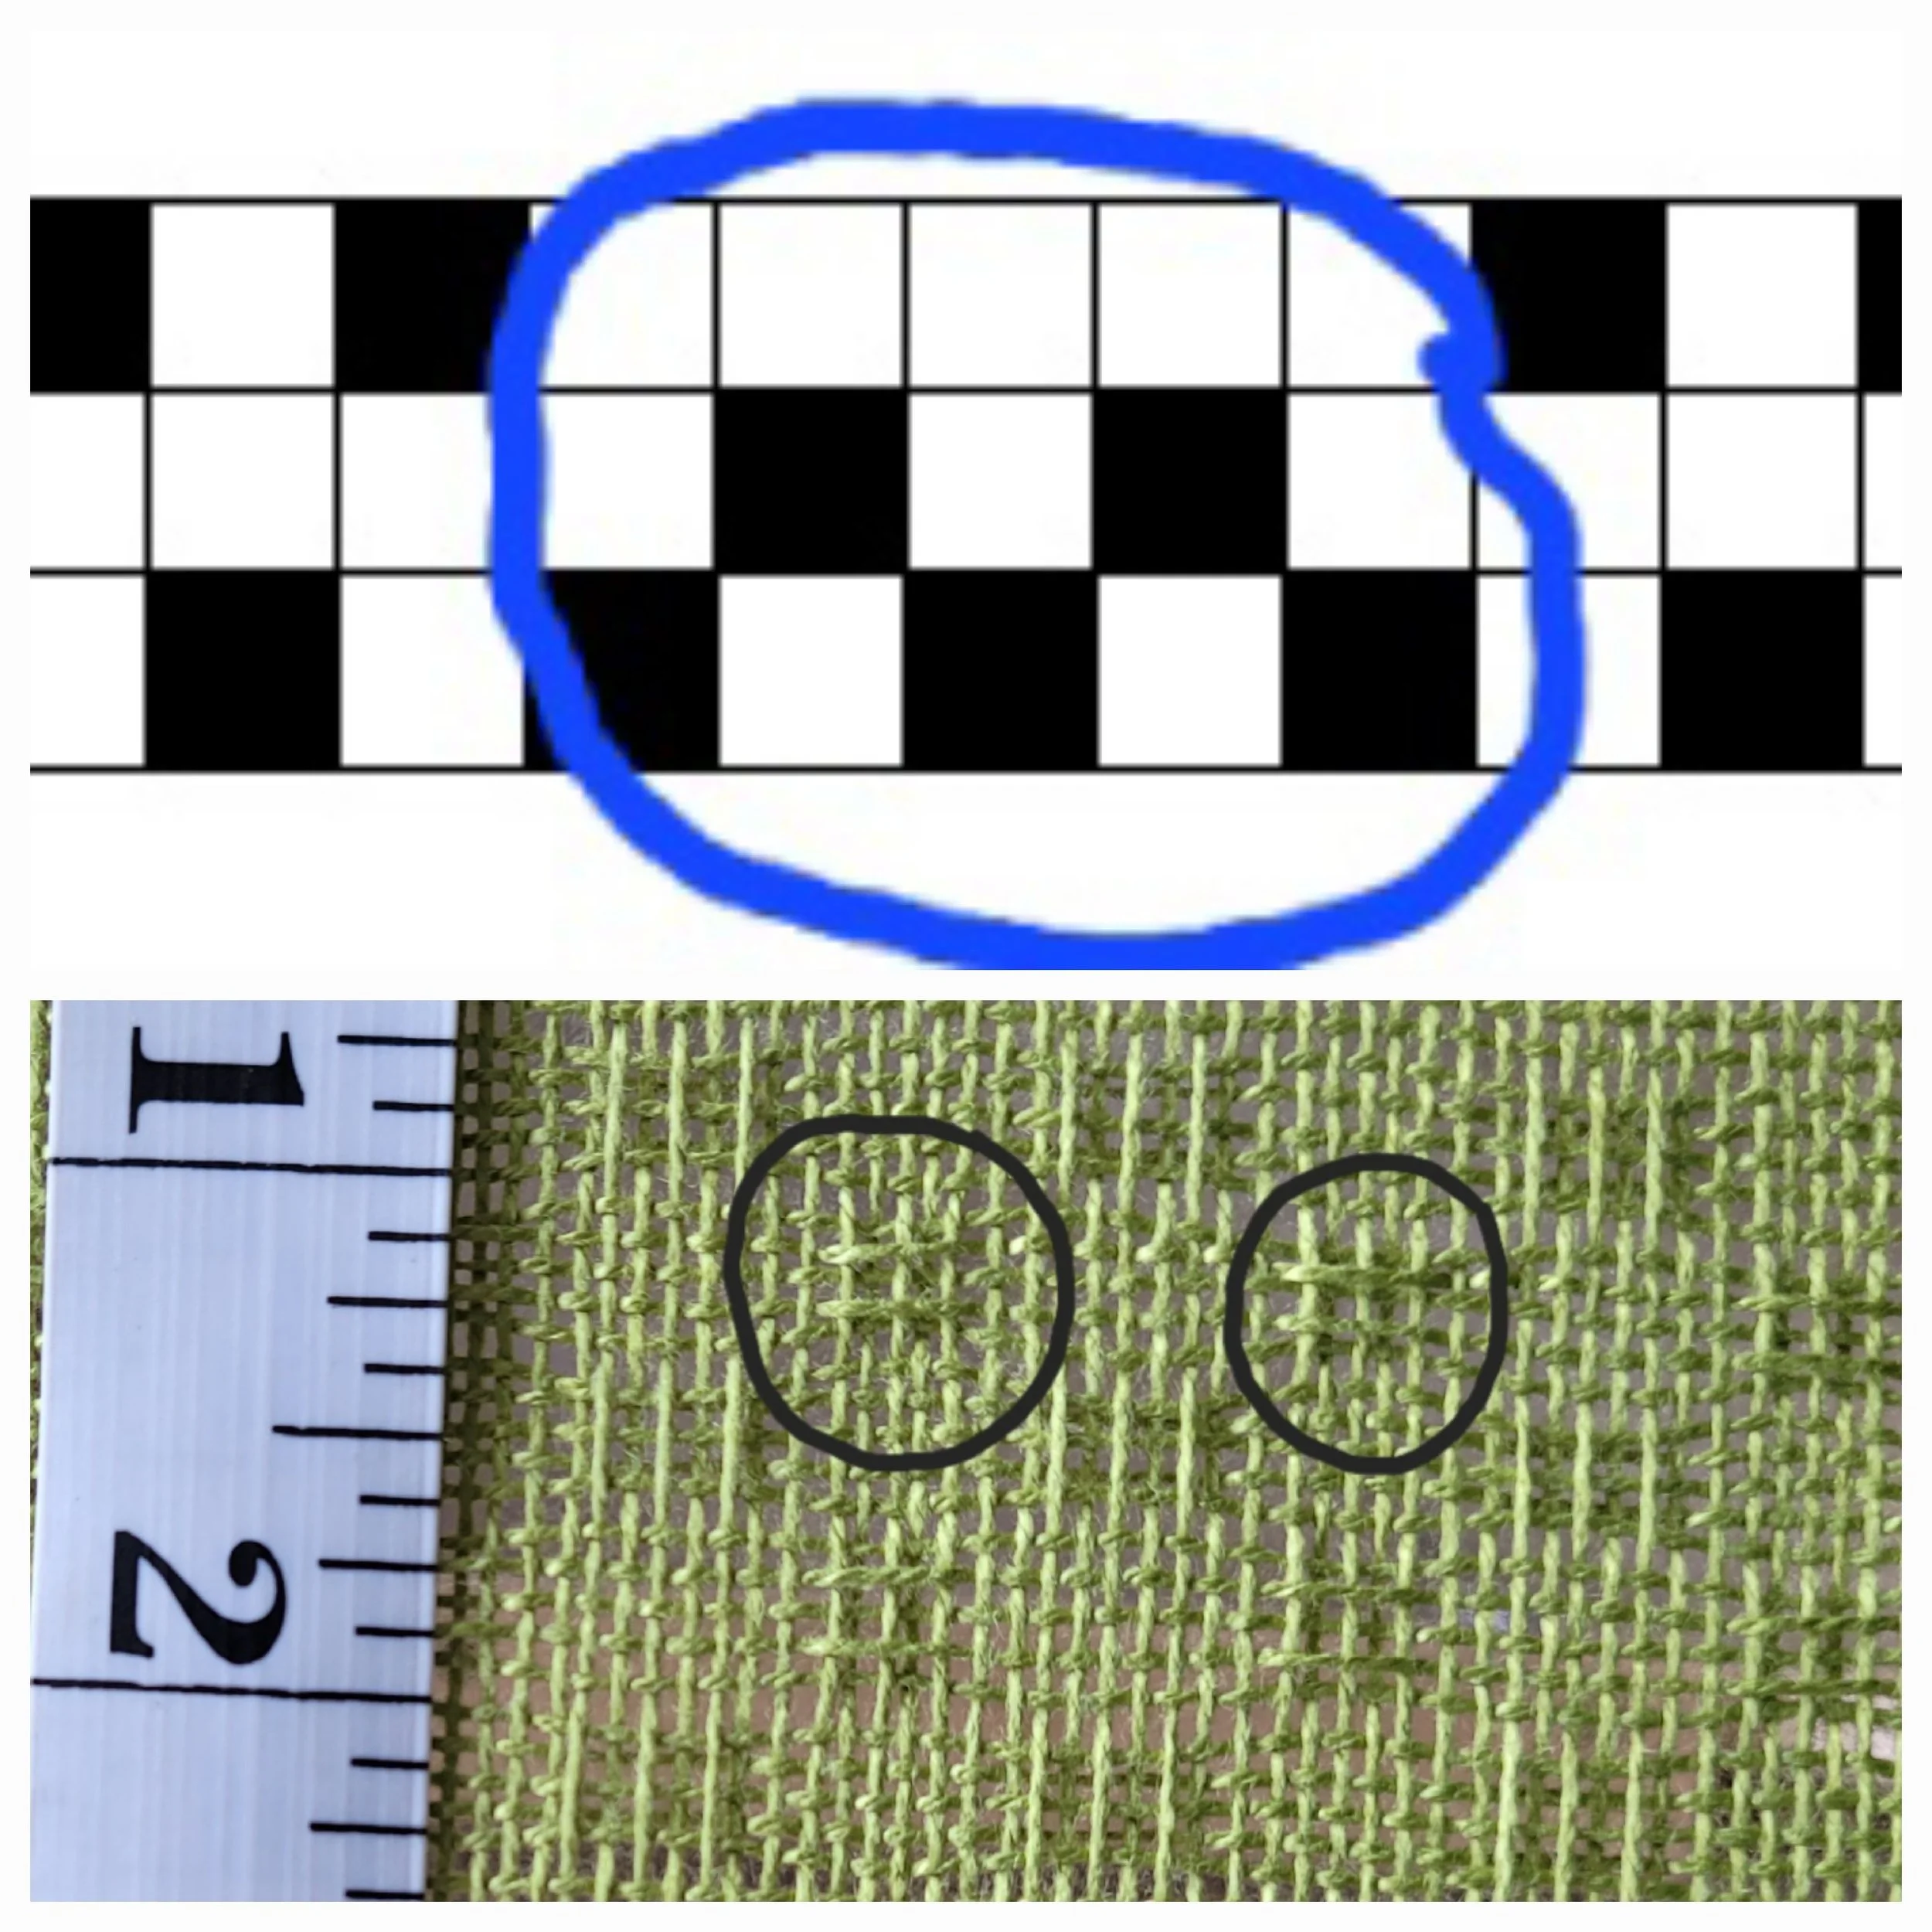
In the picture to the right you can see the crossed threads behind the reed. As you wind forward, you will need to use your fingers to gently move the threads over so they are running more straight from the reed to the back beam.
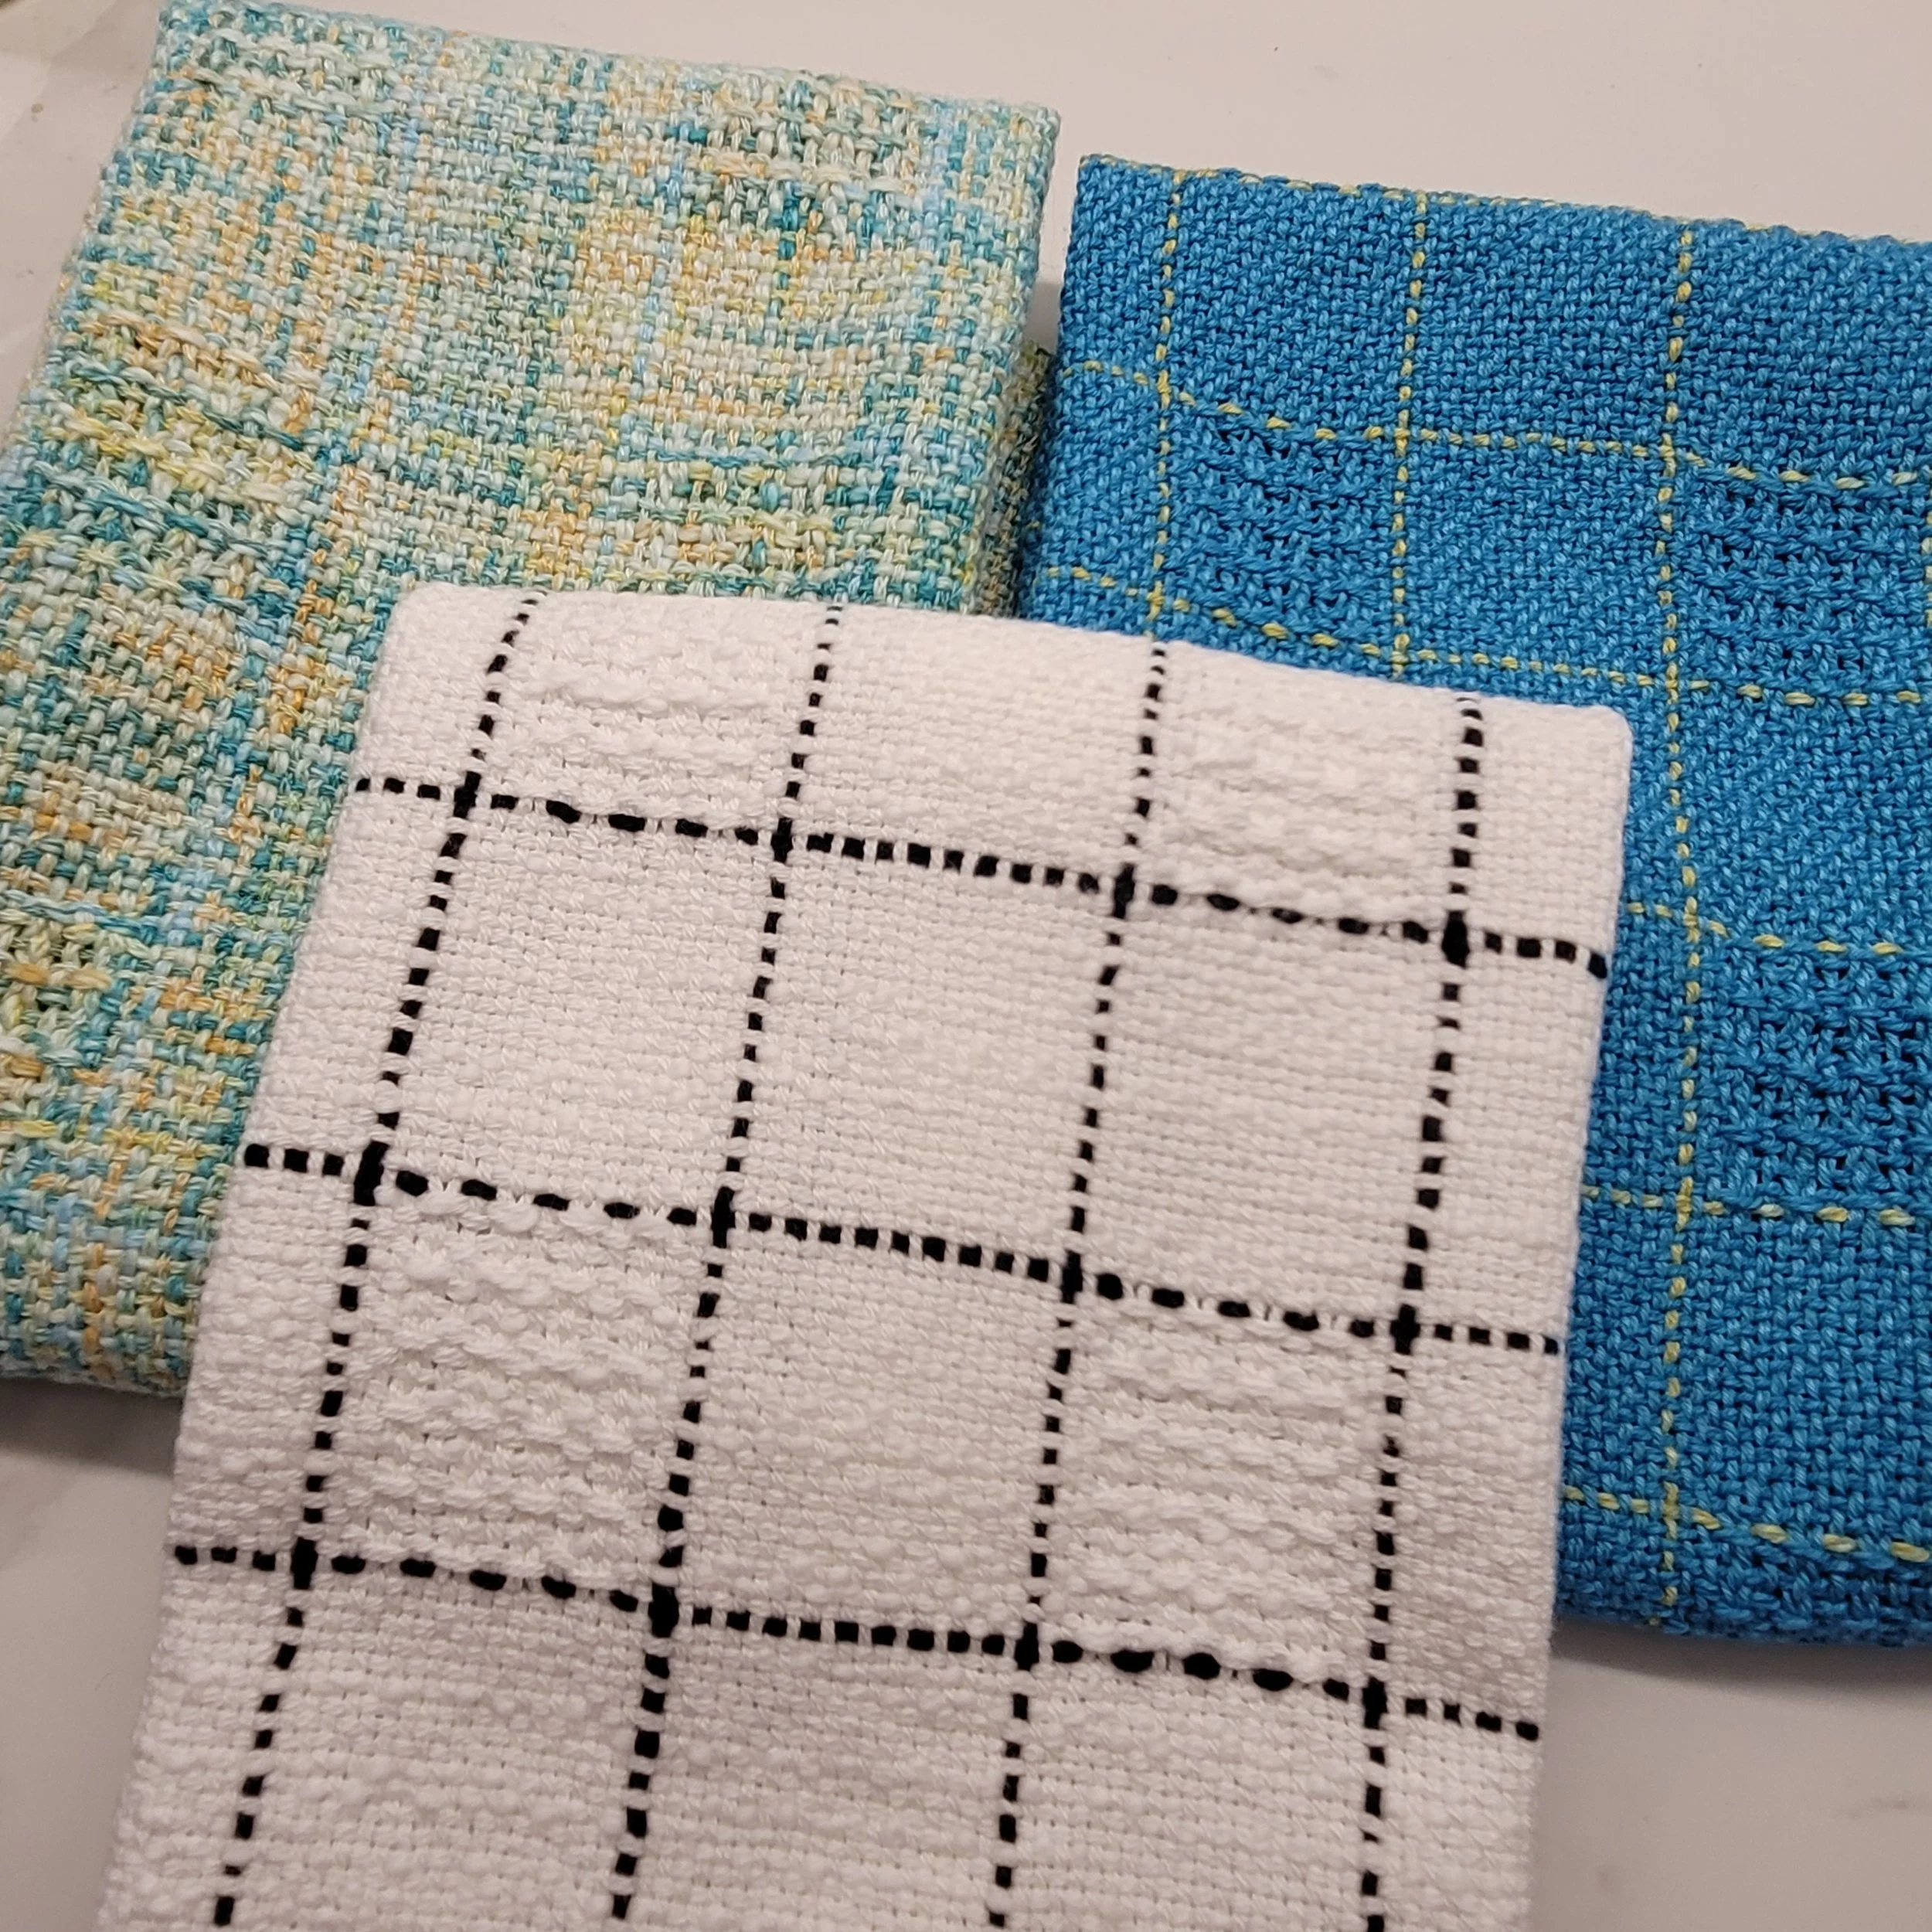
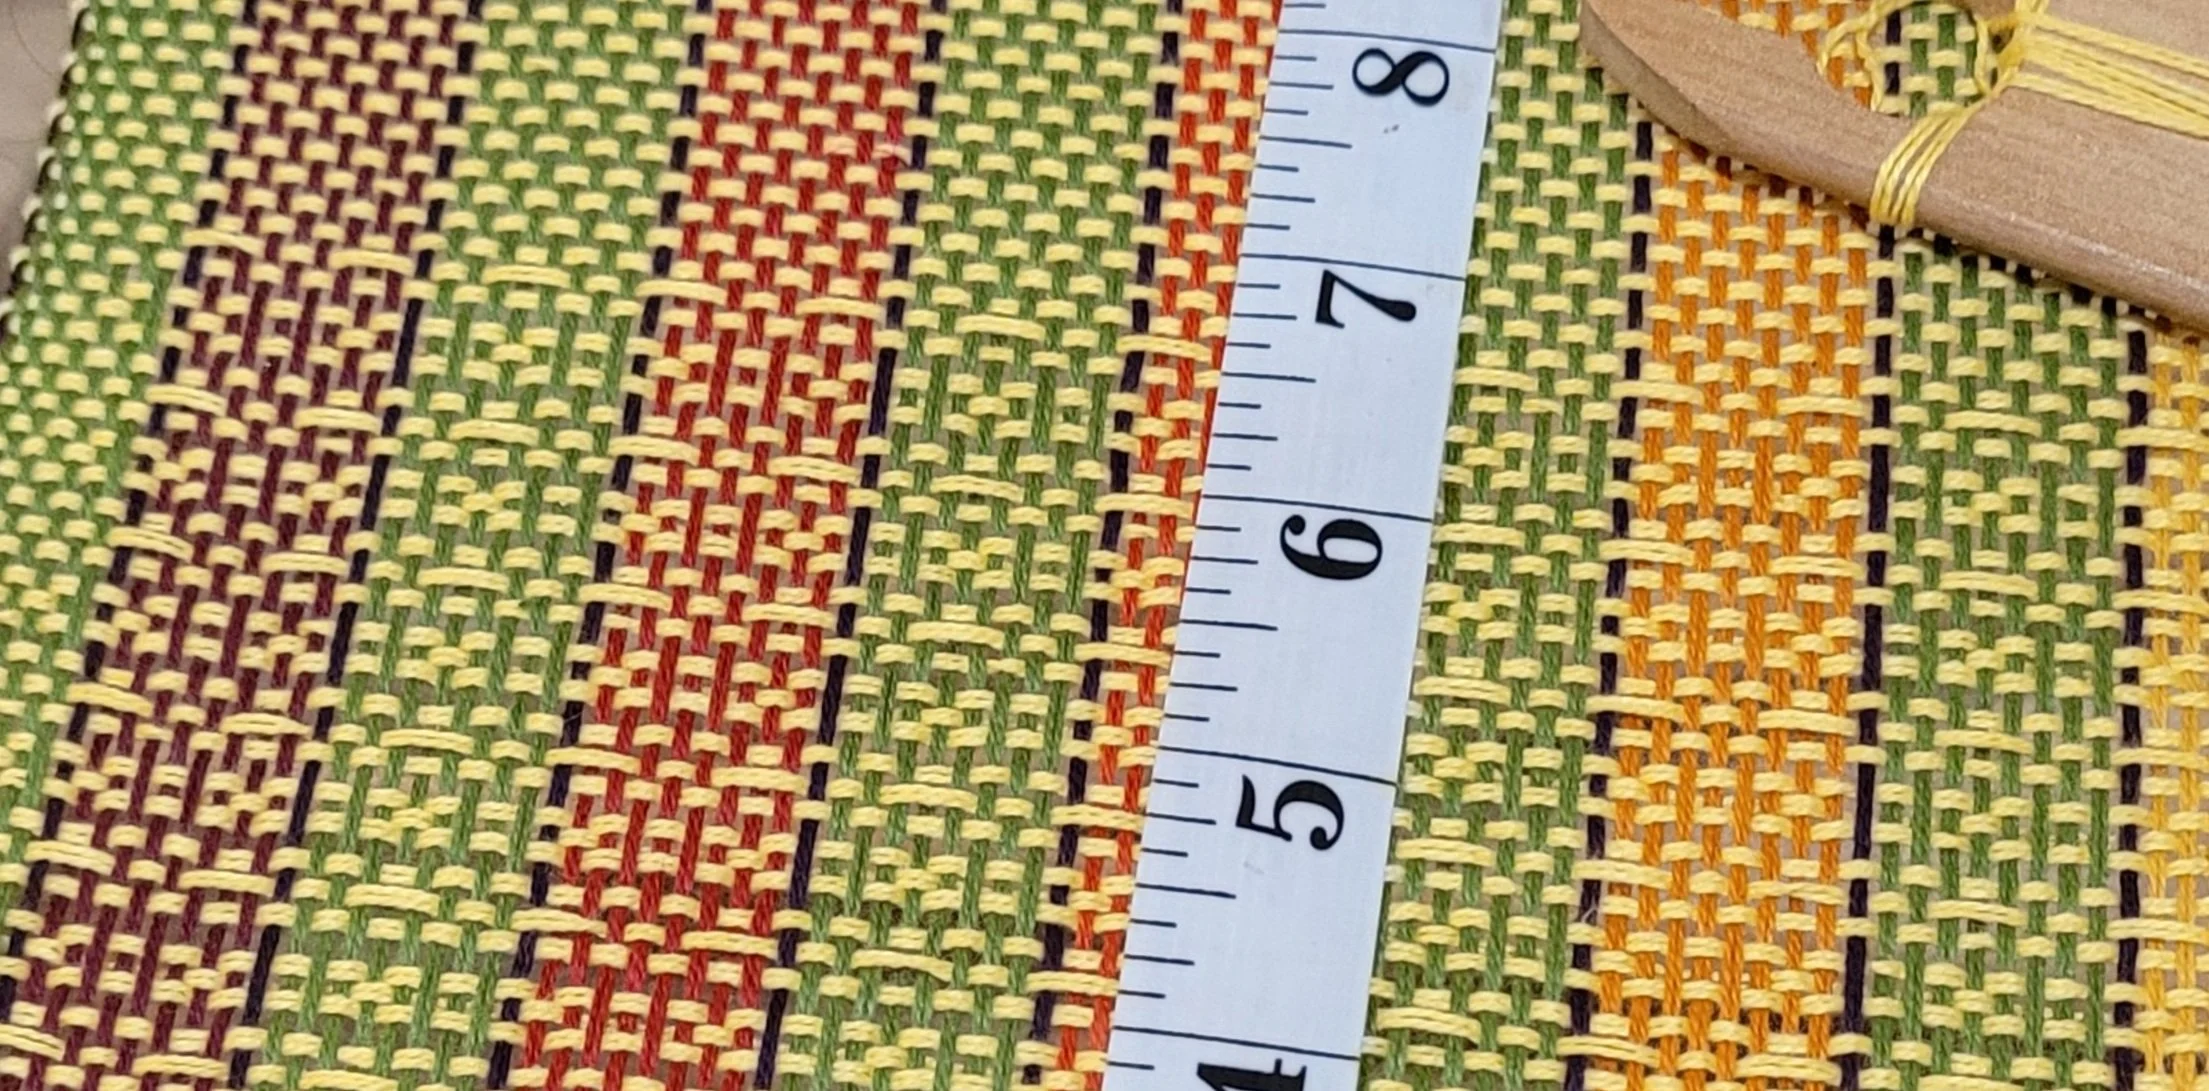
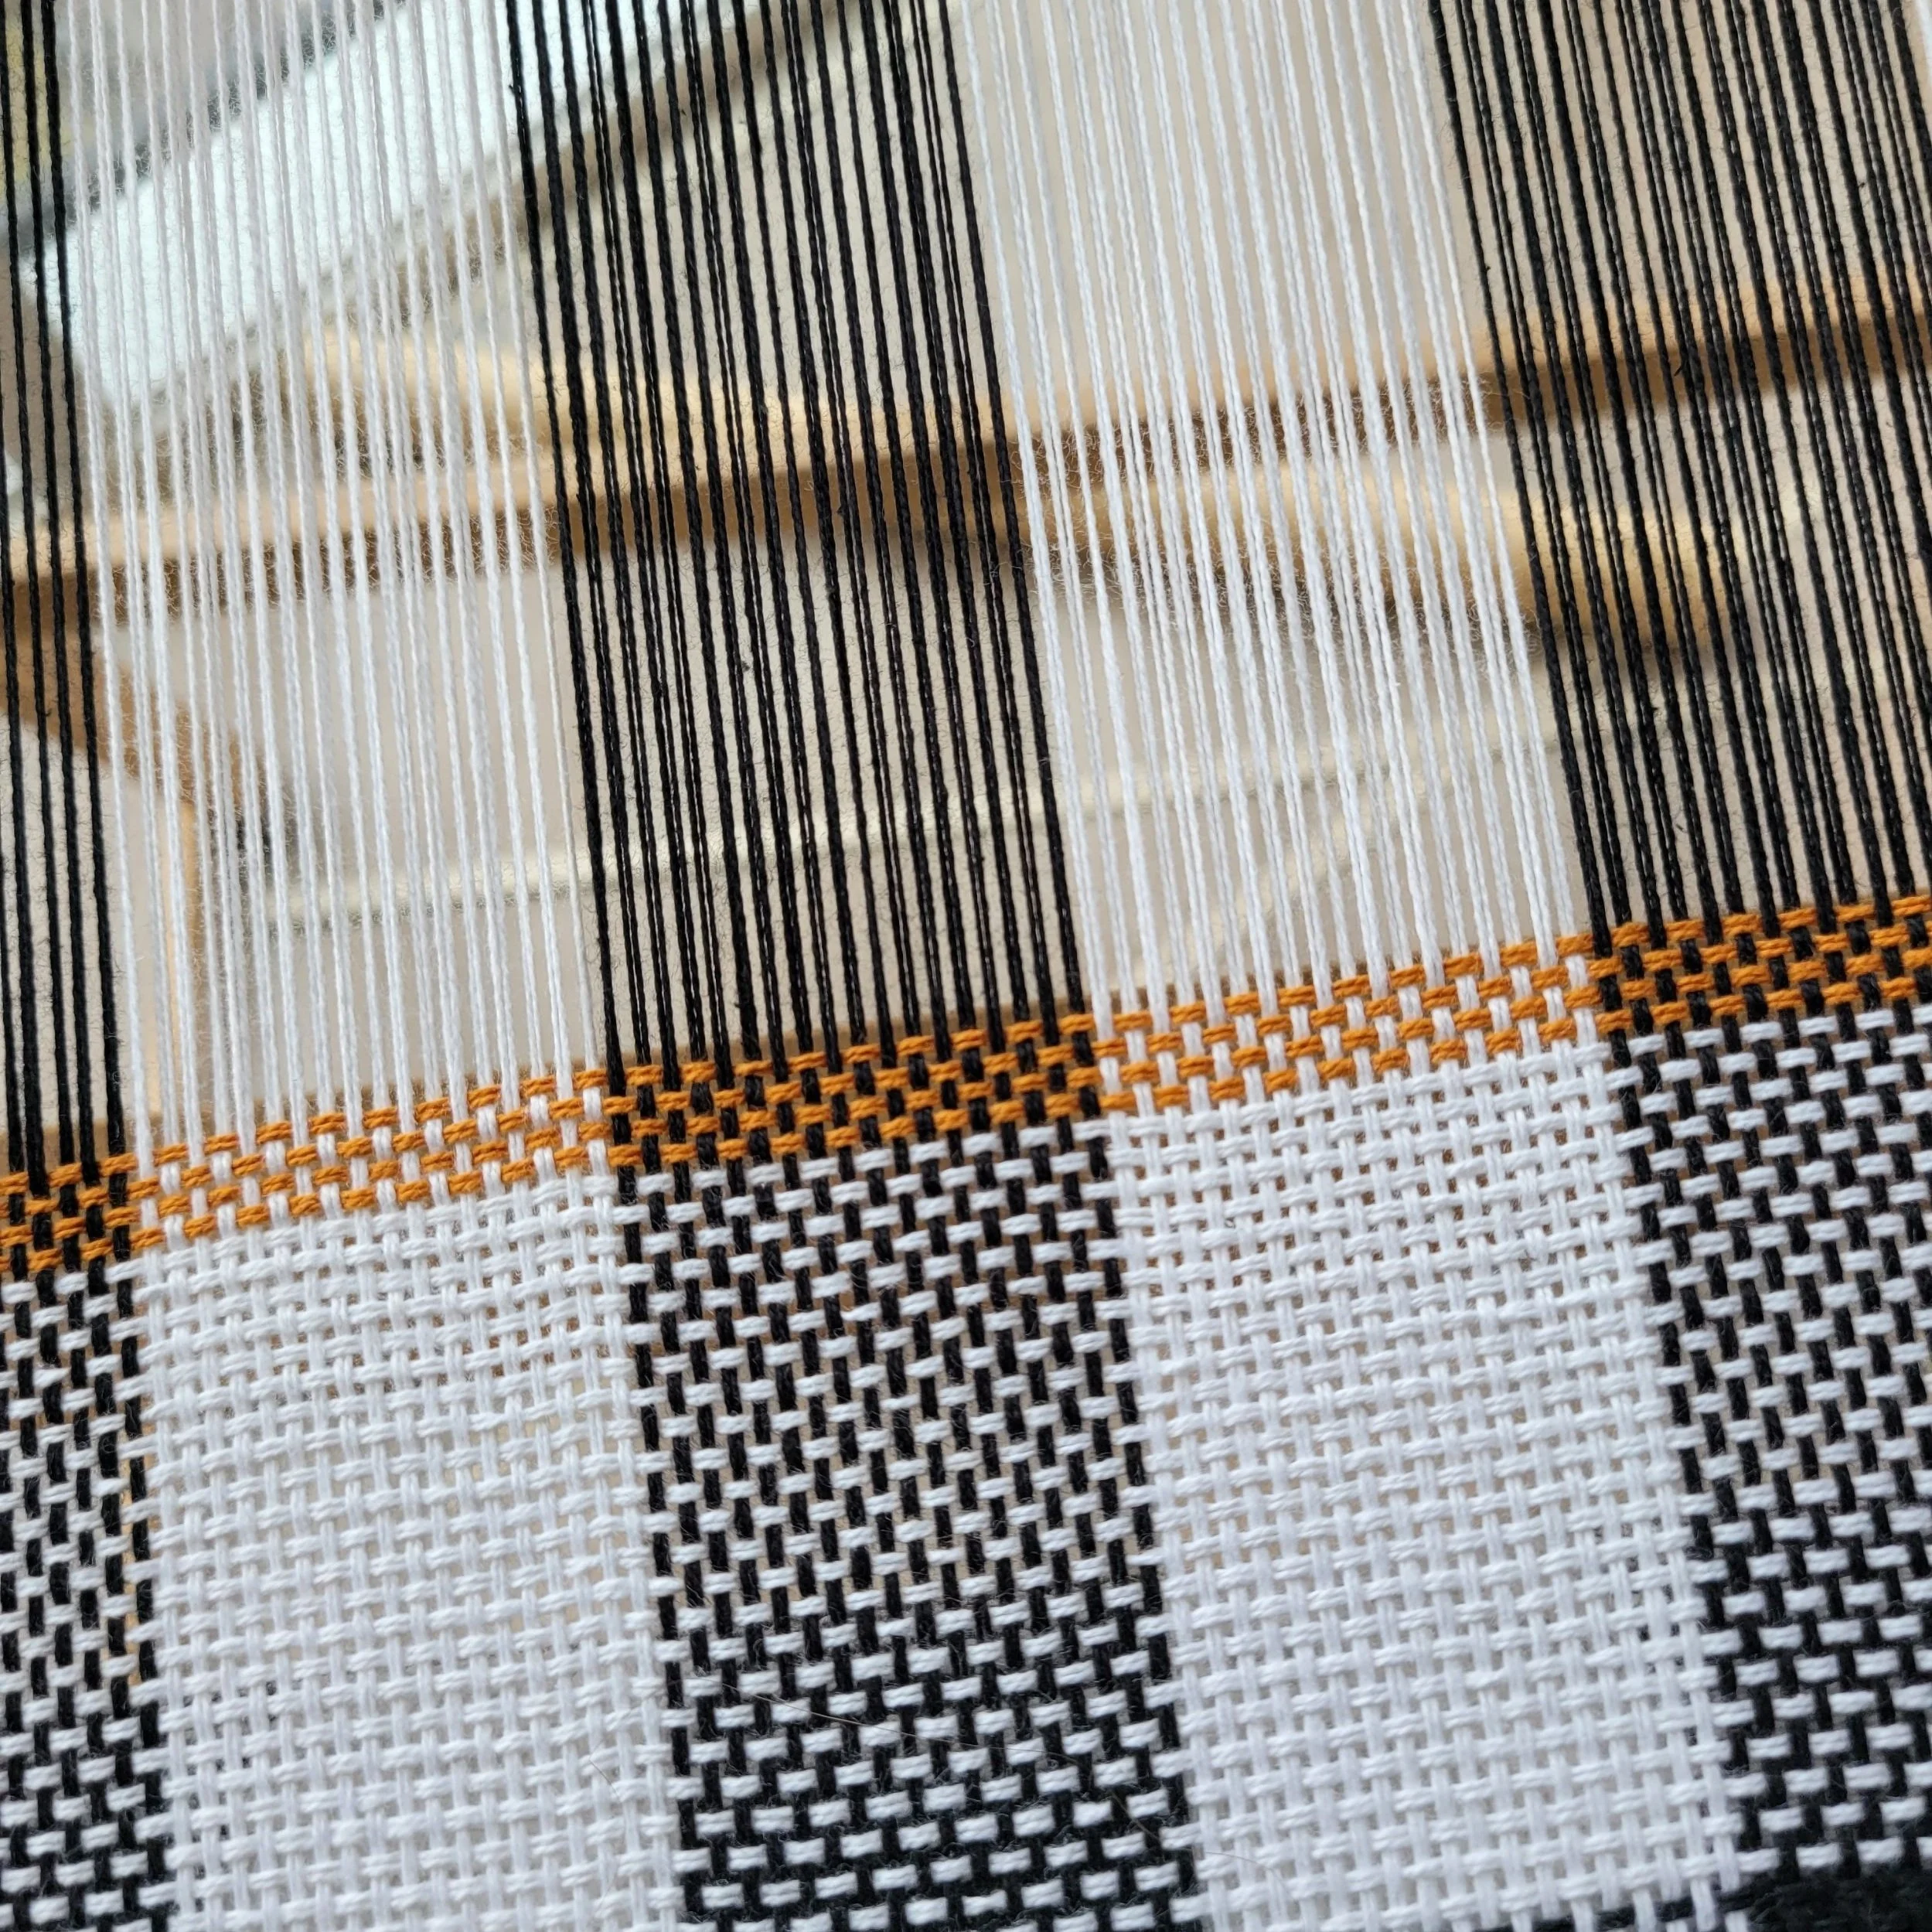
Can I mix 4/8 and 2/8? Yes, absolutely! In fact, this picture is using 4/8 for the Black and 2/8 for the White. Just remember that for the 2/8 you are warping slots and holes while with the 4/8 you are warping the slots only! It might be useful to create your own warping chart and tape it to your reed. For complex warping patterns I often write the pattern on painter’s tape and tape it to the loom. I will do the same when weaving.
In my Classic Elegance class, I used Hempathy (4/8 weight) with odd-numbered ends. Instead of cutting and tying at the peg, I rearranged ends in the heddle, which meant a bit of extra fiber manipulation during weaving.
Yes, using 2/8 would have been far easier! But the resulting towel in Hempathy or Zooey is worth it.
Want to try this towel for yourself? You can get it here. As mentioned, it is designed for heavier-weight material, but now you can easily convert it to 2/8!
💡 Enjoyed this post? I love sharing weaving tips, patterns, and tutorials to help you feel more confident at the loom. If you find my posts helpful and would like to support my work, you can do so here. No pressure — just a way to help me keep creating resources for weavers like you. 💛
Creative Solutions
A few weeks ago, I had a weaver in my home warping before a class. She was using multiple cones of cotton, and the colours were getting tangled as she warped. So, being the helpful sort that I am, I went to grab my cone holder. But before I could get it, I heard a slightly panicked, "NO!! Then I’ll need to buy more equipment, and I can’t do that right now!"
A few weeks ago, I had a weaver in my home warping before a class. She was using multiple cones of cotton, and the colours were getting tangled as she warped. So, being the helpful sort that I am, I went to grab my cone holder. But before I could get it, I heard a slightly panicked, "NO!! Then I’ll need to buy more equipment, and I can’t do that right now!"
The panic might have been in my head, because I totally get it! There are so many tools we can buy, so much yarn to collect, and then, of course, the additional looms...and suddenly, a relaxing hobby becomes a huge budget item—and not quite so relaxing.
This is my internal conversation while out shopping:
💖 Heart: Sees random beautiful thing… or something I actually need.
*Oh! This is beautiful, I love it, I could buy this!
🧠 Head: Would you like this… or more yarn?
💖 Heart: Sigh Yarn. Always more yarn. Puts random beautiful object back on the shelf and continues to wear 15-year-old jeans.
So, I completely understood her hesitation. I don’t want to be tempted to buy things I never needed—until I tried them! That meant it was time for a little creativity:
A laundry basket and a dowel.
I’m sure this isn’t a new trick, but if you haven’t tried it: Slide the cones onto the dowel, then rest the dowel across the handles of the laundry basket. You can even use small baskets from the dollar store and dedicate one to each colour.
This setup worked beautifully—except for one small issue. If she picked up any speed, the cones kept spinning when she stopped, and the cotton would fall off the cone, wrapping itself around the dowel. That stopped the dowel from turning and meant we had to keep unwrapping yarn mid-warping.
To fix it, I grabbed a couple of plastic lids, cut an “X” in the centre of each, and slid them onto the dowel on either side of the cones. Problem solved!
Once upon a time, I was a hobby farmer, and I heard the phrase:
"You know you’re a real farmer when you learn to make do with what you have."
Well, I think most hobbies are like that too. We can buy all the tools and all the things, but there is something delightfully satisfying about seeing a problem, coming up with a solution, and not spending a penny.
I’m curious…what are your creative solutions to weaving problems? Please share them in the comments.
Fixing Warping Errors
It doesn’t matter how experienced we are, we all make mistakes. Some say the the more experience you have the bigger the mistake. I suppose that might be true…mostly because we are a little over-confident and start working too fast, or we are under pressure and can’t focus.
It doesn’t matter how experienced we are, we all make mistakes. Some say the the more experience you have the bigger the mistake. I suppose that might be true…mostly because we are a little over-confident and start working too fast, or we are under pressure and can’t focus.
Not too long ago I warped almost an entire warp before realizing I had messed up. And until that point I was thrilled. I was estimating that by the time I had the warp wound on the back beam ready for threading I would have taken about 30 minutes! *sigh*. I ended up needing to unwind all that I had already warped except the first 10 slots. I’ll tell you how I did it without a tangled mess further on.
Most warping mistakes we make do not require a complete unwind, or unwinding at all. Let’s look at two of the most common mistakes.
Two ends through the same slot
Threading 2 ends into the same slot:
This is a super easy fix IF the doubled slot does not impact the pattern. If you notice this while warping, just keep going and ignore it until it is time to thread the heddle. When you get to the doubled slot, simply take the 2 extra ends and toss them off the back of the loom. Then just weave as usual. The ends hanging off the back will not interfere with you weaving. (You don’t need to make sure they are a pair, just pick two ends and chuck them!)
If tossing the ends off the back is going to cause a problem with the pattern…for example you needed 33 ends and with the doubled slot you have 33 ends but will have only 32 if you toss them off the back, there are a couple of options depending when you discovered the error.
A) When you notice the mistake, take a look at where it is in the reed compared to the beginning of the warp AND check the pattern to see if the ends need to be in a slot or hole (sometimes this matters!). If the end is closer to the beginning of the warp AND the slot/hole doesn’t matter, just keep warping. When you are threading the reed, move each slot over 1 until you reach the doubled slot. Take the doubled end and thread it into the now empty hole beside the doubled slot. If if isn’t very close to the beginning, leave a slot empty and keep warping. After winding, you can move the warp over until you reach the doubled slot. You should now have a space for the doubled end.
B) If the slot/hole matters, leave an empty slot at the next colour change. You most likely realized you had a mistake because the next repeat/colour change did not start in the correct slot or hole. At the next change, leave a space, check to be sure that the end is starting in the right slot or hole and continue warping. When it’s time to thread the heddle, move the threads over until you reach the empty slot. You should now have an end to put in it!
I’ve even got a video for you!
Skipping a slot: We have all done this. The solution depends on when we noticed the mistake!
Painter’s tape to help keep track!
A) If you are still warping the same colour, just go back and thread the slot, then return to where you left off. You will have some crossed threads behind the heddle but that is nothing to worry about.
B) If you notice it quite quickly while still warping, but are onto the next colour, leave an empty slot and keep warping. After winding, you can move the threads over one slot, starting from the empty slot and working back to the doubled slot.
C) Sometimes you will not notice this until it is time to thread the heddle, or maybe even until you start weaving if you are threading both slots and holes! If it doesn’t interfere with the pattern, treat the empty slot as a broken warp end, adding a new end, tying it onto the front beam and weighting it off the back of the loom. If it does interfere with the pattern, you will need to go back and move the ends over one until you have filled the slot. Time-consuming, yes, but not as time-consuming as undoing a whole warp!
Here’s a video!
Checking my warp!
Ok, now that we know about how to fix these mistakes, let’s just briefly touch on how to prevent them! The best way to prevent mistakes is to slow down and reduce distractions. But I get it, we get excited and want to get to the weaving, and we can’t always ignore our distractions (especially if we had a hand in making them!!). So, the next best thing is to check frequently. I try to check my work at each colour or block change. Sometimes I write the warping sequence on painter’s tape and tape it to my loom so I can do a quick check if the colour changes are frequent. I also warp using multiple pegs, so I check each time I move from one peg to the next. These don’t eliminate all my mistakes, but it does keep them to a minimum!
Now, as promised, how to unwind a whole warp without a tangled mess! I really wished I had videoed the process, but at the time I was not in a video-ing mood! The most important thing to remember that yarn under tension cannot tangle. Here’s a step by step:
Starting from the reed, use your fingers to follow the last end warped back to the peg.
Lift that end ONLY off the peg and wind it back onto the cone/skein/ball.
Only after the last end is fully wound, go back to the reed and follow the next end to the peg.
Repeat this as many times as needed to get back to the mistake.
Do not be tempted to try 2 or 3 ends at a time…I assure you it will not save time! In the end, it took me longer to unwind than wind, but there was no tangled mess and I preserved my yarn and my sanity!
Help! I didn’t Go Around the Warping Stick!!!
Even the most experience weavers make mistakes. Some are big, some are small, hardly ever are they complete disasters! The first thing to do is take a deep breath and relax. Maybe walk away for a few minutes and settle with a warm cup of tea (tea solves all my weaving woes).
I was teaching a class last weekend, and when we started I asked the students that when they found a mistake, not to unwind to fix it, but call me…because there are lots of ways to fix mistakes without having to undo anything! And, how better to teach than to turn mistakes into teaching moments?
As my students warp, I wander around the room helping as needed, but really, I’m looking to make sure that everyone is getting their cotton wrapped around that back warping stick. It’s such an easy thing to miss but so important to warping! And, if you warp standing in front of your loom, you might miss this until it is time to wind your warp. The first time this happened to me I carefully unwound my warp and fixed my mistake. The second time this happened I decided there must be an easier way! And, of course, there is!
Step 1. Always check before winding to be sure that all the warp ends are wrapped around the back warping stick. Not sure? If you have an end going from one slot/hole directly to the next slot/hole on the reed, you forgot!
Step 2. Grab some scrap yarn (it doesn’t matter what it is as long as you can tie it in a knot)! Insert your finger or threading hook between the reed and the warp and pull it back a little. There should be some give.
Step 3. Loop the scrap yarn through the warp thread and tie the ends together around the warping stick.
Done! It really is that easy. Your warp will not reach all the way back to the warping stick, but the scrap yarn will hold it back and in place so that you can wind and not run into tension issues.
I’ve got a video…sadly my hands are somewhat in the way, but hopefully you can get the idea.
What to do…When You Forgot To Hemstitch
I use the word mistake a lot, but in my mind, I have reframed them from being a bad thing to being a learning opportunity. I love that in weaving there are almost no mistakes that cannot be fixed, and since hobby weavers are not weaving to earn a living, the worst that can happen is some string is wasted. The stakes are pretty low! If you are a perfectionist, try to view your weaving as a “safe space” for making mistakes. As you learn to embrace learning experiences in your weaving life, you may find that it overflows into your daily life in a positive way. (Can you tell my educational background is social work?!)
I use the word mistake a lot, but in my mind, I have reframed them from being a bad thing to being a learning opportunity. I love that in weaving there are almost no mistakes that cannot be fixed, and since hobby weavers are not weaving to earn a living, the worst that can happen is some string is wasted. The stakes are pretty low! If you are a perfectionist, try to view your weaving as a “safe space” for making mistakes. As you learn to embrace learning experiences in your weaving life, you may find that it overflows into your daily life in a positive way. (Can you tell my educational background is social work?!)
Let’s slip back to the yarn wasted: this, I agree, in the short term can be pretty tragic and you are allowed to shed a few tears, stomp your feet or whatever it is you need to do to express your frustration and disappointment. Then do a quick Google search to see if your project can be saved or pop me an email, I try hard to answer, and who knows, your disaster could be the basis of a new blog post. (I’ve even set this email link to have HELP in the subject line!)
See that black thread? That’s my tail for hemstitching!
Ok, moving on…I had far more learning opportunities than I wanted this past week, most were not related to weaving and had something to do with my brain malfunctioning (I think it’s my age? Or maybe just too many ideas in my brain?) Anyway, I was super excited about the project on my loom. I carefully measured the tail needed for hemstitching and began weaving away. Well into the weaving process…probably around the 36” mark, I noticed a lot of yarn wrapped around the front beam. Confused, I wondered if somehow the weft had gotten wrapped around the beam and I was going to have a mess. But no: it was my tail for hemstitching! There was a piteous cry (I don’t curse, but I have a very piteous “oh no!” )
What to do? I had several options:
I could try fringe twisting without a hemstitch. It would probably work and while I love how hemstitching looks, I’m not fond of doing it.
I could tie knots instead of hemstitching, but I’m pretty sure this yarn will fray with use.
I could hemstitch after taking the scarf off the loom. Have you ever tried hemstitching a project not under tension? It’s not fun!
I could try winding the whole project back after weaving. What was there to lose? If it didn’t work, I could still do any of the other options.
So I kept merrily weaving along. It was a fun weave…no pattern yet, but it will be coming eventually. When I got to the end, I hemstitched. Then, I took the heddle and placed it behind the heddle block. With one hand on each pawl, I unlocked the front and started winding back onto the back beam. It was sooo smooth! That heddle just rolled back around that back beam like it was meant to do that all along. Maybe you have a different loom, you might need to help ease the heddle around. When I got to the beginning of the work I locked everything back in place and hemstitched. Easy-peasey! I didn’t take a lot of pictures of the process, but here’s a video!
On a side note…I love helping weavers and solving problems. I also do (try) to make a living weaving. I’m always happy to help solve weaving problems, so don’t hesitate to reach out if your “learning opportunity” has you stumped. Your questions keep me inspired and I love being part of your weaving community! If my tips or advice have been helpful, and you’d like to support my work, I have a donation option on my website. There’s absolutely no pressure—it’s just a way to help me keep creating resources and sharing what I love with you. Whether you donate or not, I love hearing from you and being a part of your weaving adventure!
Picks Per Inch: A Beginner’s Guide
There’s a lot to learn when you first start to weave. One of the first things you will notice is that weavers have their own language. We start taking about reeds and sheds and warps and wefts, fell lines, epi, ppi and before you know it, the non-initiated have glazed over and all they hear is blah, blah, blah. As a retail worker and a lover of weaving, I’ve learned to explain new terms as I used them and quit talking when the glaze appears!
There’s a lot to learn when you first start to weave. One of the first things you will notice is that weavers have their own language. We start taking about reeds and sheds and warps and wefts, fell lines, epi, ppi and before you know it, the non-initiated have glazed over and all they hear is blah, blah, blah. As a retail worker and a lover of weaving, I’ve learned to explain new terms as I used them and quit talking when the glaze appears!
As a weaving instructor, there are a few things that I harp on (just ask my students!) and one of them is ppi.
PPI? Please speak English! Ppi refers to Picks Per Inch. Still doesn’t make sense? No worries, by the end of this post you will know everything you need to know and sound like a pro too!
First, a pick is one weft thread. So every time the shuttle goes through the weave, it is called a pick. When you count how many ends are in one inch, you get the picks per inch (ppi). Pretty simple. But why does this even matter?
Inkle weaving…no weft visible
Picks per inch plays a role in the structure of the finished fabric.
Picks per inch plays a role in the structure of the finished fabric. Lots of picks per inch in relation to the ends per inch (how many warp ends are in one inch) will give a weft-faced fabric. This means you will see the weft but not the warp. (Think Krokbragd.) Fewer picks per inch in relation to ends per inch means that you will have a warp-faced fabric. This means you will see the warp much more than the weft. (Think inkle weaving.)
If you are following a pattern, think of ppi in the same way as gauge in knitting. When you have too many picks per inch, you will run out of material and the project will be much shorter and denser. If you have too few picks per inch the fabric will be gauzy and may not hold together well. (Sleazy is the actual technical term!)
Balanced Weave
Since I am focused on beginners, I’m going to stick to a balanced weave. A balanced weave means that you have the same number of picks per inch as you have ends per inch. Your ends per inch is determined by your reed. If you are using a 7.5 dent reed, your ends per inch is 7.5, so for a balanced weave, you should have about 7.5 picks per inch. This works when you are using similar weights for warp end weft and I will be assuming this for the remainder of this post.
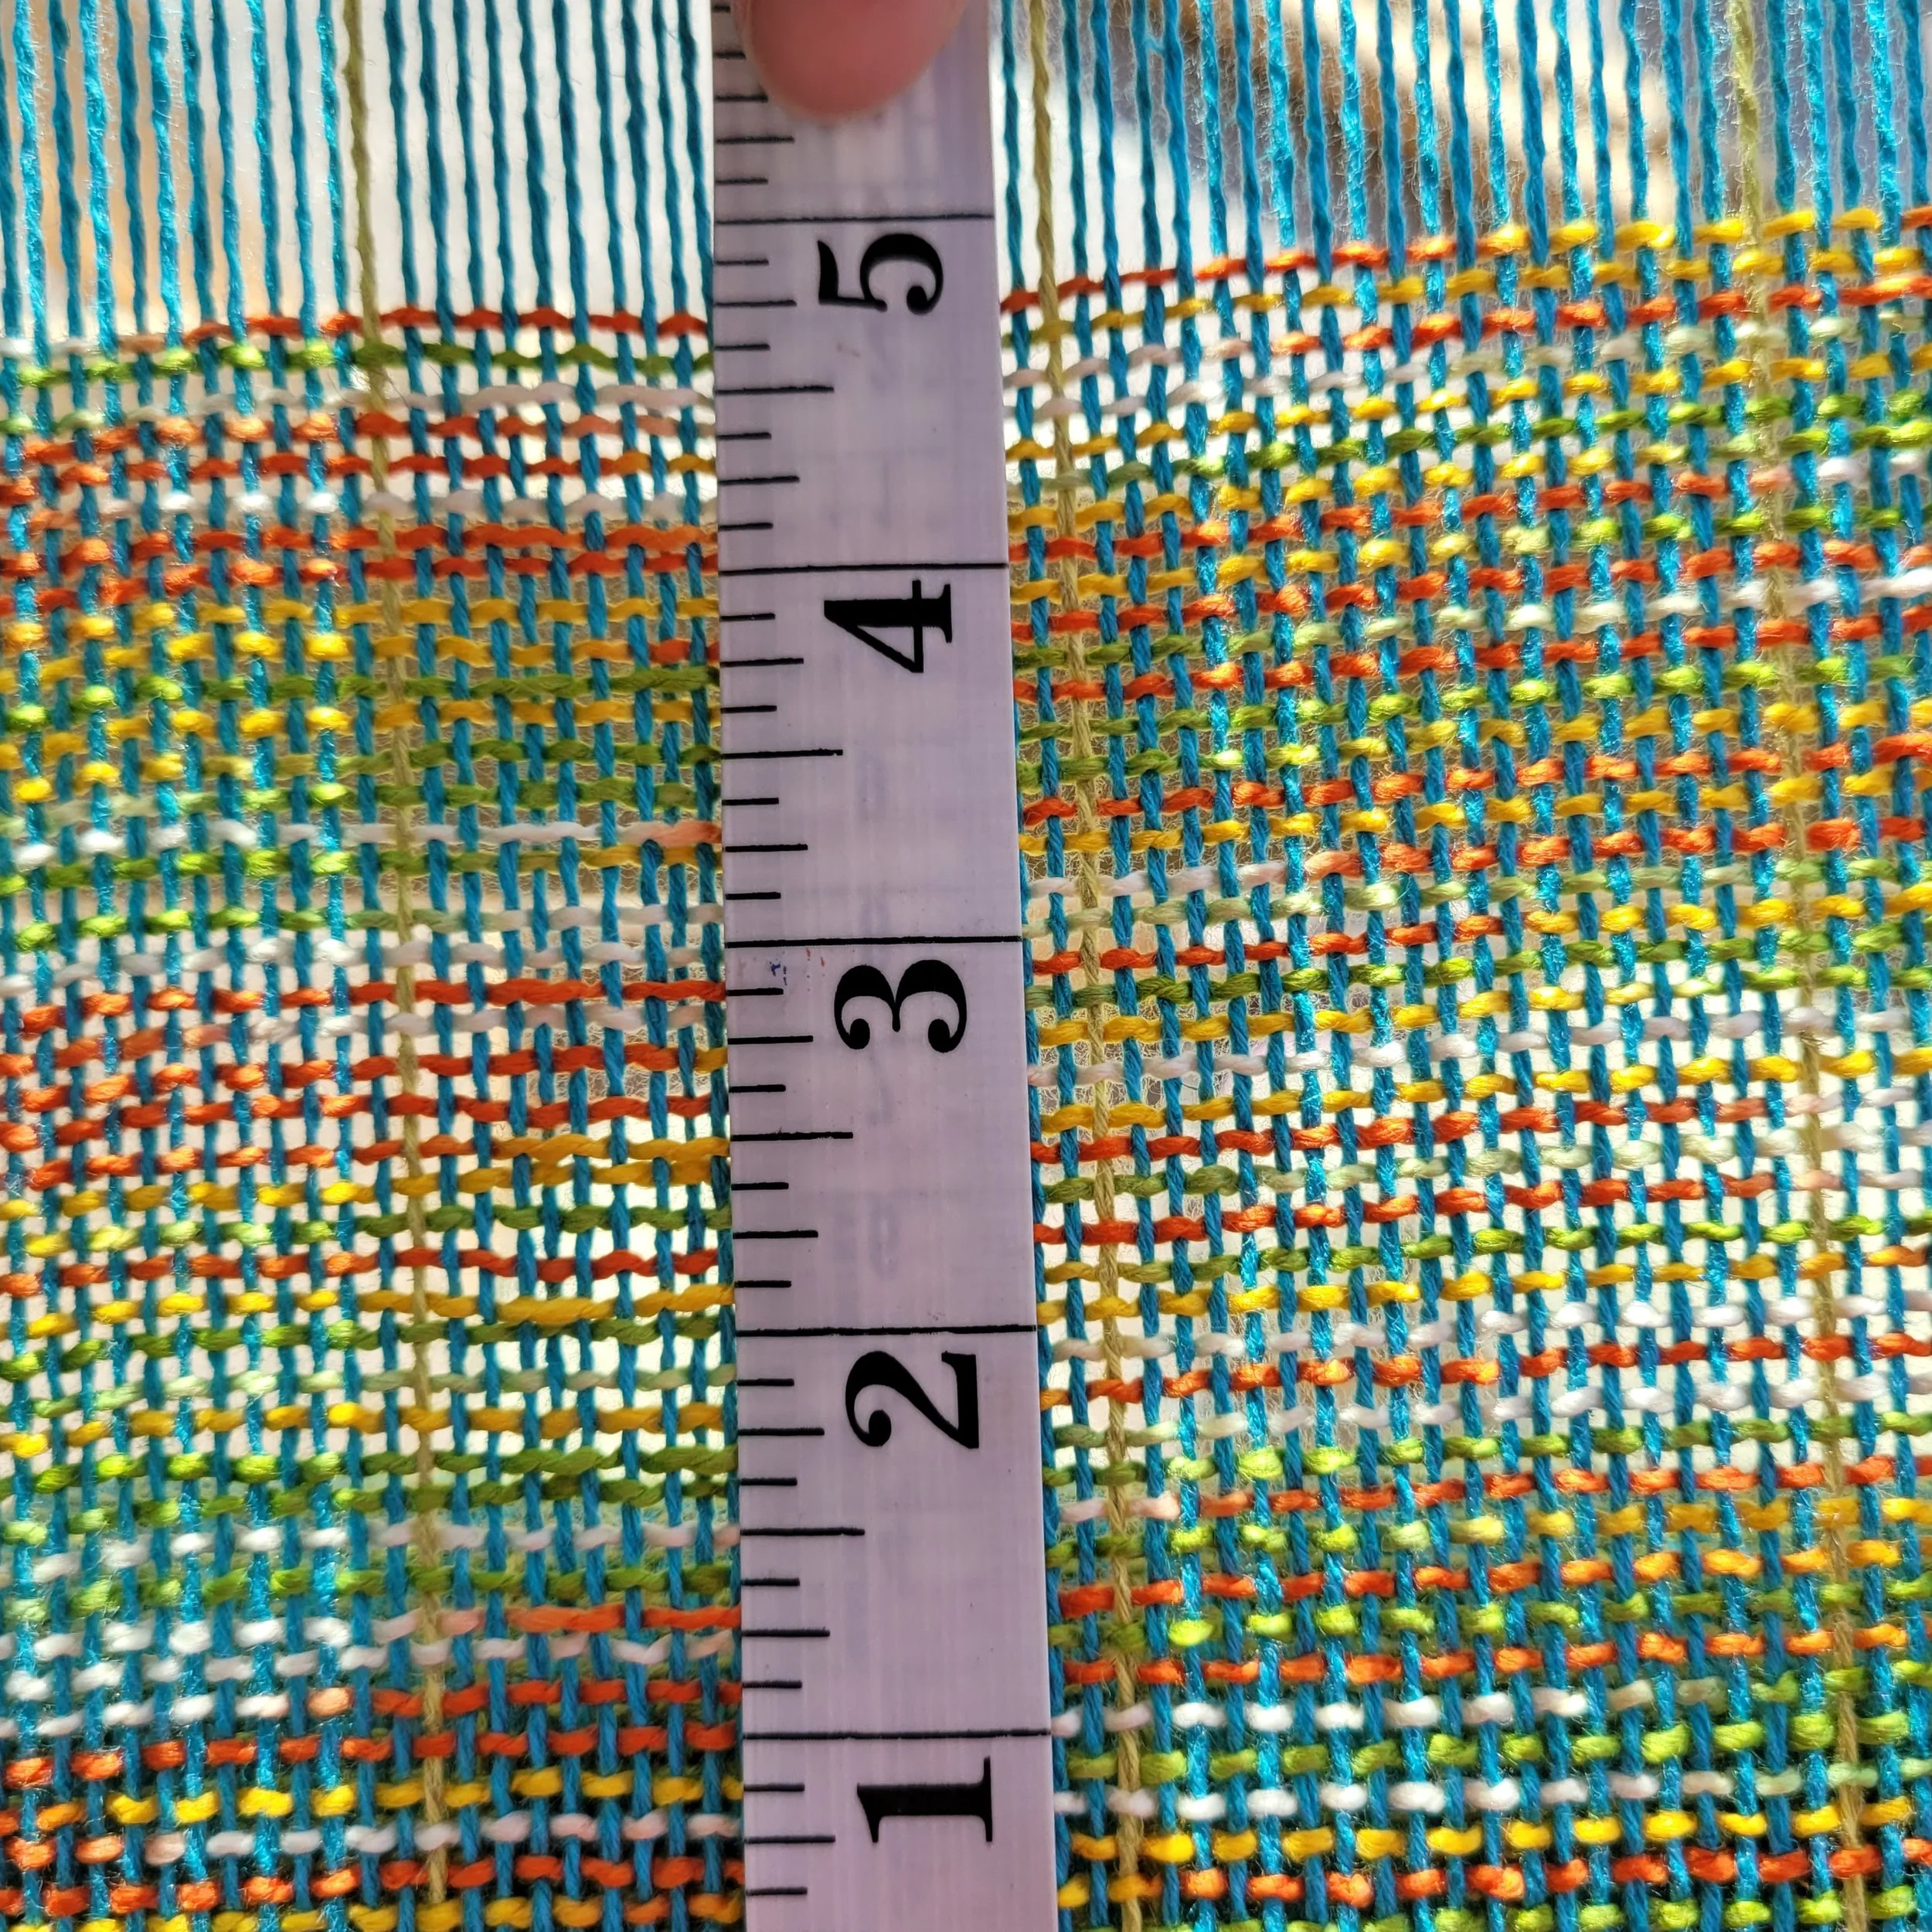
I’m using my 10 dent reed and have about 10ppi
Measuring Picks Per Inch
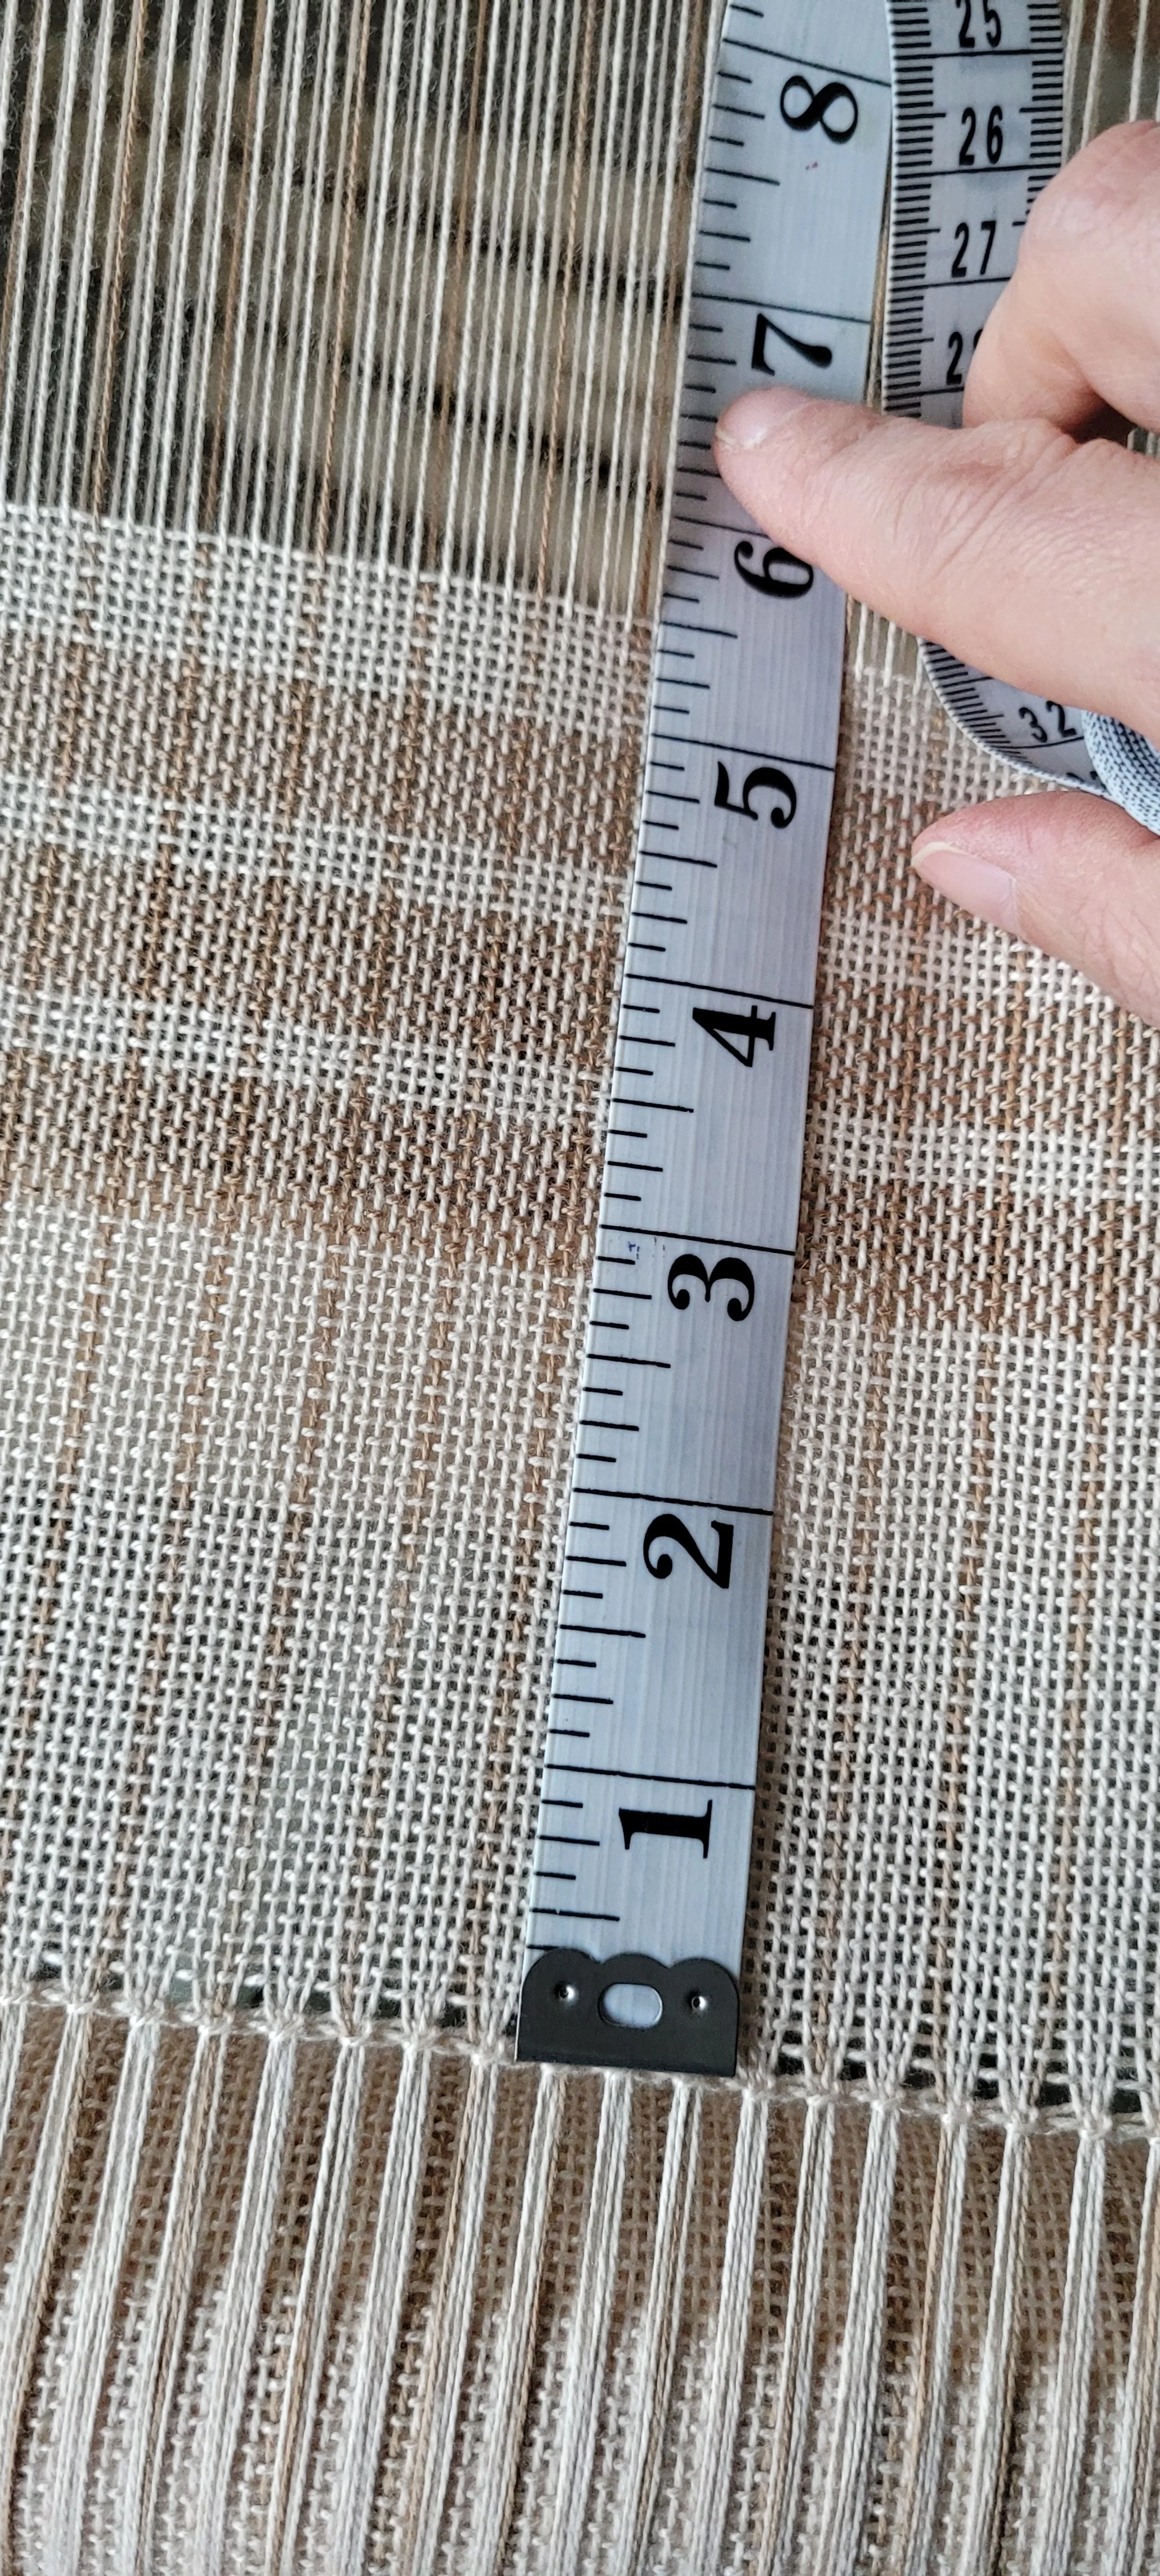
There are several tools that are designed to help you measure wraps per inch (wpi) another term we’ll talk about another time. These tools also work well for measuring your ppi. Personally, I prefer my tape measure.
As a beginner, you should be checking your ppi frequently. Every few inches, when you wind forward and when you come back to your loom. As you become more experienced, your eye will recognize when your picks per inch is off, but you should should still measure at the beginning of a project to be sure you are starting off right.
Let me share a true story here. As a teacher, I learn things every class I teach (I might learn more than my students). Anyway, I was teaching and all was going well with the pattern and weaving (okay, there was 1 disaster but I’ll save that for another blog) and it was time for the students to go home and finish their project. Later that week I received a call from a student looking for more weft yarn as she had run out. As always, when something goes wrong with a pattern, I panicked and wondered if I had made a mistake. But since I had woven this several times and had leftovers, and other students also had leftovers, I began to breathe again. I asked if she had checked her picks per inch. She had not. And so I learned to stress this many times in every class! There was a happy resolution though, we were able to find more yarn, though of a slightly different dye lot, and the scarf got finished and we are still friends! (Because weavers truly are the nicest people!)
Adjusting Picks Per Inch
On the loom and after washing!
Ok, so now let’s pretend you are weaving using a 7.5 dent reed. You’ve measured your picks per inch and they are at 14…now what??? (Most new weavers have way too many picks per inch, not too few.)
First, how you press with your reed matters! One gentle press is all that is needed. Some people refer to the pressing as allowing the weft to gently “kiss” the previous weft pick. You want spaces in your weave. Nice neat squares of empty space is perfect! When the project is no longer under tension, and has been washed, those holes will fill in. But they need the space! If they don’t have the space, you will have a very dense stiff fabric with little to no drape and the loveliness of the fibre will be lost.
Second, adjust your tension. If your tension is loose, the weft can pack in tighter. So a tighter warp means that the weft will pack in less tightly.
It takes practise to get consistent ppi, but it will become second nature and your eye will learn to recognize when you are even a quarter inch off!
PS - Did you notice that every ppi picture was a different project? That’s because I measure (and take pictures) of the ppi in every project!
Yarn Substitutions
We’ve all been there. We have the pattern in hand but no yarn. We visit our LYS and they don’t have the yarn. They can maybe order it in, but we want to start our project now! What to do? How do we know what else we can use?
I don’t have all the answers because I have not used all the yarns in all the projects *sigh*, but, here’s what I do when people message me asking for ideas:
I open up Ravelry and go to the yarn section. Type in the yarn, then pick a project. It doesn’t really matter what project but if I’m making a scarf I’m going to look at a scarf pattern just because. I do want to pick one that has many projects.
Once I find a pattern that has lots of projects, I click on the pattern, then open “yarn ideas”.
Once I have all the yarn choices, I can start picking the best ones for the project.
Now, I know not everyone uses Ravelry, so as I was writing this I thought there must be an alternative, so I googled “yarn substitution” and found YarnSub. I expect many of you reading this so far was wondering why I didn’t go to this in the first place! Sometimes if something works, I don’t go looking for something better. YarnSub is super simple. Just type in the yarn and search! I tested it with lots of different yarns and it could only not find one (and I did find the same yarn on Ravelry). You can even search by weight and fibre content. Search results will bring up the yarns with the ball band description. I now have YarnSub added to my phone!
Right, so we now have a zillion and a half choices, how do I know which one to pick?
First, eliminate anything you think you can’t get. Remember, you went to your local yarn shop for a reason so see if they carry any of the options.
Second, look at the fibre content. Animal fibres behave differently from plant fibres so replacing cotton with wool will not give the same effect as the pattern. You might decide to go with it anyway, but know it will not be the same as the pattern and you might need to change things up a bit.
Third, if it is for warp, make sure the yarn you are looking at is warp friendly. Of course you can’t start pulling yarn apart before buying, but you can look pretty closely. Is it a loose single ply? Probably not ok. Is it super fuzzy but the yarn called for is smooth? Probably not ok.
Fourth, look at the structure of the yarn. If the yarn called for in the pattern is super stretchy but the yarn is in the shop has no stretch, it’s probably not a good substitution. As a general rule, plant fibres do not have as much stretch as a plied animal fibre.
Finally, do talk to the yarn shop staff. For they most part they are friendly happy people who really want you to go home and make a fabulous project that you love. Yarn shop staff are a wealth of information that they can’t wait to share! They will be able to read the info about the yarn in your pattern and compare it to the yarns you are considering and tell you which would be the best choice and why.
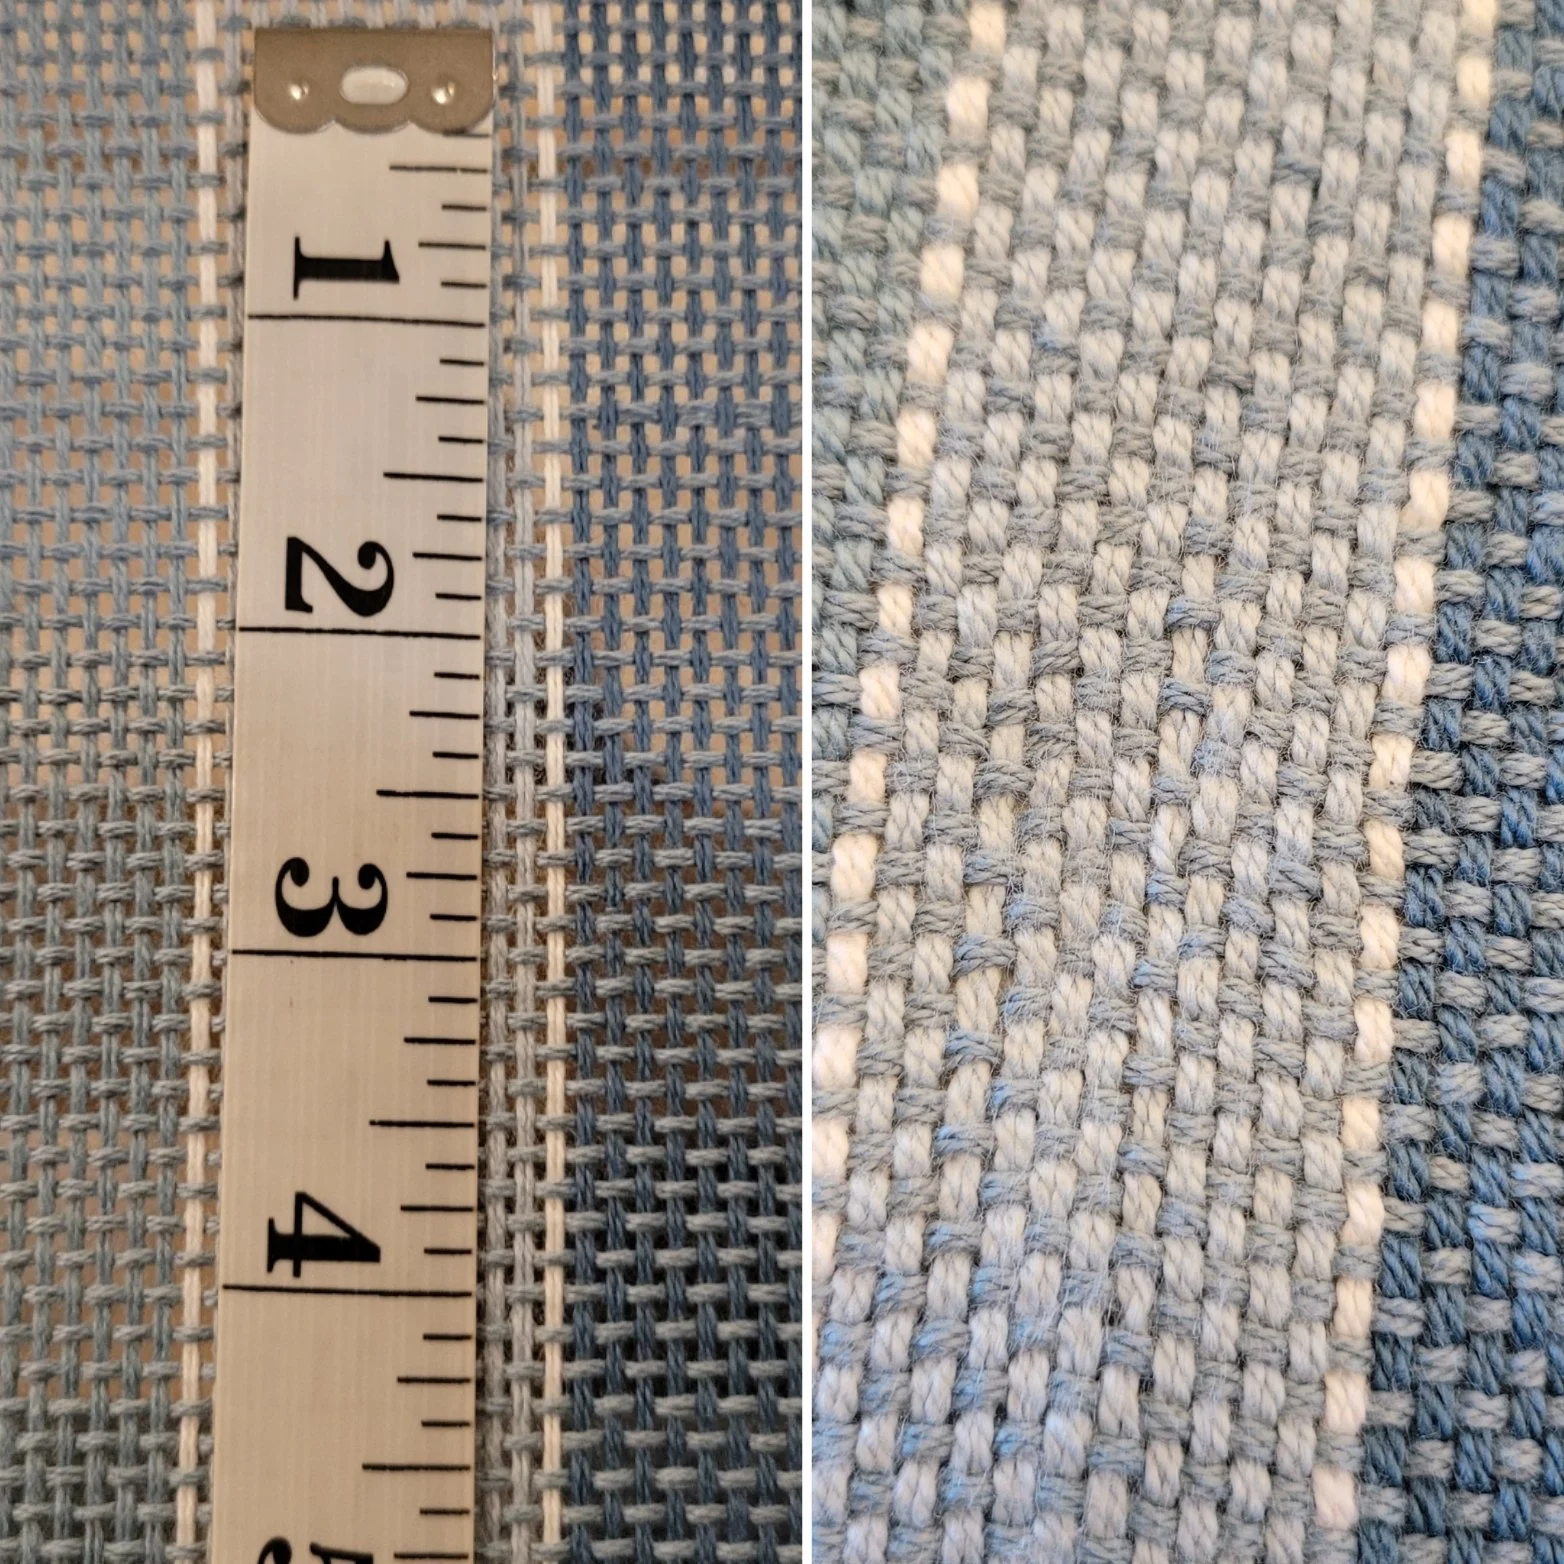
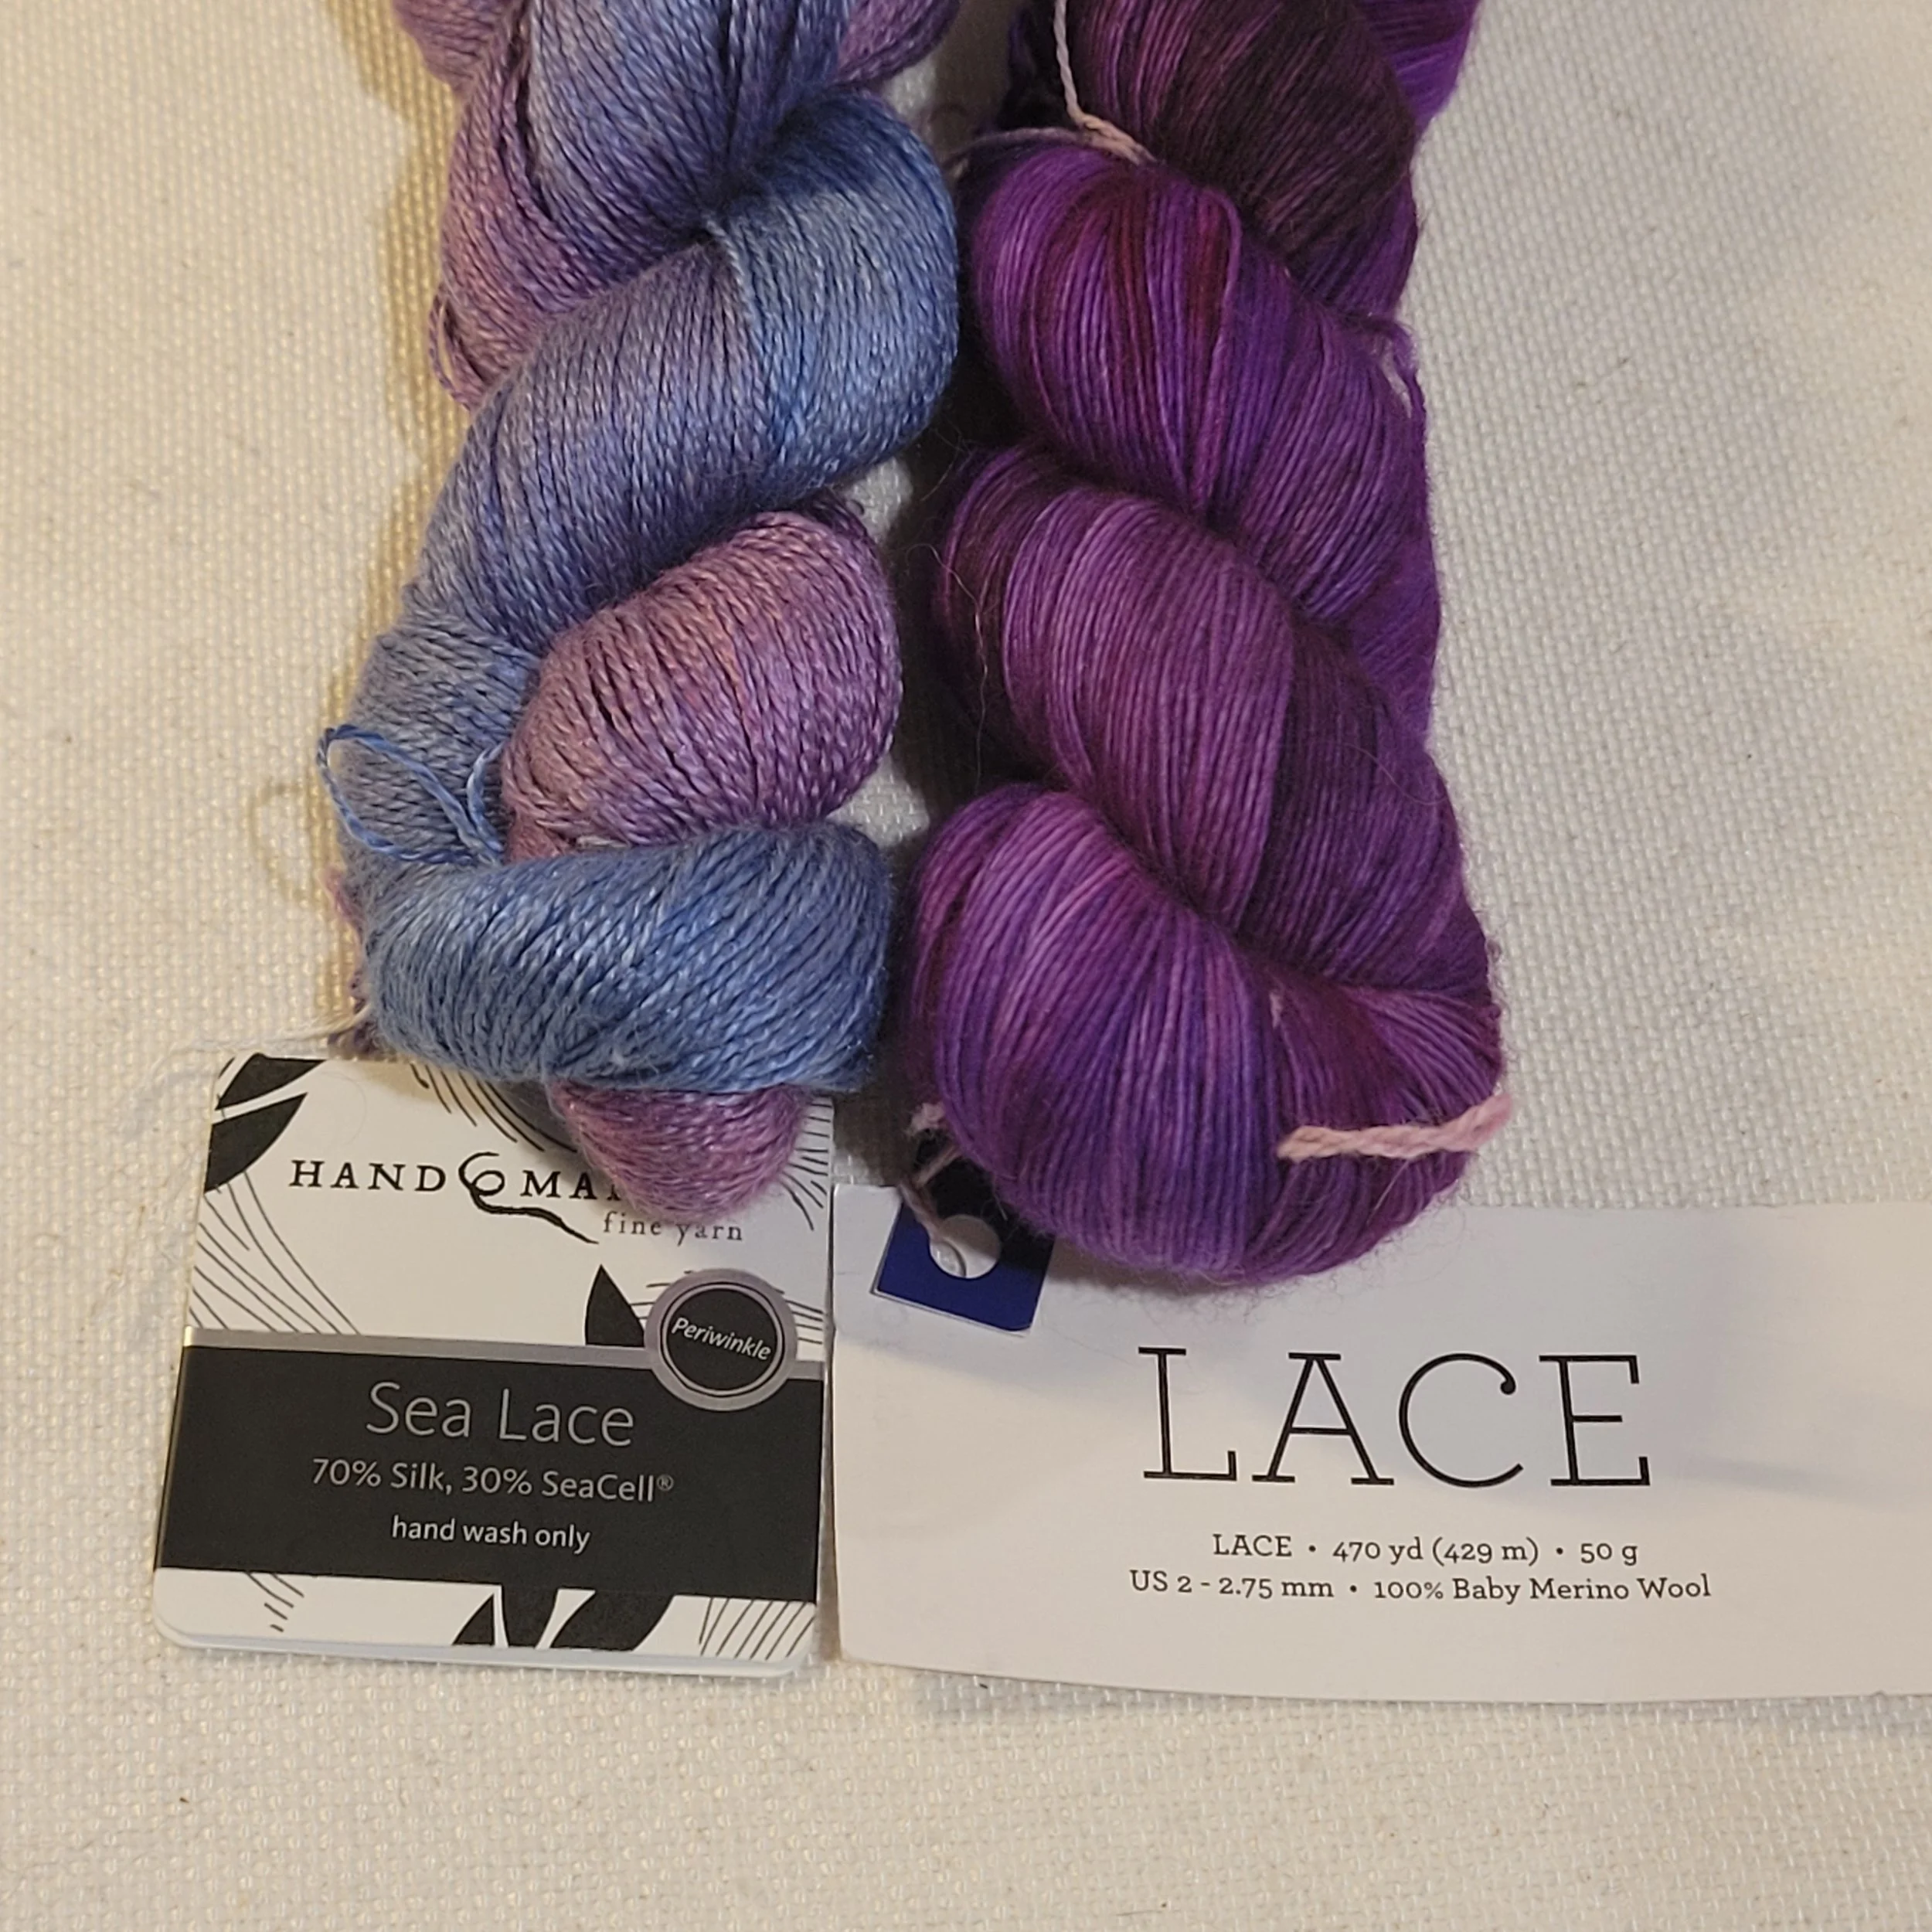
The yarns in the photo on the left might substitute well, the weights are the same and will work in the same reed. Also, both contain mostly animal fibre. But the tweedy bits in the Kathmandu will have a visual impact and might obscure a pick-up pattern. The yarns in the middle picture are both the same weight. The cotton content in the Illimani however means that there is very little stretch while the Juniper Moon has a fair bit of stretch. This might be fine, but you may need to add in extra length to the warp on the stretchy yarn to maintain the same finished length. And, the Juniper Moon is superwash meaning I might use a smaller reed. The final picture: again, the weights are similar but the content different. The Sea Lace will not stretch or full very much, but will give a beautiful shine. The Lace is has no shine and will full (in fact, it will felt with wear). That means I can use it on a bigger reed than the Sea Lace even though the Sea Lace is slightly heavier.
Three almost identical scarfs using three different yarns with very different (but lovely) results.
Now for the disclaimer. (Maybe I should have put this at the top!) When a designer suggests a yarn, it is because we have used the yarn for the project and know it works. When we suggest alternatives, we might never have seen or touched the yarn. Sometimes we are familiar enough with the alternative to be able to confidently say yes, this will work. Other times we are much more tentative. You’ll often read me saying it *should* work but I’ve never tried it.
When you make substitutions you are taking your life into your own hands. And this is exactly what I think you should be doing! Play with yarn, learn how different yarns react to tension and being released from tension. Take a tea towel pattern and weave a scarf using wool instead. There are no serious consequences from taking weaving risks and so much to gain. Yes, you may end up with a project that didn’t turn out as intended, but you will have learned some important information about your yarn and the pattern. And save the piece, you never know when it might come in handy!
Weaver Stories - Kim
The fibre arts seem to truly be a way to heal both emotional and physical injuries. Mary Black (Author of The Key to Weaving) knew this when she used weaving as physiotherapy for soldiers returning home and we seem to know it instinctively!
This week we are going to hear from Kim. I think that her story is one that many of us can relate to. How many of us view weaving as our “safe place” or a sanctuary from the world? We have the chance to take a deep breath, slow down and release the pent-up anxieties within us.
Weaving is our safe space and sanctuary.
The fibre arts seem to truly be a way to heal both emotional and physical injuries. Mary Black (Author of The Key to Weaving) knew this when she used weaving as physiotherapy for soldiers returning home and we seem to know it instinctively!
This week we are going to hear from Kim. I think that her story is one that many of us can relate to. How many of us view weaving as our “safe place” or a sanctuary from the world? We have the chance to take a deep breath, slow down and release the pent-up anxieties within us.
Here is Kim’s weaving story:
These are some of Kim’s weaves…and I think that’s a tapestry loom we see too!
I started weaving about five or six years ago. I had a severe head trauma that left me, shall I say, "different". Poor memory, attention span, etc. I took up spinning because it intrigued me and also became a kind of meditation helping with focus. However I did not know how to knit or weave. So out to bookstores to find books to help me learn. I am still very much a beginner as I live alone and in a rural area and am a slow learner but I absolutely love the process. I can give myself permission to go slow cuz that's the only way to go. I have since been diagnosed with early AD and the medication prescribed has given me a whole new perspective and focus so I can now complete projects. I was diagnosed in mid-May, meds kicked in by mid-June. Point being I have woven and learned more in a month then I had in all the years before. My hope now is to find a teacher so I can achieve more of my goals. I have a massive collection of many different looms because every time I was not able to figure one out I thought maybe another would be easier. Nope. I have got the rigid heddle down (sort of) so now onto a four-shaft. Learning Krokbragd is my ultimate goal. Anyhow spinning and weaving are my most ecstatic joys, which I live for and do every day. Life is a blessing and even the darkest times can evolve into something bright and beautiful. I hope everyone can find their joy and bliss in creativity.
All the best and warmest regards,
Kim
Kim, thank you so much for sharing your joy as well as your pain with us. May weaving always bring you joy and best of luck in your continued weaving journey!
Kim mentions books helped her learn. I thought I’d share my favourite books.
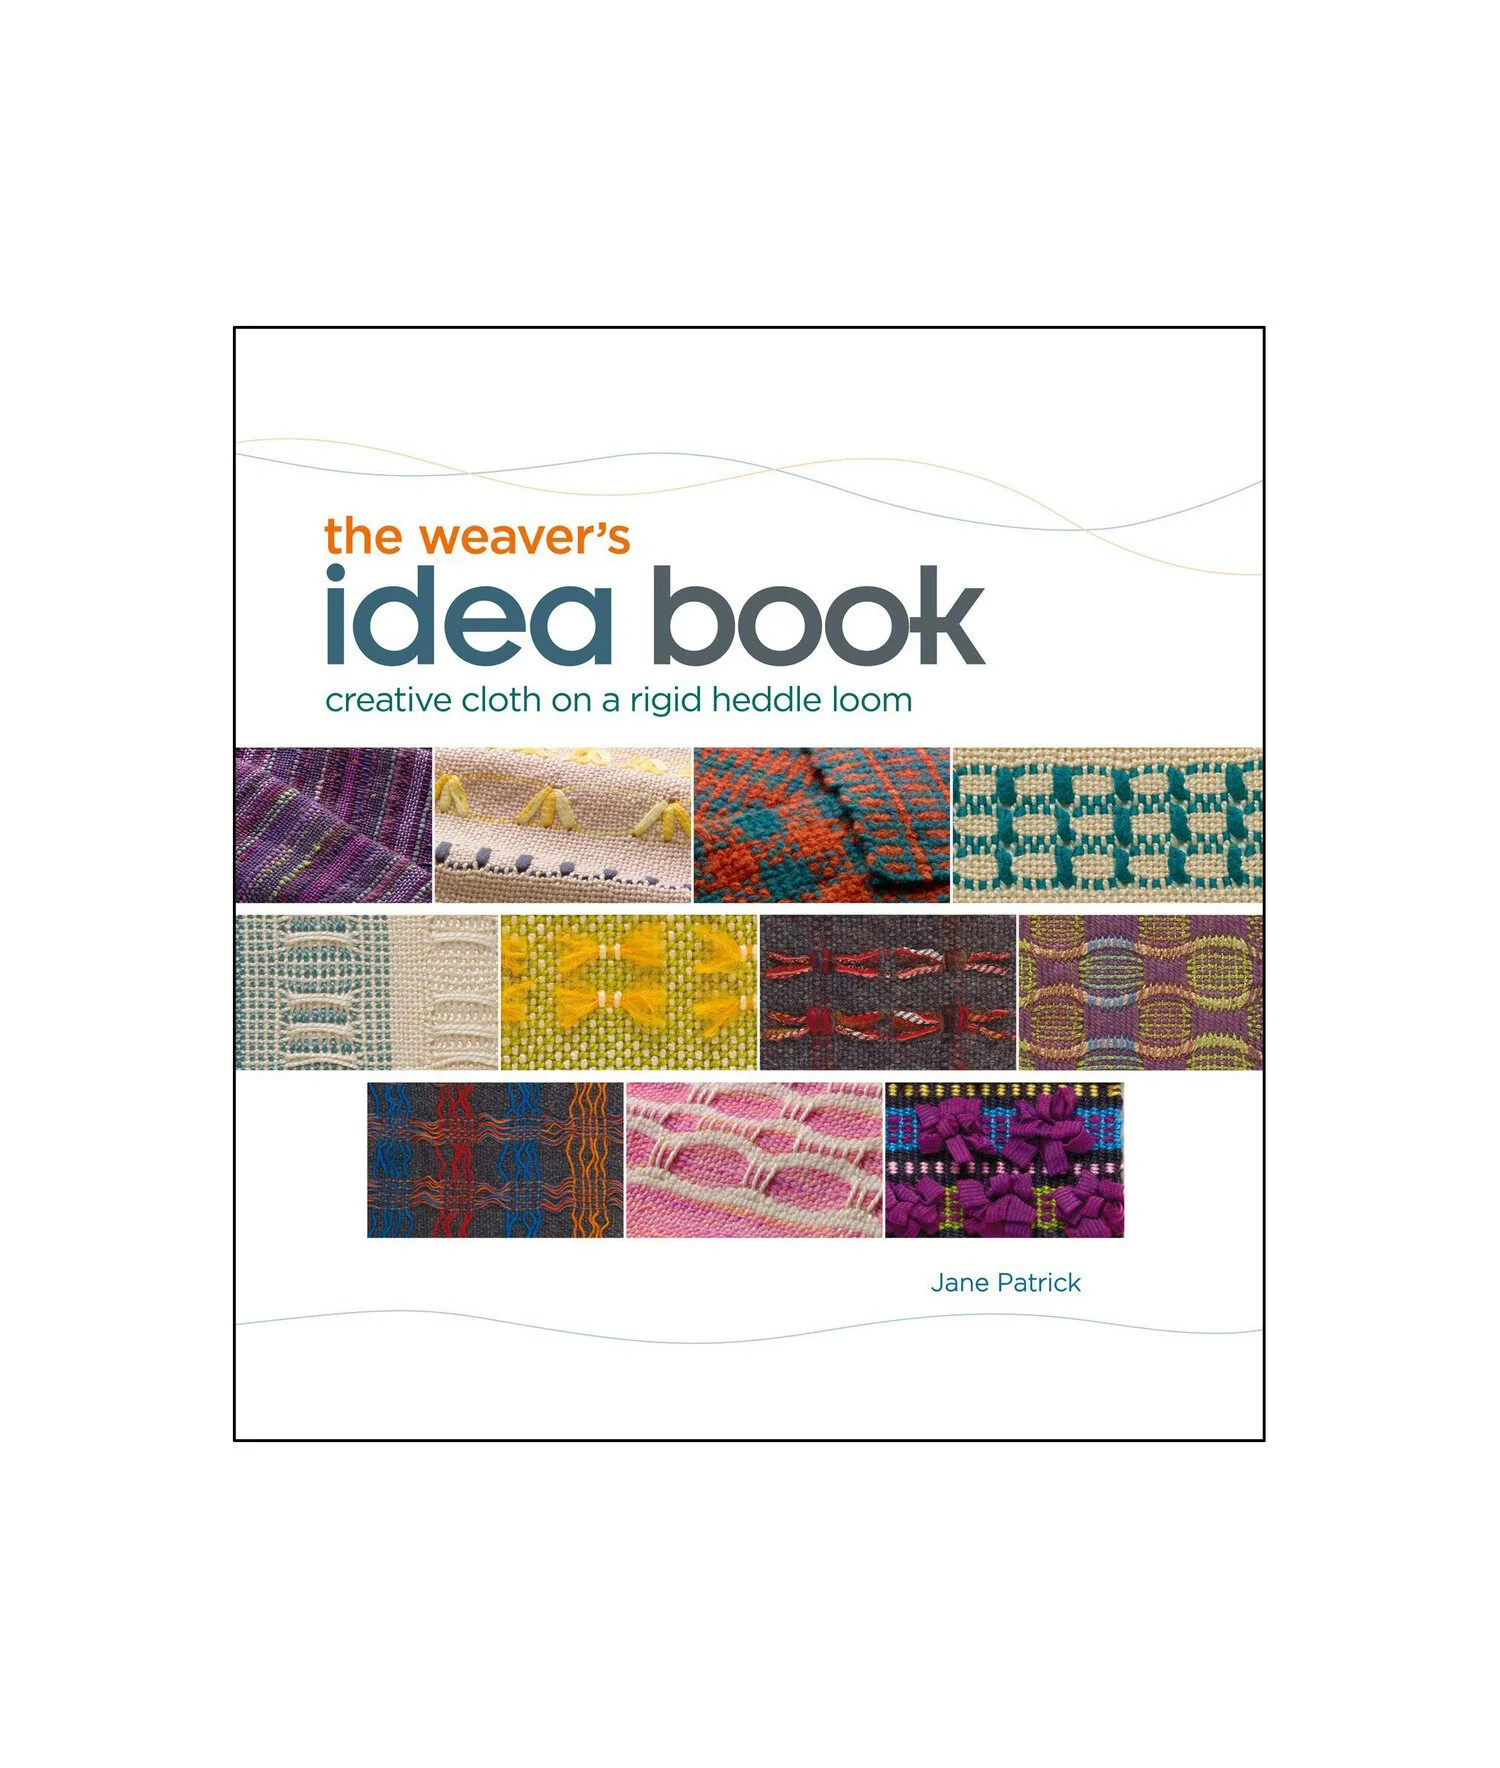
The first, and my all-time favourite, is The Weaver’s Idea Book by Jane Patrick. This got me started and I still refer back to it when I want inspiration.
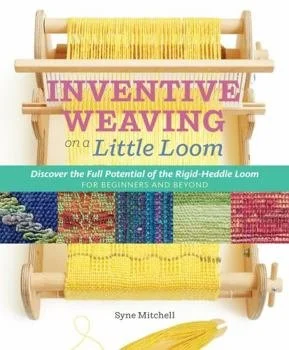
The next is Inventive Weaving on a Little Loom by Syne Mitchell. Syne has great pictures and lots of creative ideas.
I love reading your stories! If you would like to share your weaving journey, be it just beginning or a lifetime, please email me at: tammy@therogueweaver.com.
Perspective
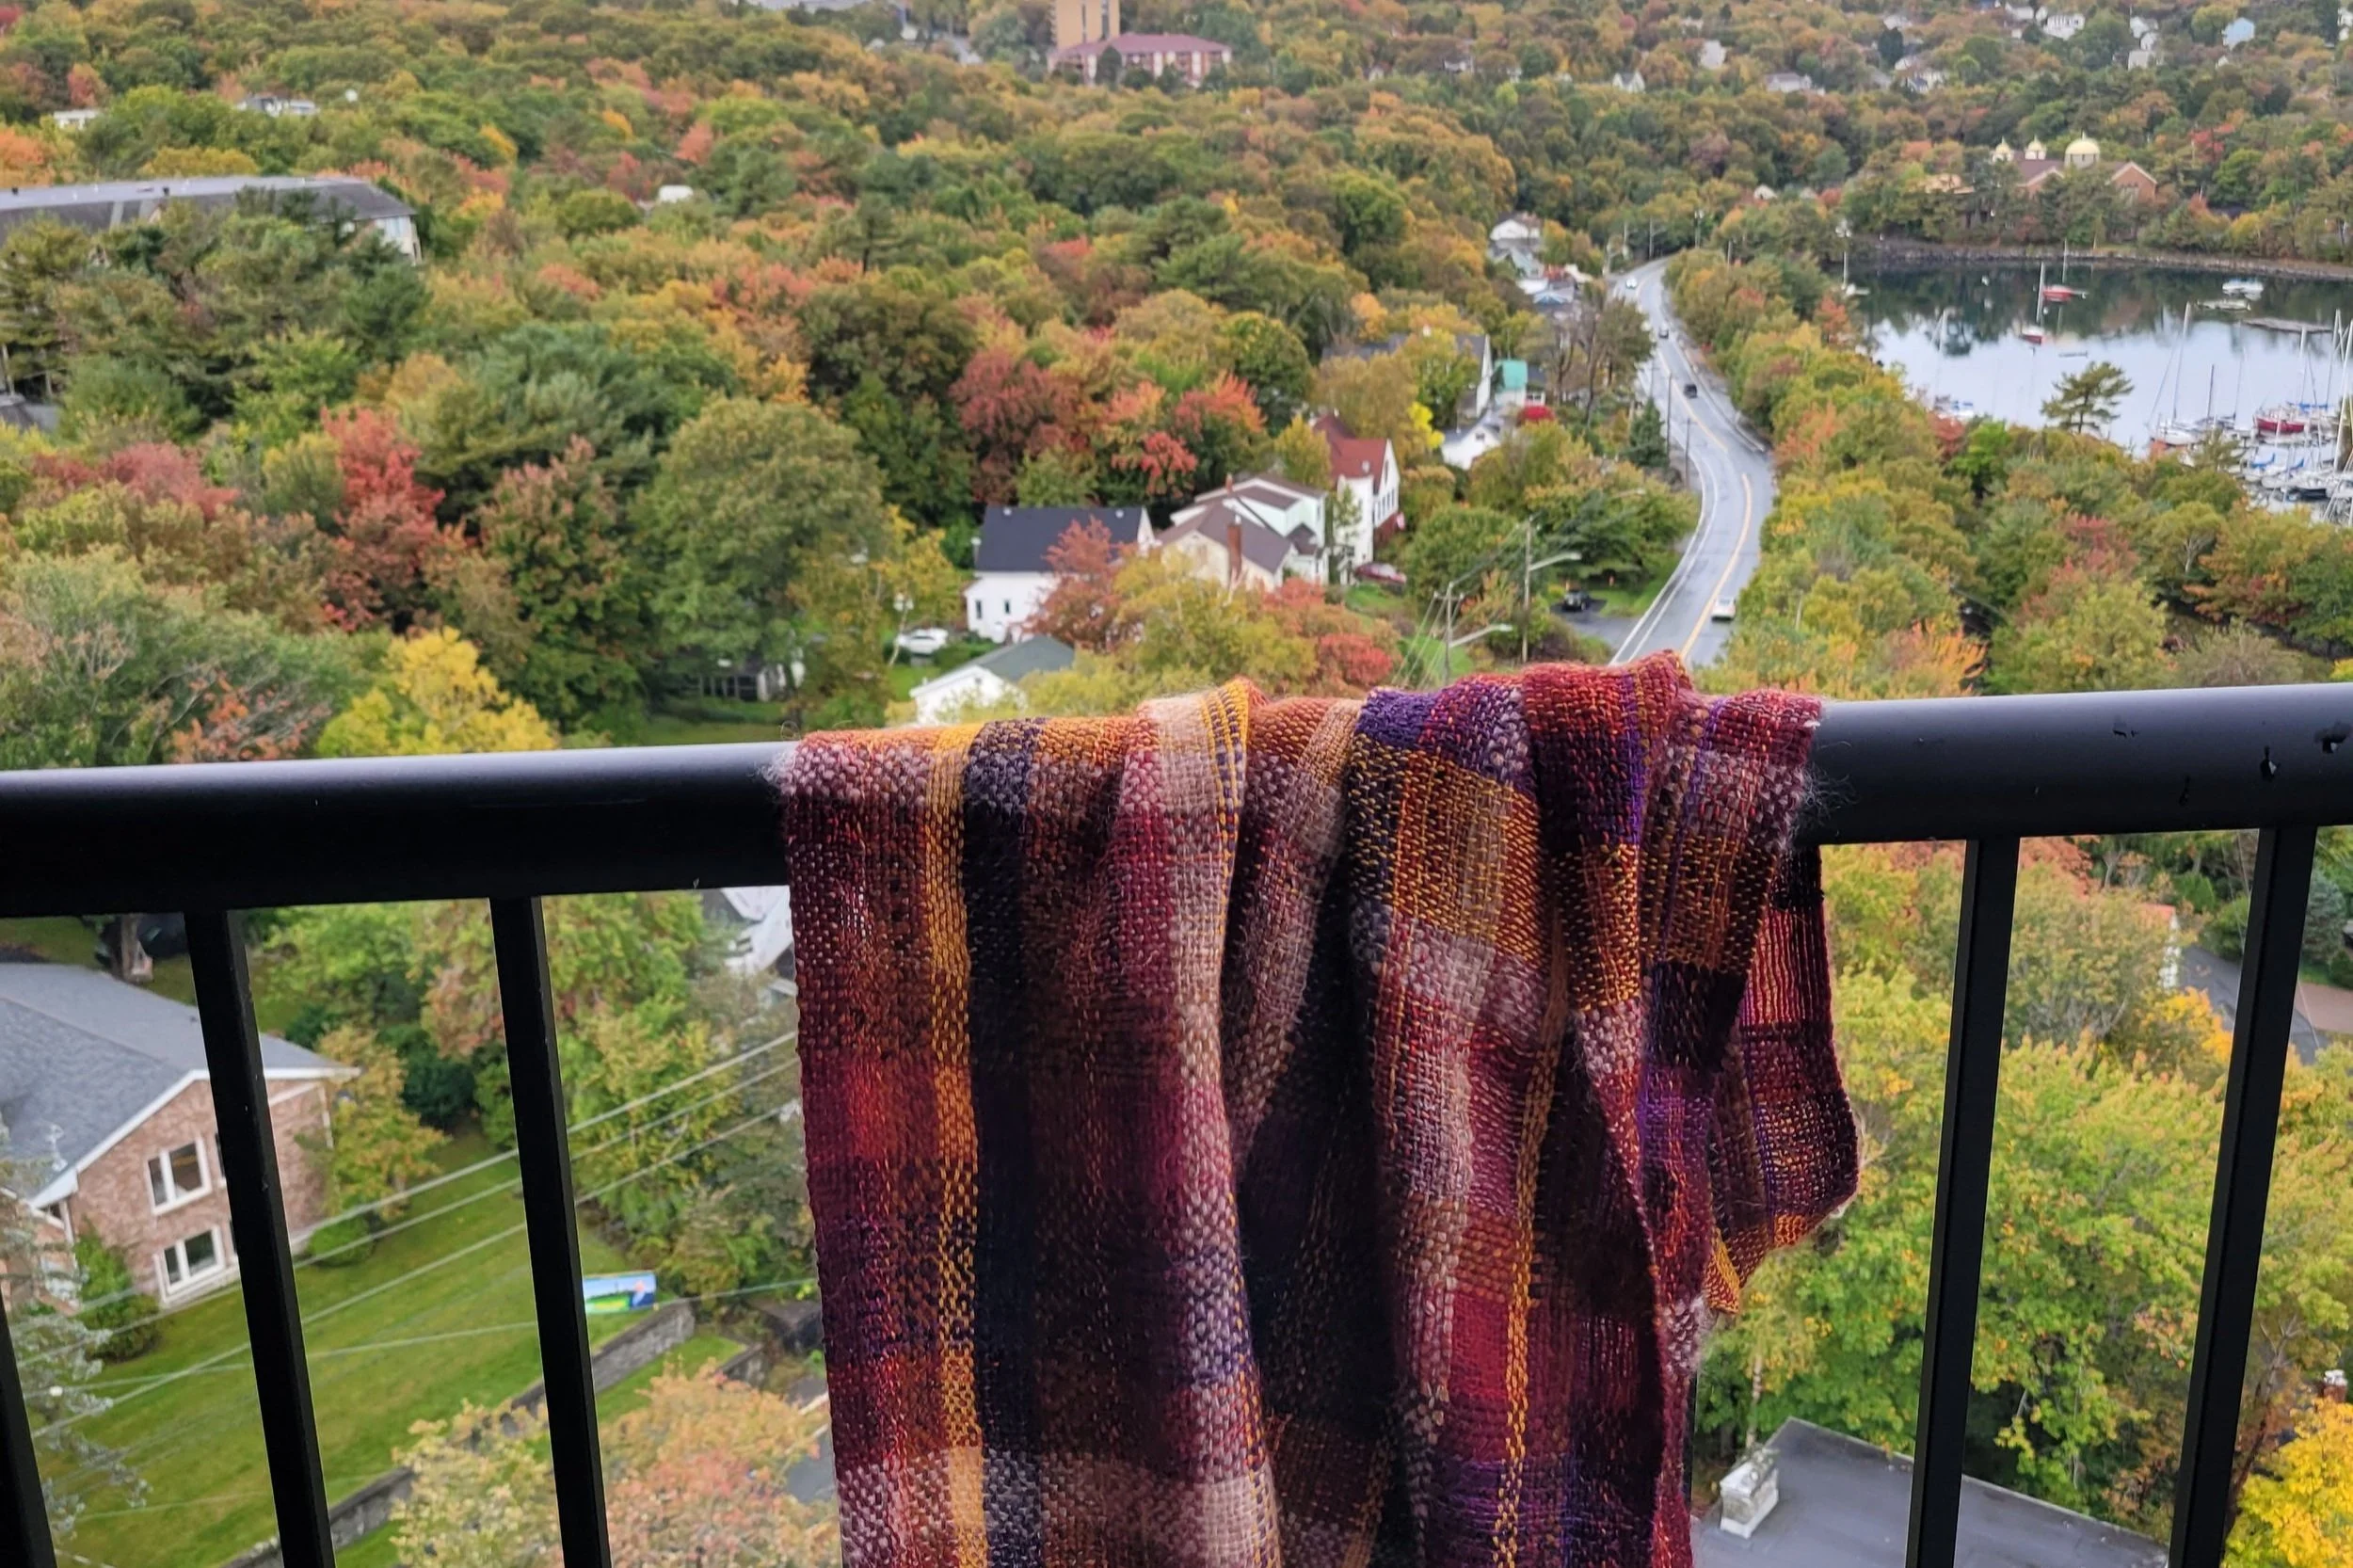
Most of my life I’ve lived on the ground, it’s a whole new perspective seeing the world from above. Instead of seeing individual trees I see ALL the trees. From up here I can pick out sugar maples, oaks and aspens. I can’t see all the tiny details, but I get a birds-eye view. Sometimes I actually see the backs of birds as they are flying below me, and some days I look out my window and it looks like there is no one else in the world as I’m in the middle of a cloud!
I love being on the ground, I like to feel the grass, I touch the trees that have interesting bark and anything that looks fuzzy. I’m very tactile…I’m the one the security guard keeps their eye on in a museum because I WILL touch: I can’t help it! I once got reprimanded for touching a wall at a museum (apparently it was a really old and very important wall), but the texture looked so interesting and my eyes just weren’t enough. (I spent the rest of the day with my hands firmly in my pocket.)
But what does any of this have to do with weaving? Funnily enough, a lot! Perspective in weaving is important…the close up and the far away. Just this week I came to the end of a project but had some extra warp still on the loom. I grabbed some Caterpillar yarn and started weaving. I take a tonne of pictures while weaving: mostly close up to measure ppi or to catch the pick-up pattern. And I’ll be honest, despite the colours I was a little underwhelmed. The colours looked all busy and jumbled and the pick-up pattern was virtually invisible. Well, said my mind, that’s what sampling is for and maybe washing will work a miracle. (It often does.) Then I left the room.
When I came back in later, I saw the piece from a distance. I saw how all the colours had aligned themselves in a way to make a lovely design. And the pattern was visible! What I couldn’t see up close suddenly because visible. It’s all about perspective. I don’t know about you, but when I am sitting at my loom I only focus on a very small piece of my work at a time. I might be paying attention to the edge, then the pick-up pattern, then checking that there are no floats. Even when I look at the whole piece, up close looks very different from standing back, or even a different angle.
There have been many times when I’ve been weaving a tone-on-tone pattern where the pattern is almost invisible while I’m at the loom and my fingers need to do the seeing for me. But when I lean to the left or right I see the pattern. And it almost always pops when I look at my weaving from the doorway of my loom room.
But that’s the perspective on the loom: there’s a whole new perspective once the cloth is off the loom. (Fun fact…did you now that the cloth on the loom is called a web? It isn’t actual cloth until it has been wet finished.) Once the weave comes off the loom, the yarns, which have been under a great deal of tension, snap back into their comfortable shape. Length is lost and patterns are suddenly visible. Then throw it in the wash and dry it and it’s a whole new thing - with two sides! I’m delighted to say that I love the wrong side of this piece. The solid warp floats really pop against the bright colours of the weft. And the softness of the Caterpillar yarn blends really well with Hempathy, a cotton, hemp and modal blend, which can feel a little…string-y on its own. Good for drying dishes, but on its own, not bath towel material. Mixed with Caterpillar, I can see baby blankets!
So, perspective. Sometimes we need to step back to see what is really there. Sometimes we need to let things finish before judging. And sometimes, we need to get close up and touch! (Maybe remember to ask before touching if you’re trying to deconstruct someone’s scarf or jacket!)
Why Every Weaver Should Weave a Colour-and-Weave Gamp!
A gamp in weaving is like what a sampler is to embroidery. You’ve probably seen samplers in pioneer museums—those beautiful, intricate pieces hanging on walls that young women made in the 18th and 19th centuries to show off their skills. A gamp serves the same purpose for weavers. It’s a woven sampler that lets you play with patterns and colour combinations, all in one project. I think every weaver needs to weave one at least once! They’re not just skill builders, but also incredible design tools you’ll use again and again. (And, non-weavers will be very impressed!)
A gamp in weaving is like what a sampler is to embroidery. You’ve probably seen samplers in pioneer museums—those beautiful, intricate pieces hanging on walls that young women made in the 18th and 19th centuries to show off their skills. A gamp serves the same purpose for weavers. It’s a woven sampler that lets you play with patterns and colour combinations, all in one project. I think every weaver needs to weave one at least once! They’re not just skill builders, but also incredible design tools you’ll use again and again. (And, non-weavers will be very impressed!)
A Colour-and-Weave Gamp as a Skills Builder Project
There are so many skills to learn in weaving, and a gamp can help you learn lots all in one project!
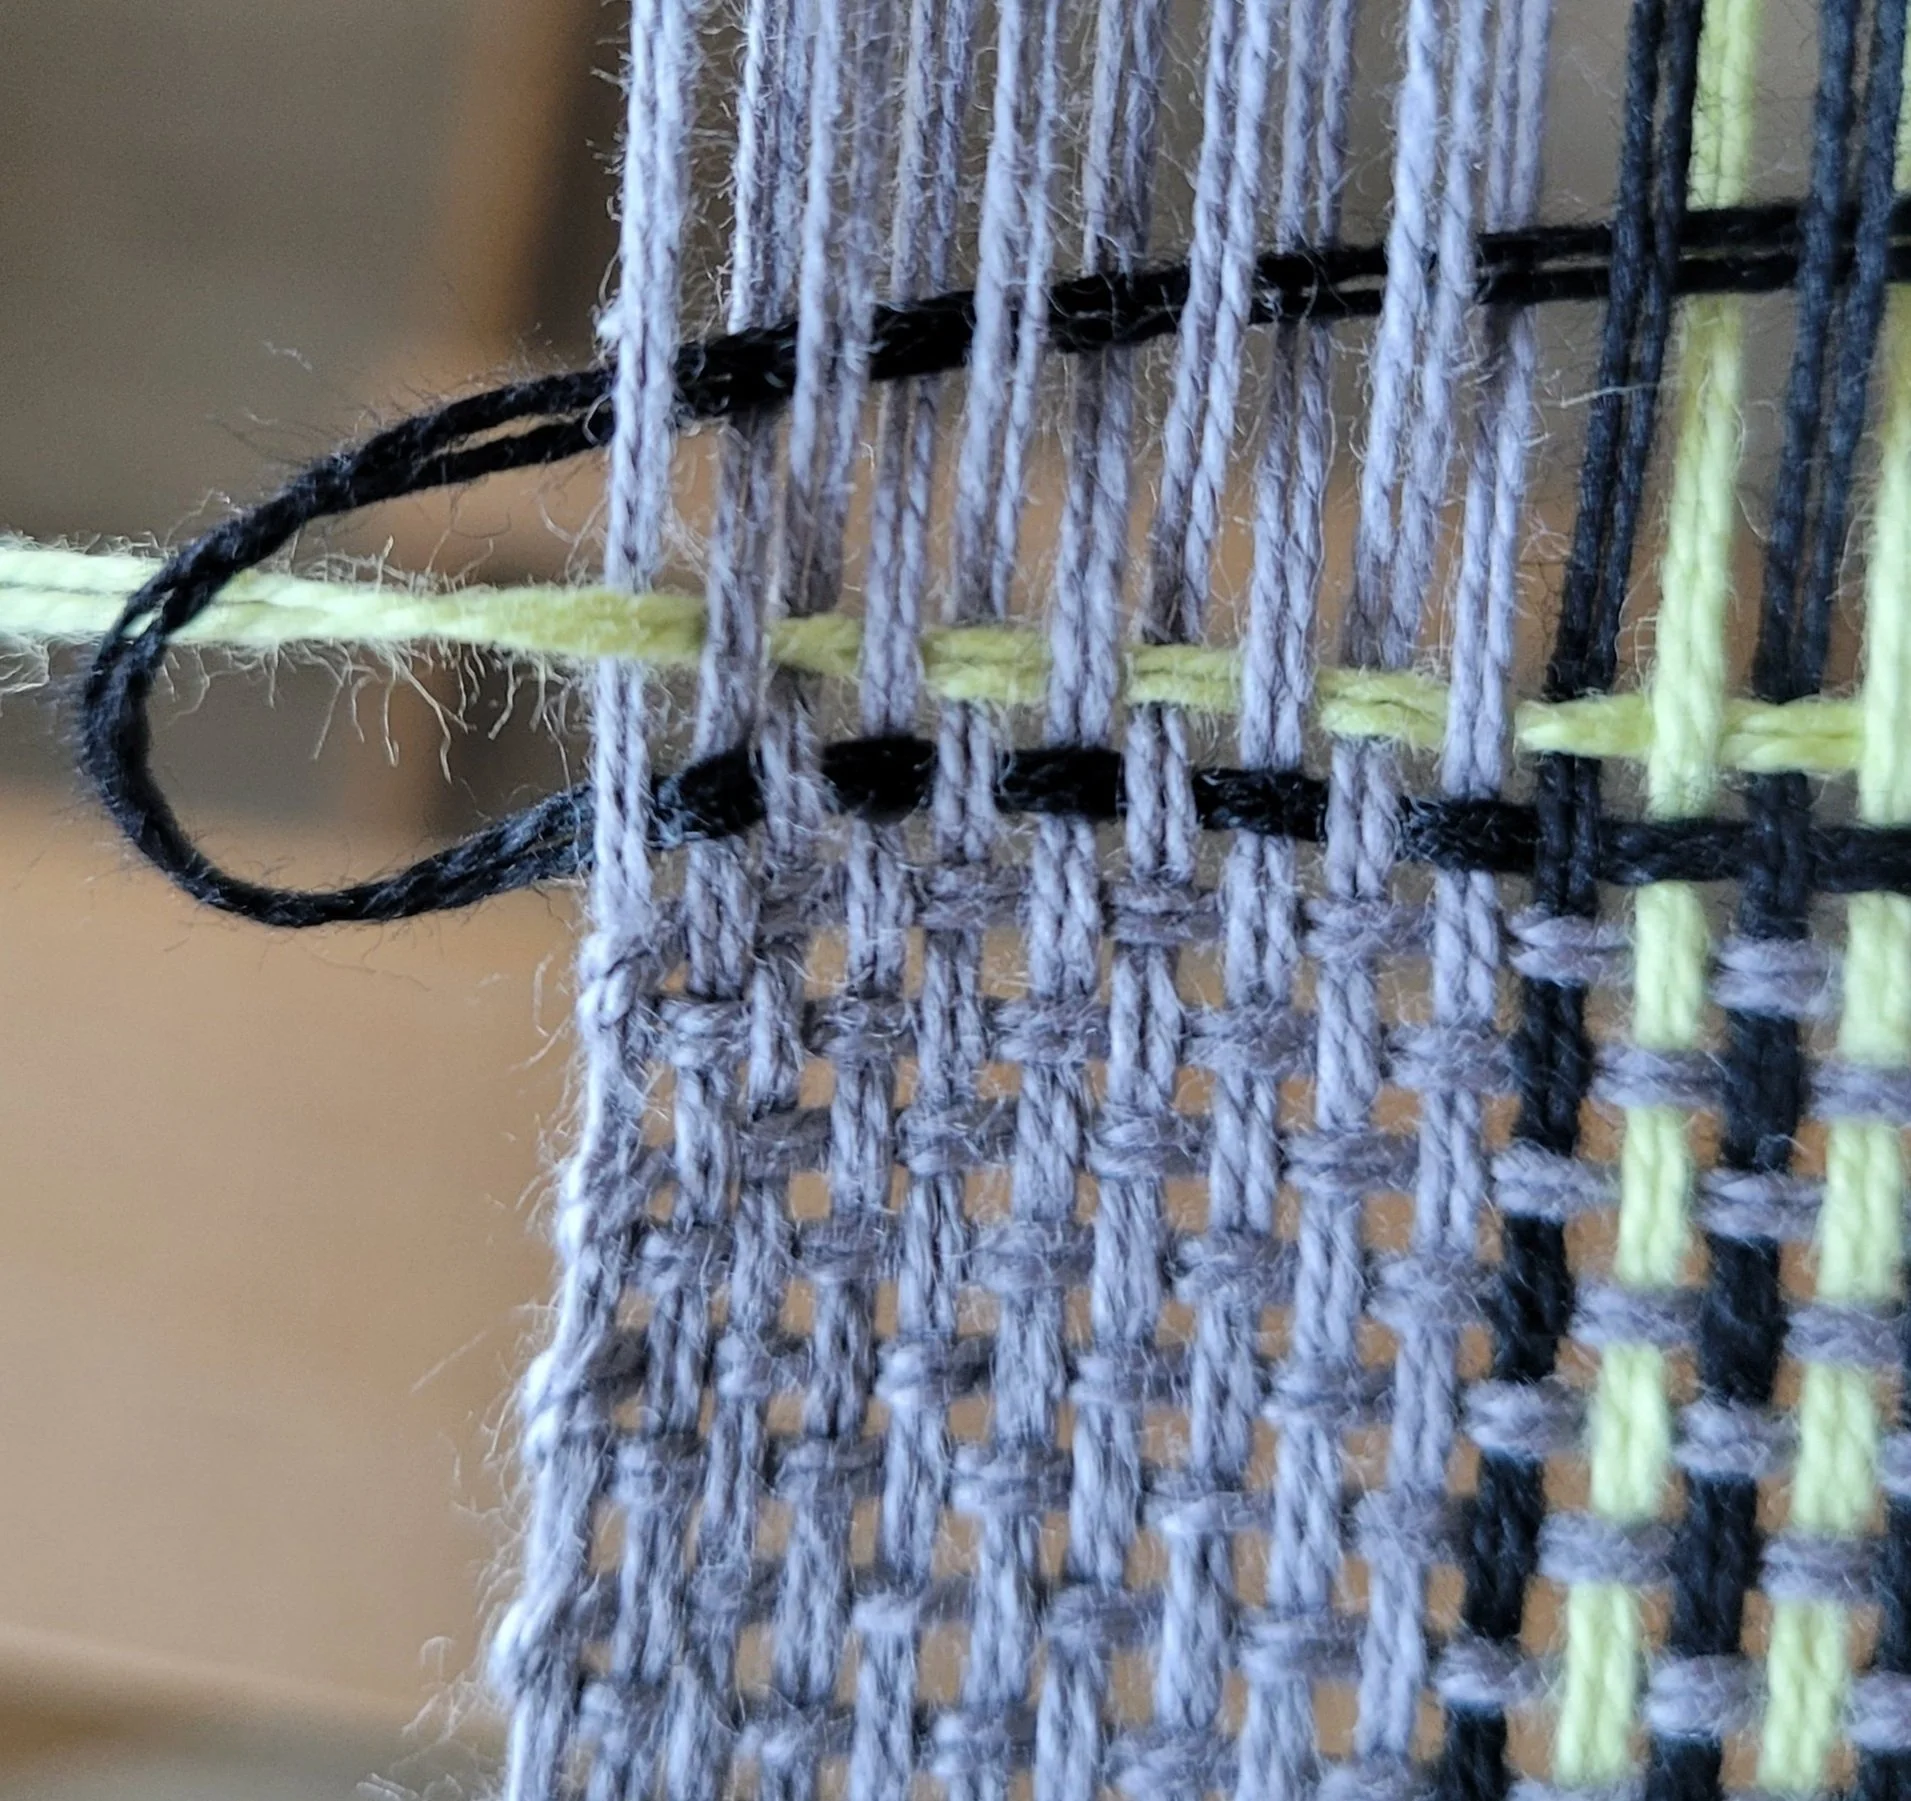
1. Warping with multiple colors: I know, changing colours while warping can seem a bit daunting at first, but trust me, it’s not as hard as it looks! When I weave a colour-and-weave gamp, I don’t cut and tie at each colour change. Instead, I let the threads cross behind the heddle. You can even warp two colours at once—it’s quicker and a lot easier than you might think. (I’ve got a video that shows you how, if you need it.)
2. Staying on track with patterns: We’ve all been there—getting into a good weaving "zone" only to realize we missed something important. A gamp helps keep you stay focused because you have to pay attention to each block change, whether it’s in warping or weaving. It’s a great way to practice catching mistakes before they turn into something you have to fix later. And honestly, learning to stop and check your work is important in any project!
3. Switching colours while weaving: Using lots of colours while weaving is fun but it can also be a bit of a hassle. A colour-and-weave gamp is the perfect way to practice changing colours smoothly. You’ll get the hang of techniques like split-plying to make colour changes almost invisible. It’s worth taking the time to learn this skill! Here’s a video.
4. Handling multiple shuttles: Using two shuttles at once is definitely a little awkward until you get the hang of it. Most of us assign a specific direction for our sheds—like, the up-shed always goes right to left. But in color and weave, you’ll need to keep a closer eye on your weaving since those usual rules fly out the window. Don’t worry—before long, your eyes and hands will learn to work together, and you’ll be less likely to get confused about which shed comes next. And here’s another video!
5. Help you really “see” how the warp and weft interact. This will give you a much better understanding of weaving and make it easier for you to visualize what will happen when planning future projects.
A Gamp as a Design Tool
Here’s a tip: don’t give away your first colour-and-weave gamp! Add it to your weaving “tool box”: you will keep pulling this out! (Try folding this up after washing and I bet you won’t be able to stop yourself from examining how the patterns were created!)
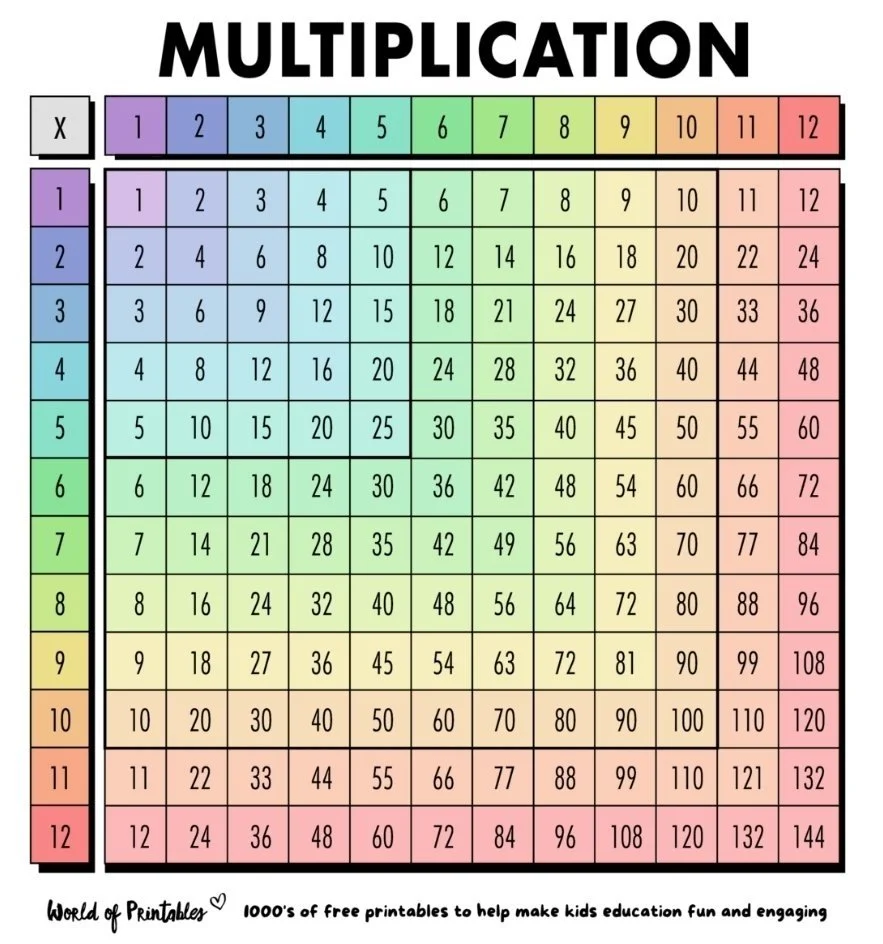
Using it to design is really simple—remember those multiplication tables from school? That’s how a colour-and-weave gamp works. Just lay it out, pick the pattern you love, and trace it horizontally to see what the weaving pattern is. Then, trace it vertically to see how the warp was threaded. If you’re like me and prefer not to repeat the same design twice, find a warp pattern you already have on your loom along the bottom and explore the vertical column for something new to try. The possibilities are almost endless! And here’s the best part: you don’t need to learn anything beyond plain weave (unless you want to experiment with pick-up sticks and colour-and-weave, which can look amazing).
If you’re looking for a project that’s not only going to boost your colour-and-weave skills but also give you a practical tool for designing future projects, weaving a color-and-weave gamp is it! It’s a project that will grow with you, letting you revisit and discover new ideas every time you sit down at your loom.
Want to weave up your own Colour-and-Weave Gamp? Check out this pattern.
Hybrid Warping
Let’s talk about what hybrid warping is. And let’s get this out of the way…it’s really almost the same as direct warping. So close, that I have had some people let me know that it really isn’t hybrid at all. But it’s a little different, and I don’t have a better name, so hybrid it is! The word hybrid implies that there is a cross involved (not a weaving cross, that is something different and we aren’t talking about that today).
Let me just start this blog by saying that i don’t think I will ever like anything as much as direct warping. It is what rigid heddle looms excel at and part of what makes them so great. BUT (there is always a but!), there are some really good reasons to learn how to warp different ways. So the past couple of weeks I’ve been trying really hard to only hybrid warp. It wasn’t easy, not because it’s hard, but because it slows me down!
Direct warping
Let’s talk about what hybrid warping is. And let’s get this out of the way…it’s really *almost* the same as direct warping. So close, that I have had some people let me know that it really isn’t hybrid at all. But it’s a little different, and I don’t have a better name, so hybrid it is! The word hybrid implies that there is a cross involved (not a weaving cross, that is something different and we aren’t talking about that today). The cross is between direct warping and indirect warping. Direct warping is a method of warping where the threads are taken directly from the cone or ball, through the heddle and onto a peg or pegs set up to the full length of the project. Thus a 90” warp needs at least 90” of space to warp. Indirect warping involves winding a warp onto a warping board, then taking the warp from the board to the loom and “dressing the loom”. It means a 90” warp needs only the space the warping board takes up.
Hybrid combines the 2…using a warping board and your loom together, you can direct warp reducing the amount of space needed to warp. There are other reasons you might want to try hybrid warping over direct warping.
You can pause mid-way and not have a whole room or hallway blocked until you get back to it. In a house that has only one bathroom this could be very important! If you have young children that need attending, or animals that like string this can be very useful. Or if you can only stand or bend over for a limited time, this might save your weaving career.
Your warp is safe(r) from the other people/animals who share your space. There are no temping strings to touch or grab or chew or accidentally walk through! You can even throw a sheet or towel over it to keep it a little more safe.
If you have mobility issues this might make weaving accessible. I did a hybrid warp in a wheeled office chair from beginning to ready to weave without ever lifting my bum off the chair…just to see if I could. While it wasn’t as comfortable as direct warping, I did it!
I have a stand-up sit-down desk that allows me to adjust to the exact height I need to be comfortable. This is especially helpful for taller weavers.
Right! Now you know what it is, and why you might want to use this technique, let’s talk about how to do it. I’m going to walk you through my steps…remember I’m a little Rogue, what you read here may not be what you have heard before. That’s ok: you should adapt every technique you ever use to suit you…there are no weaving police!
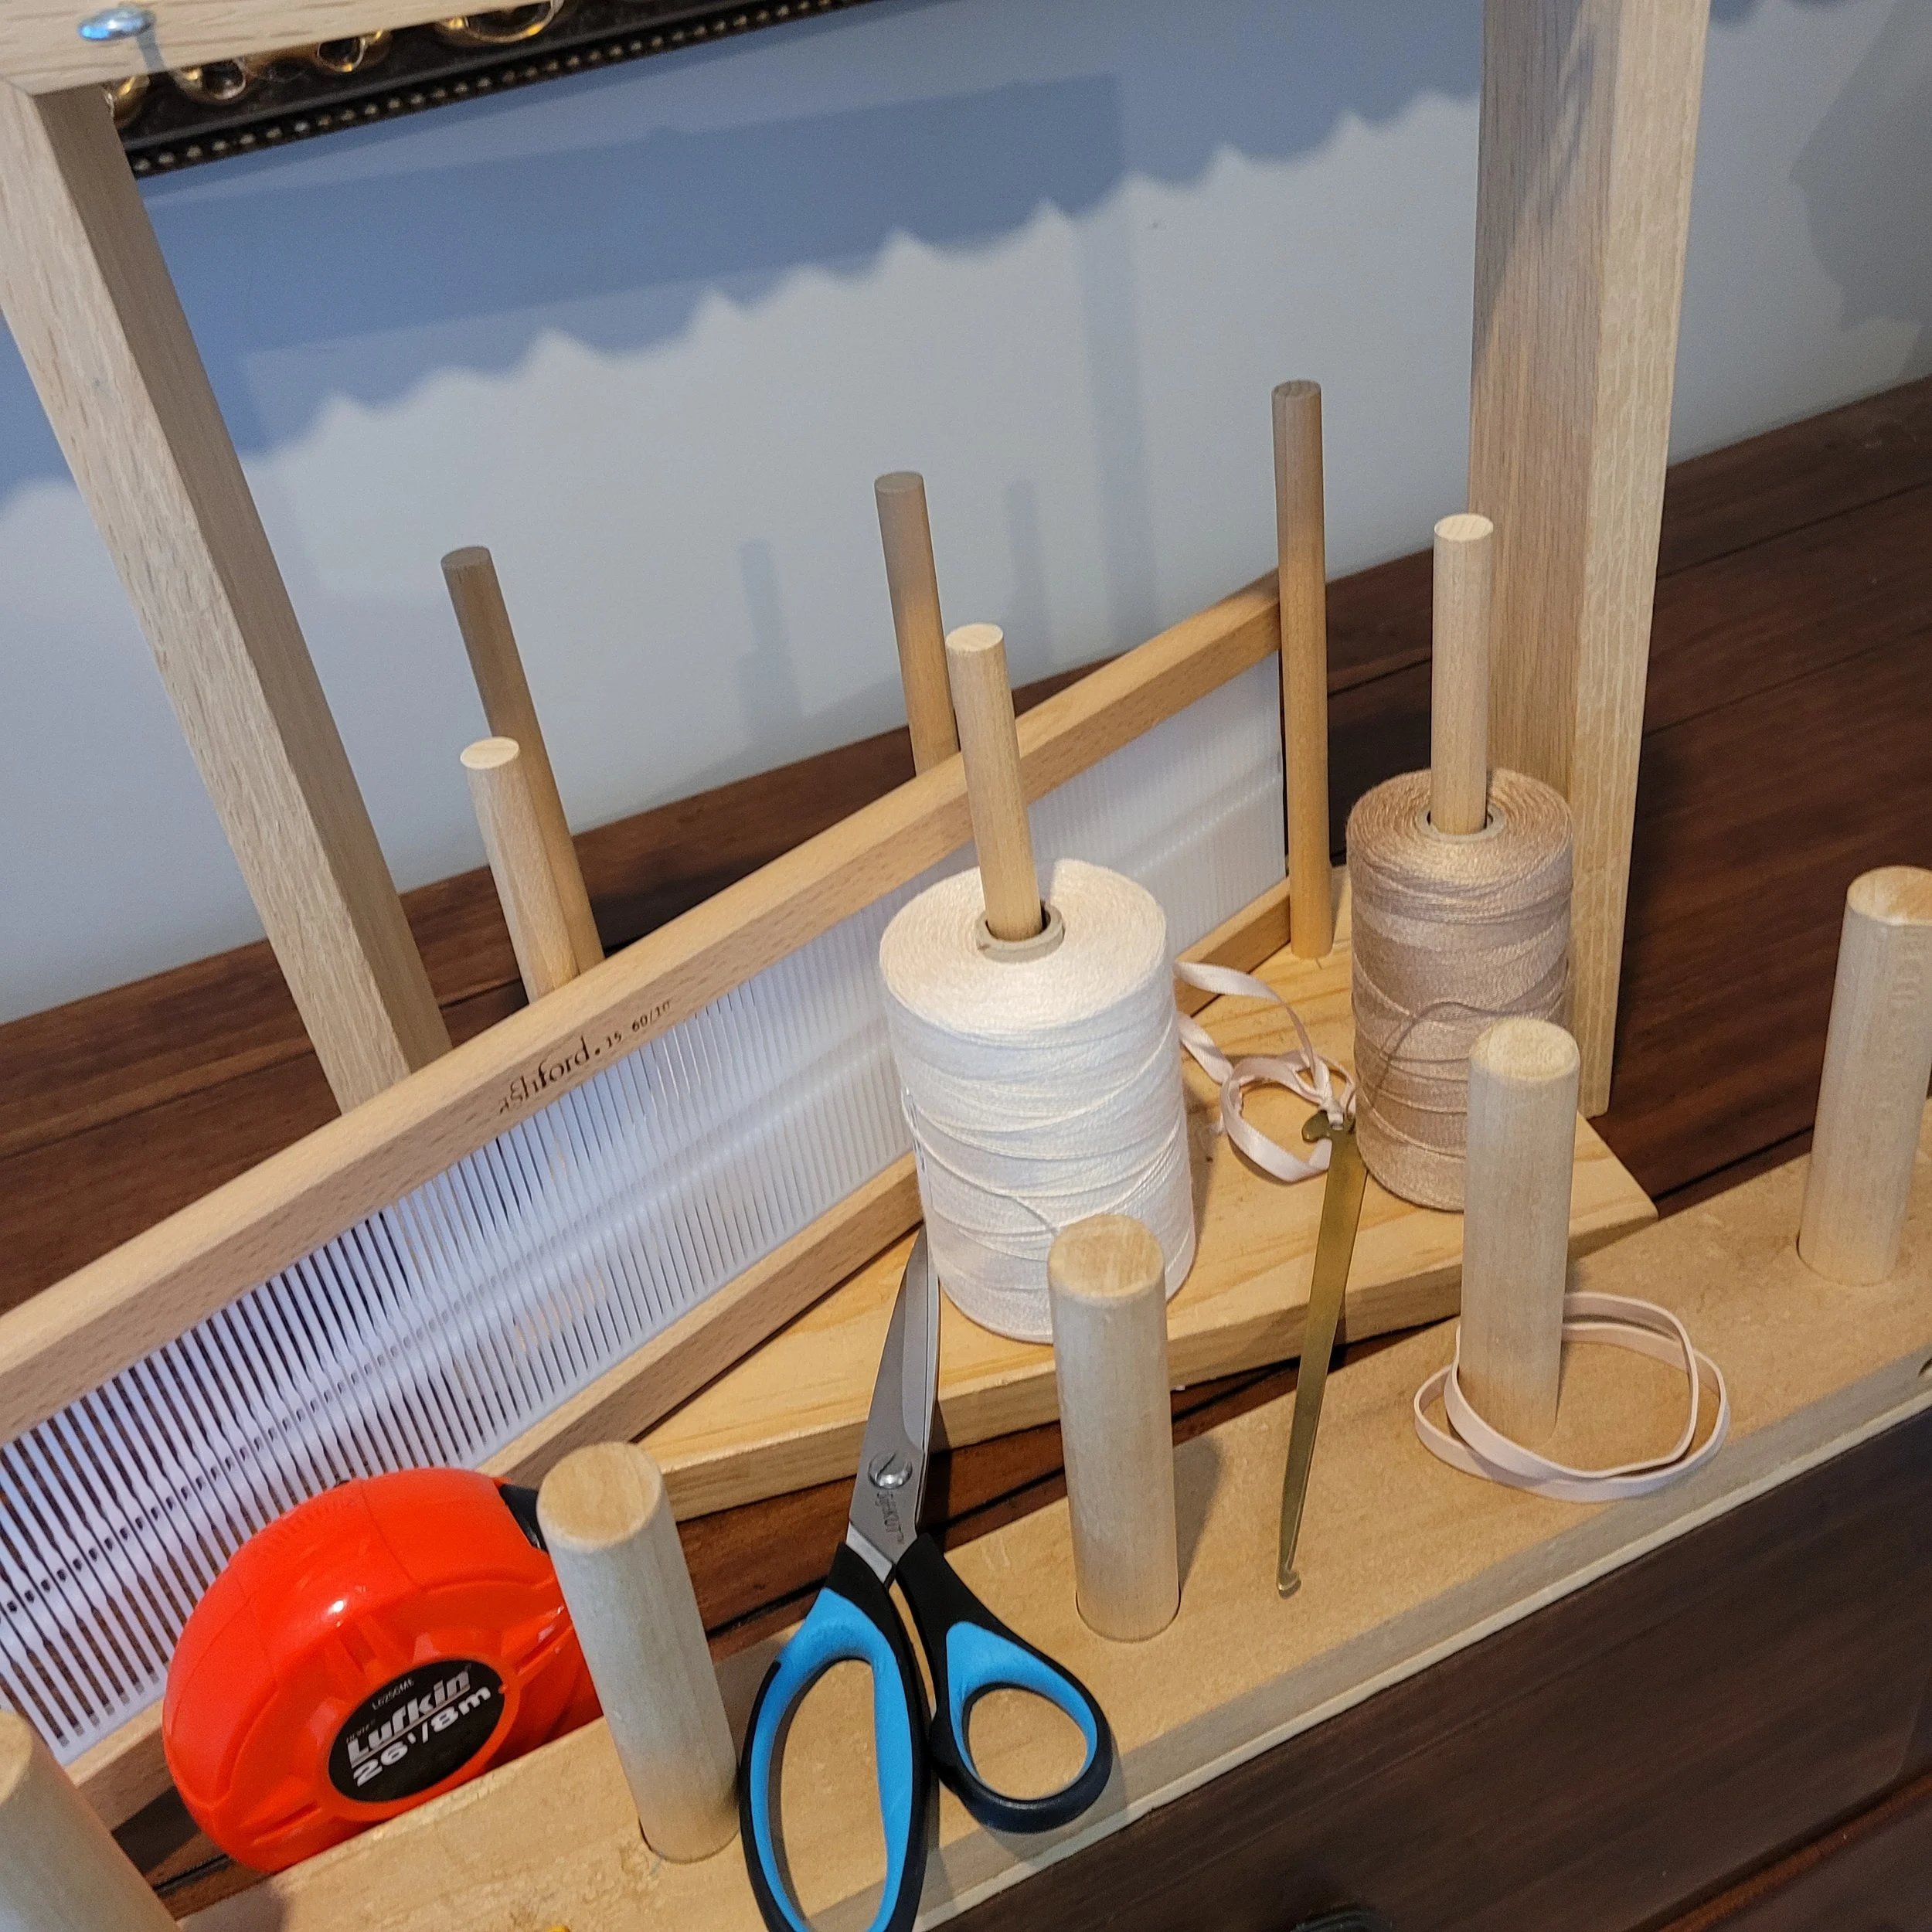
First, you will need: a warping board (I like my small Ashford warping board), a flexible tape measure, some weights and your loom. I leave my loom on its stand. (If you don’t have a stand it is absolutely worth the investment!)
This is before I learned to keep some space between my loom and warping board!
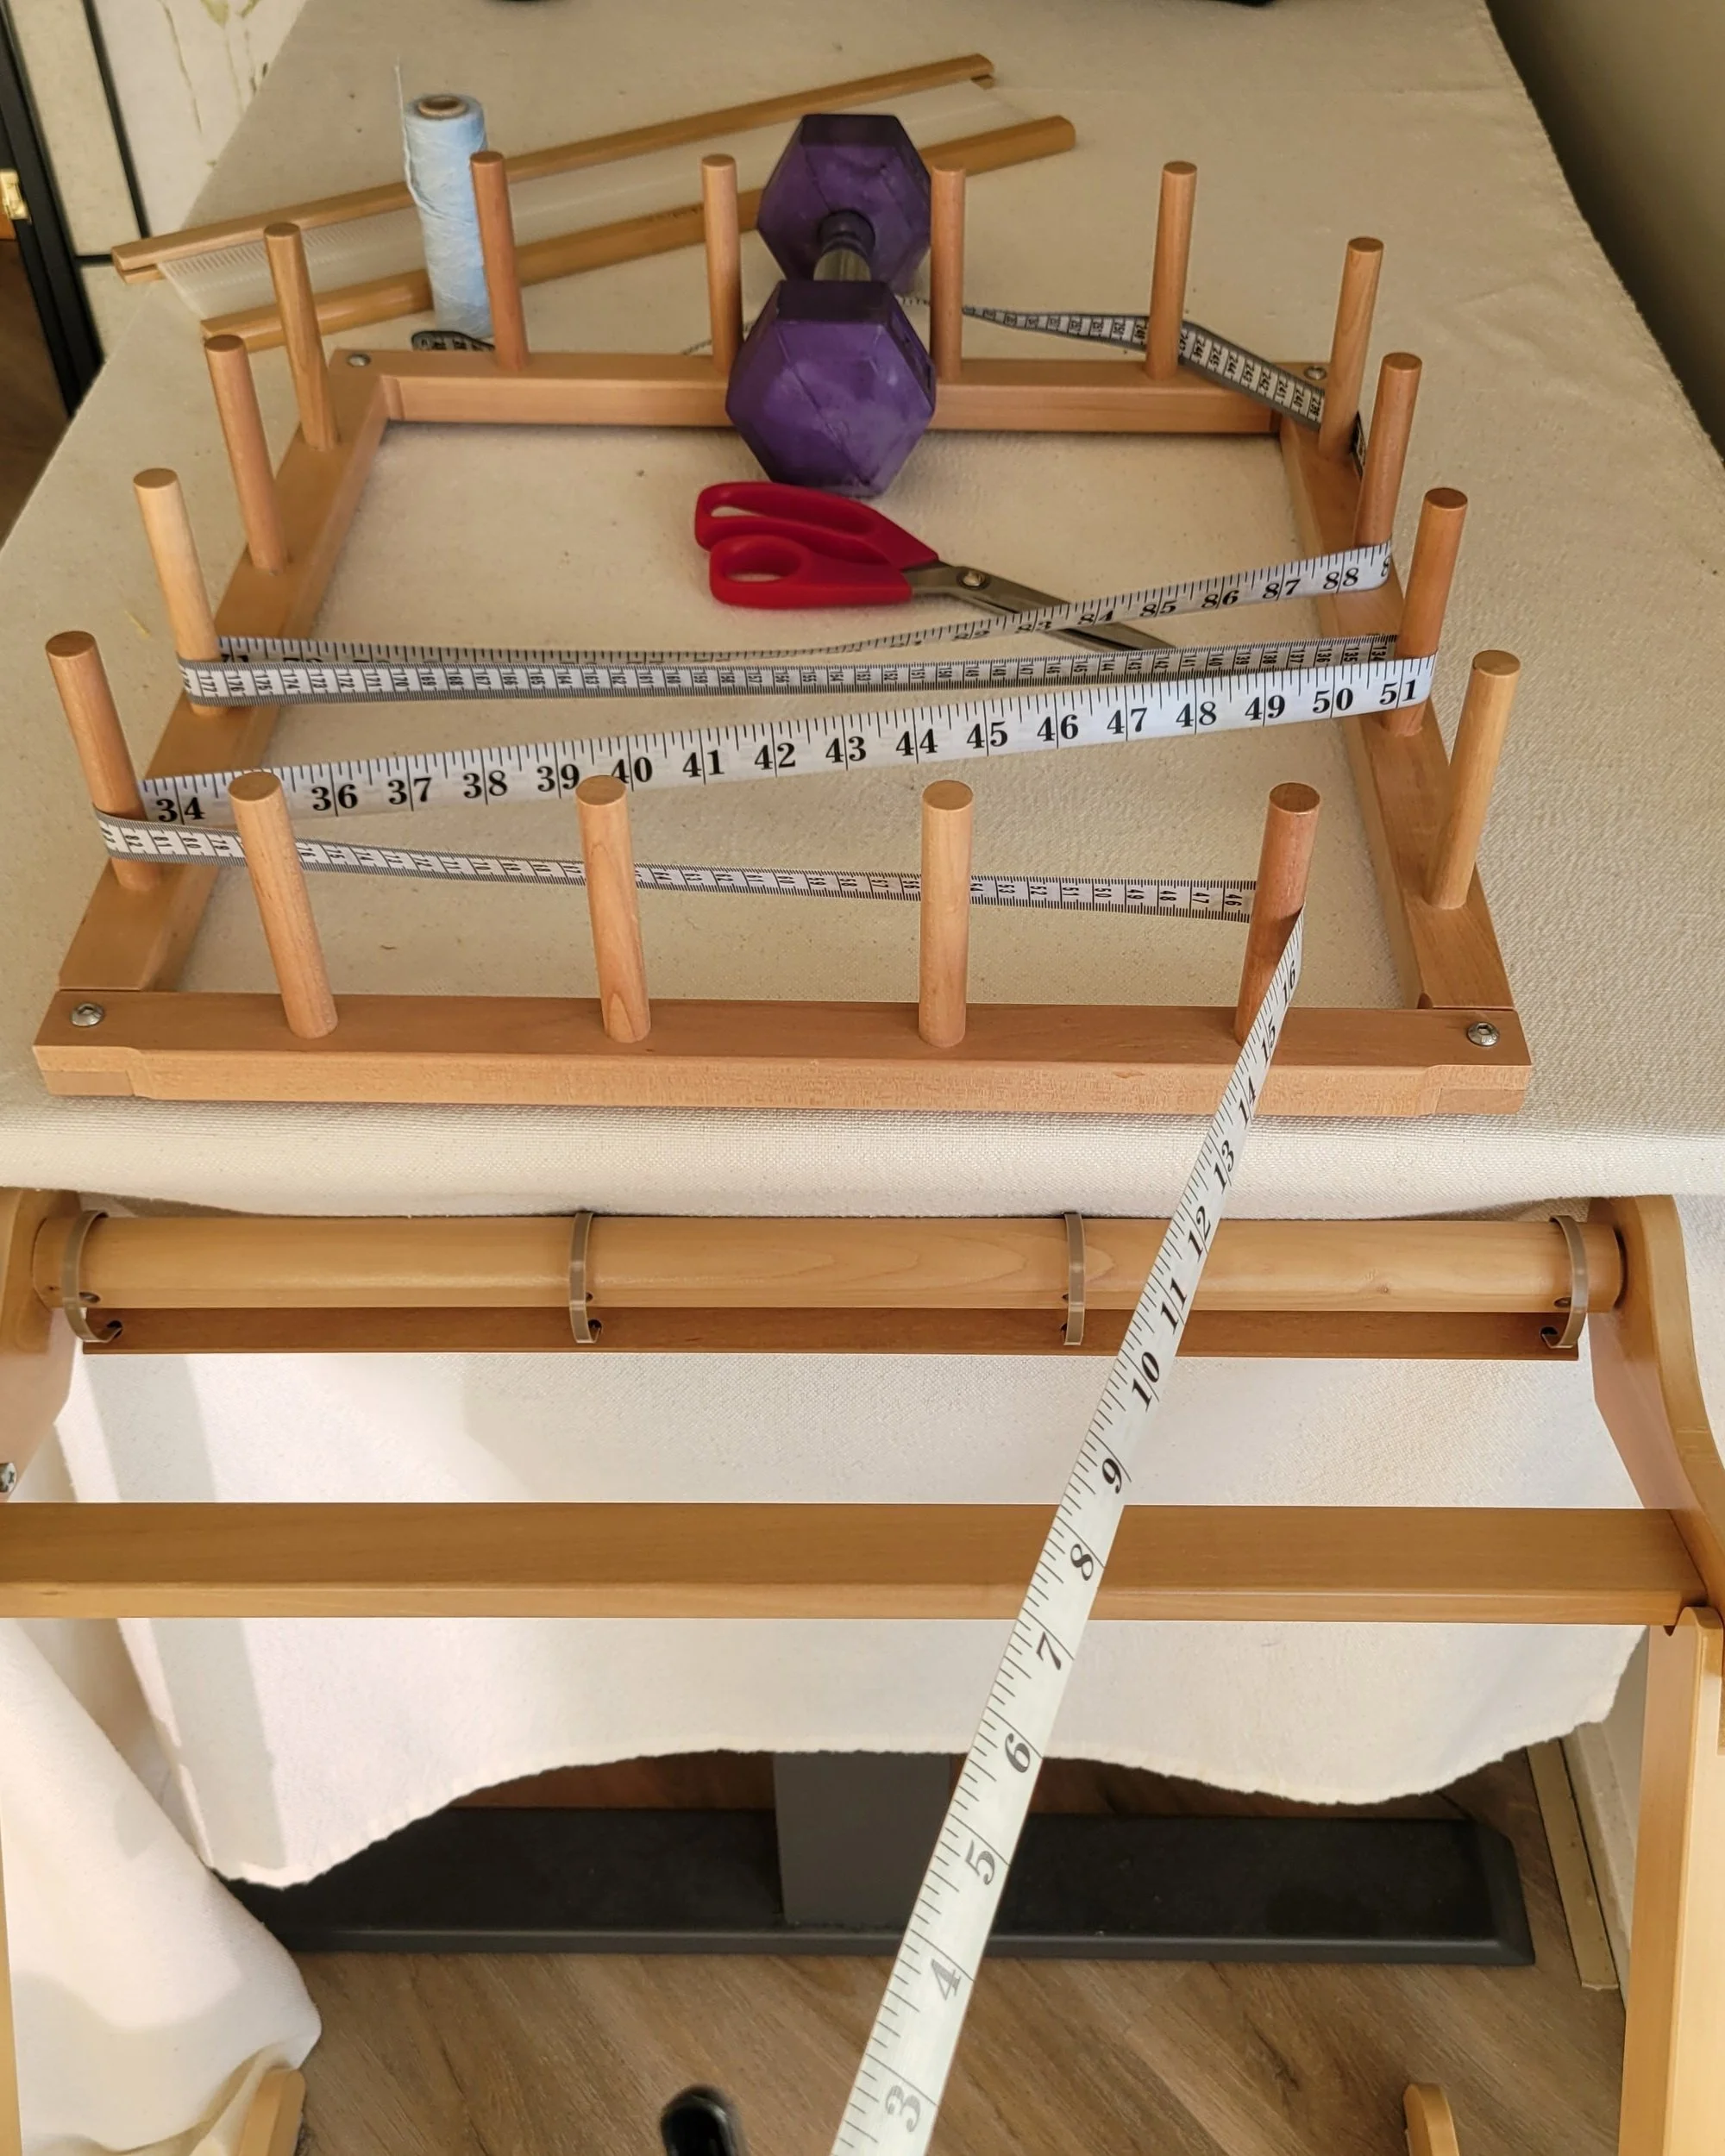
Set up your loom and warping board. I place my board on the end of a table, about 6-8” away from the edge. I use weights to hold the board in place. My board has little feet, if I place it at the end of the table and try to clamp it, the board tilts up, weights work better for me! I place my loom, with the front facing the warping board, about 12” away from the edge of the table (I’ll tell you why later).
Using the flexible tape measure, measure the the path the yarn needs travel to get the correct length. I clip my measuring tape to the back warping stick on the side furthest away from me and run the tape measure around the pegs until I get to the right length ending at a peg. If needed I can adjust the loom or board slightly closer or further apart for an easy path. The tape measure CANNOT cross over itself as you measure! Once you have the path measured, leave the tape measure as is, it shouldn’t go anywhere.
Tie the yarn to the back warping stick and pull it through the first slot you intend to warp. I always start on the far side of the loom…the side furthest away from me. follow the path of the tape measure with a single strand of yarn, When you get to the last peg, wind it around and follow the same path back to the loom. You’ve just warped your first slot! You can now slide the measuring tape out.You can follow this exact same path for the whole warp. Here’s a video that might help!
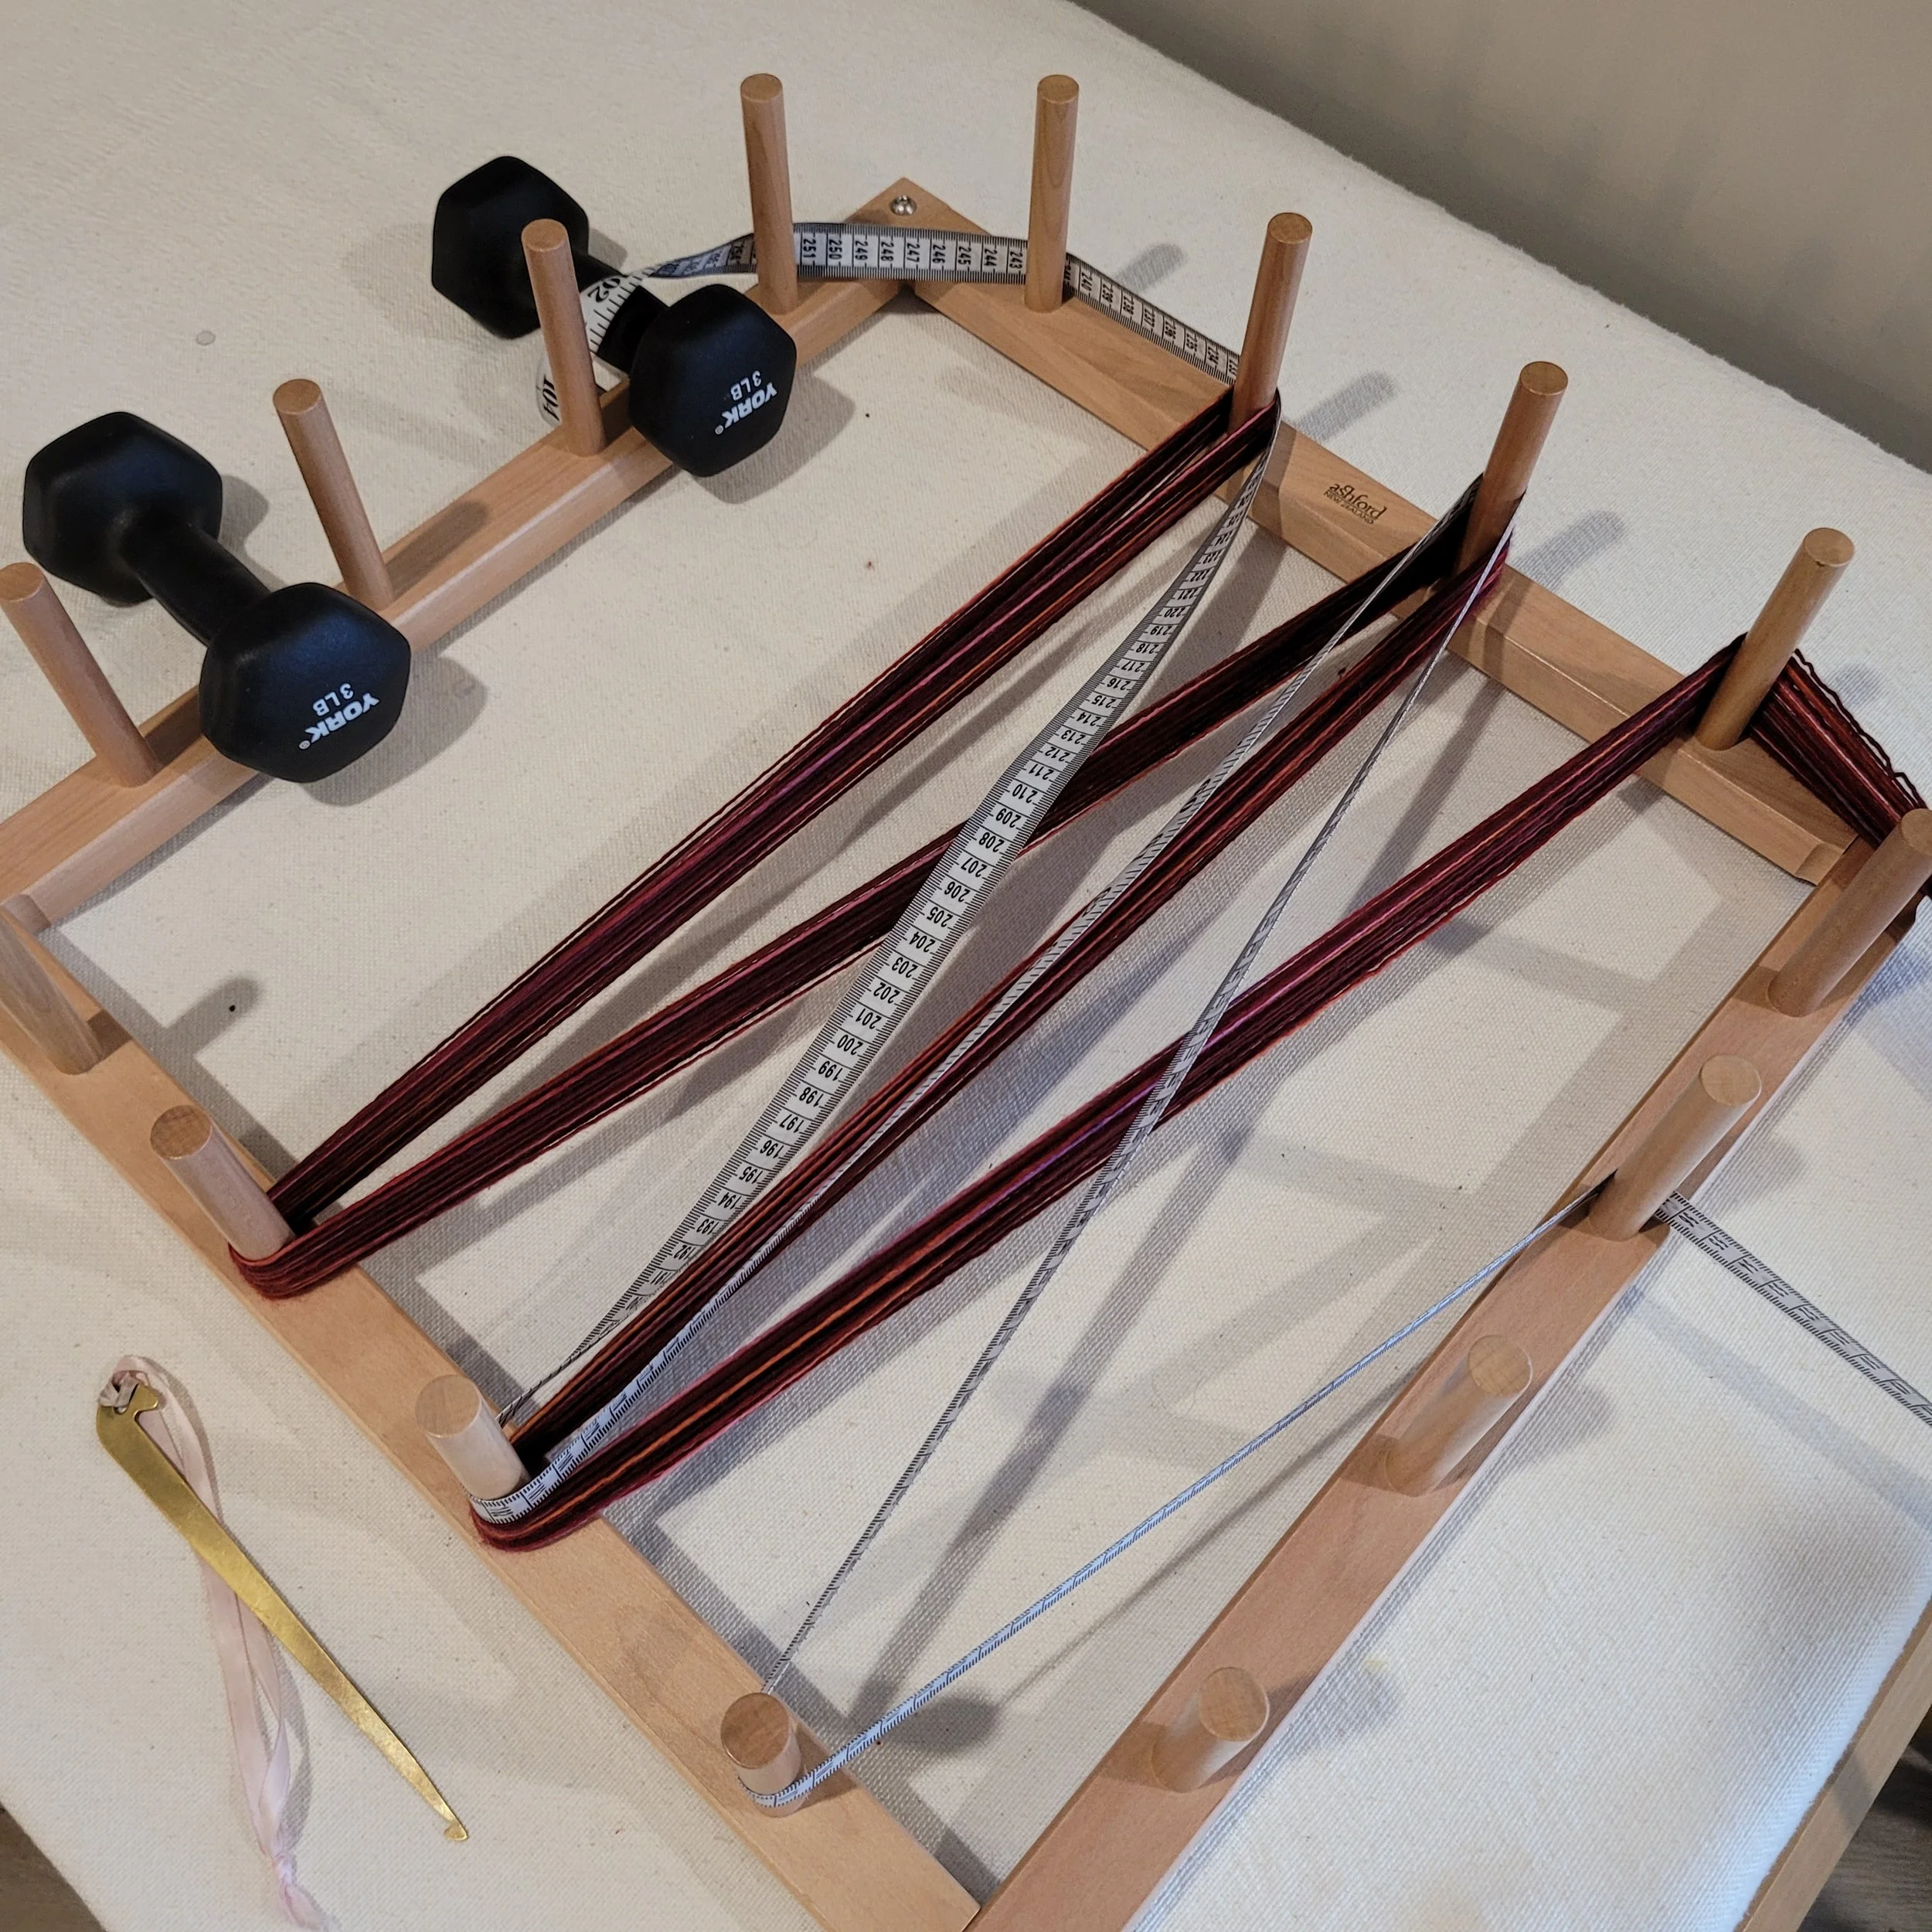
Measuring Path #2. Note that while the second path crosses over the first, it never crosses over itself!
That’s it, the warp has been wound! We still need to wind it onto the back beam, but we’ll get to that in a minute.
As mentioned earlier, you can follow this exact same path for the whole warp. However…it’s like warping with a single peg…the warp will not be even. So, if you want an even(ish) warp, follow the next steps.
For a warp that is 24” wide, I usually follow three distinct paths. So, after the first third is warped, I get out my tape measure and measure a new warp path, this time starting from where I will warp my next slot. My new path will cross over the former path and use some of the same pegs. That’s ok, what is important is the the new path DOES NOT cross over itself. Continue warping the same path until you have only a third (or so) left to warp.
Measure the third and final warp path. Again, you will use some of the same pegs (you may need to keep pushing threads down) and crossing over the first and second paths. Again, that’s ok, the key is that no path can cross over itself!
Alright, the warp is wound, but it still needs to be wound around the back beam. Here’s how I do it:
Remove the weights from the warping board. Stand behind the loom and start winding, sliding the loom forward as you wind. The warping board may slide forward a little too. Wind until the warp goes all the way around the back beam once. This is why I have a gap between my loom and my warping board…I want my warp secure before I cut the ends or remove the warp from the warping board. Once it has wrapped around the back beam once and my loom is locked, very little can happen that can’t be salvaged!
Now I can cut the warp at the end pegs. If my warp will wind smoothly through the pegs, I can continue winding, however, I find that it usually doesn’t, so I crank and yank. But ( and there’s another but!) I’ve been playing around with dowels for winding, so stayed tuned for that adventure!
Weaver Stories-Allison
I believe that everyone of us has “True Self”: the person we were created to be. When we discover who that is, and fully engage in it, we will thrive! For Allison, her caring nature led her to nursing, but as with many things, when we are stifled in one area, out whole self begins to suffer. I love how Allison’s nature shines as she continues to care for and nurture people (and herself!) in her fibre adventures.
I believe that everyone of us has a “True Self”: the person we were created to be. When we discover who that is, and fully engage in it, we will thrive! For Allison, her caring nature led her to nursing, but as with many things, when we are stifled in one area, our whole self begins to suffer. I love how Allison’s nature shines as she continues to care for and nurture people (and herself!) in her fibre adventures.
Let’s hear Allison’s voice as she tells her weaving story.
My name is Allison, and I live in North Carolina. For as long as I can remember, I’ve been a maker. After starting a career in nursing over 20 years ago, I taught myself to knit and crochet to relieve stress. (I am always picking up new crafts…) And as you can imagine, I racked up quite the yarn stash over the years.
In 2022, after pouring heart and soul into my professional work, I began to suffer from burnout. I was spending very little time doing creative work; the absence of creative expression took its toll and really crippled my mental health. Toward the end of that year, I resigned from my job. I also did something else: I bought a rigid heddle loom.
I had no idea how much this purchase would change my life! Up until that day, I had only woven a scarf on my mother-in-law’s floor loom with a lot of help. It was a little intimidating. Also, I never had the space or money for a floor loom, but this rigid heddle loom looked like the answer to my yarn stash. It turned out to be much more than that.
After completing a few projects on my own, I joined Heritage Weavers and Fiber Artists in Hendersonville, NC. Hoping to learn more about weaving, I quickly fell into a fiber black hole. I learned more about rigid heddle weaving, learned to weave on a floor loom, and how to prepare and spin wool. And I finally found the space and a little extra money for that floor loom… While I do love to make projects with my looms, I am a huge fan of playing and sampling. But most of all, I love to teach. This year, I began teaching my own rigid heddle weaving classes, as well as leading a monthly study group.
In the aftermath of what felt like a complete identity crisis, I have found something that fulfills me as an adult educator, a nurturer, and an artist: teaching and making fiber craft. As of this writing, I am in my first year in the Professional Craft – Fiber program at Haywood Community College (Clyde, NC). I’m not sure what’s next for me in the great big world of fiber, but I’m excited, nonetheless! I know now that where one door closes, another opens.
PS, I love this Towel!
Thank you so much for the opportunity to share my story!
Allison, thank you so much for your story. Thank you for being brave enough to step back from what was hurting you and stepping into what heals you. And thank you for continuing to care and nurture others. Best of luck at school!
Letting Go (of yarn)
Do you hide yarn? Do you feel like you need to sneak it onto the house when no one is home? Do you yarn shop alone so no one knows how much you are buying? These seem extreme, but trust me, I hear stories about this all the time! Let’s get something out of the way before we start letting go: If you are a yarn collector, own it! There are much odder, less useful things to collect…a quick google search told me that people collect water bottle labels, airsick bags, do not disturb signs and banana stickers! (Seriously, Banana Stickers!) And each of these people have their collections proudly displayed. They are not hidden under beds and in closets or disguised as throw pillows! So first, display your favourite skeins. A clear glass bowl with beautiful yarn on your coffee table, a book shelf for seasonal colours, a pretty little stack on a dresser. Yarn you see is yarn you use!
My yarn matches the cloth and the picture! Well, sort of.
Do you hide yarn? Do you feel like you need to sneak it onto the house when no one is home? Do you yarn shop alone so no one knows how much you are buying? These seem extreme, but trust me, I hear stories about this all the time! Let’s get something out of the way before we start letting go: If you are a yarn collector, own it! There are much odder, less useful things to collect…a quick google search told me that people collect water bottle labels, airsick bags, do not disturb signs and banana stickers! (Seriously, banana stickers!) And each of these people have their collections proudly displayed. They are not hidden under beds and in closets or disguised as throw pillows! So first, display your favourite skeins. A clear glass bowl with beautiful yarn on your coffee table, a book shelf for seasonal colours, a pretty little stack on a dresser. Yarn you see is yarn you use!
That said, many of us have yarn that for some reason doesn’t make the cut anymore. There are all kinds of valid reasons for this…the colour doesn’t suit your current hair colour, it was an impulse buy and now you have no idea what you were thinking, your friends said it looked great but it’s a colour you never wear. And of course, don’t forget all the leftovers that you are determined to make into a scrappy blanket or preemie hats you plan to donate to your local hospital.
Yarn hiding in closets, boxes and under tables!
This is the yarn that is hidden because every time we see it we feel a little guilty. Get rid of the guilt yarn! This yarn is taking up space in your home (and more importantly, in your head) that could be used for much better things! It is ok to let go of these yarns. I promise you will feel better!
Can I bring in a business term now? Have you heard of the “Sunk Cost Fallacy”? The sunk cost fallacy is the tendency to continue investing in a project based on the cumulative prior investment (time, money, or resources) rather than future potential benefits.
Let’s put this into yarn terms. First, you visited a yarn store, it was an hour away. You found some yarn you loved. It was a little expensive, but beautiful and you knew you would find something to do with it. Besides, you drove all this way (time, gas, money) you need to get something! You bring your yarn home and you still love it and really want to use it. So you start thinking about it, what it might want to be. You go to your computer and start looking for patterns, you go down several rabbit holes, and before you know it, the whole evening is gone and you still don’t have a project. The yarn sits on the coffee table for a bit and you stroke it and think about it and look for the “right pattern”. Then guests are coming and you need to clean up, the skein gets swept into a box and stashed out of sight. You still occasionally think about that skein and think, “I should really do something with that.” Much later, you are cleaning out the closet and you come across the skein. It’s still lovely. But now you are also thinking about all the yarn you have since accumulated, see the price tag, remember how much mental time you spent on this skein and now you feel a little guilty because you’re pretty sure you are never going to find the right project. So you stick it back in a box and pretend you will use it, or you hide it in the box hoping to also hide from the guilt.
A few of my skeins-in-waiting. I'm not getting rid of these! They still make me smile everytime I see them.
Sound familiar to anyone? You can’t get rid of the yarn because you have already sunk a lot of costs (time, money, space, mental energy) on it. But it is also not bringing joy and is in fact, costing you joy! You will not be able to let go of the yarn until you can let go of those costs. But what if you could gain more by letting go than you spent acquiring? (No, this is not a get-rich-quick scheme, in fact, will be no financial gain, rather a release from guilt, restored joy and the recovery of storage space!)
I don't have a lot of space anymore, so my yarn is part of my decorating scheme!
This is a very timely blog for me as I am in the process of downsizing. When you have a lot of space, you don’t realize just how much stuff you have (and I’m not just talking yarn). But, sticking to yarn, I’m a little ashamed of all the yarn I have that I know I have no intention of using. I kept the because it was perfectly good yarn and getting rid of it seemed a waste. But now in retrospect, hoarding it seems even worse! So I’m letting go of a lot of yarn. And it feels good. I have a friend who has a friend who wants it all. She will sort through it and keep what she wants and donate the rest.
Are you ready to unload some yarn but don’t know where to start? Here are a few ideas to get you started.
Bits and pieces...I might get rid of these, someday.
I did use these bits and pieces! (So that means I should keep them all right?)
Get rid of the UFOs that you know you will never finish. The sweater you started when you were pregnant and decided to keep and finish for your 1st grandbaby, the yarn that makes you itch just thinking about it, the really complex pattern that you put in time out 3 years ago and now have no idea where you are in the pattern: let it go.
The yarn from a friend’s friend who was clearing out her mother’s house. Seriously, you didn’t pick this yarn, you have no planned projects and it is probably yarn you would not have chosen for yourself. Keep 1 or 2 skeins you love, make something for the friend’s friend and let go. It’s ok, you are not ungrateful: let it go.
Yarn that you have kept in a box for more than _____ (you decide the time…maybe three years?). If you haven’t used it yet, will you ever? If you are really brave and really determined to destash, don’t even open the box, just let it go!
Bits and pieces. I know the leftovers from a sock or sweater doesn’t look like much, but when they get all put together, they take up so much space! Unless you have proven to yourself that you do actually use the bits (instead of just planning to use them): let it go!
Inexpensive yarns that are easily replaced if you change your mind. I have (had) a lot of yarn that can easily be found for $3-$5/skein. This was the hardest for me. But with limited space, it just didn’t make sense to try to store it all when it was so easily replaced *if* I needed it again. (I didn’t get rid of all of it).
So, you’ve set aside the yarn you are ready to let go of? Now what? Get it out of your house as fast as possible!!! Churches, nursing homes and schools are good places to start. Check for weaving guilds or craft groups in your area that might be interested. My local second-hand shop always takes yarn too.
I'm going to fill this with yarn!
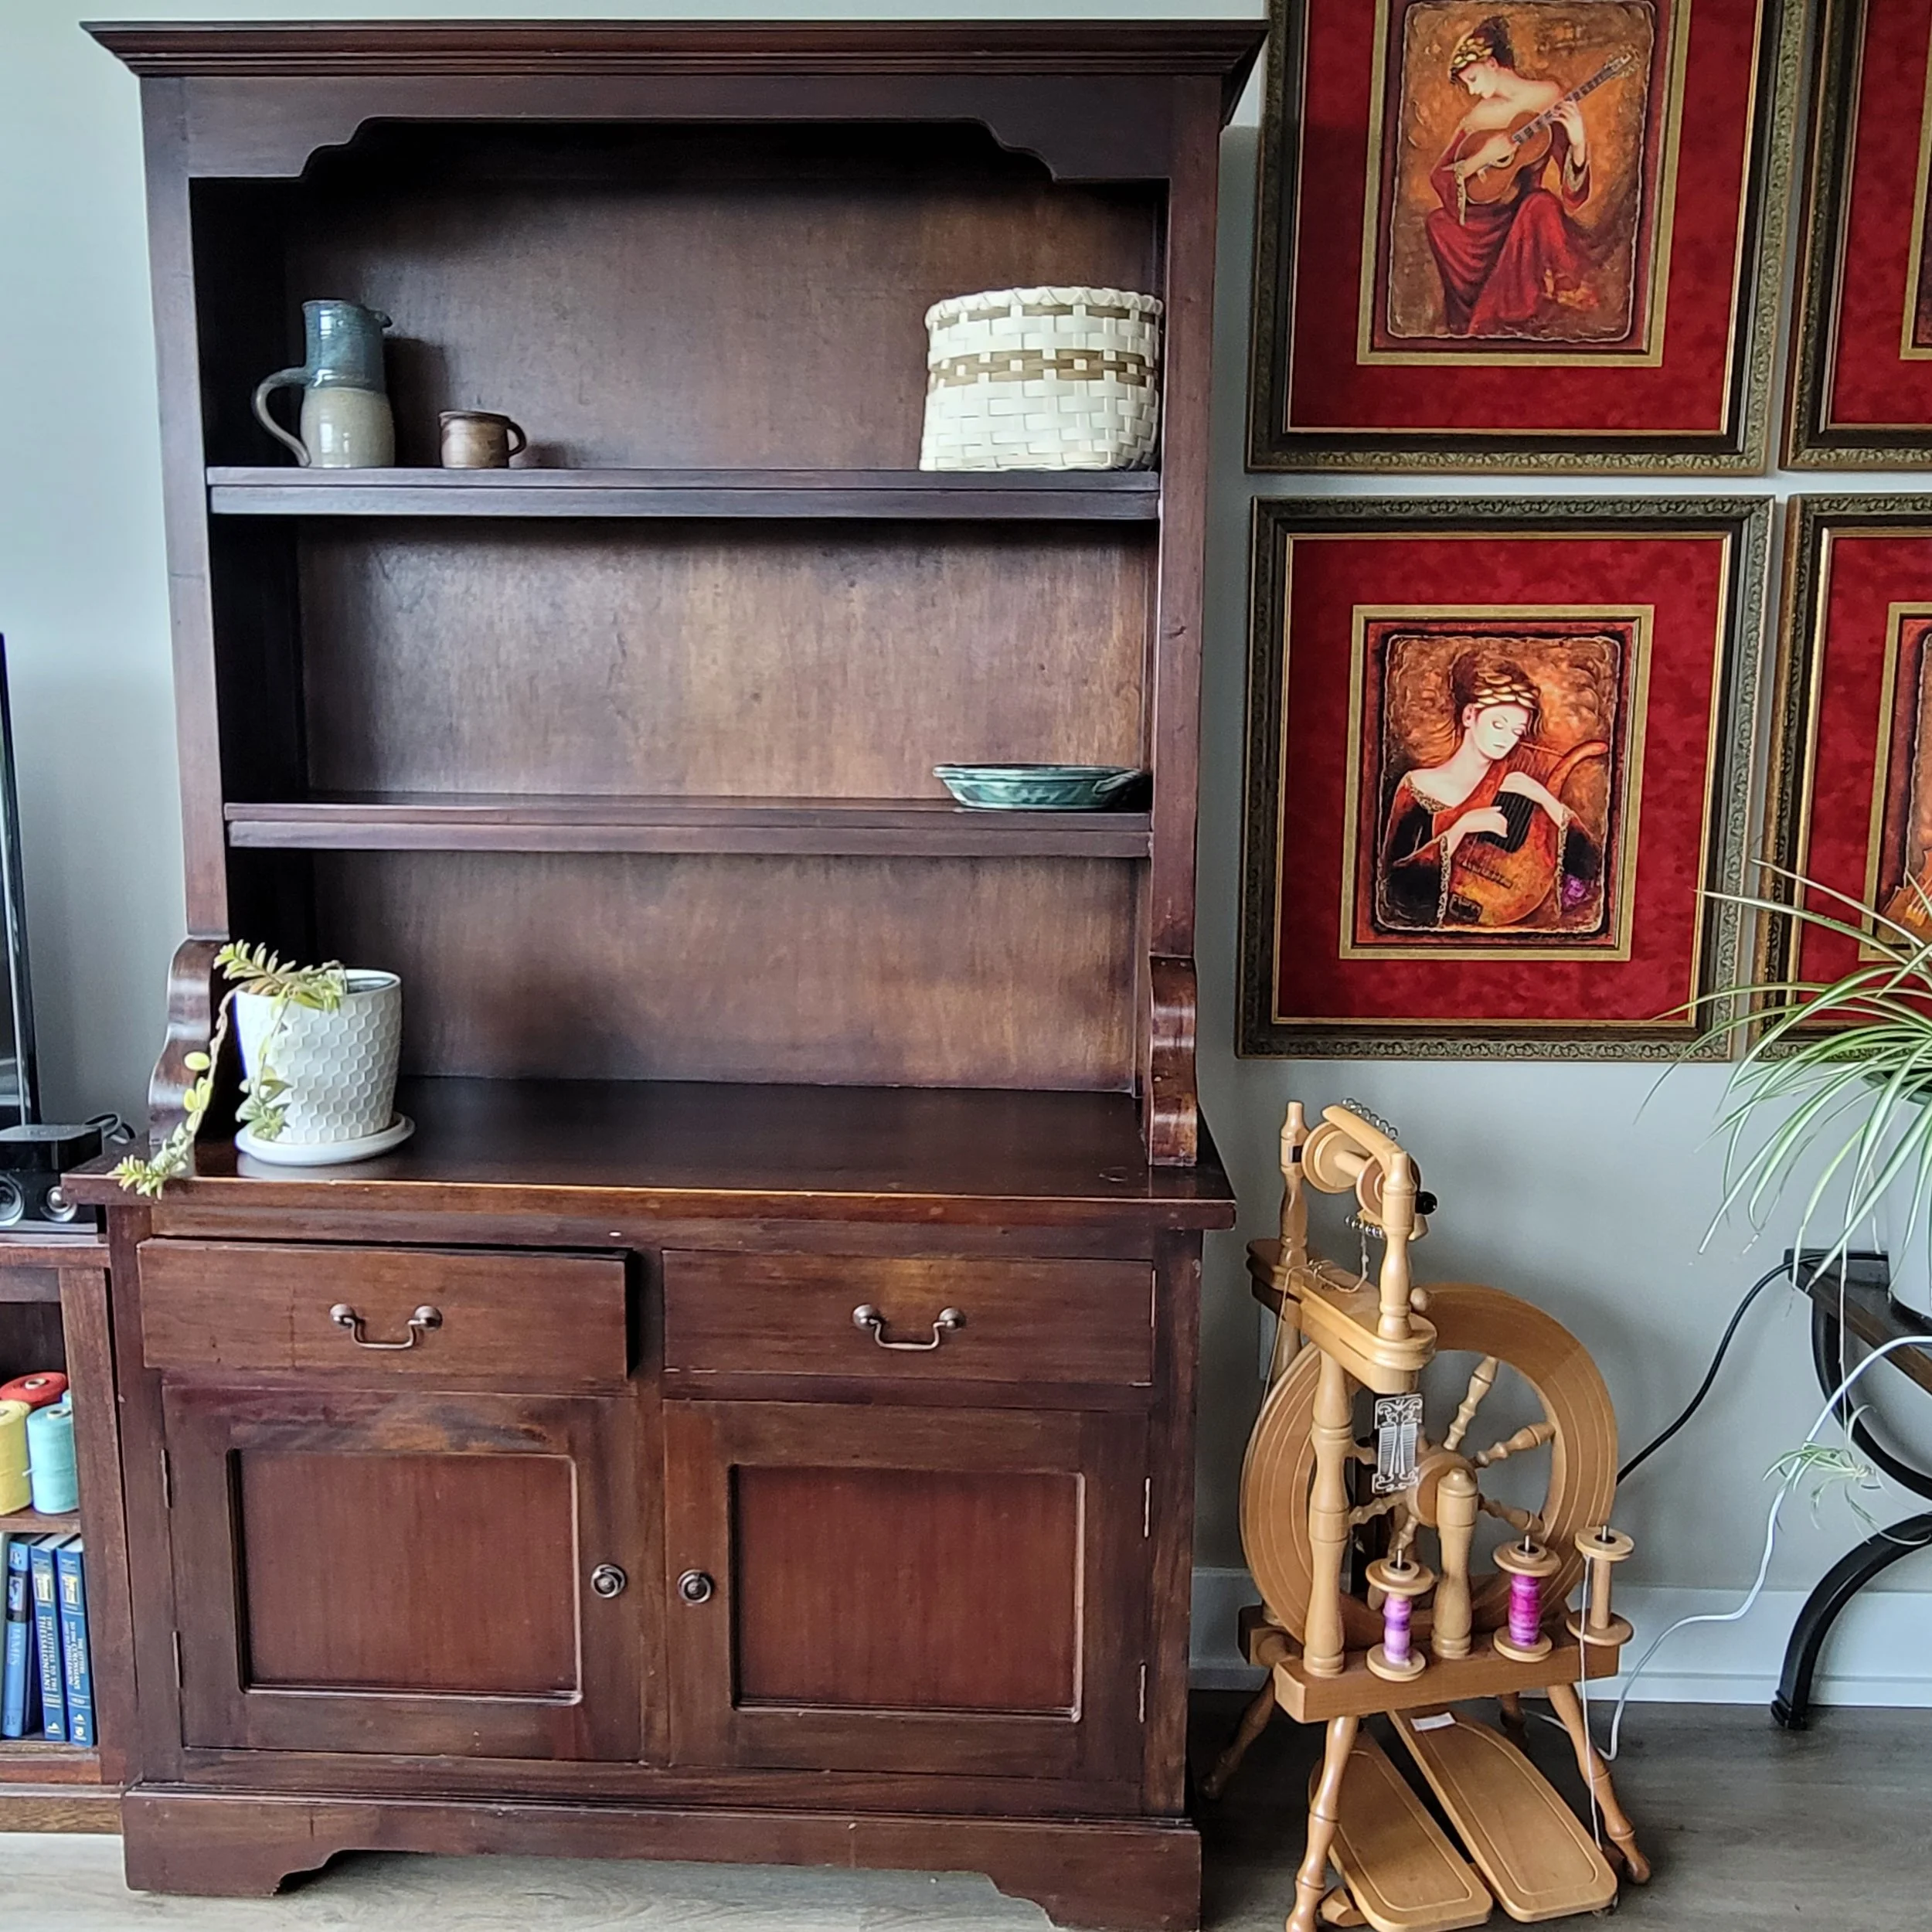
There, now, don’t you feel so much better? I know it was a relief for me to give myself permission to let go! (Plus, now I have more room for yarn I really love!) And won’t it look lovely on this buffet and hutch?
By the way, if you really love your yarn and can’t bear to part with any of it, that’s ok too…so long as it isn’t interfering with your daily living, by all means, enjoy your stash!
The Rogue Weaver
A Weaver's Story--Diane
There was so much that resonated with me in this story. While the changes in my life over the past few years have not been nearly as significant as those Diane has experienced, I too find comfort in weaving and sometimes use it to sort through the mess of thoughts that can swirl in my head. And I also have found that somehow, looms multiply!
Let’s read what Diane has to say.
I wanted to share how weaving has profoundly impacted my life over the past year. A year ago, my world turned upside down. As a single mom raising two kids, caring for two aging parents, and working two jobs, I was constantly on the go. Then, in a matter of months, both of my parents passed away, and my children moved away to college. I found myself alone at home with just the dog for company. The quiet was overwhelming, and I struggled with feelings of loss, depression, and anxiety.
One day, I stumbled upon an article about weaving, and something clicked. I decided to give it a try and purchased a 24" Rigid Heddle Loom. I took a class and created my first table runner. The process of weaving was both soothing and engaging, providing a much-needed escape from my worries. Soon, I was making towels, table runners, and mug rugs, and I found myself drawn deeper into the craft.
Feeling ready for a new challenge, I upgraded to a 48" Ashford Rigid Heddle Loom and began weaving larger pieces like shawls, blankets, and bed runners. I loved every minute of it and found solace in the rhythmic movements and creative process. I also expanded my knowledge into pick-up sticks and color-and-weave patterns.
Wanting to take my weaving on the go, I invested in the 12” Ashford Knitter's Loom. It's been perfect for making towels, samplers, and mug rugs, and I keep it warped at all times for quick, anxiety-relieving weaving sessions. Then along came a 15” Cricket Loom, my first Schacht loom, which I enjoy working on immensely. I keep both the Knitter's and Cricket looms warped all the time. Eventually I heard about the Bekka Looms. I am from Minnesota, so it seemed natural to acquire a 10” Bekka Loom. I love the simplicity of this loom.
As my skills grew, I sought more complexity and purchased the Brooklyn Ashford 4-Shaft Loom. This opened up a whole new world of intricate patterns and thoughtful planning. However, many of the patterns I was interested in required even more shafts, so I eventually acquired the 32" 16-Shaft Ashford Table Loom. It's been an incredibly fun challenge, and while warping can be tricky, I'm improving with each project and class I take.
The Weaver's Guild in Minnesota uses Schacht looms for classes. To have my own loom for class and mirror what was happening in class, I added a 20" Schacht Flip It Loom. This has been really good for classes, traveling, and quickly weaving towels and other products. It's a portable version of my 24" Ashford Rigid Heddle.
I have found that I enjoy weaving larger projects, especially shawls. They have become a constant wardrobe accessory for me. So, missing a rigid heddle loom between 24” and 48”, I added a Kromski Forte Hearth Rigid Heddle Loom. It’s a lot of fun.
People will ask me what is my favorite loom or project and I can’t say. I continue to go back to my 24” Ashford Rigid Heddle as a base for most projects. But I love the 10”, 12” and 15” looms for quick projects, mug rugs and placemats. The 20” is great for towels as well as my 24”. The 32” and 48” make the blankets and shawls that I love. I am just beginning to understand work with multi-shaft looms becoming proficient at warping the 4-shaft and now 16-shaft table looms. I can honestly say that I use most of my looms on a rotating basis. I wouldn’t want to give any of them up.
Throughout this journey, I've embraced imperfections and enjoyed the learning process. My latest creation was a tote bag, but I needed a good handle, which led me to the Ashford Inkle Loom. My weaving adventures didn't stop there—curiosity about spinning led to the addition of a Kiwi Spinning Wheel and an Ashford Drop Spindle to my collection.
In just a year, weaving has transformed my life, helping me navigate through a difficult time with creativity and purpose. Weaving has been instrumental in this journey, and I am grateful for the joy and peace they have brought me. In two weeks I am taking my very first FLOOR LOOM class, can a floor loom be that far away in my future?
Thank you for letting me share my story.
Warm regards,
Diane
Diane, thank you so much for sharing your heart with me and your fellow weavers! It's so easy to dwell in the loss and not find out "who you are now". I'm so glad you found your new self, and that is a wonderful, valuable, and precious self!!!
I also love how looms multiply!
Perfect Hems Revisited
I’ve written a blog post about hemming before, but I’ve sewn a lot, and I mean A LOT of hems since writing that post so I thought I’d share what I’ve learned.
Should you have already read of the original post, nothing in it is wrong, I just do somethings differently now.
First, let’s talk about why we might want to hem our projects.
I’ve written a blog post about hemming before, but I’ve sewn a lot, and I mean A LOT of hems since writing that post so I thought I’d share what I’ve learned.
Should you have already read the original post, nothing in it is wrong, I just do some things differently now.
First, let’s talk about why we might want to hem our projects.
1. A hem produces a nice finished edge. Fringes are nice, but for some projects, a hem really is better. Tea towels and napkins spring to mind. These are items that see heavy use and lots of washing. Even a short fringe tends to get ratty under those circumstances.
2. Baby blankets shouldn’t have a fringe. Little fingers and toes can get tangled and no one wants that! Babies love a nice satin edge, but I haven’t learned how to add that yet so I just do a plain hem. (Satin edges are on my list to learn!)
3. Some people just don’t like a fringe…they get caught in zippers, or fray, or maybe you just don’t like twisting them. Whatever the reason, you don’t have to like fringe!
4. You hate hemstitching! You can skip the hemstitch entirely if you know you are going to sew a hem!
Ok, now you know why you might not want a fringe, let’s talk about how to hem.
Before Starting
1. Plan for your hem before warping. If you are using a pattern, check to see if the pattern includes a hem or fringe. If your pattern anticipates a hem, follow the pattern as written. If it is finished with a fringe, you will need to make some changes. First, you will need to lengthen your warp. My tea towel hems are about 2-2.5” so I would add an extra 6” per towel to my warp. This allows for take up. Since I generally warp for 2 towels at a time, I would add at least 12” to the warp.
Second, you will need to adjust how long the item is, on the loom, with the hems added. A tea towel with a fringe that finishes at about 24” on the loom will be about 29-30” on the loom with the hems.
NOTE: If you are adding a hem to a scarf, you may not need to add extra warp as the pattern will have included extra warp for the fringe…but I’d add a little extra anyway just to be sure I had enough at the end of the warp to weave comfortably.
2. Weaving in Scrap Yarn? You all know that I hardly ever spread my warp with scrap yarn before starting to weave. I let my warping sticks do the job for me! If you are planning to hem, however, it does make it a little easier to sew after removing the project from the loom if you have a few picks at the beginning and at the end of the weave. I don’t do it very often because I forget, but it’s always nice when I remember! You’ll want to weave in a few extra picks at the end too. Use a contrasting colour and it will be easy to see exactly where to sew! This also provides a little bit of protection to your project if you can’t get to the machine immediately after removing from the loom.
3. Lighter Hem or Not? I generally weave my tea towels with 8/2 cotton doubled. In the past I always recommended using the 8/2 single for the hem. This was to prevent the flare that can happen while hemming. However, I now usually use the 8/2 doubled as I’ve got a few other tricks to eliminate the flare.
Before Wet Finishing
Straight, Zig-Zag or Serge? You’ve now taken your project off the loom and it is ready to be wet finished. But if you tried to wet finish it before sewing, your weaving will come undone. (I once missed a final line of stitching and lost half a towel to the washer.)
It is your choice if you use a straight stitch, zig-zag or serger. Usually, I sew a single straight stitch. My machine seems to have troubles doing a zig-zag on unwashed woven fabric. Do be sure that the sewing runs across the whole width, it’s super easy to miss the first and last bit of the weaving. Start sewing forward, then go backwards past the end of the fabric, then forward back onto the fabric again.
If my serger is out, it seems to do a great job and produces a lovely edge. But you certainly don’t need a serger!
After Wet Finishing
This is the actual hemming, but all the stuff that comes before is important too! And this is where I go a little (ahem) rogue.
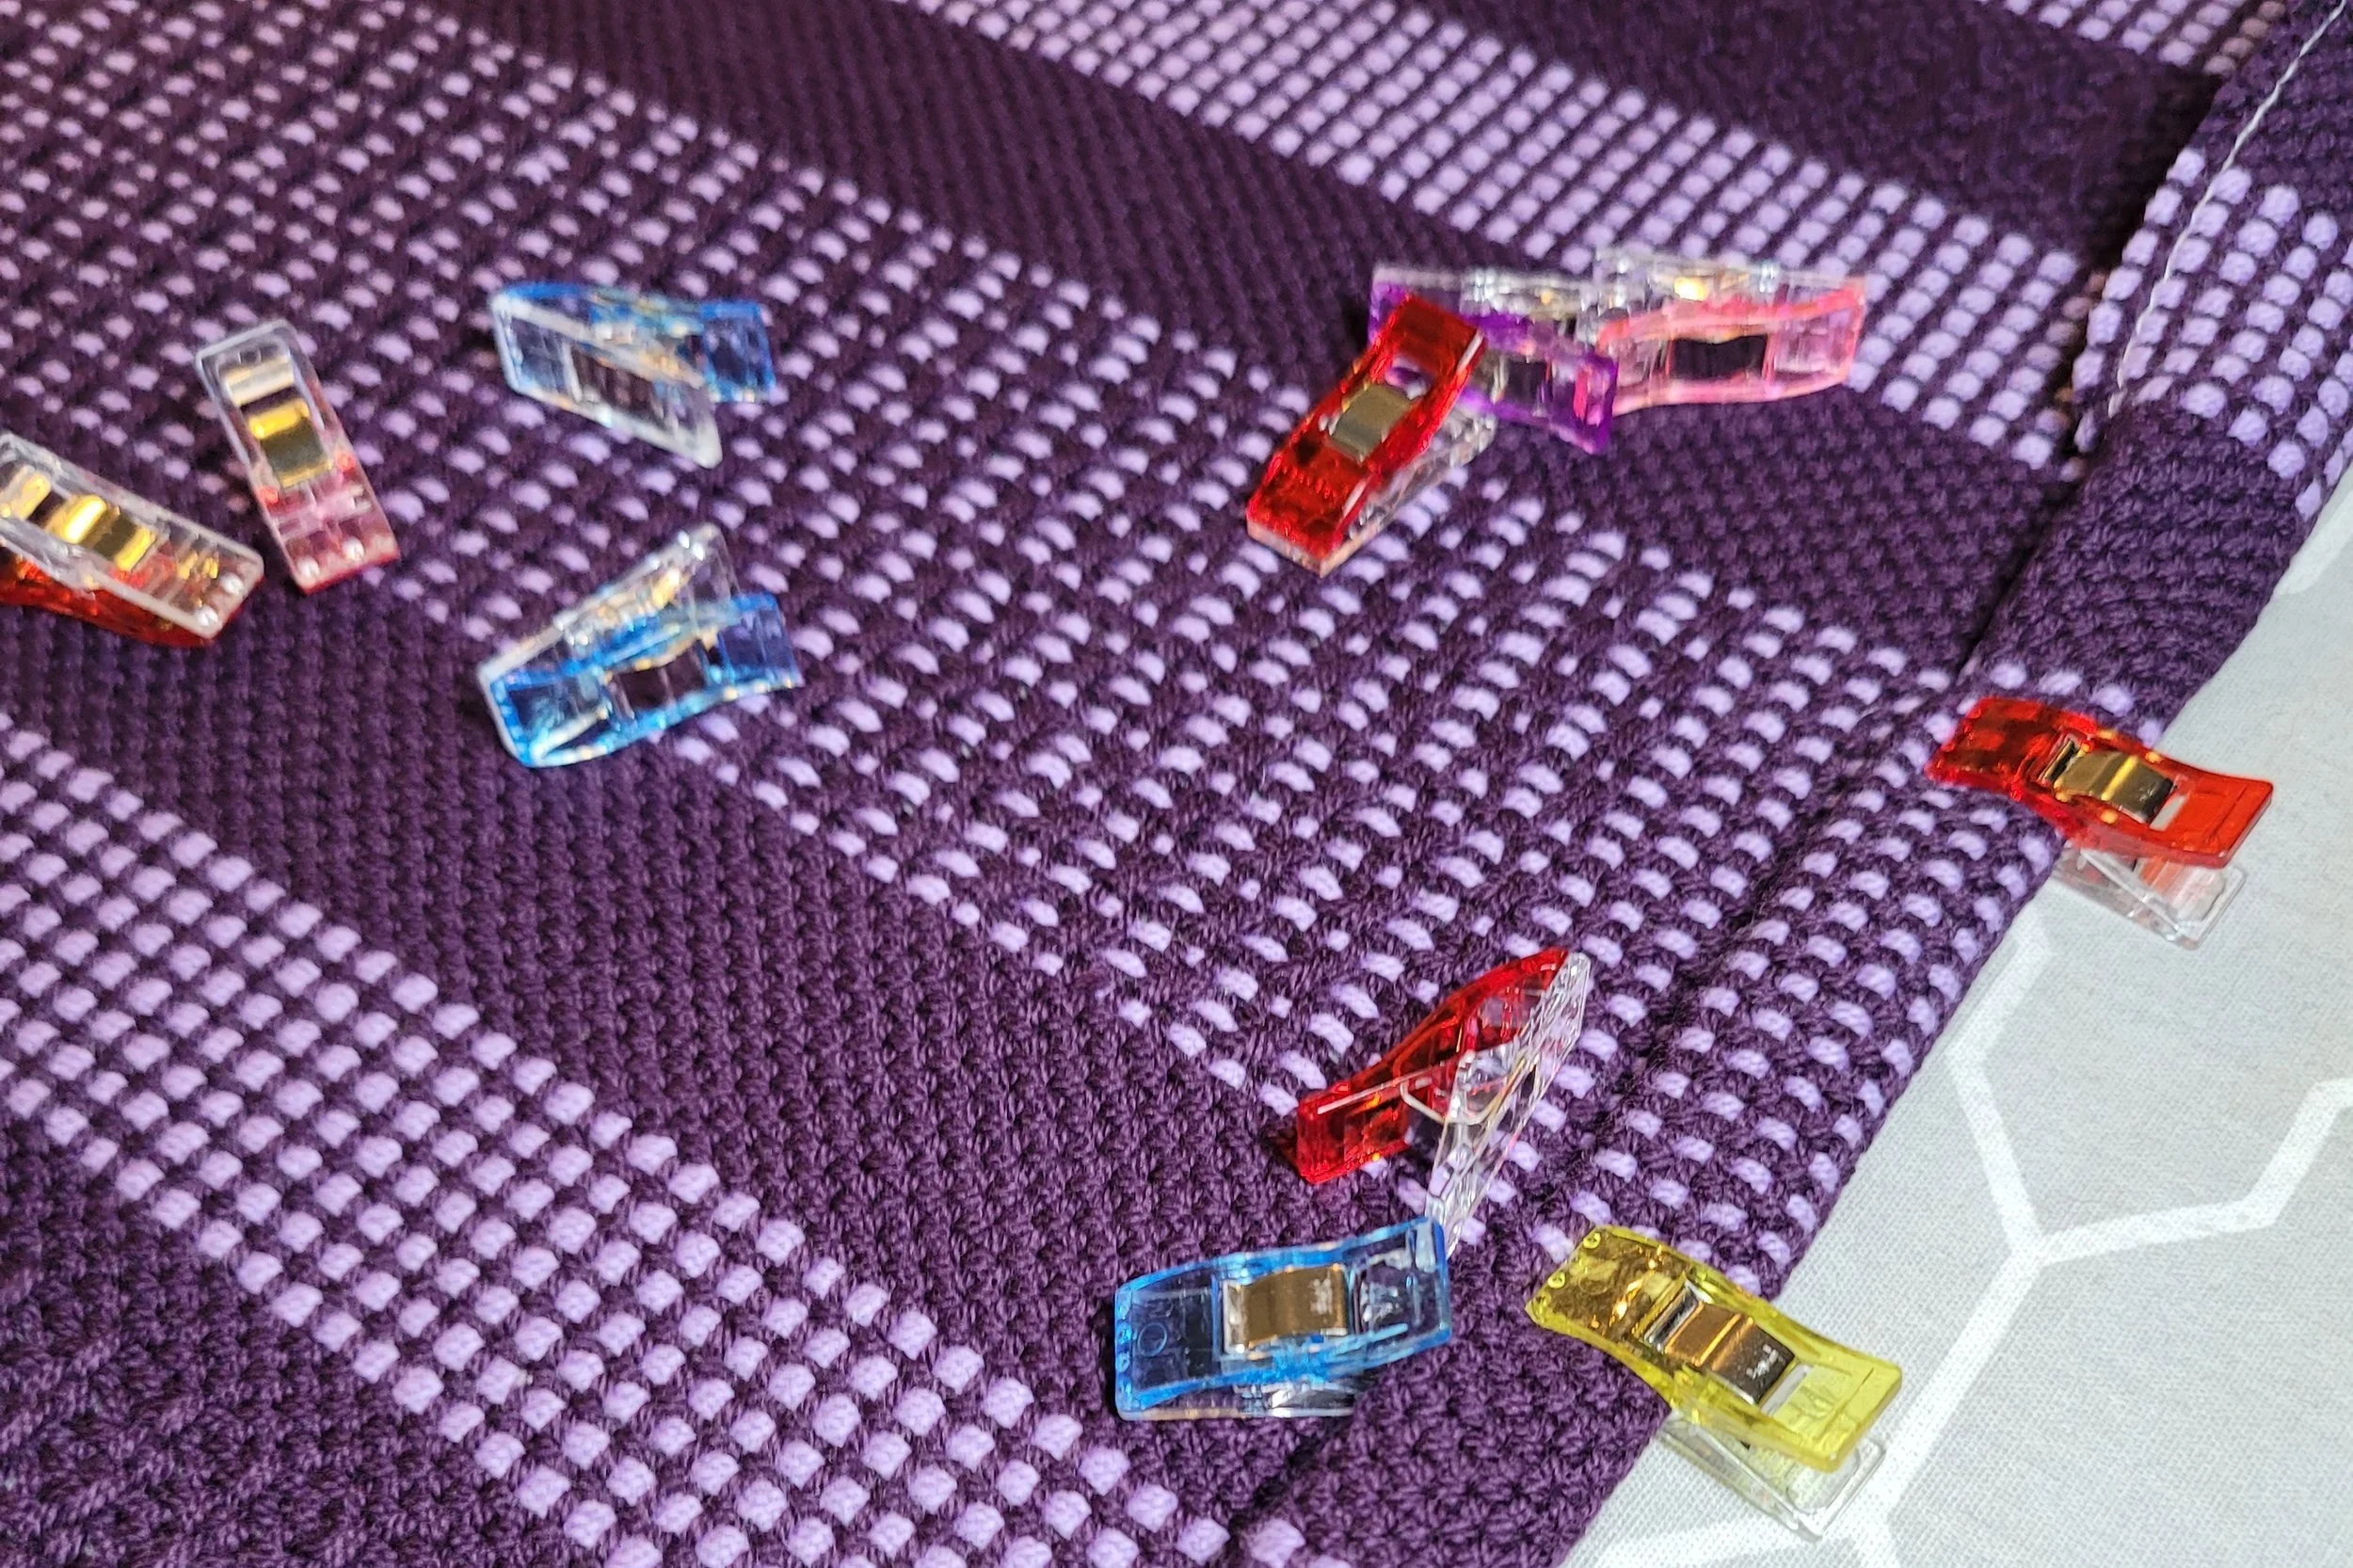
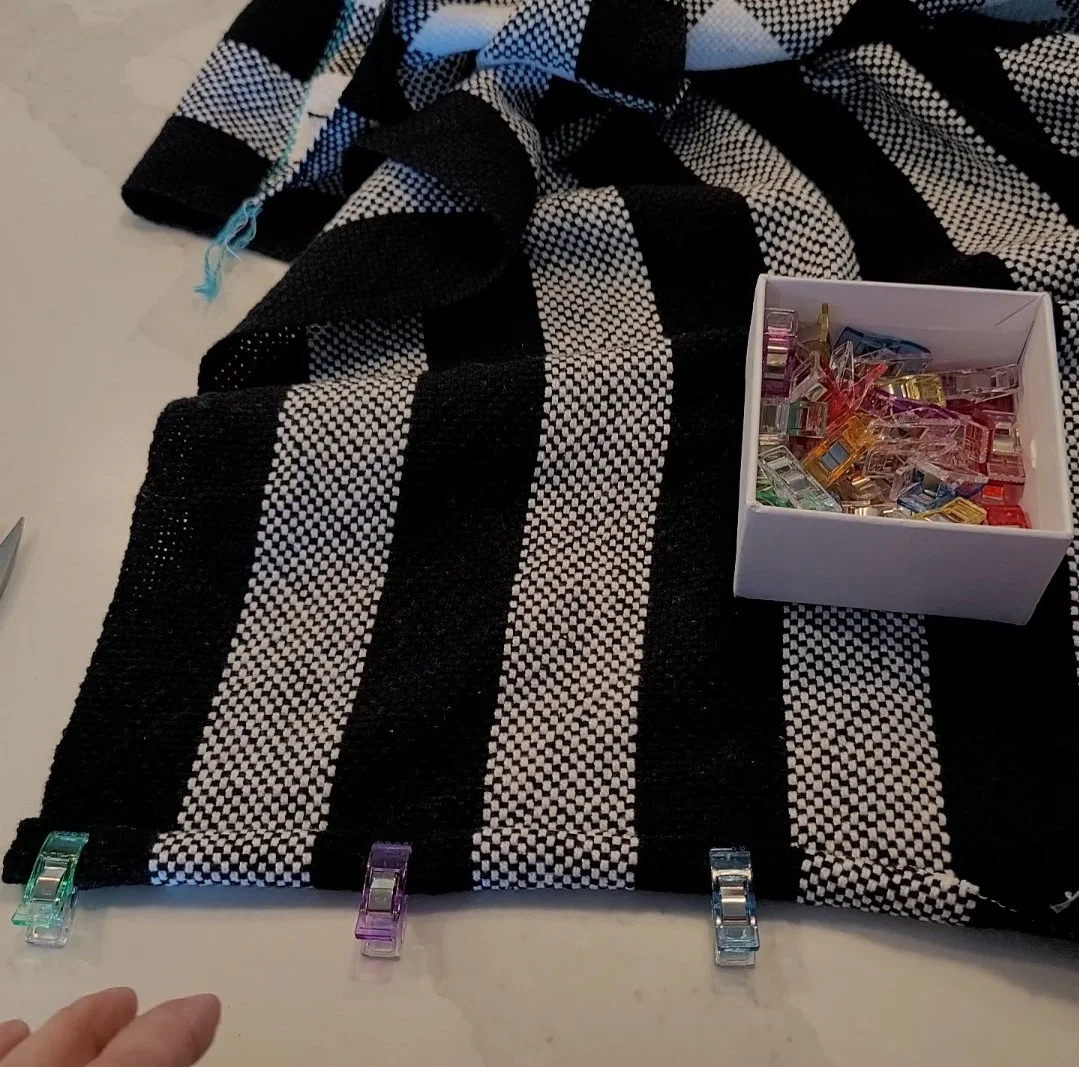
First, press your work. I just press my work, I do not press my hems before sewing. *gasp* Instead, I use these fantastic quilting clips. I got mine at my local sewing store, but if you can’t find them there, or you can’t get out, you can find them on Amazon. Please note that these are not heat proof, they will melt if they connect with a hot iron.
When you sew your hem, you want to hide the raw edge. This requires 2 folds: the first to fold the raw edge in, and the second, to sandwich it between 2 layers. To do this “properly” you should make the first fold, press it, them make the second fold, press it, then pin and finally, sew. Quilting clips eliminate the need for pressing!
Before we move to the actual sewing, just a little note about tension and needles. I use a universal needle, size 80 and my tension is set to about 2.5-3. If you find your machine is “eating” your fabric, open up the bobbin area and blow out the fluff and/or change the needle. I find this solves all my sewing machine issues! I bought my machine 25 years ago, it’s nothing fancy, I’ve repaired it once (while it was still under warranty) and had it professionally cleaned and tuned once. I highly recommend a simple, no bells and whistle machine! For thread I use 100% cotton, usually Gutermann.
Here’s a step by step:
1. Starting on one side, fold the raw edge to the wrong side, fold again and clip. Work your way across the fabric clipping frequently. You want to be sure that the warp ends stay straight through the folds. This is super easy to see if you have colour changes: just make sure when you clip that the colours line up. Here’s a video!
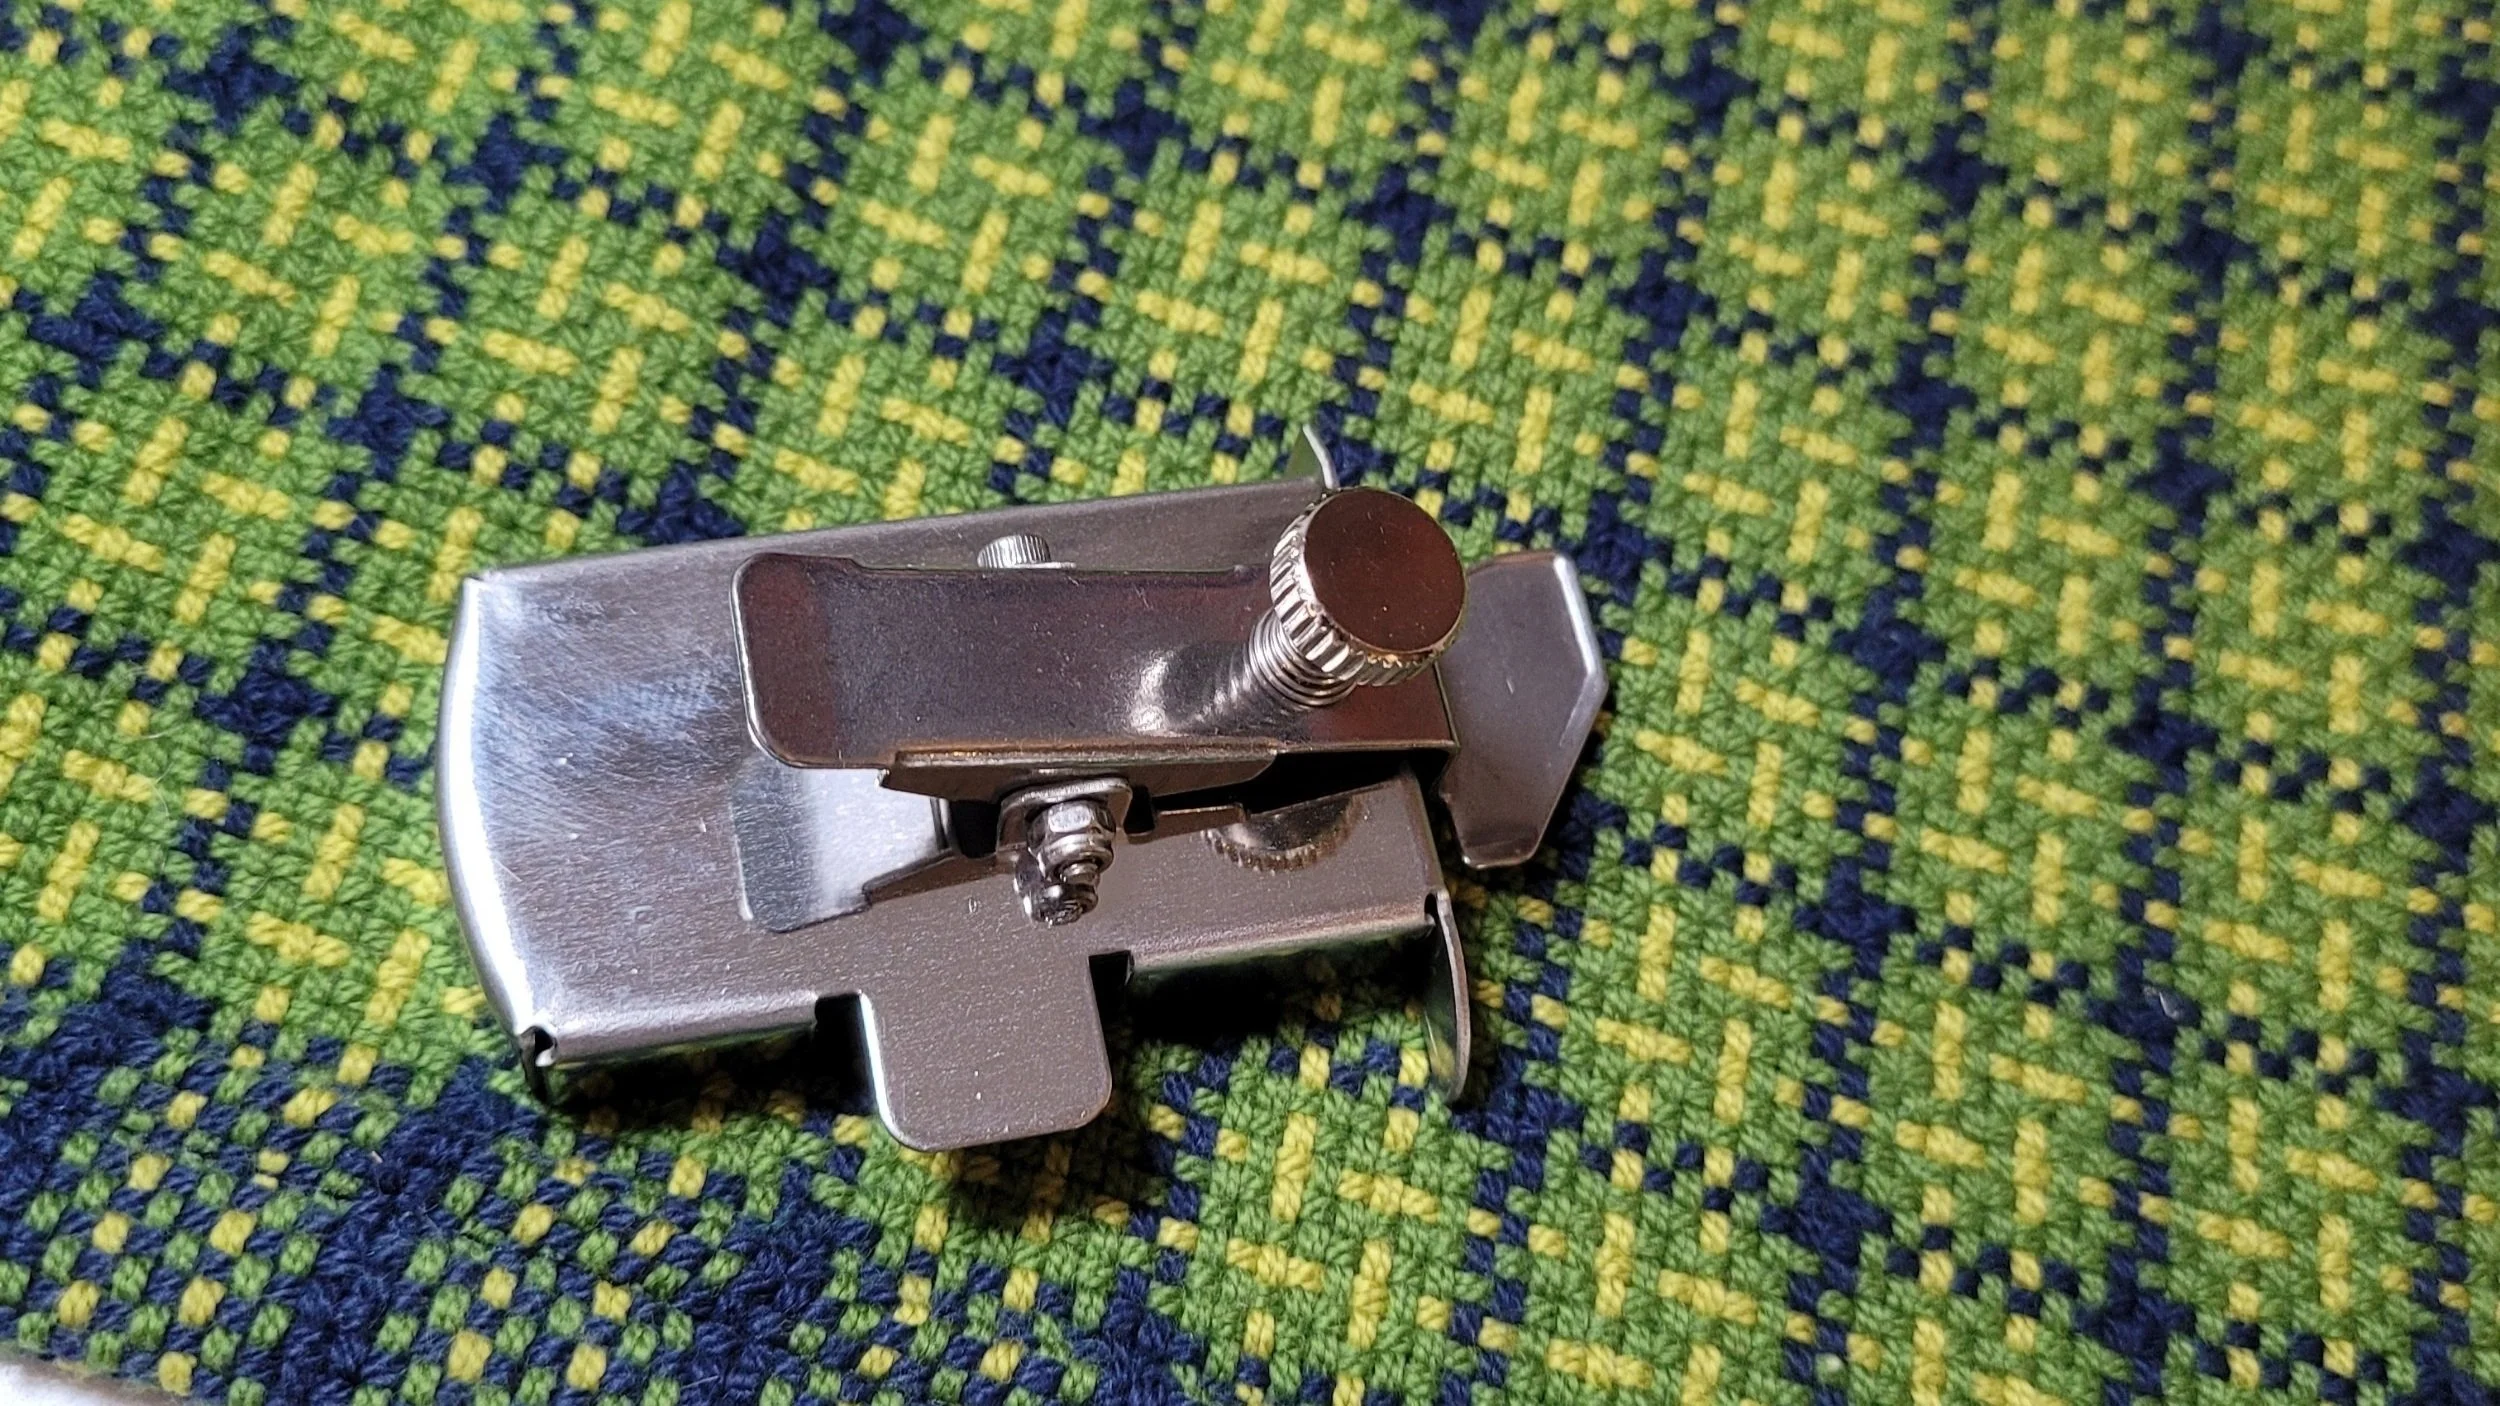
2. Bring your work to the sewing machine. I’ve started to use a magnetic seam guide to ensure straight hems. It takes a little getting used to, but it was worth it! Raise the presser foot and place the hem under. Place the fabric under the foot so that when the foot is down, it will be completely on the fabric: the sewing will not start at the edge. Starting a bit forward means the foot will not have to climb up the hem which can cause all sorts of problems. If you are using one, place the magnetic guide being sure to adjust it so the fabric fits easily under the guide. The presser foot might rest a bit on it, that’s ok. Here’s a video of me using the guide. Again, you should be able to find one at your local sewing shop, but here’s an Amazon link.
3. Sew a few stitches forward, then reverse and sew back to the very edge.
4. Start sewing forward again. As you sew forward, keep an eye at the colour changes. This is where you will see if the layers of fabric are moving evenly. If you have a walking foot, this is supposed to allow both layers to move together, but honestly, either I had one that didn’t work or I just didn’t know how to use it because I didn’t find it worked noticeably better than my regular foot! You can use your fingers to ease things along if needed. Occasionally I use one hand to slightly hold back the lower layer and the other to gently ease the upper layer. It is so slight as to be barely noticeable. Also, keep an eye on those clips and remove them before they hit the guide if you are using one!
5. Sew to the end, being sure all layers are even, then reverse a few stitches and then sew right off the end. It is the easing of the upper layer and the holding back of the lower layer and being sure all the layers are perfectly matched at the end that will prevent the flare. Here’s another video, this time of the actual sewing!
You should now have a perfect hem!!!
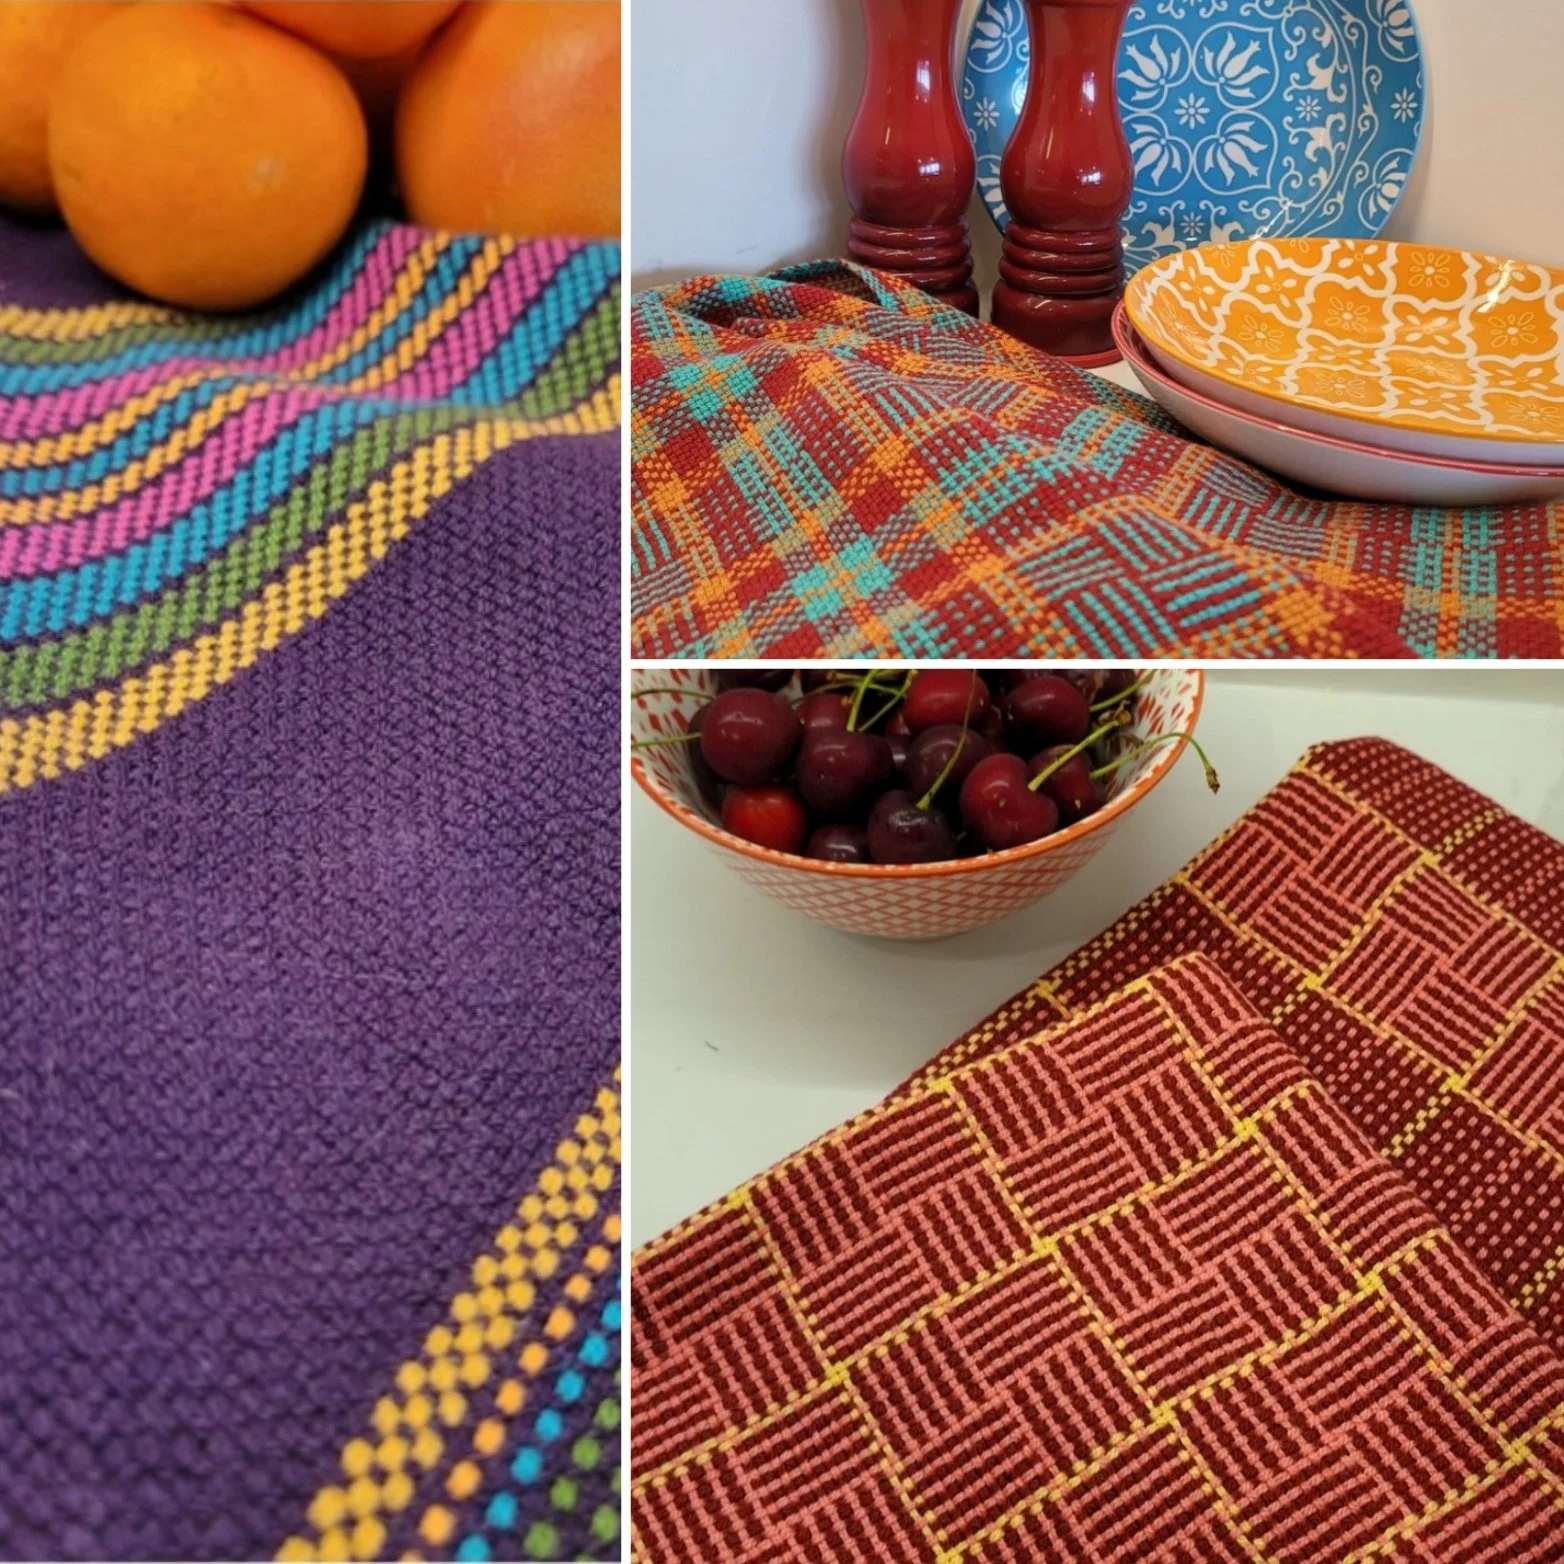
If you don’t have a pile of towels to practise on already, here’s a few of my favourites for you to try. I’ve picked stripey ones so it’s easy to line up the hems!
Happy Weaving,
The Rogue Weaver
Down the Rabbit Hole - My Weaving Journey
So, I knew just a little – a VERY little – about weaving (I did know what a rigid heddle loom was, at least, thanks to a friend). Found myself down at Gaspereau Valley Fibres, looking around, not knowing where to start. Met Tammy, who began to share her enthusiasm about weaving to this newbie … when she got to talking about “sheds” (“sheds?”) , I got confused … and then I thought, well, stop right there, I knew I had a LOT to learn !!!
(I’ve been asking for your weaving stories. Mostly because I’m nosy and I want to know everything about everyone. (Don’t worry, I can keep a secret!) But also because I know that for many, weaving has come at a time in life when it was really needed, or it came unexpectedly but made a huge impact.
This morning I’ve got our first story, and it is someone I know personally and you have heard me make mention of. I met Moira through Gaspereau Valley Fibres before she knew she wanted to be a weaver. She jumped in with both feet and now she edits my patterns, and newsletters, and blogs…Here’s her story. - Tammy)
So, I knew just a little – a VERY little – about weaving (I did know what a rigid heddle loom was, at least, thanks to a friend). Found myself down at Gaspereau Valley Fibres, looking around, not knowing where to start. Met Tammy, who began to share her enthusiasm about weaving to this newbie … when she got to talking about “sheds” (“sheds?”), I got confused … and then I thought, well, stop right there, I knew I had a LOT to learn !!!
Tammy assured me that I REALLY COULD DO THIS !! … and down the rabbit hole I went!
The Inspiration and Success!
Classes followed (every chance I got, even if I thought it might be beyond my skill level). I began building my yarn stash, then bought a larger loom (my first was a 16” Ashford SampleIt, I quickly knew I needed bigger) … and then another loom … and yet ANOTHER.
Single looms get lonely!
Just a small sample of my weaving!
Skip forward a couple of years, and I am thoroughly immersed in the world of weaving – and absolutely loving every minute and every new challenge.
My weaving skills have vastly improved over time, and I credit a certain individual for that: there is no limit to her encouragement, patience and help.
Enter The Rogue Weaver …
And, most recently, a new and somewhat different rabbit hole. I stay in the background, but you may see my name crop up occasionally when pattern editing is mentioned. As a proof-reader in my previous working life, I review and check the new or updated older patterns before they are released to all of you, whether you are an experienced weaver, or a newbie beginning this adventure.
Welcome to this fabulous fibre world !! I hope that you enjoy it as much as I do.
Moira
Chart Reading Made Easy
I have a confession to make. I can’t read a draft designed for rigid heddle looms! Terrible isn’t it? But they just don’t make sense to me. So, as is my wont, I designed my own way of writing things. They make perfect sense to me. Many of you are already familiar with my way of writing the pick-up patterns for weaving. I hope that once you get the hang of it you end up finding it as intuitive as I do. (Seriously, I’d love your feedback on my style!)
I have a confession to make. I can’t read a draft designed for rigid heddle looms! Terrible isn’t it? But they just don’t make sense to me. So, as is my wont, I designed my own way of writing things. They make perfect sense to me. Many of you are already familiar with my way of writing the pick-up patterns for weaving. I hope that once you get the hang of it you end up finding it as intuitive as I do. (Seriously, I’d love your feedback on my style!)
You may have noticed that some of my more recent pick-up patterns have included charts for inserting the sticks (don’t worry, I still include step-by-step written instructions and pictures). I know that we all have different learning styles, so I really strive to make sure I include as many ways to explain things as possible…that’s part of the reason my patterns are soooo long! I did think it might be worth just explaining my method in hopes that when you see the patterns you will have the confidence to give them a try instead of running for the hills!
Let’s start with a brief overview. A rigid heddle has 2 sheds, created by slots and holes. A shed is the open space between warp ends that the weft passes through. When the heddle is lifted, all the holes are pulled up over the slot ends (Shed 1). When the heddle is lowered, all the holes are pushed down, under the slot ends (Shed 2). Alternating between these 2 sheds, we get what is called plain weave. Plain weave is beautiful, and if all you ever do is plain weave, you are a weaver!
We can, however, add extra “sheds” to our loom by adding pick-up sticks. (You can add extra heddles and string heddles too, but today we are focused on pick-up sticks.) Each pick-up stick adds an extra shed for our weft yarn to pass through. If we are willing to do the work, there is really no end to the number of sheds you can have on a rigid heddle. (Check out this scarf, I haven’t counted, but I’ve been told one would need 24 shafts to do this on a floor loom!) Pick-up sticks change the space between the warp ends creating new pathways for the weft to travel. You can read more about using pick-up sticks here.
Ok, on to my charts! Let’s look at one from my most recent pattern, Lace Napkins. It looks complicated but it really isn’t. I promise. First, here’s a few things to know:
All charts are read from left to right.
The top row represents the ends in slots that are on top of the pick-up stick.
The middle row represents the ends in slots and are under the pick-up stick.
The bottom row represents all the ends in holes.
Perfect sense, right? Not quite? Let’s look at something simpler first. Although there are three rows, only the bottom and middle have ends in them. If we go back up to the rules above, we will see that we have the holes on the bottom and the slots in the middle. There is nothing in the top row (where the pick-up stick would be). So we can ignore this and we have a simple plain weave pattern. Two sheds, 1 up, 1 down.
Let’s look at a slightly more complicated chart. This one also has just two rows used, but this time it is the holes and the pick-up row that are being used. We can actually ignore that bottom row because a pick-up stick will never pick up an end in a hole. So if we look at the middle and top row, we can see that every slot end will be on top of the pick-up stick. If you’re ahead of the class, you probably realize that using this pattern will create very long floats. In this case, this is maintaining the plain weave structure while the pick-up stick is doing something else at the same time. Completely confused yet? Let’s put it all together and see if it makes sense.
Let’s go back to the first chart: in this chart we have ends in all three rows. First, we can ignore the bottom row. That is all the holes, and if you remember, the pick-up stick will never pick up ends that are in a hole.
So we will only look at the slot ends, those in the middle and the top row. (There is a reason for the bottom row, we’ll get to that in a bit.)
Remember that the middle row is under the pick-up stick. The top row is on top of the pick-up stick. This means the pick-up stick needs to “pick up” the ends. (Get it?)
So for this chart, the pick-up stick will go over the first 2 ends, then it will “pick up” the next 5 ends by going under them. It will go over the next 2 ends, then under the next 5. If you were to flip your pick-up stick on edge, you would see groups of 5 ends on top of the pick-up stick. See the picture to the right.
If the instructions were written, it would look like this:
With the pick-up stick, go over the first 2 ends then:
Go under 5 ends, over 2 ends then under the final 5 ends.
Now, if you can visualize, imagine this: the heddle is in neutral and the pick-up stick is behind the reed and on edge. This will push down all the ends that are under the pick-up stick creating a 5-end weft float (2 ends that are under the pick-up + the three ends in the holes—this is why the bottom row is there!) The 5 ends on top of the pick-up stick are actually maintaining the plain-weave structure in between the floats. Now you can look at a chart and “see” what will happen!
If this doesn’t make sense yet, don’t despair! I also do not learn by reading. I need pictures and experience! When following a pattern, use all the methods available! Use the written instructions, compare it to the chart and look at the pictures. After a few projects I know that you will get it!
Feel ready to try it out? Here’s a few patterns to try out:
Silver Linings shawl, HopScotch Tea Towels and my new Lace Napkin pattern.
Right side / Wrong side How Floats Visually Impact Weaving
We all know that fabrics have a “right side” and a “wrong side”. Now, if you have only ever woven plain weave fabrics, both sides will look the same. But, if you have added pick-up patterns to your weaving, you will notice that what you see on top of the loom is different from what is underneath. That is what we are going to talk about today.
We all know that fabrics have a “right side” and a “wrong side”. Now, if you have only ever woven plain weave fabrics, both sides will look the same. But, if you have added pick-up patterns to your weaving, you will notice that what you see on top of the loom is different from what is underneath. That is what we are going to talk about today.
A few weeks ago I received an email from a weaver wondering what she had done wrong. The top of her work looked great, but what was wrong with the back? I was able to reassure her that she had done nothing wrong, this was just how the pattern works. But let’s take a look at what happens on a rigid heddle when we use pick-up sticks.
There’s really only one thing to know: warp floats on the top make weft floats on the bottom and weft floats on the top make warp floats on the bottom. That’s it! Let’s look a little more closely though.
Below is my Bumberet Inspired Tea Towels. The first picture shows the right side with warp floats. The weft is navy, and since we have warp floats, the warp colours really pop out. But if you look at the other side, you will see weft floats in navy. It still looks great, but the warp doesn’t pop. In a pattern like this, you can decide after weaving which side you like best!
Now let’s look at another pattern. In the picture below is the Surprise Twill pattern. In this pattern, we are weaving weft floats. However, in this case the “right side” pattern is actually on the “wrong side”. Since I think weft floats are easier to weave than warp floats, I purposely wove this wrong side up! You will note in the second picture, you can see a twill-like pattern made with warp floats.
Now let’s look at lace. Cameras do funny things to colours, so believe me when I say this is the same project with the same cotton! The picture on the left is the right side. You can see that there are tiny weft floats. However, because of the weaving pattern, on the wrong side, there are long warp floats. While both sides look pretty, I definitely would use the left as the right side!
Float length is something to consider. You may not mind a longer float on a tea towel, but might find it unpleasant on a scarf as floats do tend to get caught on buttons, jewelry, and anything else! Sticky yarns work better for longer floats in scarfs as in the wet finishing they tend to almost felt into place making them less likely to catch. Also, using a smaller reed will make the floats smaller!
So far, I have only shown pictures of warp floats or weft floats…but what happens when you combine them? Let’s look at a the Waffle Weave scarf. Can you see the difference? Me neither! When warp and weft floats work together, both sides can end up looking the same.
But not always! In the picture below, because I am using the same colour for warp and weft, it is easy to see that the left has weft floats where the right has warp floats.
So there’s a little lesson on floats and how they show on the finished projects! Want to play around with floats yourself? Check out the patterns I mentioned in this post:
and
Happy Weaving!
Record Keeping
Do you ever read about weaving and come across the record keeping section and think…gee, I wish I could keep good records! Or maybe you wonder what records you should be keeping, or where you should keep them. I am not a great record keeper in the traditional sense. I don’t have a notebook with samples and details. I applaud those who do. It must be wonderful to look back and see exactly what you did for various projects. But I know this is just not how I am designed. I’ve tried various ways, combined them and come up with a system that currently works for me.
Do you ever read about weaving and come across the record keeping section and think…gee, I wish I could keep good records! Or maybe you wonder what records you should be keeping, or where you should keep them. I am not a great record keeper in the traditional sense. I don’t have a notebook with samples and details. I applaud those who do. It must be wonderful to look back and see exactly what you did for various projects. But I know this is just not how I am designed. I’ve tried various ways, combined them and come up with a system that currently works for me.
Before we get to my system though, let’s talk about what information should be kept.
The date the project was started (this is especially important if you keep photographic records).
The warp and weft yarn, including the colours, the reed used and the picks per inch (ppi).
Warp length, the number of ends warped and the width of the warp in the reed.
The woven width on the loom (this will be less than the width of the warp in the reed due to draw-in).
Where each weaving pattern begins (measured from the beginning of the work), where colour changes happen, how the hemstitching was done, if it was done and any other pertinent info concerning the actual weaving.
The length of the project off the loom before wet finishing.
The length and width after wet finishing…as well as how the item was wet finished.
There may be things that I’m missing, but I’m pretty sure I got all the major ones! Now let’s look at some of the ways I’ve kept records.
I confess that I am old-school. I love notebooks and pretty-coloured markers. So, I have a notebook and a set of 24 journaling markers. I date each project at the top of the page and then draw out pictures, designs, patterns and any other relevant information. This works well for the designing process, then I start another page and write all the details of what I actually did (as opposed to what I originally planned, because sometimes plans change).
2. Phone Apps. My favourites are Samsung Notes and Squid. Both are free and both work with text or a pen to write. Both allow you to change the colour ink, page template, create notebooks and import pictures. I use it the same way as the physical notebook. What I can’t do is share the notebooks across devices. But, I use it on my phone, and my phone is always with me. I love that I can take a picture, import it to the app then point out the important info.
3. Kindle Scribe…this is my current favourite. Writing on it is jut like writing in a notebook. I mean, exactly! I can set up folders and each folder can have notebooks. I can change the page template…but I can’t change the colour of the ink, which is a little sad. The pages are bigger so it’s easier to use than my phone and the battery lasts forever! And I can read books too!
So, these are my three favourite ways to keep records. While I love my notebook, I usually use technology because I am known for misplacing notebooks, but I won’t lose my devices! In addition to these methods, my camera is an ever-present companion. I take pictures of everything! I like to gather my materials and take a picture being sure that the colour names are visible as well as the reed size. I take pictures of pattern repeats, I measure and take pictures with the tape measure visible (I try to do this for ppi, each colour/pattern change, the end of a project and the length off the loom before wet finishing.) If I’m really organized, I will put all the pictures for a project in a single album and label the album with the name of the pattern.
What’s your favourite way to keep records?


