

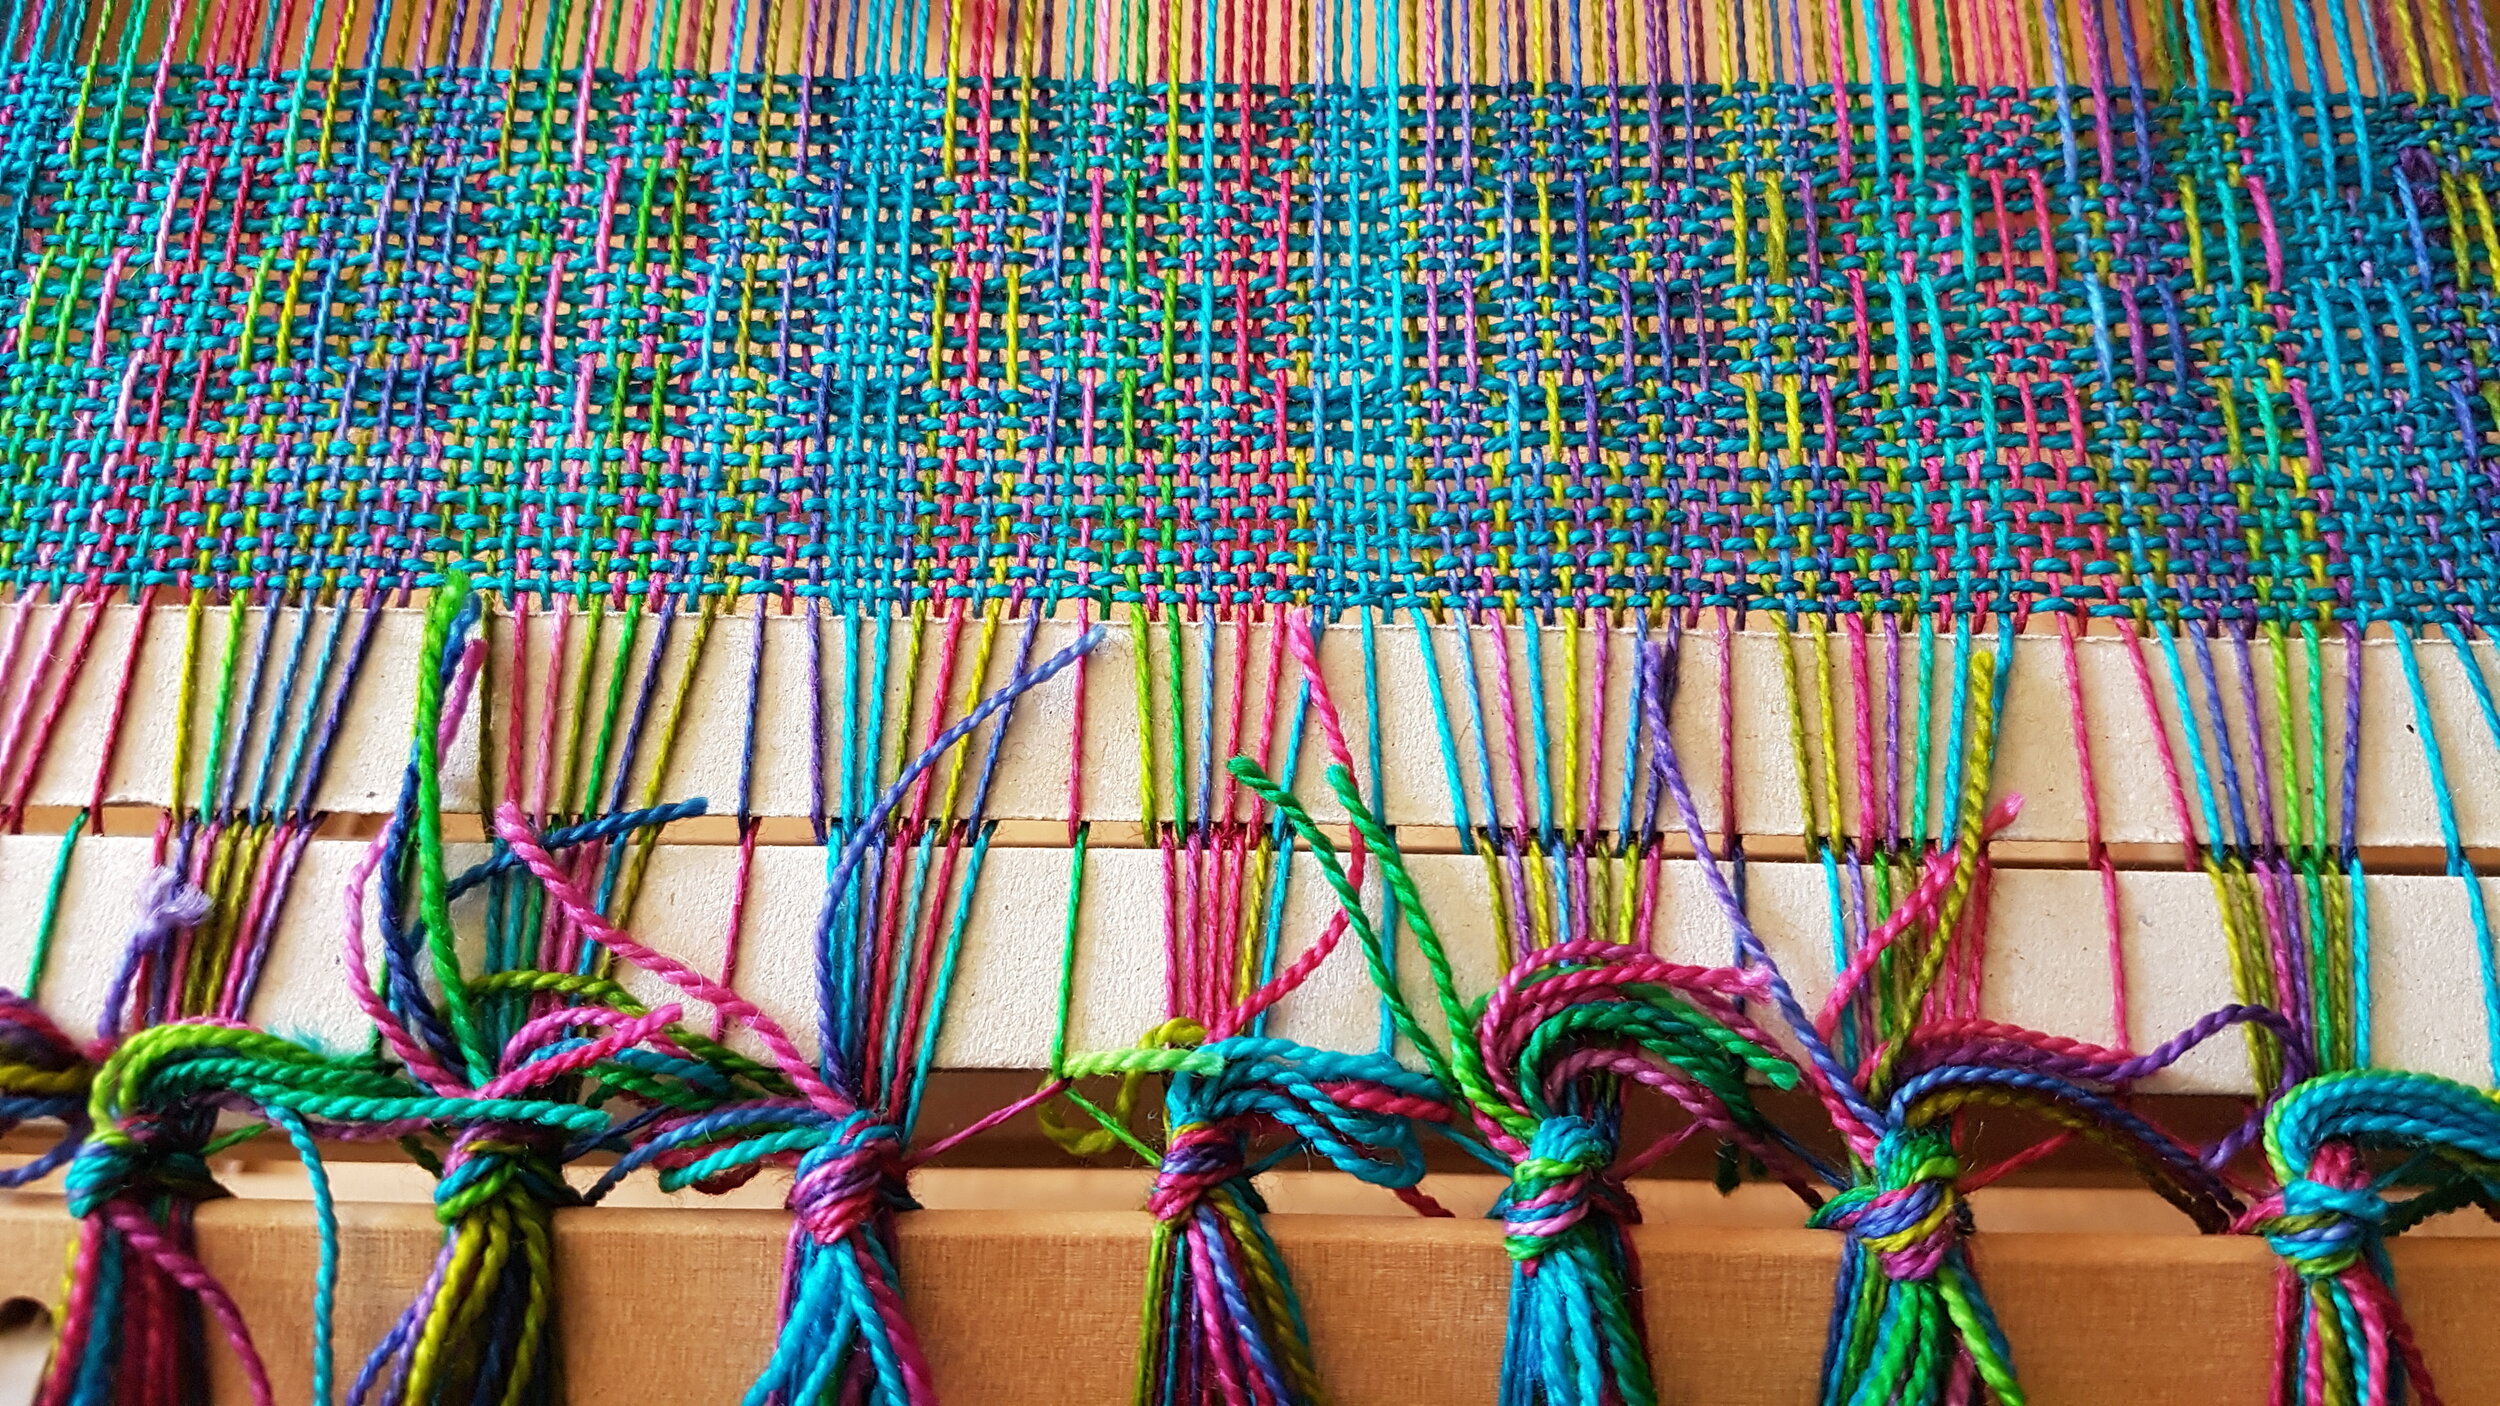
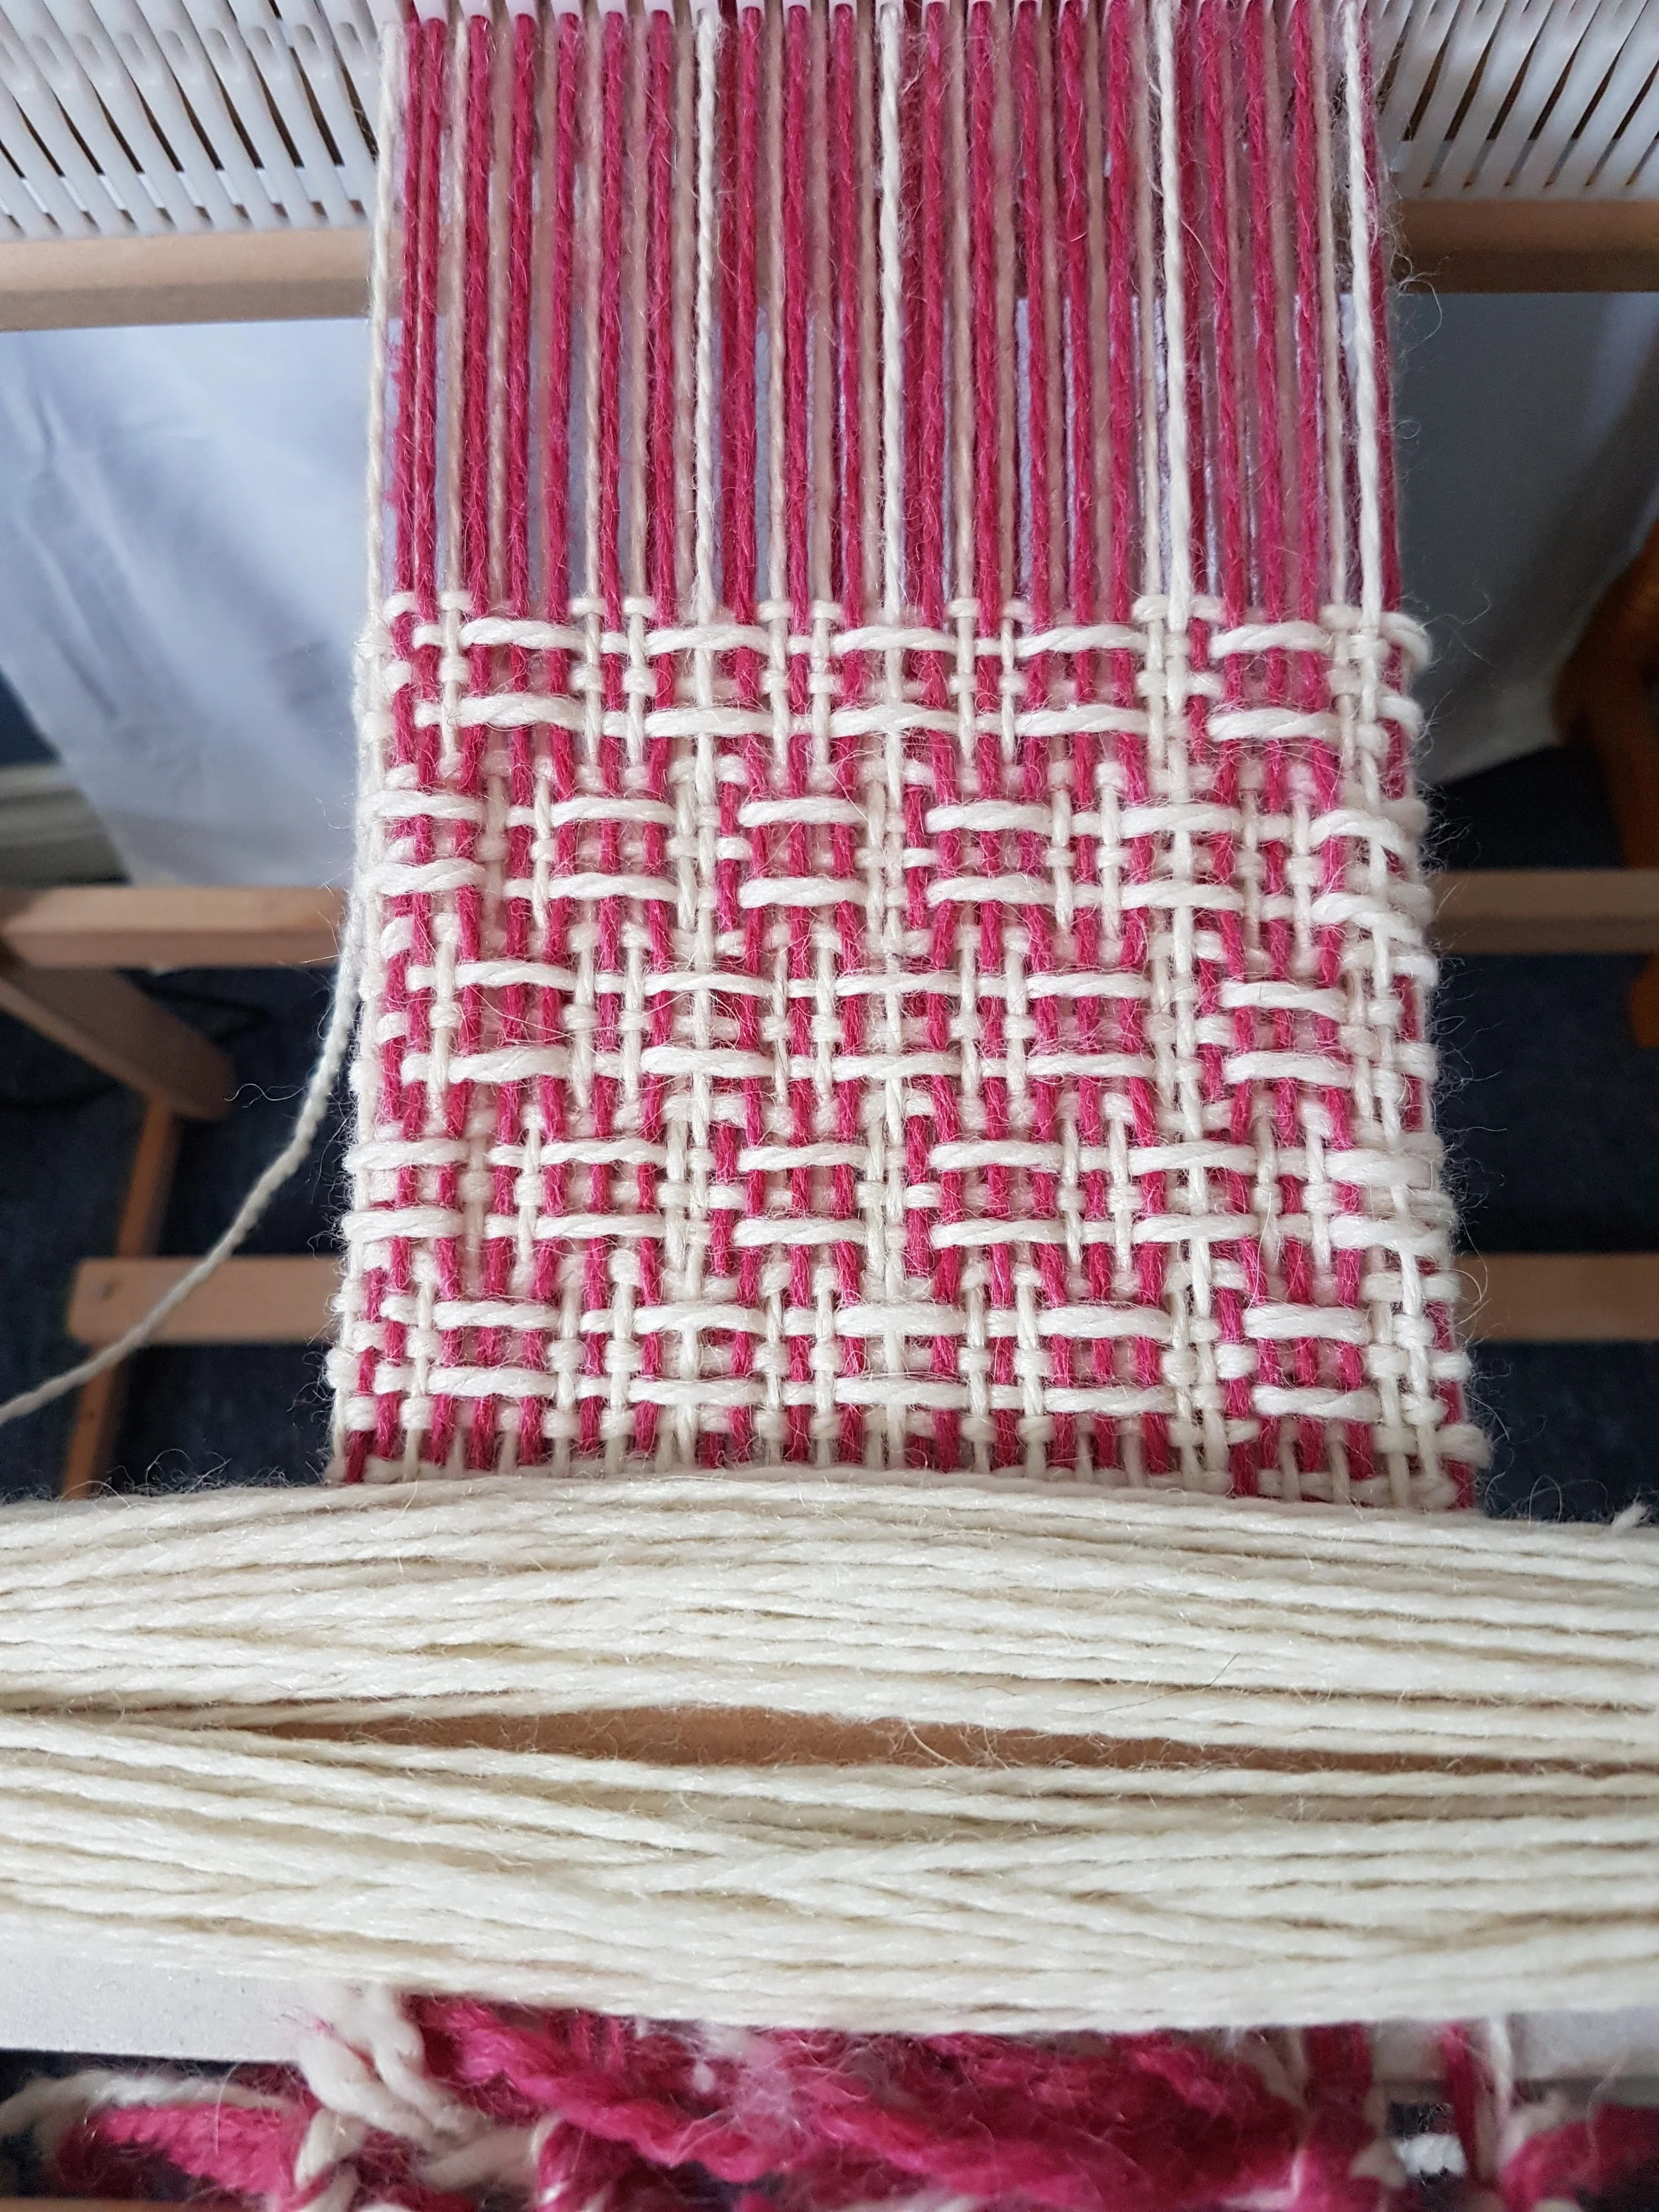
String Heddles
If you follow me, you know I like to push the limits of rigid heddle weaving, but at the same time, I want weaving to be easy and fun. And I love pick-up sticks!!! Often when I use multiple pick-up sticks they slide over each other so need to be inserted only once. However, I also have patterns where one pick-up stick needs to be reinserted each time it is needed. When I first started weaving with multiple sticks, I didn’t mind reinserting the stick each time.
Let’s talk about string heddles, what they are, how to make them and why you might use them.
If you follow me, you know I like to push the limits of rigid heddle weaving, but at the same time, I want weaving to be easy and fun. And I love pick-up sticks!!! Often when I use multiple pick-up sticks they slide over each other so need to be inserted only once. However, I also have patterns where one pick-up stick needs to be reinserted each time it is needed. When I first started weaving with multiple sticks, I didn’t mind reinserting the stick each time. And really, I still don’t most of the time. I put off using string heddles because I didn’t want to stop weaving long enough to make them. Then I didn’t really like them because they sometimes came untied while weaving. But I’ve learned a few things and now I like string heddles!
What are String heddles?
String heddles are exactly what they sound like…string that acts as a heddle around a single warp end. Your rigid heddle has slots and holes. Each warp end is threaded into a slot or hole and the movement of the heddle determines which ends go up and which stay down. When you weave you will notice that the slots stay level and the holes either move up or down. String heddles will only be used on ends that are in slots are used the same way as a pick-up stick adding up to 2 extra sheds!
How to Make String Heddles
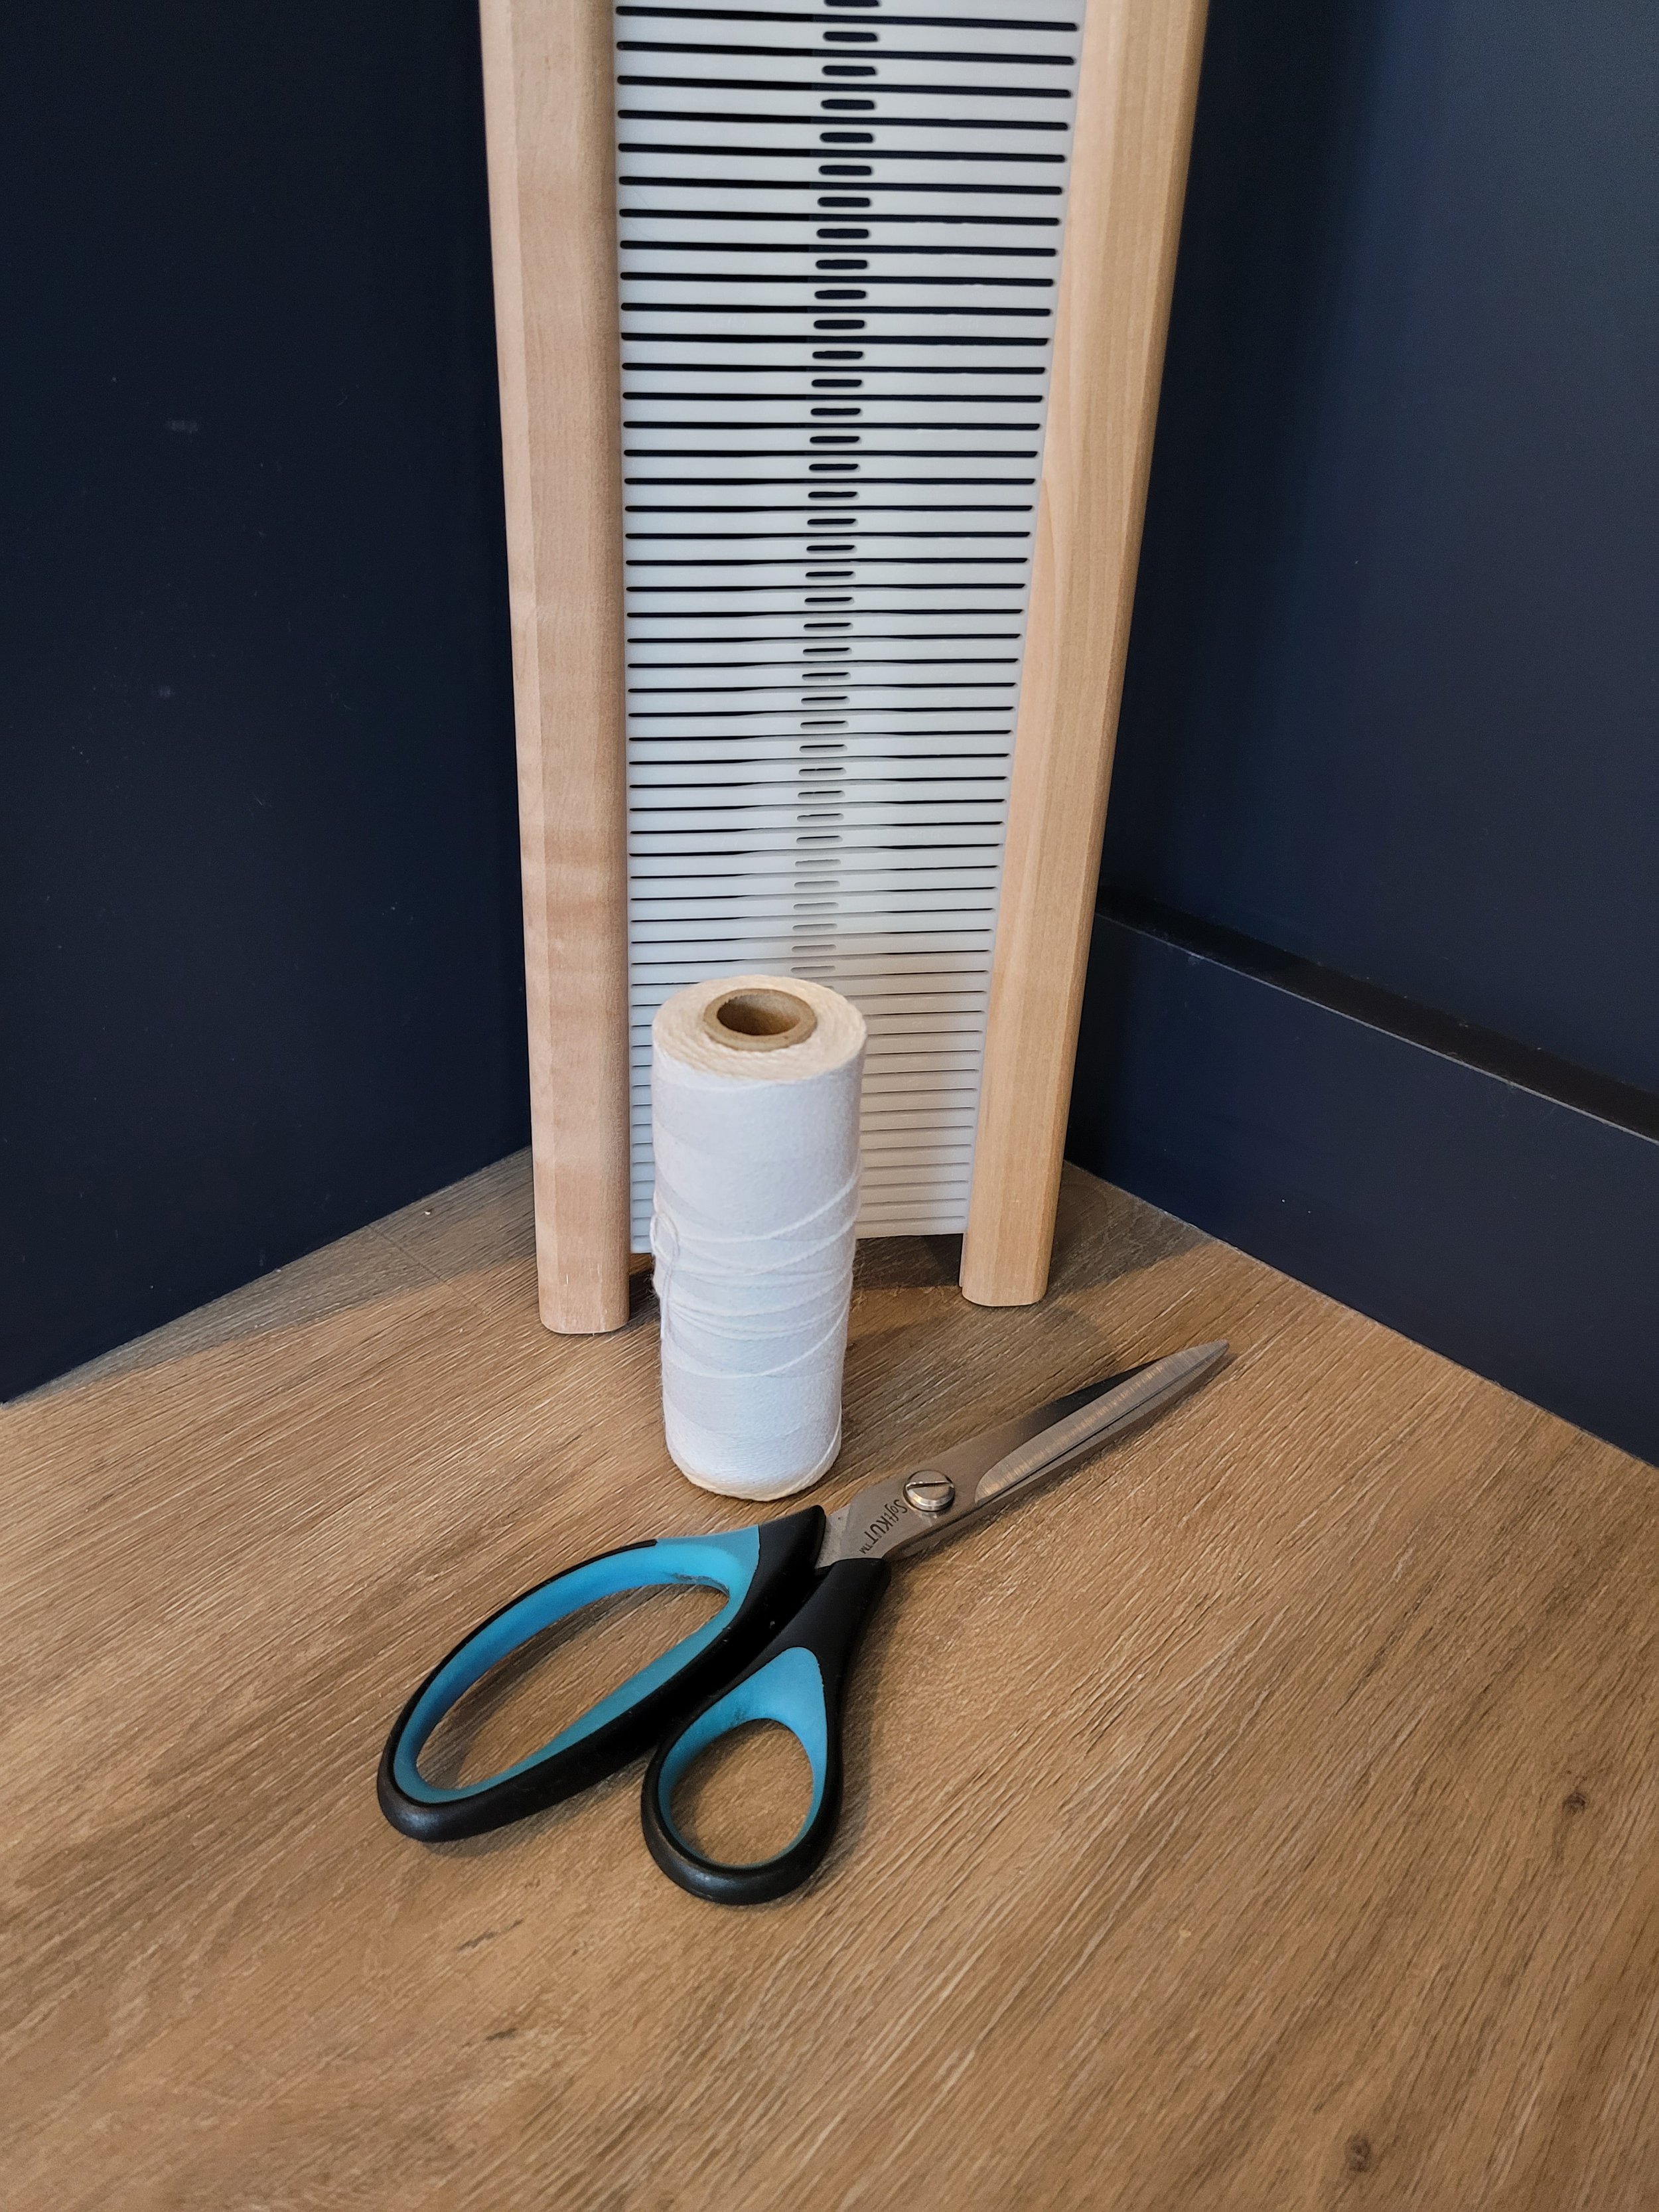
You can make your own string heddles. It really isn’t hard, just time consuming. You will need an extra reed, 8/4 cotton and a pair of scissors.
Sitting in a comfortable chair, rest one end of the reed on the floor and hold the reed between your knees. Wrap the cotton once around the reed and tie a square knot. Cut the ends short. Done, you now have 1 string heddle! I leave the heddles on the reed until I have made them all. I keep them in groups of 10 to make counting easier. So after I have 10, I slide them all together down the reed, then make the next 10, slide them down leaving a space between them and the previous 10. Here’s a video: https://youtu.be/MkjMSigjMOs

As I mentioned earlier, I put off using string heddle because I didn’t want to take the time to make them. And I have a solution for that…texsolv heddles!!!! These are premade heddles for floor looms, but they work great as string heddles and have several advantages: they do not come untied, they do not stick or get fuzzy, they are all the same size and best of all, you do not have to tie them!! They are more expensive, I bought the 9.5” heddles from LeClerc for about $27/100. They come as a single long “string” so do need to be cut apart. Be careful when cutting to ensure that you are cutting in the right spot. Switching from handmade cotton heddles to texsolv has definitely improved my weaving life! If you have a choice, buy the shortest heddles available. (Bonus, you can use these on your inkle loom too!)
Inserting String Heddles
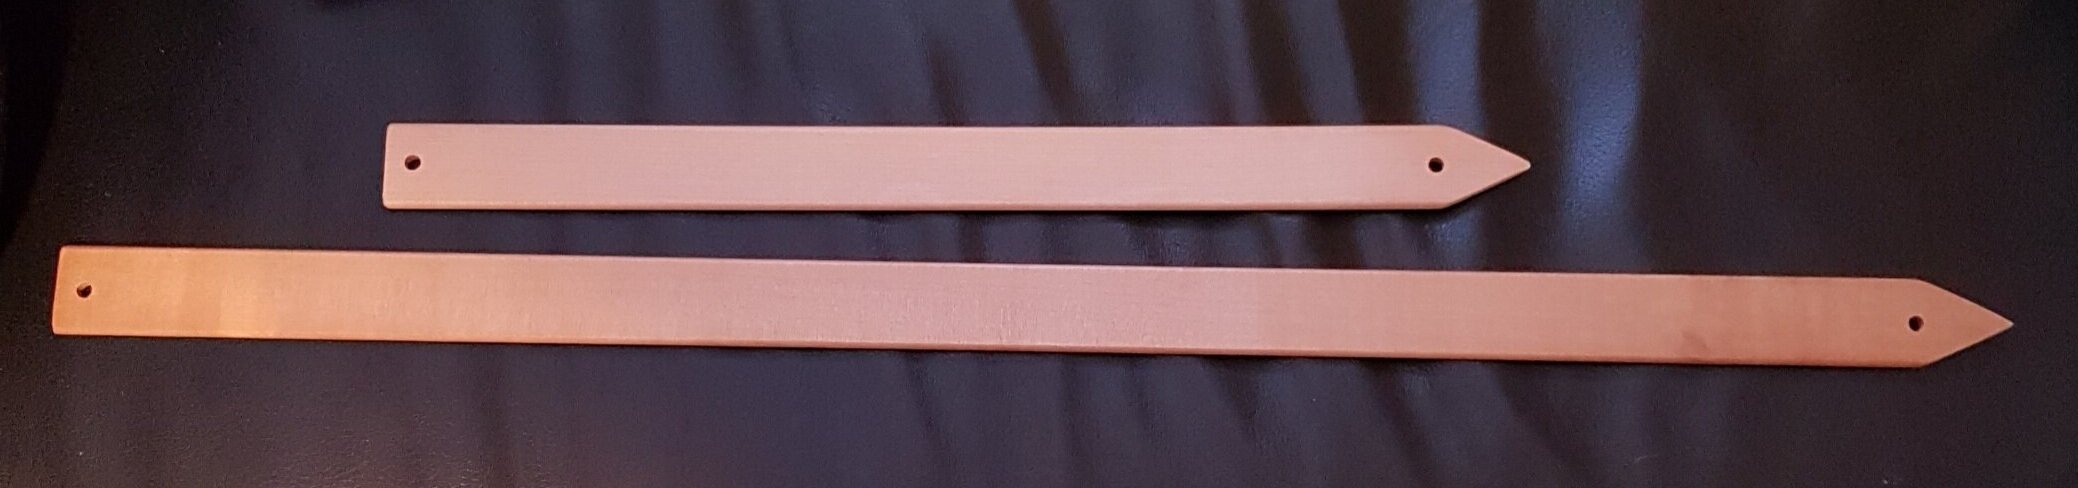
If you can insert a pick-up stick, you can insert string heddles. You will need 2 pick-up sticks or shuttles a little longer than the warped width in the reed, string heddles, and painter’s tape.
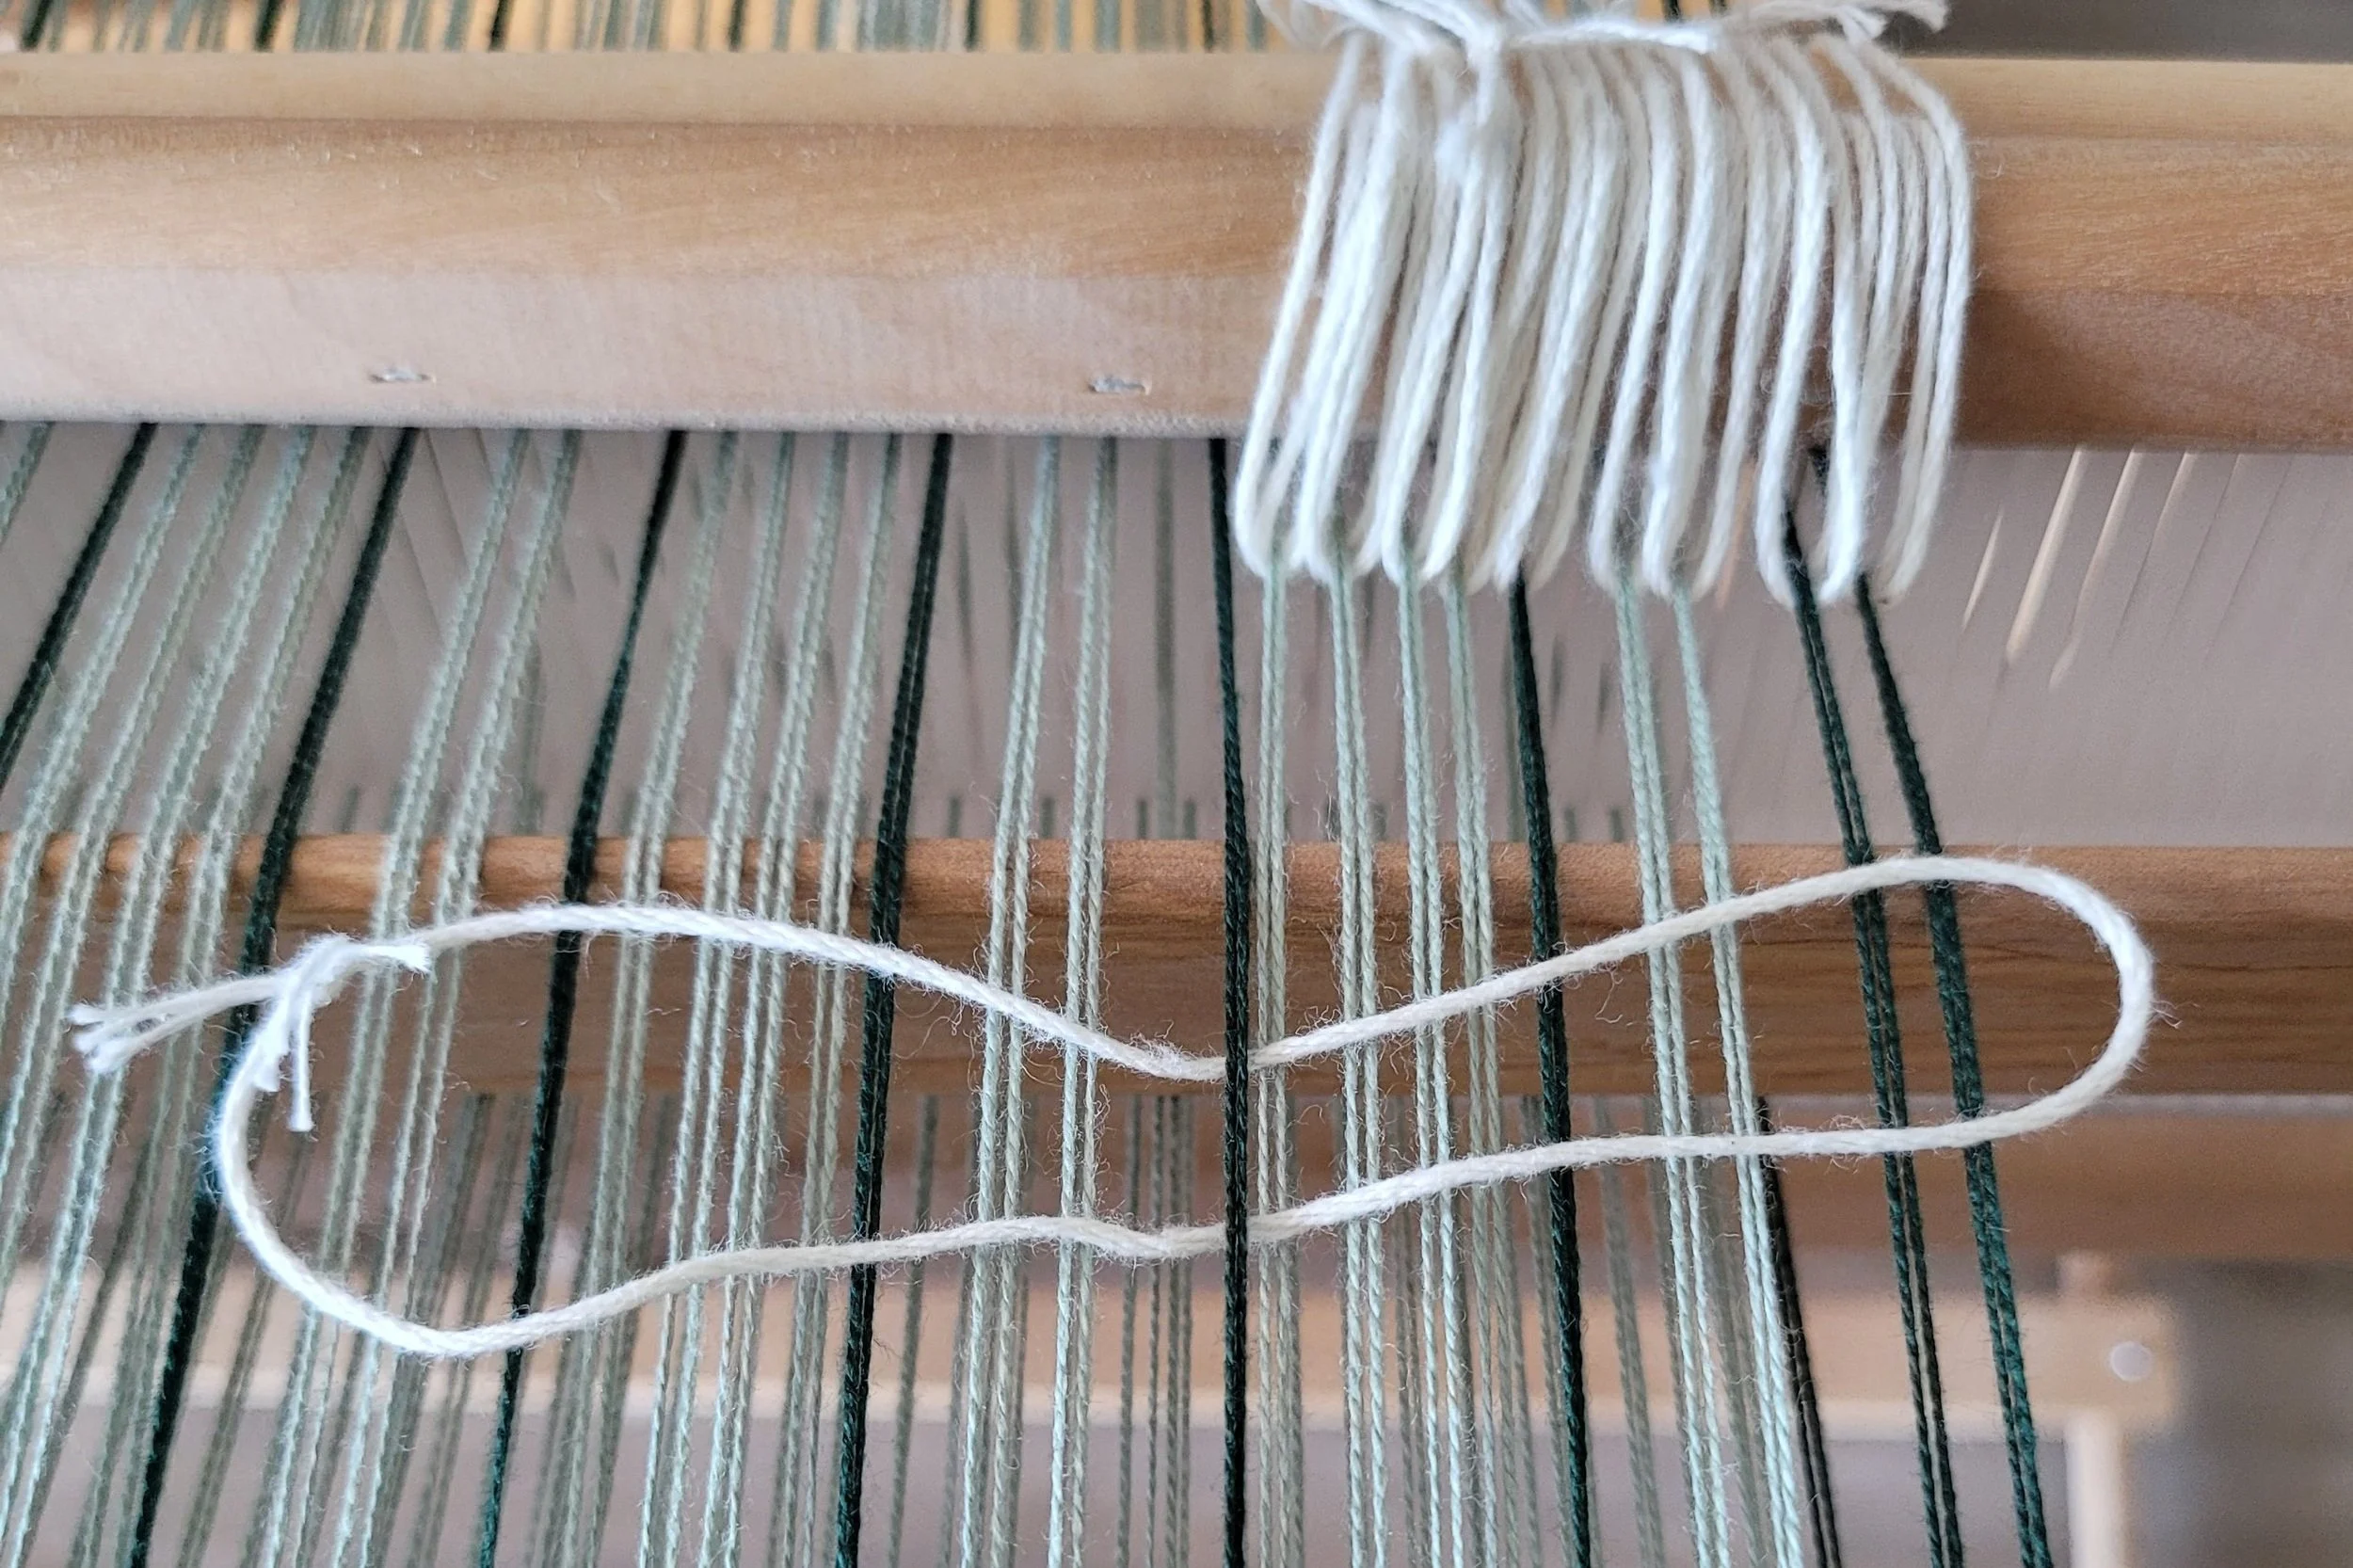
Insert the pick-up stick as usual. The string heddles will go around the warp ends that are on top of the pick-up stick. Count these ends and count out the right number of heddles (this acts as a check at the end). Starting at one end, add the first string heddle. Put it under the warp end, then fold the heddle up and place both ends on the second pick-up stick. I usually wait until I have a number of string heddles inserted and on my fingers before putting them on the second stick. Here’s a video: https://youtu.be/zw3FRtq5yQ4

Work your way across the loom. If you counted out the right number of heddles before you started, you should have no heddles left. As a second check, place the heddle in neutral and flip the pick-up on edge. Every end on the pick-up should have a heddle. Flip the pick-up flat and pull up the stick with the heddles: it should lift all the ends off the pick-up stick. You can now remove the pick-up stick.
Use painter’s tape to tape the heddles so they can’t slide off the pick-up stick (now called a heddle rod). I run one strip from end to end then wrap tape around each end.
Here’s a few things to note when using string heddles:
If you are using a pick-up stick and string heddles, the string heddles must be inserted in front of the pick-up stick.
When you are using the pick-up stick, the heddle rod will slide forward to the back of the reed. This won’t cause any problem with the shed.
Remember to slide the pick-up stick back to the back of the loom when using the string heddle rod.
If you are getting a small shed in the plain weave sections check to make sure that the string heddles are all moved to the back of the loom.
Why Use String Heddles?
String heddles are best used when there are multiple pick-up sticks in a repeating pattern. You will see in many patterns that when 2 pick-up sticks are used, one is inserted and remains in the project for the entire weaving process. The second needs to be replaced each time it is needed. Every time you inset a stick, there is opportunity for error. Using string heddles means you only need to do it once. I will often weave the first repeat with just pick-up sticks. After examining the cloth and confirmed the pick-up stick is correctly inserted, I will add the string heddles. It’s easier to correct a misplaced pick-up stick than a misplaced string heddle.
It takes time to insert a pick-up stick. We aren’t running a marathon, and weaving should be fun, not time driven, but some patterns can mean more time is spent inserting the pick-up stick than weaving! Once we switch to string heddles things move a little faster.
Finally, string heddles open a whole new range of possibilities for you and your rigid heddle! Complex lace work suddenly becomes very possible!


Looking for some projects to try out string heddles? Check out these patterns:

Fringe Twisting
Fringe twisting is just one more step in finishing your weaving. And just like every other thing in the weaving process, you need to think about your fringe before the project ever gets on the loom. Let’s look at fringe generally first.
Why twist? The most important reason is because it looks nice and stays looking nice. An untwisted fringe looks great when it is freshly trimmed and pressed. After that the yarns begin to unravel, shred, tangle and, let’s face it, start looking a bit ratty. If you are making something for baby, a blanket for example, long thin threads can wrap around little fingers and cut off circulation.
There are times you may decide not to fringe twist. Sometimes the yarn is so beautiful you want the colours to shine (I can’t bear to twist Handmaidens’ Maiden Hair) Or the fringe will look too heavy for the item. When I make loose gauzy mohair wraps, I don’t twist. And of course, there are other ways of finishing a fringe that don’t require twisting…various types of knots for example.
As I said earlier, fringe begins before the yarn goes on the loom. Fringe is made with the loom waste. That means when you are calculating warp you do not have to add extra for fringe but on the other hand, when you tie on, you want to leave enough waste to have the desired length of fringe. This is never and issue for me, I always have enough! Also, be sure that when you cut your work off the loom that you have left enough for fringe.

Having a fringe requires a hemstitch. Well, you could do it without a hemstitch, but it will look much better if you have hemstitched. So, when you hemstitch, think about how many ends you want in each bundle and hemstitch accordingly. Fingering weight I usually hemstitch in bundles of 4 and do a 2x2 fringe twist.
And now, what you have all been waiting for…the actual fringe twisting, step by step!

You will need: t-pins, something to stick your pins into (foam blocks work well) a ruler and sharp scissors.
1. Trim your fringe (remember that it will be shorter after twisting so don’t over trim) I use a rotary cutter and mat for this step.
2. It works best if you have your work anchored. Pin the edge of your work to the foam blocks…don’t skimp on the pins!

3. Clip the yarn into your fringe twister (I love my Leclerc quad) If I’m doing a 2x2 fringe I’ll take my first bundle of 4, divide it into 2 groups of 2 and place each group of 2 in one clip. With my quad twister I can do 2 bundles at a time.
4. Start twisting! Count the number of turns (this will vary depending on the yarn and the length of the fringe. Counting will ensure your fringe looks uniform across the work.
5. Hold the ends of 2 bundles and unclip. Tie a knot in the bottom and release. Gaze in awe as the yarn twists around itself.

6. After the first bundle is twisted, have a look. Is it twisted enough? Not enough? Do you like the length? Adjust as needed, then continue across the work . Repeat for the other side. Keep your ruler handy to make sure you are making the fringe the same length. Knotting a little higher or little lower can have a big impact!
7. Check to be sure the fringe is even and knots are tight. Trim close to knot.
You now have a lovely fringe that will keep your scarf, or blanket or table runner, or whatever you have woven, looking beautiful for years of use!


Dealing with Pesky Loose Ends
I’ve been working with linen lately. I’m finding it slippery, unforgiving, and tricky as warp! The first time I warped and tied on just as usual. Everything went well until the first time I wound forward. Everything went loose! Next time I paid extra special attention to winding on and checking tension. Again, everything was fine until I wound forward the first time and again, everything went loose. Third time I tried using 2 heddles. I think I need to practice more with 1 heddle before I try that again!


I’ve been working with linen lately. I’m finding it slippery, unforgiving, and tricky as warp! The first time I warped and tied on just as usual. Everything went well until the first time I wound forward. Everything went loose! Next time I paid extra special attention to winding on and checking tension. Again, everything was fine until I wound forward the first time and again, everything went loose. Third time I tried using 2 heddles. I think I need to practice more with 1 heddle before I try that again!
Loose threads are not the end of the world. Those loose ends can be fixed. Today I’ll give 2 of my favourite tips for loose threads.
Have you ever warped, tied on, then found when the heddle is in the downshed all the lower threads are crazy loose? I find this happens most often with warps with little to no stretch…cotton, linen, silk. First thing, be sure when you are winding and tying on all the threads are even in the heddle (slots and holes should be side by side).
If you’ve done that and you still have a problem it is super easy to fix. Place the heddle in the down shed, place a shuttle or pickup stick in the shed behind the heddle. Slide to the back warp beam. Slide the stick back each time you wind forward. Problem solved!

2. Sometimes there are just 1 or 2 threads that are loose. You can pay extra attention to those spots while weaving to be sure your shuttle goes over and under the troublesome ends or you can fix the problem for good. Simply hang an s-hook on the offending end and let it hang behind the back warp beam. You can add extra s-hooks to give extra weight as needed. I generally add s-hooks to the first and last end when weaving with cotton. I find it helps keep my selvedges tidy.
These 2 tricks mean I never need to deal with loose ends…and neither do you!
Happy Weaving!

Hemming
A good hem starts on the loom. I think about my hem before I ever start weaving. I want both hems to took the same so the first thing I think about is colour. If my weft is all one colour, it’s easy, my hems will be the same colour. If I’m using multiple colours, I need to choose a colour. If I’ve used a border colour that will become my hem colour. Otherwise, I use the darkest colour, or white no particular, reason, just because.

I make a lot of tea towels and dish cloths. That means I also sew a lot of hems! This post will take you through my steps to making hemming easy so those towels don’t languish in the “need to be finished” pile.

A good hem starts on the loom. I think about my hem before I ever start weaving. I want both hems to took the same so the first thing I think about is colour. If my weft is all one colour, it’s easy, my hems will be the same colour. If I’m using multiple colours, I need to choose a colour. If I’ve used a border colour that will become my hem colour. Otherwise, I use the darkest colour, or white no particular, reason, just because.
The next thing I think about is cotton weight. Most of my towels use 2/8 cotton doubled. For my hems, I use 2/8 single even if the main weaving will be 2/8 doubled. This makes for a lighter hem that does not add a lot of bulk. My sewing machine thanks me! When I use chenille or boucle or slub I will still use 2/8 cotton if I have the right colour. I also press my weft in tightly…usually 15 threads for each inch woven. I weave 2-2 1/4” per hem. I do not hemstitch my towels ever.

I never warp just 1 towel, I always warp for at least 2, sometimes 4. Usually 2 because I can get bored with 4! Doing more than one towel means I need to know the end of one and the beginning of the next. I just weave in 2 picks of a contrasting cotton.

When I take my work off the loom, I take it straight to my sewing machine. I sew a straight stitch at either end to secure the weft. Then I will sew a straight stitch on either side of the contrasting threads. I’ll cut all ends leaving 1” or so hanging and trim the extra warp again, leaving about a 1” fringe. I do not cut my towels apart yet.

Next, it’s bath time. Tea towels and dish cloths are meant to stand up to hard wear. They get thrown in hot water and soap for a regular cycle, then dried on high.
Next comes pressing, which can be a whole post on its own. Pressing is literally pressing the iron on the work, hold for 15 seconds or so then pick up the iron and move it to the next spot. Don’t iron as normal, sliding the iron back and forth across the work, as you may distort the weave (straight lines may become wavy). While pressing, trim all remaining ends flush to work and remove any remaining fringe. You won’t want to, but press both sides. Cut the towels apart by cutting between the 2 contrasting threads and remove those threads.

Now finally we get to the actual hem! Flip towel to wrong side. Turn end over about a ½” and press. Turn again and press so that the raw edge cannot be seen. I try to line up the hem so it just hits the beginning of the actual towel. Press firmly. Repeat for the other side of the towel, being sure you are working with the wrong side up. Make sure your threads line up, particularly at the colour changes.
Sew hem with a straight stitch and press once more. I love my walking foot for this task. Alternatively, you can hand sew your hem with 2/8 cotton. Give your towels a final press
Hemming is a lot of work, but a well sewn hem can make or break a towel.


Lessons Learned from Yarn
As many of you know, my 2020 weaving challenge was colour. I needed to use more of it, particularly the bright colours. I didn’t just want more colours though, I wanted confidence to put colours together. I made a ridiculous number of tea towels. 2020 became the year of tea towels. Tea towels act as a perfect palette for mixing colours and if I wove an ugly tea towel, well, that would be one more tea towel for my kitchen! As it turned out, each one was my favourite, until I wove the next one!

As many of you know, my 2020 weaving challenge was colour. I needed to use more of it, particularly the bright colours. I didn’t just want more colours though, I wanted confidence to put colours together. I made a ridiculous number of tea towels. 2020 became the year of tea towels. Tea towels act as a perfect palette for mixing colours and if I wove an ugly tea towel, well, that would be one more tea towel for my kitchen! As it turned out, each one was my favourite, until I wove the next one!
Challenging ourselves is good. There were times however, when I needed a changeI needed something simple yet beautiful. Something I could do without thought and just allow my mind to be filled and soothed by the softness of the yarn and the richness of the colour. The kind of weave that allows me space to think, to process and to just be at peace in the moment. And that’s what we are looking for in our crafts isn’t it? Our craft grounds us so that when we go back into the world we can go peacefully, and bring that peace to others. We may not like what is happening around us but we can face it with calm determination knowing that our outward circumstances cannot rule our hearts. Whatever happens in the world, we can march out and meet it with the same patience we untangle a stubborn knot.
Which leads me to today’s post. I’ve learned a lot from yarn. In fact, weaving, or any craft involving yarn, can teach us much about how to live life.

1. Never fight the yarn
Knots happen. They seem to happen most often in the really expensive yarns. You know, the skeins you bought because you loved them so much but now you’re afraid to use? Those ones, they love to knot. Also, mohair. Untangling knots is a slow, sometimes tedious activity. But we all know that the looser we hold the yarn the easier it is to untangle. Once a knot gets pulled tight to can be impossible to untie. The best way to sort a knotty problem is to patiently, gently, tease the threads apart and always move in the same direction as the yarn. Gradually work away at the little knots, one at a time and the big snarl goes away. Keep your hands and your heart soft.
2. A little tension is good…too little and you create a mess, too much and things begin to crack.

Tension (or stress) is good, but not too much. A yarn under tension will not tangle. That’s why we warp and weave under tension. Just the right tension and everything works the way it should. Let things relax too much and you get a tangled mess; too much and things begin to break. Don’t be afraid of a little tension in your life. It will help keep you moving forward. And when things get to be too much, take a hot bath…hot baths relax everything!
3. Listen to the yarn…you cannot expect yarn to be what it was never meant to be.
Some yarns are stretchy, some are fuzzy, some are a little prickly. Some yarns work as warp and some just won’t. Take time to get to know your yarn. A prickly yarn will always be prickly, don’t try to make it be a soft neck warmer. Definitely don’t make a loose bulky yarn act like warp. Forcing yarns out of their comfort zones a little might yield some fabulous results…taking them too far can ruin something that might have been beautiful. Approach each project with an open mind, willing to listen and try something different if need be.

4. Don’t write off a yarn because of one bad experience.
Some yarns require a little more patience than others. Mohair for example. Mohair makes for delicate, airy wraps but many avoid it as warp. It is sticky, it is a challenge, but treated with just a little extra care it can work. A wider sett and just a little extra patience brings out the best in even the stickiest mohair. Then there’s boucle. Winding boucle on a rigid heddle requires a little more attention: even under tension it likes to tangle. But winding can be done easily by slowing down and “snapping" small bouts of warp as you crank and yank. Just a little bit of the right attention at the right time can make all the difference in the world!
I believe we all learn life lessons from whatever crafts we engage in. What are some of the things you’ve learned from your chosen craft?

Pick-Up Sticks will Explode Your World
I’m a big fan of plain weave. It is perfect for so many projects…hand painted warps shine, stripes in tea towels stand out and for a purely meditative weave, nothing beats plain weave. But have you tried pick-up sticks? They will explode your weaving world!
Pick up sticks weaving
I’m a big fan of plain weave. It is perfect for so many projects…hand painted warps shine, stripes in tea towels stand out and for a purely meditative weave, nothing beats plain weave. But have you tried pick-up sticks? They will explode your weaving world!
What are pick-up sticks? Essentially, they are just like stick shuttles except they have rounded ends, or a point. The pointed end makes it easy to pick up some threads and go under others. When inserted pick-up sticks create an extra shed (or 2) so it’s possible to do more than plain weave. (If you don’t have any pick-up sticks shuttles work too)
There are 2 ways to insert pick-up sticks.

1. Place the heddle in the down position, this brings all the ends in slots to the top. Stand behind the loom slide the point over and under the threads as the pattern directs. It might be over 1, under 1; over 2 under 1; over 5, under 5, or any other combination.
2. Place the heddle in the down position. Working in front of the reed place the pick-up stick as the pattern directs. Turn the pick-up stick on its edge to raise up the threads on top, slide a second pick-up stick under the raised threads behind the reed.
I always use method 1 but my books all use method 2. Method 2 works well for those with back or neck problems who don’t want to lean over the back of their loom. Here’s a video because it’s so much easier to see than write!
Sometimes it can be difficult to see exactly which threads to go over and under. If the warp is dark, slide a white piece of paper in the shed after placing the heddle in the down position. If the warp is light, use a dark piece of paper.
Now that the stick is in place you have 2 new sheds to use! (Remember the shed is the space the shuttle slides through).

Weft floats
1. Place the heddle in the neutral position. Slide the pick-up behind the heddle and flip it on its side. When the yarn goes through this shed you will see weft floats.
2. Place the heddle in the up position. Slide the pick-up stick behind the heddle leaving it flat. This will create warp floats.
And that is all there is to weaving with pick-up sticks! And this is only the beginning! You can use multiple pick-up sticks to create incredibly complex patterns. Patterns using only 1 pick-up stick are simple, the stick can stay in place the entire weave. With multiple sticks they usually need to be removed and replaced each repeat. That’s when you might want to start using string heddles. (But that’s for another post!)
If you think you’re ready to try pick-up sticks, here’s a link to a pattern I use to teach beginner pick-up weaving complete with video links. https://www.therogueweaver.com/new-products/malabrigo-waffle-weave-scarf
Happy Weaving!
New Year, New Weavers
Welcome to a New Year! From what I’ve seen on social media many are embarking on weaving! I know you won’t regret it!! As a weaving instructor I see many new weavers and weavers who want to improve their weaving. There is lots of advice I could give, but today I’m going to keep it short and sweet: don’t beat so hard! That’s it.

Welcome to a New Year! From what I’ve seen on social media many are embarking on weaving! I know you won’t regret it!! As a weaving instructor I see many new weavers and weavers who want to improve their weaving. There is lots of advice I could give, but today I’m going to keep it short and sweet: don’t beat so hard! That’s it.

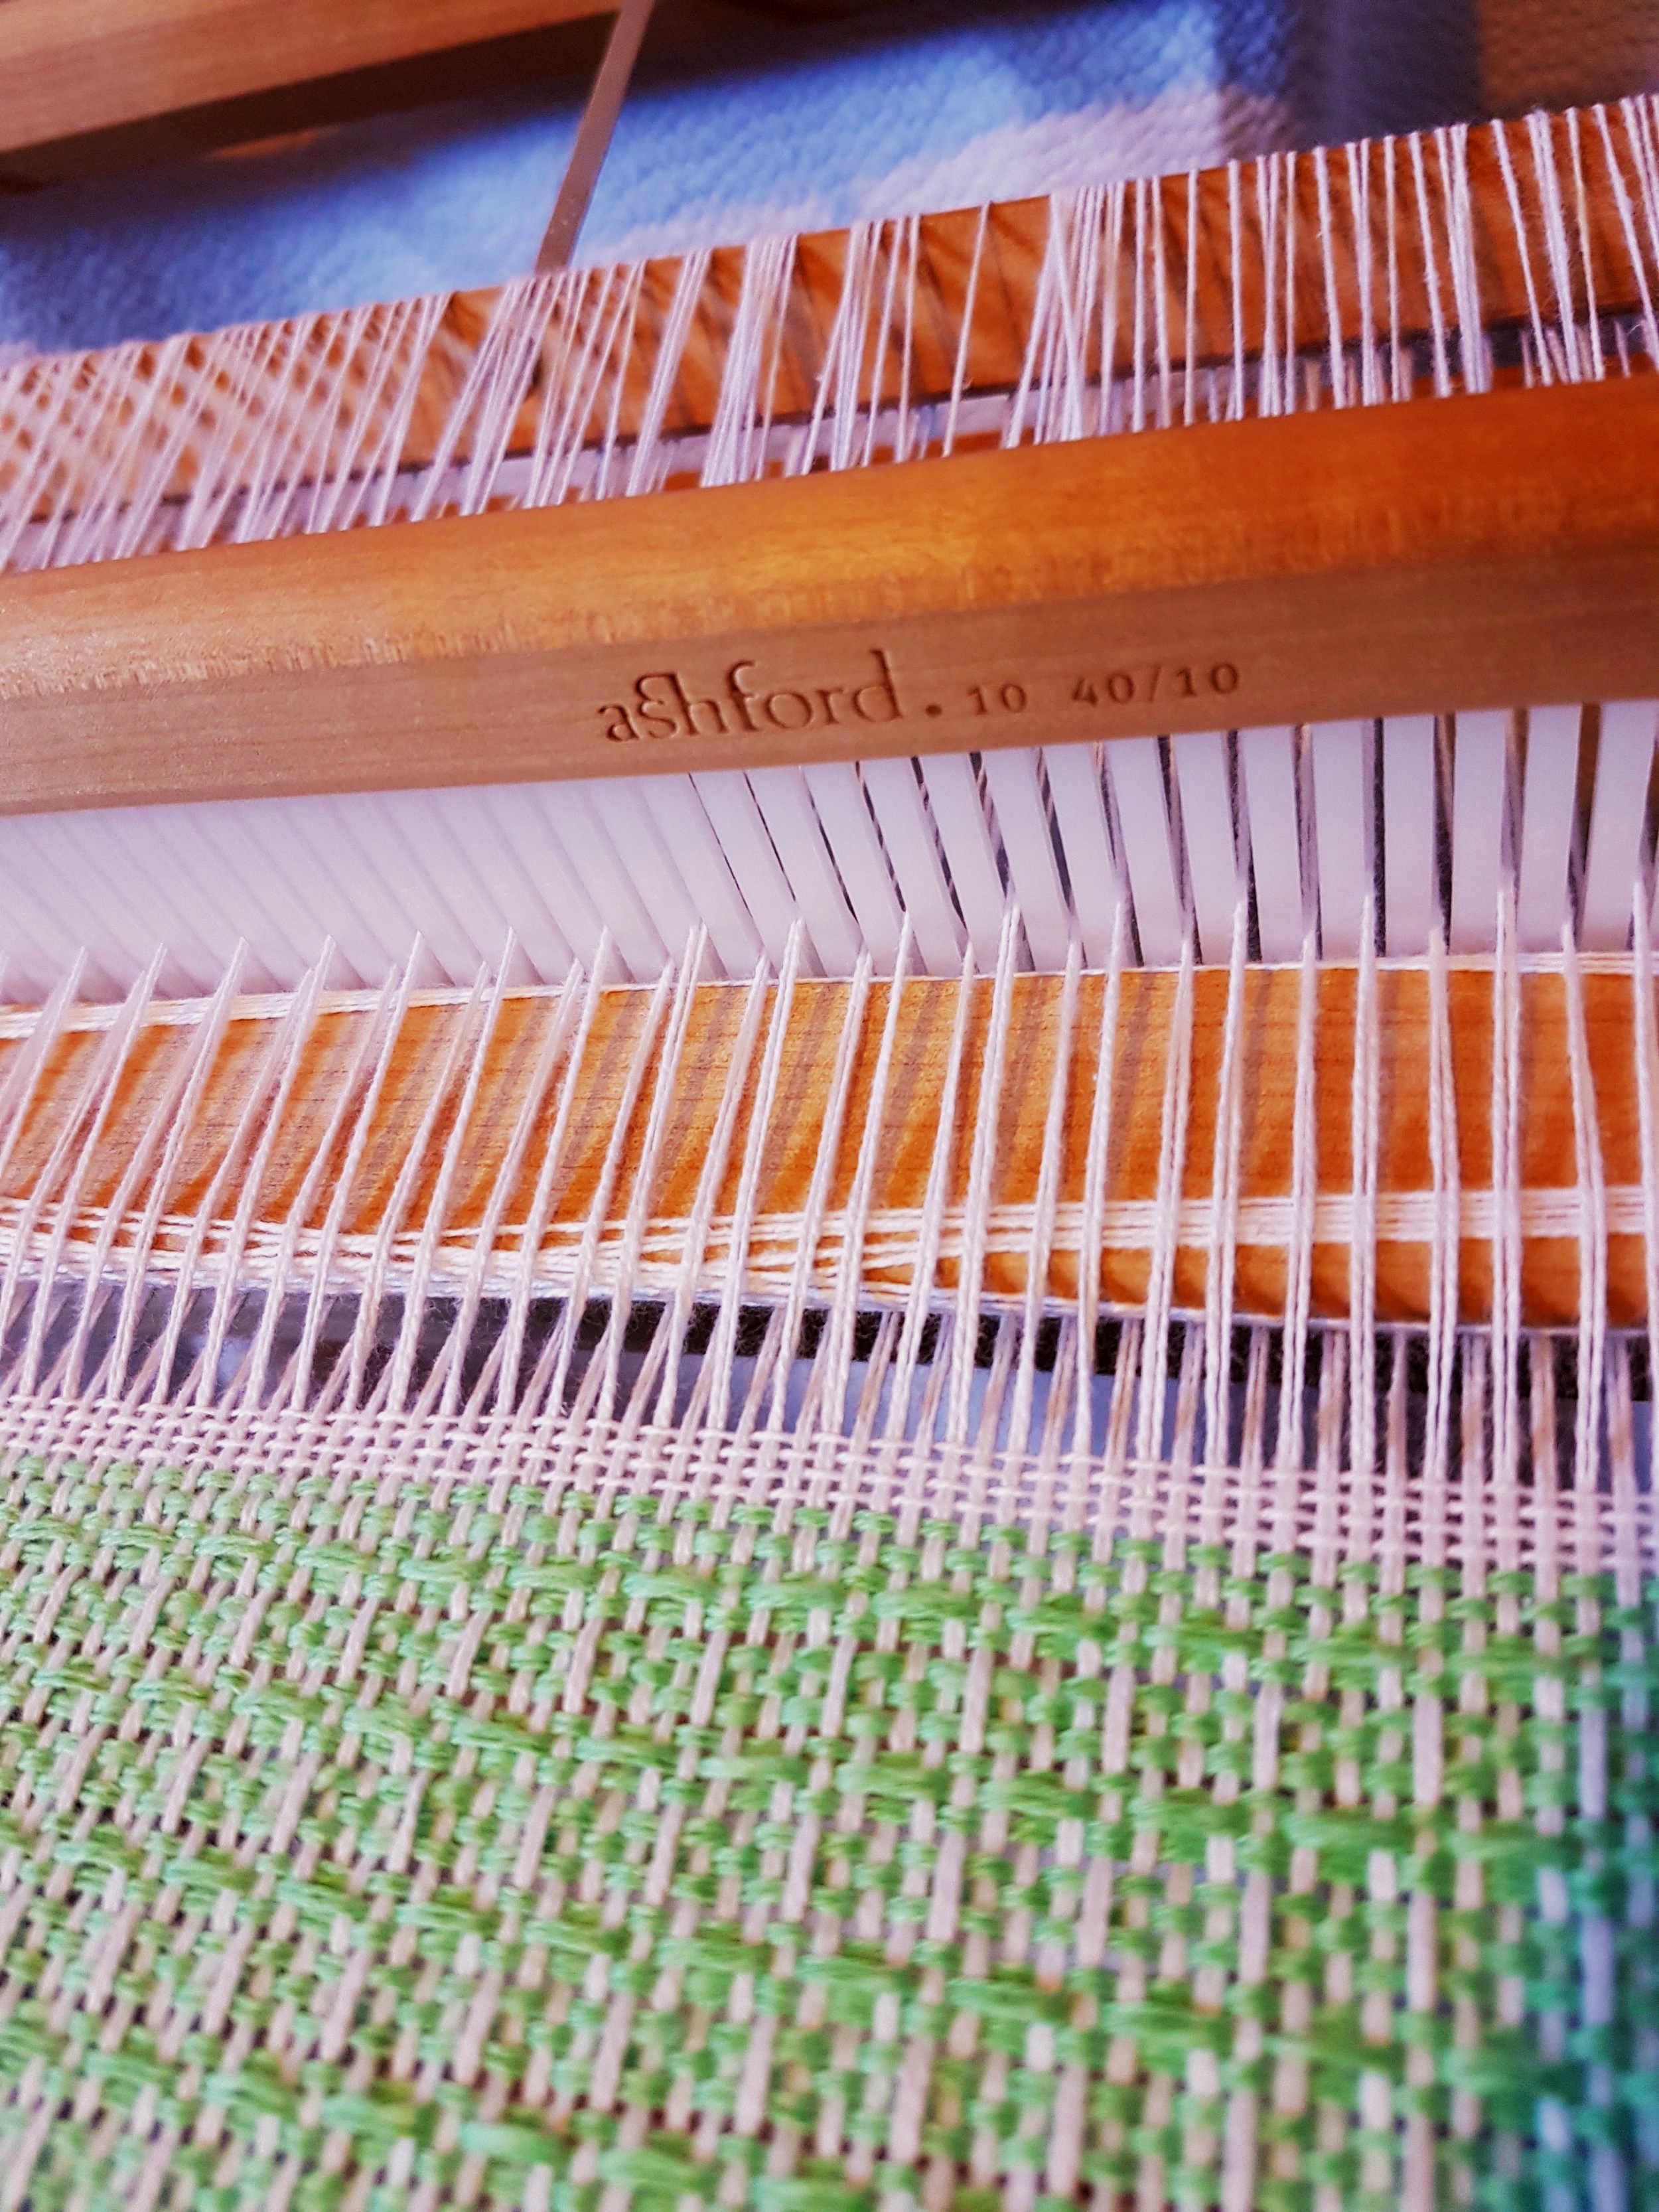
This is a weft-faced fabric-meant to be dense with no warp showing
Experienced weavers know that what they see on the loom is not the fabric that will come off the loom and is not the fabric that will emerge after finishing. New weavers try to make the fabric on the loom look like the fabric they want when it comes off the loom. So they beat. Really hard. The weft is pressed so tight that nothing is getting through that fabric. When it comes off the loom and is finished a very dense stiff fabric results (and they have used way more yarn than they anticipated, or the pattern called for). I know this from personal experience!
Here’s the non-technical theory behind weaving. When you weave, the warp is under tension (stretched out). This allows the fibres to move up and down easily and create nice sheds for the shuttle. When the fabric (it’s actually called a web at this point) is cut off the loom, all the tension is released. So if you wove 80” on the loom, it might only measure 72” off the loom as the fibres go back to their natural relaxed state. This will vary depending on the fibre.

Weaving on the loom-note the holes
After you have taken the work off the loom, it takes a hot bath. This relaxes the fibres even more, and with agitation, fulling can occur. Fulling draws the fibres closer together creating a stable fabric. So now your 72” piece might only measure 65” (again, this will vary depending on the fibre)
In order for this to happen, the fibres need to have room to relax and move.

A ruler works too!
Here’s a couple tips to help you out:
1. Keep a tape measure handy. A balanced weave (good for beginners to practice) will mean that you have the same ppi (picks per inch) as epi (ends per inch). So if I am weaving a scarf on a 7.5 dent reed I should have 7.5 weft threads per inch of weaving. Check you work often with the tape measure. Especially when you are coming back after a break.

This is the same project as above after finishing-no holes!
2. Pay attention to how you draw your heddle forward. If the heddle is tilted towards you, you cannot see the weft being pressed into place. If you tilt it a little away from you, you have a great view of what is going on and have a little more control. You should be able to see through your work easily. Here’s a little video https://www.instagram.com/tv/CI6xZN-JWLQ/?utm_source=ig_web_copy_link
I hope this is helpful to the new weavers out there! Follow me on facebook or Instagram to find out when new blog posts are out. This year I plan to cover some beginner tips (things like edges, pick up sticks, and project planning) as well as delve deep into double heddle weaving, and, just because I can’t control myself, there will be some inkle weaving, tablet weaving and floor loom weaving. I’d also love to cover topics you are interested in, so if there is something you are looking for, please let me know!

Mohair for Warp?!
I’m on a few weaving groups on Facebook as well as following a number of rigid heddle weavers on Instagram. As I read the posts I learn a lot, some I agree with, some not so much. One idea that seems to be coming up a lot lately is mohair. Specifically, that one should not use mohair for warp. I must disagree!

I’m on a few weaving groups on Facebook as well as following a number of rigid heddle weavers on Instagram. As I read the posts I learn a lot, some I agree with, some not so much. One idea that seems to be coming up a lot lately is mohair. Specifically, that one should not use mohair for warp. I must disagree!
I know why weavers believe this, I’ve experienced why weavers, after 1 attempt at a mohair warp swear never again, but I love the effect of a mohair warp. I love the light airy feel. I love the drape. I love the warmth. I love how far just a little bit can go. So, here are my tips for using mohair as warp, and a free “pattern” to make your own mohair wrap.
Use the right hedd!e. Mohair is sticky. If it is too close together you will have problems. I usually use my 7.5 (for 1000m/100g) or 5 dent (500m/100g)
Place an extra shuttle or pick up stick behind the reed as follows: with heddle in the down position place shuttle in the shed behind the reed. Slide shuttle as far back as possible. This shuttle will stay in the work for the entire project. I find the down shed is usually the stickiest. The shuttle helps and if it is too sticky and you can’t get a clear shed: just slide the shuttle forward, flip it in its edge and voila!
Be prepared to spend extra time. Weaving with mohair does require a little extra patience. You will need to check to ensure the shed is clear before passing the shuttle through. You will probably spend time hand picking some threads apart. You may need a few s hooks to help with tension issues. You will need to be extra vigilant to ensure the right number of picks per inch.
After winding the work forward, place the heddle in the up position and spend a few minutes making sure there are no tangles behind the reed. This will make it easier to keep the up shed clear until you wind forward again.
Finally, have fun, try some lace or finger techniques. Mix and your warp, most of all, don’t be afraid, it is after all, only string!


I promised a free pattern. It’s not really a pattern because it is so easy, but here it is:

You will need a 7.5 dent reed and a mohair and silk blend (I use Zambezi by Fleece Artist/Handmaiden but Rowan Kidsilk Haze will work just as well. (Or any other mohair silk blend that is 1000m/100g)

Warp measures 100” (2.5 meters) Warp as wide as you like or your loom can handle (1000m will warp and weft 100” x 32”) Tie on in small bundles. I like to tie little bows because they are easier to untie at the end. Plus, they are so darn cute!
Weave at about 6 picks per inch. It really looks like a window screen as you are weaving!! (remember the tips above)

Hemstitch the ends in bundles of 4, alternatively, or if you forget to hemstitch, knots in bundles of 4 look like little beads (ask how I know!) Don’t worry about the spaces between bundles…they will wash out, I promise!
Weave until you can weave no more (about 84”)
Cut off the loom and tie fringe in large loose bundles to prevent tangling. Soak in very hot water (I use my washing machine). Spin out the water and dry on high heat for 5 minutes. Untie bundles and press with a hot iron set for steam. Trim ends and enjoy!
PS If you would like to order an already made wrap, please contact me!
Keeping Things Simple
In weaving, as in life, is can be tempting to make things much more complex than they need to be. At least for me. I find keeping things simple can get a little boring. Why do the simple thing when you can do the much more complicated thing? This philosophy has been the primary contributor to numerous unfinished projects in my life. The thing about complicated though, is that as you progress, the complexity can grow exponentially. Especially if you are just working from ideas in your head! It’s taken a long time, but I’m beginning to learn that sometimes, the simplest thing is really the best.

In weaving, as in life, is can be tempting to make things much more complex than they need to be. At least for me. I find keeping things simple can get a little boring. Why do the simple thing when you can do the much more complicated thing? This philosophy has been the primary contributor to numerous unfinished projects in my life. The thing about complicated though, is that as you progress, the complexity can grow exponentially. Especially if you are just working from ideas in your head! It’s taken a long time, but I’m beginning to learn that sometimes, the simplest thing is really the best.

Each summer Interweave puts out a call for submissions for Little Looms, a special edition of Handwoven and a magazine especially for rigid heddle, inkle and pin looms. I’ve submitted a number of pieces and have had three pieces accepted. When I choose which pieces to submit, I think about the complexity of the project. Not because I want to show off but because I want to show what a rigid heddle can do and encourage people push the limits. I was very surprised and pleased to see my Mermaid Wrap on the front cover. Particularly as its’ submission was an after thought.

This past summer I sent in a double weave blanket, a log cabin scarf, a twill poncho and a 3/1 lace checkered scarf. All are rather complex patterns. As I said, submitting the Mermaid Wrap was really an after thought. I love the scarf, it is so beautiful but, I thought, too simple! I didn’t do anything; the yarn did all the work. I was convinced to send it in after seeing the cover of the Handwoven May/June 2018 edition. The front cover features a gorgeous travel wrap by Debra Jarchow…in plain weave. So simple yet so gorgeous. So, I sent it in and was pleasantly surprised when it was chosen (along with my Classy scarf with 3/1 lace).

Quiet Sabri
Lesson: just like people, yarns have voices and personalities. Some yarns want to fade into the background and are happy to let the pattern, texture or another yarn shine. Other yarns have a big personality. They want (or need) to be the centre of attention. This is shown so well in these two patterns. In the classy scarf, the Sabri yarn by Illimani, is lovely. It has an incredible drape but is understated. The texture draws the eye more than the yarn itself. Sabri is a quietly confident yarn, quite content to be the supporting actor to lace. Handmaiden’s Maiden Hair on the other hand, draws every eye as soon as it walks into the room. Trying to pair it with another attention seeker would be disaster!
In a way, a weaver is like a movie director with the yarn as characters. Our job is to cast the right characters and show them to their best advantage so that even complicated looks simple. Sometimes we must be quiet and let the yarn speak.

Maiden Hair steals the show!
A Weaving Do Over
Sometimes the only way to learn is try and see what happens. A favourite phrase from me to my children as they were growing up was, “what is the worst that can happen?” They found it a particularly unhelpful bit of advice. It certainly isn’t advice suitable to every situation, but for the little things it can help keep things in perspective. I know most of us worry a lot. And worry can stop us from trying something that we might really regret later. So, thinking about what the worst thing that can happen can spur us on. If we can cope with the worst-case scenario, we should go for it! (Besides, the worst-case scenario hardly ever happens!)

Sometimes the only way to learn is try and see what happens. A favourite phrase from me to my children as they were growing up was, “what is the worst that can happen?” They found it a particularly unhelpful bit of advice. It certainly isn’t advice suitable to every situation, but for the little things it can help keep things in perspective. I know most of us worry a lot. And worry can stop us from trying something that we might really regret later. So, thinking about what the worst thing that can happen can spur us on. If we can cope with the worst-case scenario, we should go for it! (Besides, the worst-case scenario hardly ever happens!)

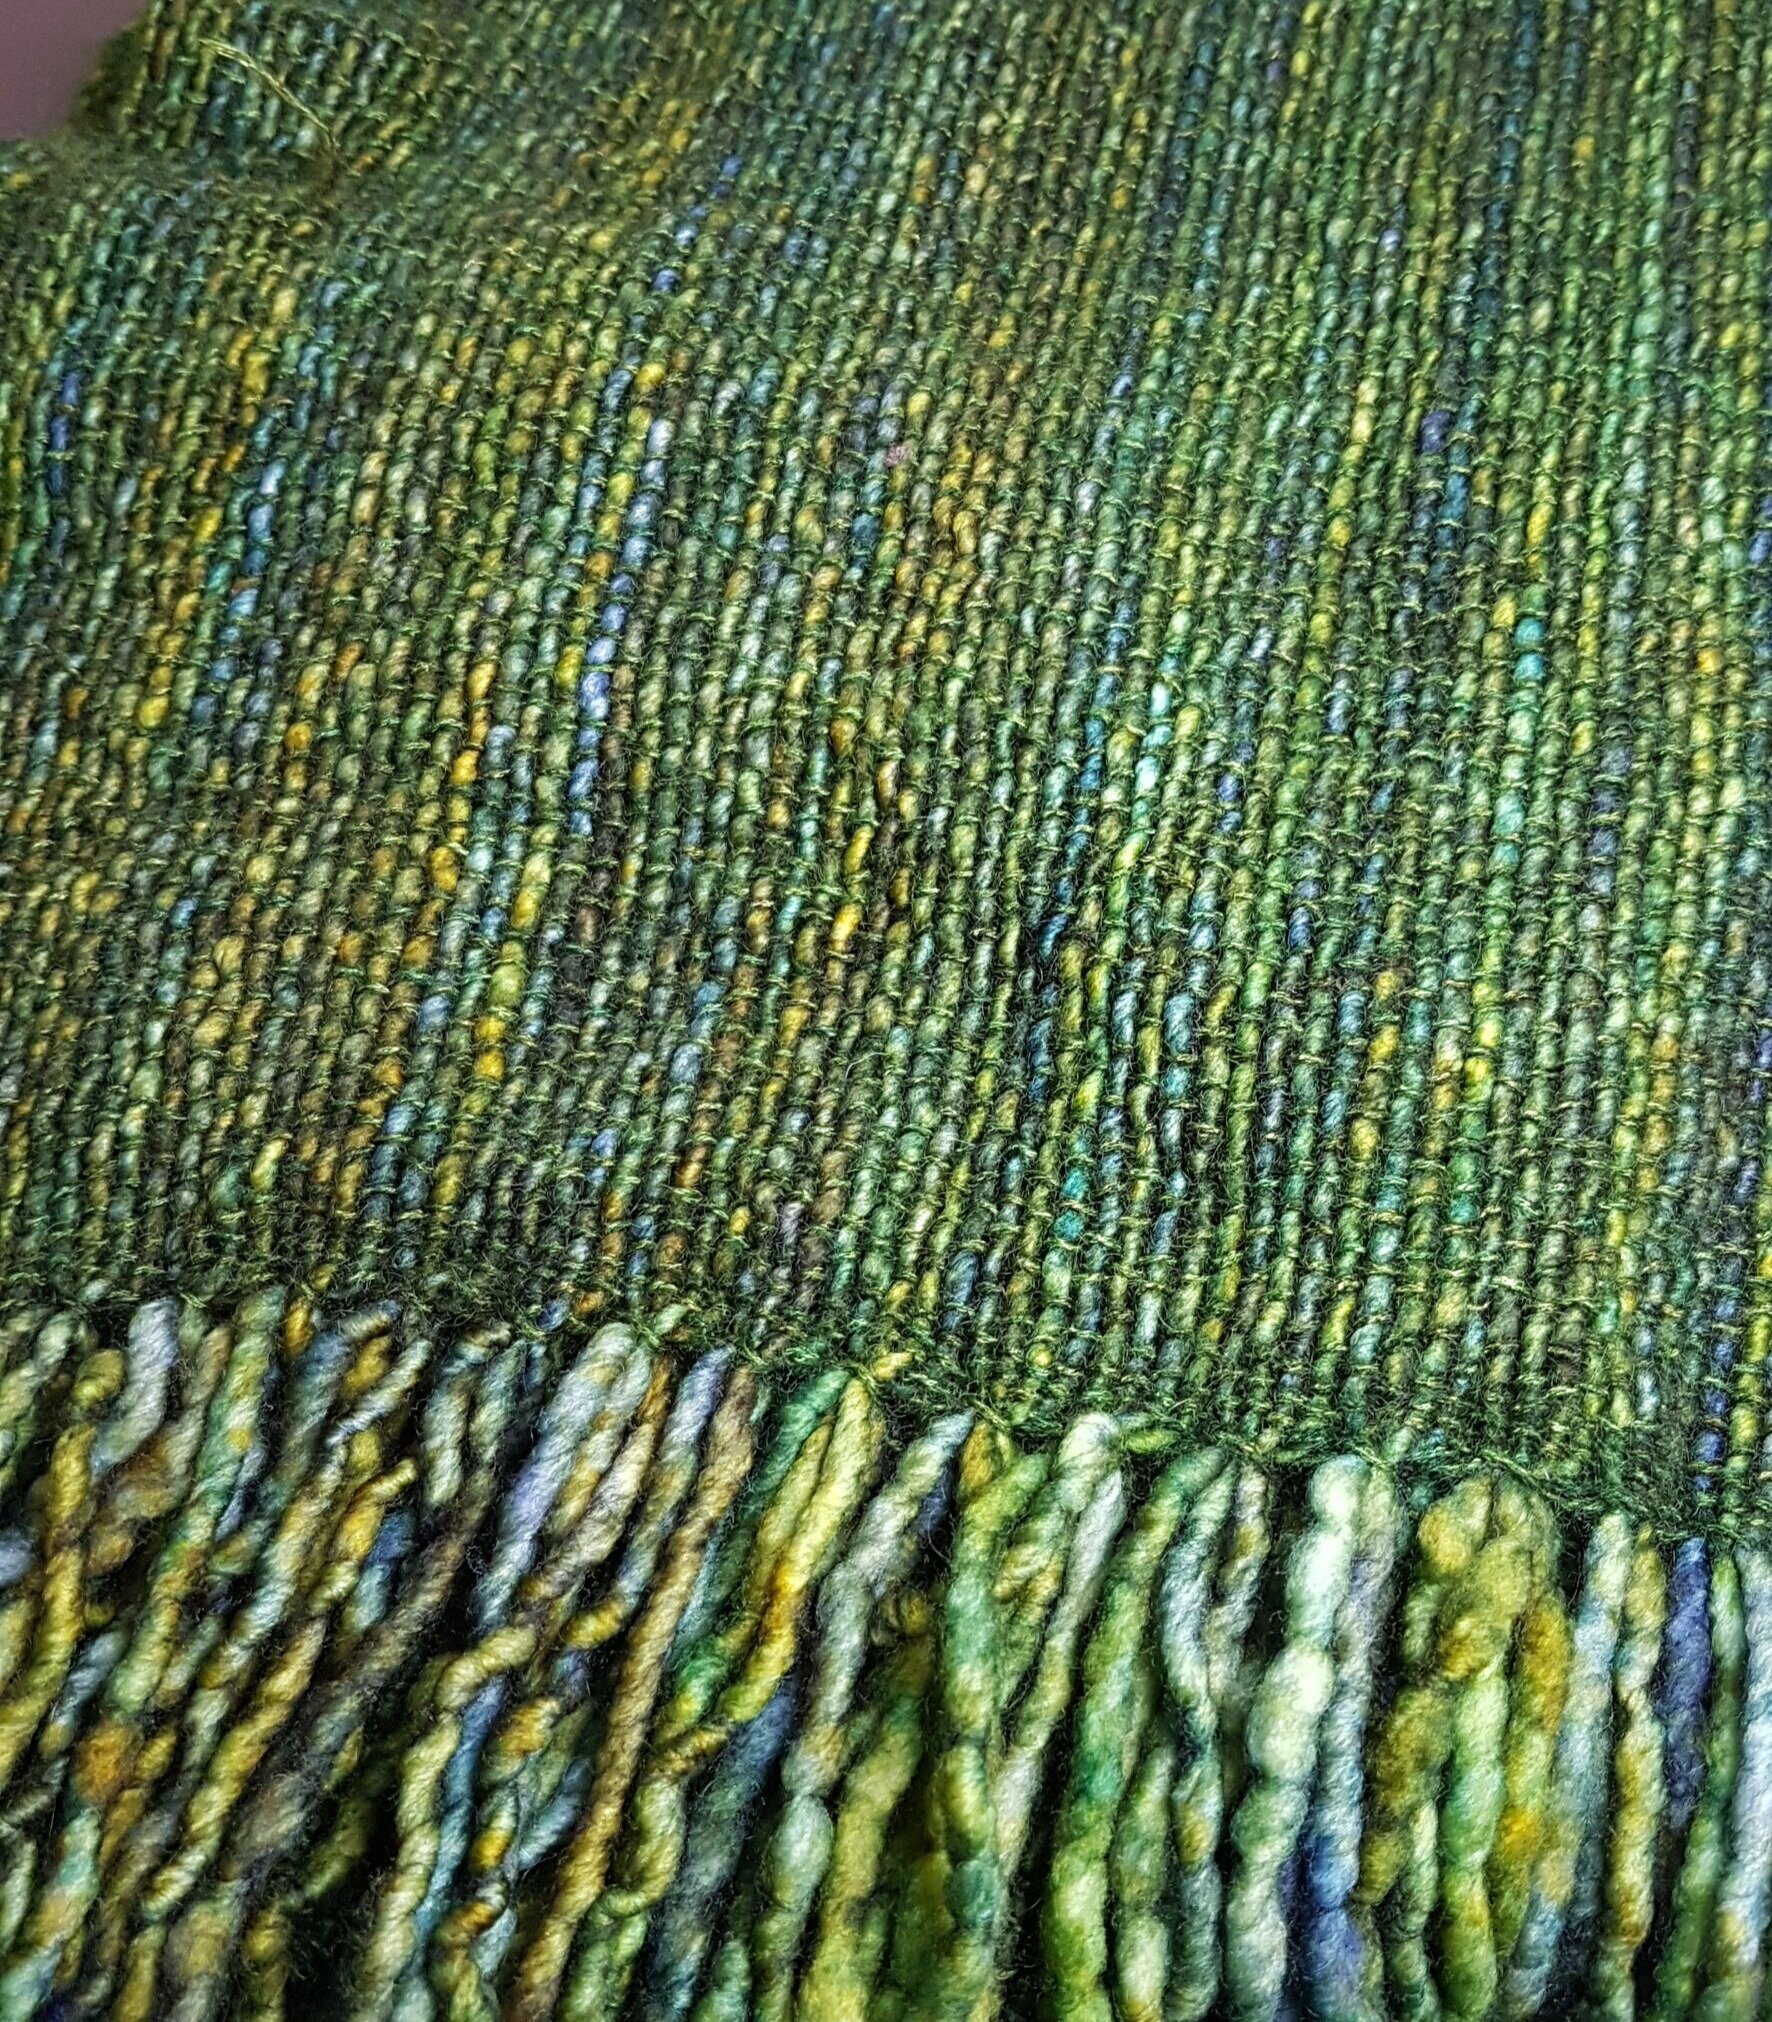
The thing about weaving is that if it doesn’t work you have only lost some string and time. And, you can always have a do over. Almost 2 months ago I did a post ab )out Boucle and Chenille. Click here to see post: www.therogueweaver.com/blog/2019/4/5/boucle-and-chenille It was a post about risks and me not liking them. In it I mentioned that chenille tends to worm. Here’s an update on my chenille towels. I have used these 2 towels exclusively as hand towels in the bathroom. We have 4 people living in the house, 2 of whom work from home so are home (obviously) all day. These towels see a lot of use and have each been washed at least once a week, sometimes twice. The plain weave towel is standing up reasonably well. It has no worming, but it seems to feel a little thinner and it is quite stretchy. The waffle weave, well, you can see from the pictures that it hasn’t stood up so well. However, it has only wormed badly at one end…the end I started weaving from and wasn’t beating as hard. The other end has worn quite well. (That was sett at 10 epi and 15 ppi)

Overall however, I think they can be better. I’ve done a little more research and actually found a floor loom pattern that uses chenille. It recommends a sett of 16 epi for a scarf. So, I went back to my loom: I really want chenille bath towels. I could have been patient and waited until I had my current project off the floor loom, but I also really want to do these on the rigid heddle. I have a 15-dent reed but I’m really not sure that the chenille would fit through the holes, so I used my 12.5 instead.

Again, I wove 1 in plain weave and the other with warp floats. As you can see from the picture at the top and bottom, I also alternated my warp floats hoping this would give a little more structure and help reduce worming. Since using pickup sticks would require replacing it every 5 picks, I used string heddles for the first time. At such a tight sett and fuzzy yarn, it was a challenge but so worth it! I’ve washed these and just need to hem them. The plain weave feels like velvet, still a little thin for a bath towel but lovely. The one with warp floats? Oh. My. Goodness. It feels so good: soft and velvety. So much nicer than the purple waffle weave. Which I think is odd. The waffle weave, at a looser sett feels a little stiff, but this new one has no stiffness at all, just velvety softness! Now I just need to hem them and put them to use. If they wear well, I’ll make some bath towels, if not, I guess it will be back to the loom!

Right side and wrong side together
How to Nurture a Relationship that Lasts (with your Rigid Heddle) PT 4
This is my last post on this topic. So far we have looked at choosing the right loom, care and feeding of our looms and our own attitudes. This week is about developing ourselves. Our rigid heddles have so much potential but if we don’t develop ourselves, we will never begin to unlock that potential.

This is my last post on this topic. So far we have looked at choosing the right loom, care and feeding of our looms and our own attitudes. This week is about developing ourselves. Our rigid heddles have so much potential but if we don’t develop ourselves, we will never begin to unlock that potential.
How can we develop ourselves?
1. Read books, magazines and articles.

My favourite rigid heddle weaving books are: The Weaver’s Idea Book by Jane Patrick and Inventive Weaving on a Little Loom by Syne Mitchell. Both contain patterns, but what I like best about them is the number of different types of weaving and the pictures. They cover colour and weave, mixing textures, pick up sticks, string heddles, using 2 and even three heddles and so much more!
Interweave puts out a magazine each year Little Looms (My scarf is on the front cover of this year’s edition!!) and it is filled with patterns for rigid heddles, tapestry looms and pin looms.
I love Pinterest! Search rigid heddle and there are tonnes of ideas, articles, blogs, and pictures that come up.
2. Hang out with other Weavers
Your area may have a weaver’s guild. Or maybe there is an informal group that gets together, maybe at a home or your local yarn shop. You can learn so much from talking to other people or just watching. If you can’t find weavers near you, try hanging out online. There are facebook groups that are just for rigid heddle weavers and they are a fount of information! I belong to a group called “Rigid Heddle Looms” and it has 5.5k members who are scattered all over the world. That means that anytime I have a question someone in the world is awake and can give an answer!
Sometimes you will run across people who are very adamant about “right” and “wrong” ways of doing things. Take all advice with a grain of salt. There are always multiple ways of doing the same thing. Take advice, try lots of different things then do what works for you even if it is absolutely the “wrong” way. If it gives you the end result you want, it is the right way for you. There are no weaving police!

3. Take classes
If you have the opportunity to go and take a class with a real live instructor do it! Even if it is project based and you aren’t in love with the project you will learn something. Live instructors will be able to answer your specific questions, see what you are doing and suggest easier ways, new ways or even tell you when you can skip a step! In addition you will meet other weavers, who may live near you, who will now be your friends! And they will have helpful ideas too. Don’t be afraid to ask your local yarn store if they can have a class on a specific topic (pick up sticks, double weave, colour theory…whatever) Chances are if you want it, others do too. Or if you pull a whole group together the store will (probably) happily oblige if there is an able instructor.
Online classes are excellent too. You get to learn from the best instructors. They will endlessly repeat themselves and remain cheerful. Sometimes in person classes can be overwhelming and you forget half of what you learned by the next morning, online classes can be watched over and over again.
4. Don’t be afraid to try new things
Remember, it is just string. If your project doesn’t work, it isn’t the end of the world. If you aren’t sure and can’t afford the loss try new techniques with less expensive yarn first. This helps you learn the skill, but it won’t finish the same so is only good for technique. I often try new patterns with cotton. It’s inexpensive and regardless of how it looks, I will have a usable tea towel! If you are sure of the technique but not sure how the fibre will finish buy a little extra and weave a sample.

In conclusion, developing a lasting relationship with your rigid heddle isn’t much different from developing lasting relationships with people…Take the time to get to know each other, give them what they need to thrive, don’t expect what they are unable to give, adjust your attitude when needed and work on yourself!
How to Nurture a Relationship that Lasts (with your Rigid Heddle) PT 3
We’re continuing my series on How to Nurture a Relationship that Lasts (with your Rigid Heddle). This week we are going to look at attitude and the first thing I want to say is that weaving on a rigid heddle is real weaving! I hear many people say that they have “just” a rigid heddle, like they are somehow “lesser” weavers. This is absolutely not true! A rigid heddle is a real loom that real weavers use to produce real weaving. Never put yourself or your loom down! Now, let’s look at some truths about rigid heddle looms.
We’re continuing my series on How to Nurture a Relationship that Lasts (with your Rigid Heddle). This week we are going to look at attitude and the first thing I want to say is that weaving on a rigid heddle is real weaving! I hear many people say that they have “just” a rigid heddle, like they are somehow “lesser” weavers. This is absolutely not true! A rigid heddle is a real loom that real weavers use to produce real weaving. Never put yourself or your loom down! Now, let’s look at some truths about rigid heddle looms.
1. A Rigid Heddle loom is not a “beginner” loom (although it is perfect for beginners)
While weaving on a rigid heddle may result in you also acquiring a floor loom, getting a rigid heddle because you can’t afford/don’t have the space/want to try weaving before making the investment in a floor loom/ will leave you with a desire that your rigid heddle will never be able to satisfy. Rigid heddles and shaft looms are as different as knitting and crochet. You may love one and hate the other. If a floor loom is what you really want, get one, there is one for every budget and space constraint.

I use both my 32” rigid heddle and my 36” floor loom in a 9’x8’ space.
2. Expect great things from your rigid heddle and it will deliver
This is a double weave using a pick up on the top layer, plain weave on the bottom
Rigid heddles can do far more than plain weave. Add in pick up sticks, string heddles, multiple heddles and varident reeds and the possibilities are endless. A rigid heddle can do patterning that just can’t be done even with a multi-shaft loom as well as twill, deflected double weave, overshot krokbragd, and even tapestry weaving. Additionally, yarns that aren’t suitable for the high tension of a floor loom can work very well on the rigid heddle. Rigid heddles are perfect for single skeins of hand painted yarns as there is so little waste. And you can weave yardage to sew with! Weaving can sometimes take more time than on a floor loom but the ease and speed of warping more than make up for it.
3. Don’t expect the loom to do what you should be doing

Fixing a threading error
It is rarely the fault of the loom when projects don’t turn out as expected. Warped well a rigid heddle has a good shed (big enough to use a boat shuttle with plain weave, though I don’t always recommend using one). Be sure to use the right reed for the yarn (a floor loom allows for flexibility using the reed substitution chart, but not a rigid heddle). If you want nice selvages you will have to practice. Tension is important. Poor tension results in a less than fun weaving experience. As mentioned in a previous post, use the best fibre you can afford…a bad fibre cannot produce good fabric. I’ve only cut off projects before completion twice. Once because I used yarn with too much stretch to get a good tension (because it was cheap enough to experiment with and I didn’t know better) and the second because I had poor tension due to mistakes I made warping. Nothing that has ever gone wrong (fabric too dense, too loose, ugly etc) has ever been the fault of my loom.
To sum up, love your rigid heddle loom for what it is, not what you wish it was. Don’t overlook its’ potential: challenge it and yourself, experiment, and have fun! Below, from left to right: double weave log cabin, plain weave sewn into a shirt, twill sampler using two heddles and rosepath twill using two heddles


How to Nurture a Relationship that Lasts (with your Rigid Heddle) PT 2
Last week we discussed choosing the right loom. This week is about providing your loom with what it needs to thrive. It might be your loom’s responsibility to please you, but it is your responsibility to provide it, and you, with the proper tools and equipment. A new loom package will give you everything you need, except the yarn, to get started with basic weaving.

Care and Feeding
Last week we discussed choosing the right loom. This week is about providing your loom with what it needs to thrive. It might be your loom’s responsibility to please you, but it is your responsibility to provide it, and you, with the proper tools and equipment. A new loom package will give you everything you need, except the yarn, to get started with basic weaving. You will get a loom, a reed (some let you choose the size, most give a 7.5 or 8 dent reed) 2 shuttles, clamps, warping peg and a threading hook.

It can be tempting when starting new hobby to minimize expenses. After all, you may not like it. But I guarantee you won’t like it if you don’t have the right equipment! Trying to weave on a 32” loom without a stand will cause you physical pain and you’ll start to associate weaving with pain. Not getting the size reed to use the yarn you really want to use will leave you feeling dissatisfied with your finished products. And using poor quality fibres can create so many problems that you dread going to your loom. Skimping can sabotage a potentially beautiful relationship. Besides, for most of us it is psychologically less painful to drop $600 in one fell swoop and have everything we want/need than to be continually spending $100-150 while still feeling there is more we need to be really content.
What else should you get?

32” with stand
1. A stand is a must if you are getting a loom bigger than 24”. If you are getting less than 24” I still recommend a stand because it makes warping so much easier. If you or someone you know is handy go ahead and build your own…but remember that the designers of the stand for your loom have had lots of experience and know what height and angle is best and how to balance it so it isn’t prone to tipping!
2. Extra reeds. Think about the yarns you want to use and the projects you want to weave and get the right reeds. The 7.5 or 8 dent reeds that many looms come with are great for dk and worsted weight yarns. 10 dent for sport and fingering, 4/8 cotton, or 2/8 cotton doubled; 12.5 for fingering; and 15 for lace. At the other end, a 5 dent is good for aran/bulky and a 2.5 for super bulky. You might also consider getting 2 of the same size so you can learn double weave to either weave wider blankets, get the sett you want (2 10 dent reeds allow you to weave at 20 ends per inch) or weave twill.
3. Extra shuttles of various sizes. Just because you have a 32” loom does not mean all your shuttles should be 32”. The shuttles should be just a little longer than your project is wide. It’s just more comfortable. Using a 32” shuttle takes a lot of shoulder energy and can be tiring so if you are working on a 12” scarf, using a 14” shuttle is much more comfortable.

Pick Up Stick and Shuttle
4. Pick Up sticks…these are like shuttles except with points on the end. They make it very easy to create complex looking patterns.
5. A couple good books and classes. I’m a fan of in person classes over online classes simply because a live instructor can personalize to you specifically. S/he can see what you are doing and give tips specific to you. Plus you will learn from the others in the class and perhaps meet new, local, friends! That being said, online classes do have benefits…you can do them at your convenience, repeat as many times as you want and have very experienced teachers.
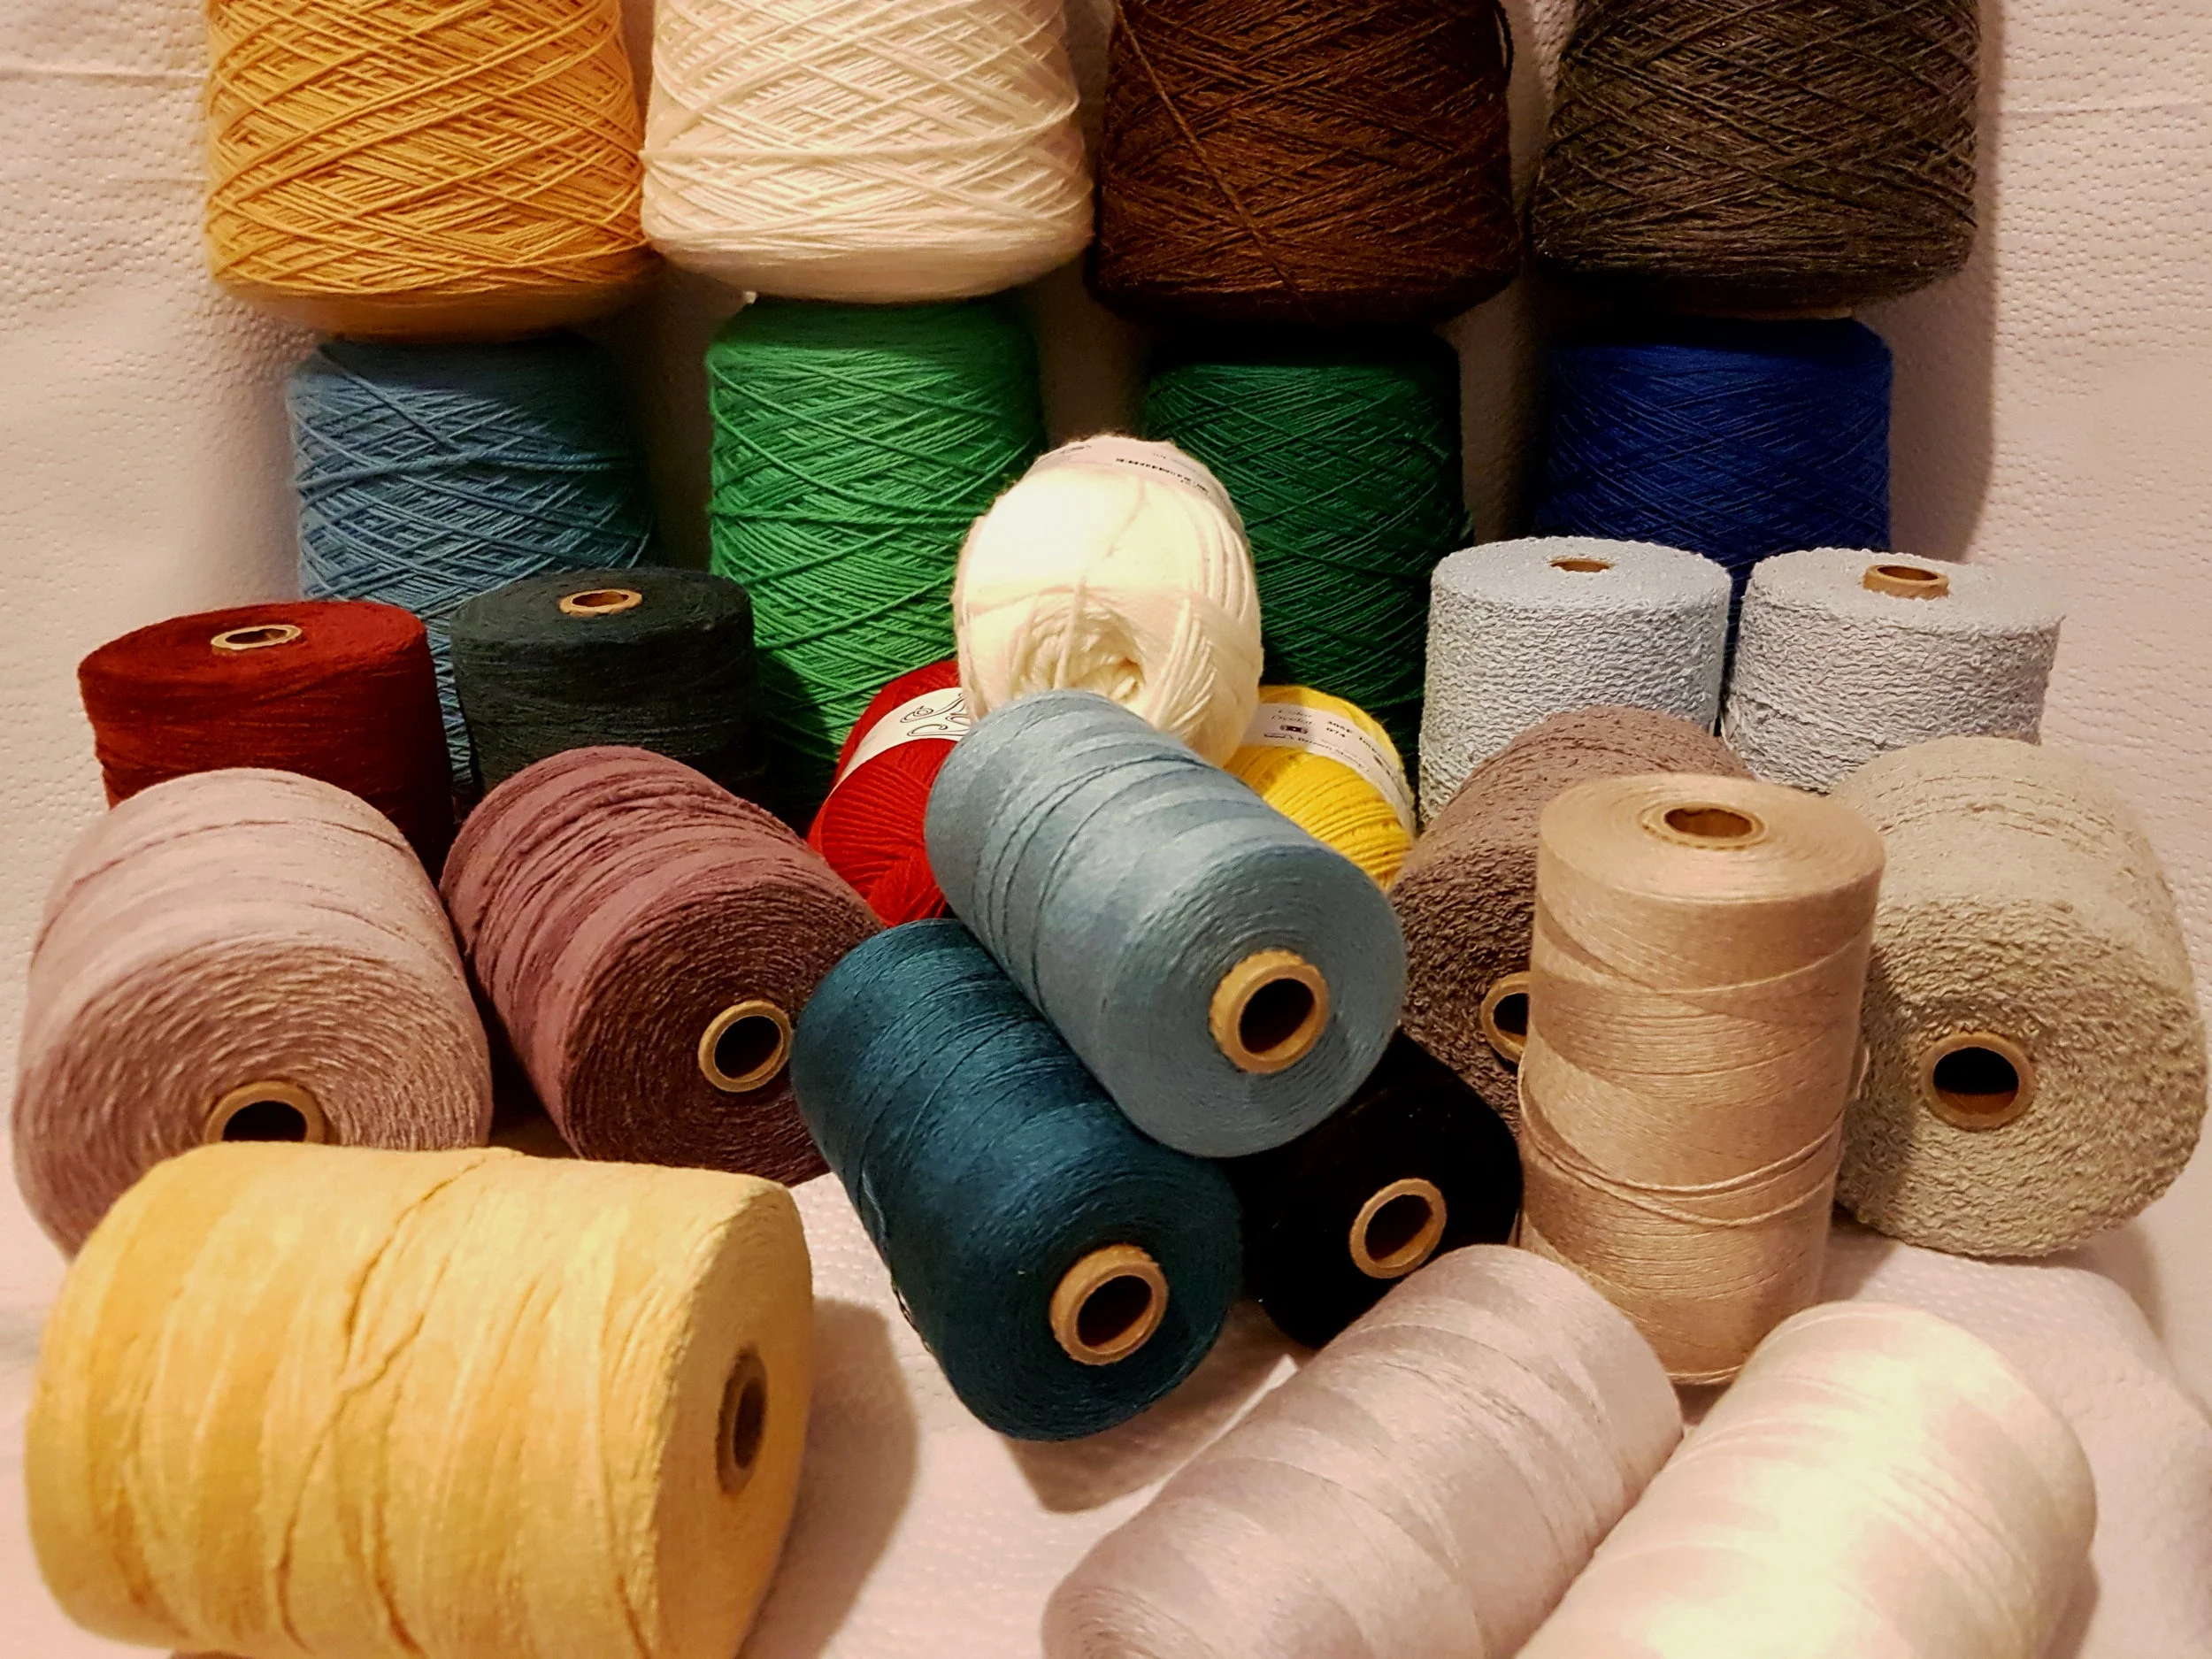
6. Good quality fibres that you love! Life is too short to use ugly yarn. This is your hobby and you should enjoy every moment spent at your loom. Don’t sabotage a potentially beautiful relationship by using poor quality yarn because it’s cheap. Get the best you can afford, something that feels nice in your hands and gives you pleasure just to look at. Even for beginner projects, maybe especially for beginner projects! Your first projects may not be perfect but if you hate the yarn, can’t stand the feel if it or it's a mess on the loom you will begin to associate weaving with negative emotions. First impressions are important!
Fun and Handy Extras
There are always a few things that you don’t really need, but they definitely add to the ease and enjoyment of weaving.

Varident Reed
1. Varident reed: this is pretty cool. It’s a reed with pieces of reeds of all sizes that you can put together in the order you want to use any weight yarn in one project. Great for using up all those little bits of leftover yarn.

Fringe Twister
2. Fringe twister: another very cool gadget. Just clip, turn and tie and you have a beautiful twisted fringe. Untwisted fringes tend to look a little tattered over time.
3. Extra warping sticks: if you plan to weave lots of yardage, these will come in very handy.
4. A portable light that will clamp onto your loom. It’s always nice to have good light!
Just a quick note about buying used looms. This is a great way to get a fantastic deal. Before you buy, make sure all the pieces are there, that the loom holds tension and that you can get parts if you need them (extra reeds, double heddle kit if it isn’t built in, stand if you want one etc). It’s not a deal if you can’t use it.
I hope if you are considering a loom, or are a beginner weaver, you have found this helpful. If you are not a weaver, and you’ve read this far…wow! Thanks! Here’s my words of wisdom for the week: Life is always easier with the right tools (whether it’s a skill to learn or a physical object). It’s worth learning what they are and acquiring them. So many times we “make do” and struggle, but if we used the right tool (or skill) the job would have been done faster and better, with less grief, and we might have enjoyed it! I don’t believe we need to buy everything, on the contrary I believe we should buy less. Borrow when you can, share what you have. But when you do buy, buy the right tool. You will enjoy life more!
How to Nurture a Relationship that Lasts (with your Rigid Heddle)
It’s hard starting new relationships. They take time and effort. You have to set boundaries and learn the other person’s boundaries. It can be a bit of an uncomfortable shuffle during the first little while, then suddenly it becomes an effortless dance, like you’ve known each other forever.

It’s hard starting new relationships. They take time and effort. You have to set boundaries and learn the other person’s boundaries. It can be a bit of an uncomfortable shuffle during the first little while, then suddenly it becomes an effortless dance, like you’ve known each other forever.

Building a relationship with your rigid heddle is the same. It’s hard work learning a new language, new movements and boundaries. And then, after failures, frustration, maybe even tears, everything falls into place and weaving is second nature. Over the next few weeks I’m going to give some tips and advice about how to develop a relationship with your rigid heddle that will last a life time.
Pick the right loom
When choosing a loom, you should do your homework. Just like you won’t like everyone person you meet, you won’t like every loom. While all rigid heddle looms operate in much the same way, they have distinctions. Some fold, some have permanently attached rods, others are removable. Reed sizes vary with the brand of loom. Some come finished in a choice of gorgeous finishes, others are completely unfinished.
Think about what you want to make before you choose your loom.

If all you ever want to do is weave narrow scarves with dk weight yarn a 10” Cricket by Schacht or the Ashford Samplit might be perfect for you. But if what you really want are tea towels and wraps, these looms will bring more sadness than joy. Think about the width and length of what you want to make. Sure, a 16” loom with a double heddle kit can weave 32”, however if you plan to make a 32” baby blanket for every baby born to anyone remotely connected to you, you would be happier with a 32” loom right from the start.
Talk to other weavers and visit your local yarn store that carries looms.
People who weave are a great resource. We love being invited to talk about our passion (we’re used to being asked to stop talking). Tomorrow, April 27, is LYS day, here’s my plug: Local yarn stores care more about you being happy with your purchase than the amount of money you spent. Your local store might have looms you can try. You can ask about why one loom over another. Describe what you want to make and they can prescribe the right loom. If they don’t have the one you want, ask if they can get it (and ask why they don’t carry it, there might be a really good reason!) Ask about the price of accessories. Ask how easy it is to get parts. And when you buy your loom from a local yarn store you can feel great about going back to them for help and advice. In addition they may offer services such as assembling your loom, patterns, help reading patterns, choosing the right fibre for your project and whatever else you might possibly need (including advice about any life issues you might be experiencing completely unrelated to weaving) all free! And we want to see your finished pieces, honestly! We feel a little like midwives, helping dreams come to life. We love to see the end result. Please, come and brag about your projects so we can celebrate with you. And we’ll genuinely commiserate with your *ahem* not so successful projects.

Design Your Own Shawl Pt 2--Choosing the Right Reed
There are so many places you can start once you have decided that you want to make a shawl. Today we are going to start with reed size. The reed you choose determines how many ends per inch (epi) the warp has. This in turn determines the density of your final fabric.

There are so many places you can start once you have decided that you want to make a shawl. Today we are going to start with reed size. The reed you choose determines how many ends per inch (epi) the warp has. This in turn determines the density of your final fabric.

I use an ashford rigid heddle and it currently has the widest selection of reed sizes: 2.5, 5. 7.5, 10, 12.5 and 15. To my knowledge it is the only rigid heddle with 2.5 and 15 dent reeds (I could be wrong, please correct me if I am) When paired with a double heddle option the Ashford looms can achieve 2.5, 5. 7.5, 10, 12.5, 15, 20, 25 and 30 epi when doing plain weave, making it possible to use almost any yarn you could want. When you consider the change in epi when threading for twill there are even more options (2 10 dents threaded for rosepath twill produces 12 epi for example).
But what is the best option for you? How do you choose the right reed? We will stick to simple today. There are two primary methods: 1, if you have already bought the yarn and 2, if you have a specific reed size.

1. You already have a beautiful yarn that you want to use. In this case, use the wrap test to determine the epi. There are some nice tools for this, or you can use a pencil or ruler. Wind the yarn around the tool or ruler for 1 inch and count how many wraps then divide the result by 2. The result will give you a rough idea of which reed to use. In my example, there are 18 wraps per inch (wpi), divide that by 2 and I get 9. The closest size reed is 10. Notice that the yarn isn’t pressed tight together or pulled tightly around the ruler.
2. You only have a 7.5 and a 10 dent reed. In this case, the yarn you choose will depend on the reeds you have available to you. Here is a general guideline. We’ll look at other things to consider next in this post.

bulky and fingering
2.5—super bulky
5—bulky/aran
7.5—aran/worsted/dk
10—sport/heavy fingering/4/8
12.5—fingering/heavy lace
15—lace/2/8
The above methods give you a place to start. Following these guidelines will likely result in a successful plain weave project as well as work for most pick up or finger controlled techniques. But there are other things to consider.
1. Are you using a superwash or non-superwash wool?
A superwash wool is not going to full as much as a non-superwash. So if you do your wrap test and the result is between 2 reed sizes (say 8.5) the wool will determine which reed is best. For superwash choose the 10, for a non superwash the 7.5 might be just fine.
2. What is the fibre?

Bamboo and Tencel—still lots of spaces in the weave
Pure silk, bamboo or tencel for example do not full as much as wool, alpaca, llama or angora. So again, consider how much fulling you can expect from the fibre and choose your reed accordingly.
3. Is the fibre spun worsted or woolen?
Woolen and worsted spun refer to how a wool is spun (not to be confused with worsted weight) Very simply, worsted is smooth and has the air squished out during spinning, while woolen is puffier because the fibres are every which way which holds in lots of air. Woolen will full more than worsted. It will also stick more to its neighbour so a wider sett might be preferable.
4. What is the end result you want?
Again, back to the wrap test. If we get a result of 9, going up to a 10 will give a slightly denser fabric while going down to the 7.5 will give an airier, more drapey fabric. Either can work depending on what you want. If you want placemats you might want a fairly dense material. A sticky yarn, like a mohair blend, will make a lovely stable fabric at a wider sett.
So, there you go, a “few” things to consider when choosing a reed size! Next week we’ll talk about choosing the actual yarn.
Inspiration is All Around
You know you weave too much when you see weaving inspiration everywhere! I was on vacation recently. It was lovely: hot, sunny and chock full of inspiration. Mayan ruins, waves, the silky smoothness of sting rays, the exquisite patterning on the shell of a turtle. I’ve come home with so many new ideas that I hardly know where to begin.

You know you weave too much when you see weaving inspiration everywhere! I was on vacation recently. It was lovely: hot, sunny and chock full of inspiration. Mayan ruins, waves, the silky smoothness of sting rays, the exquisite patterning on the shell of a turtle. I’ve come home with so many new ideas that I hardly know where to begin.
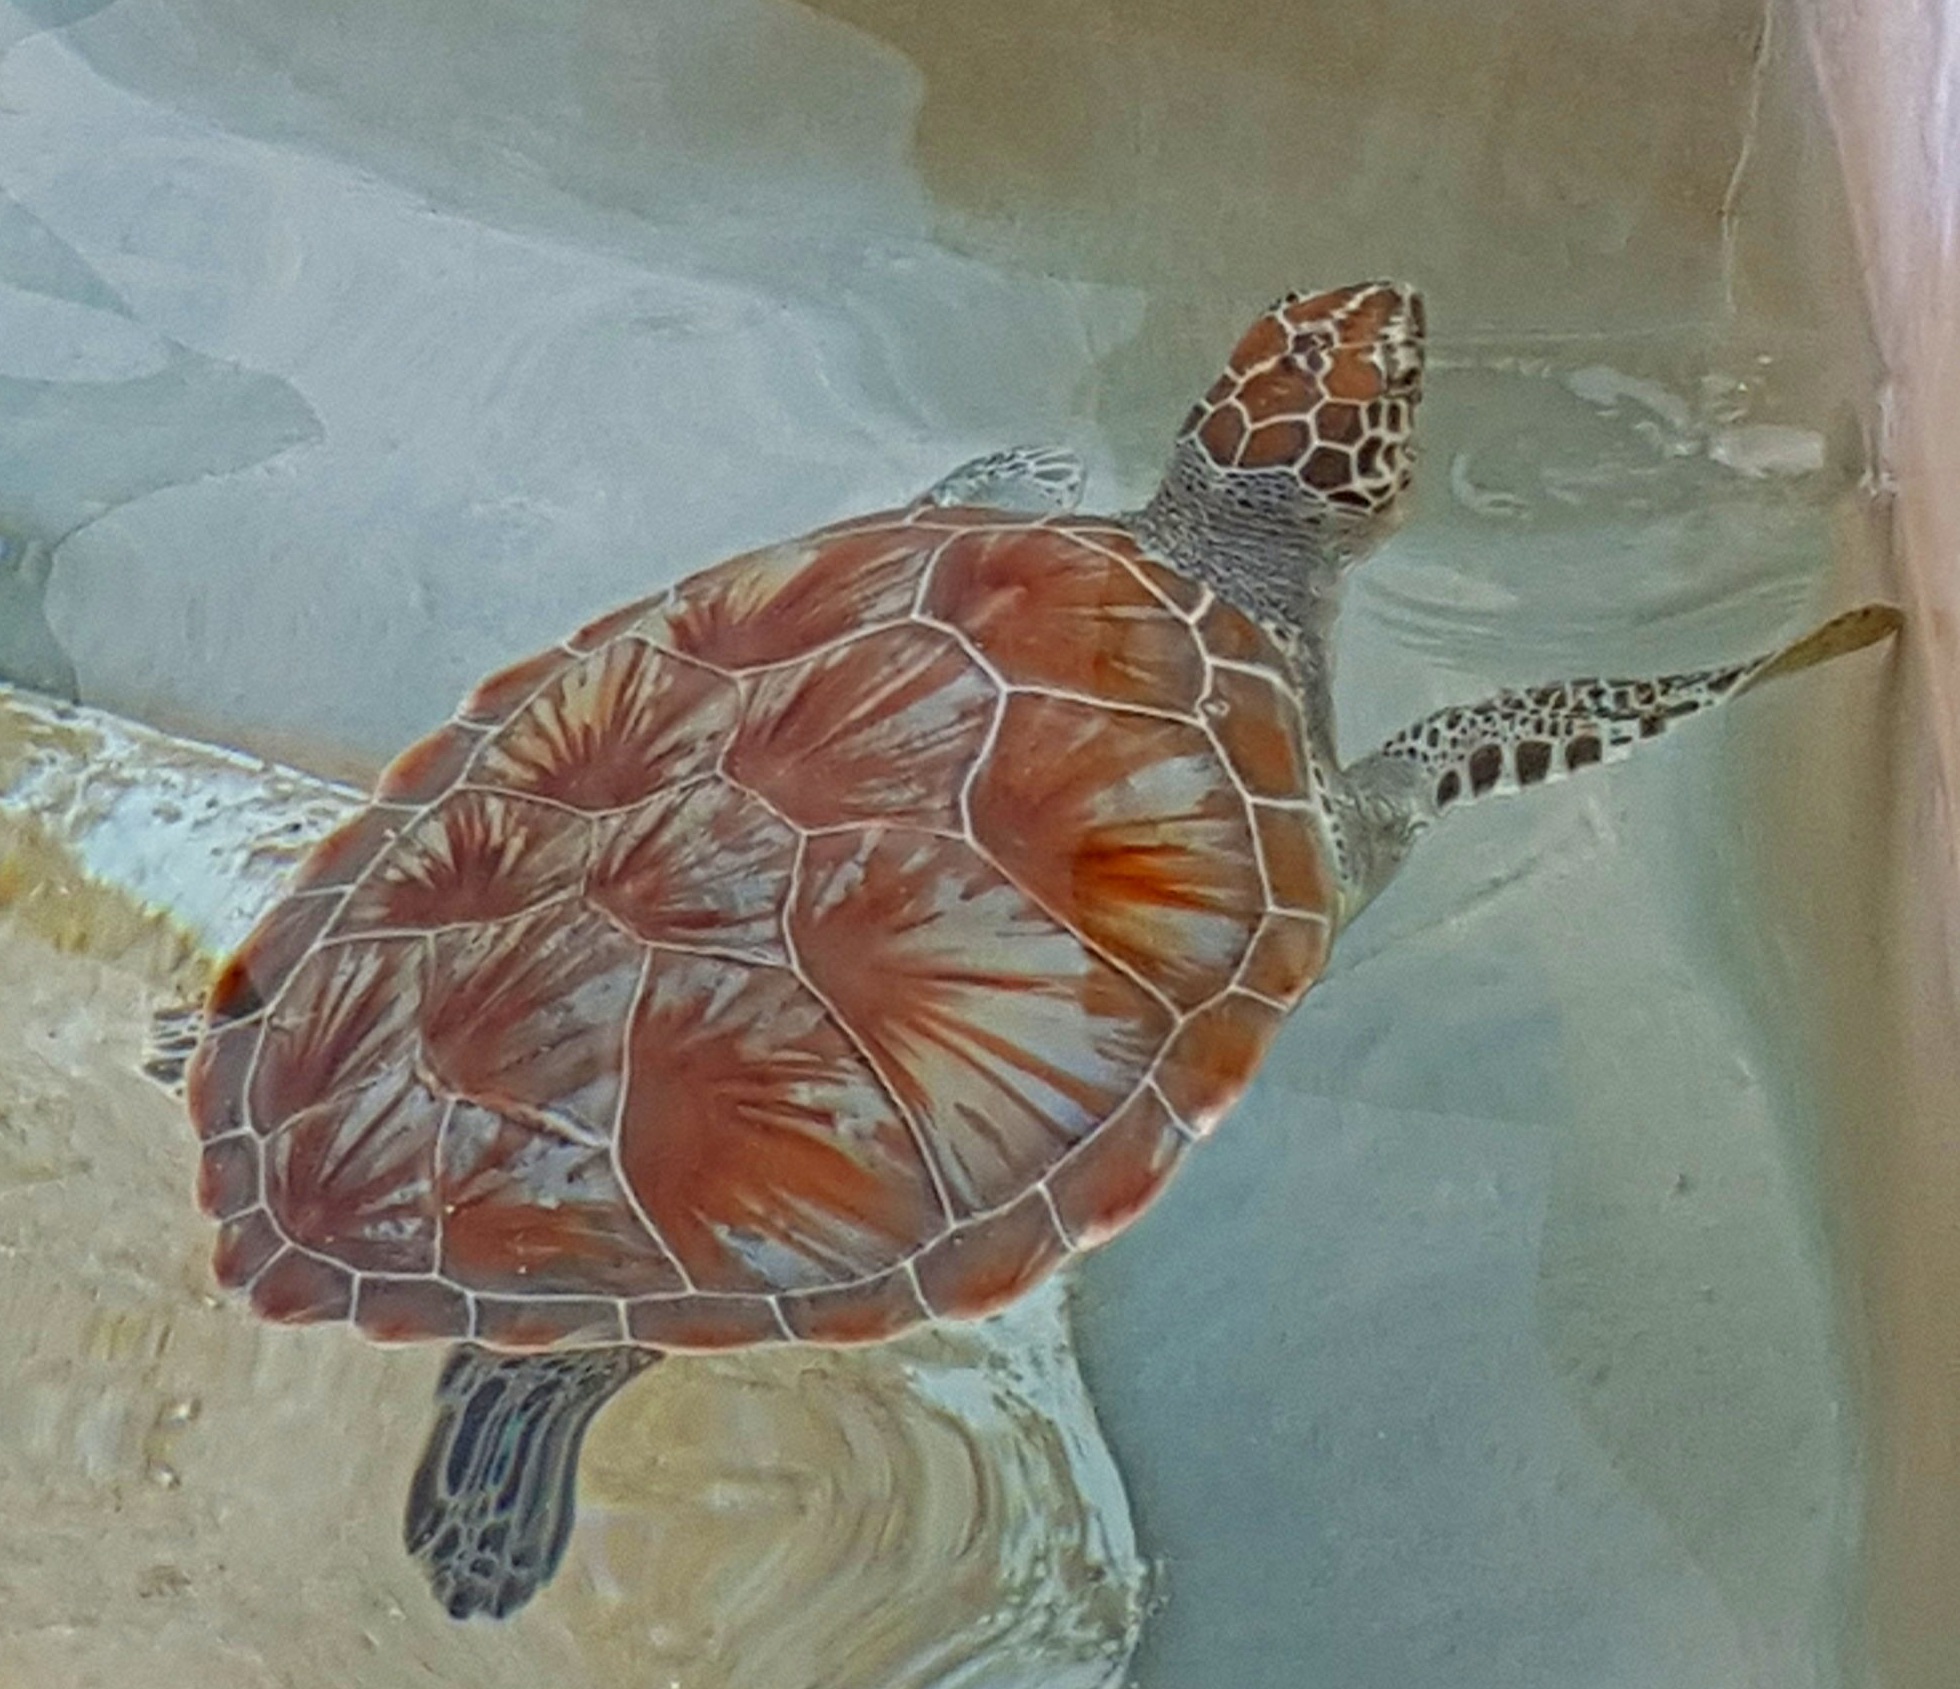
That’s what I love about weaving, and especially rigid heddle weaving. I can look at everyday things and see how the colours and patterns can be worked into weaving patterns. I didn’t have my loom with me (I’m seriously considering a flip loom for future vacations) but I spent happy hours on the beach imagining how to weave a turtle shell pattern and thinking about combining the symmetry of the Mayan temples with lace “vines”. I wonder if chenille would feel as soft as sting rays?
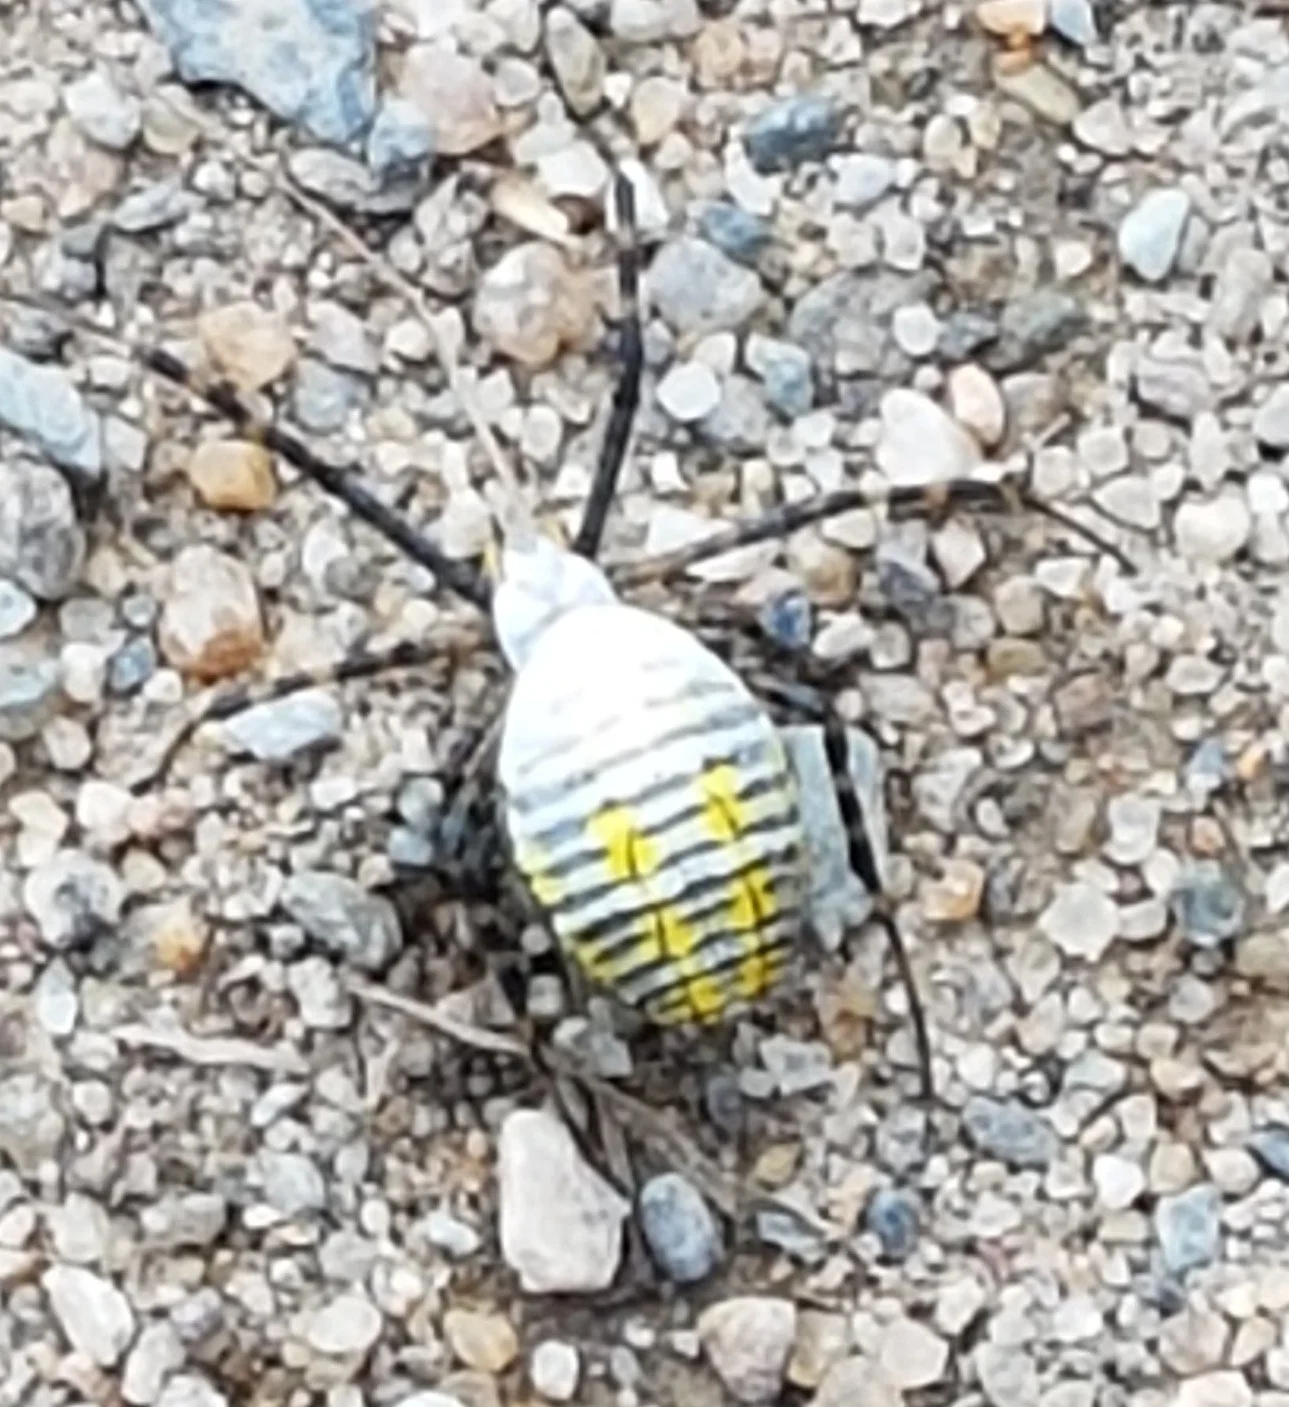
Inspiration is all around us, we just need to look. My camera is my best friend. I see a colour combination I like, I take a picture. I see an interesting pattern I take a picture. A cityscape…take a picture. I have pictures of flowers (how can I weave a Queen Anne's lace?), spiders (check out the pattern on her back) seaweed (what an amazing colour).


Weaving is about creating something beautiful and useful, but it also about creating art. Taking what we see in nature or man made objects and bringing them into our art. The pictured scarf was made before we left, but it so beautifully shows the Mayan ruins. I’ll make another one…richer in colour and texture, showing the deep greens of the jungle that so quickly over runs anything man can build, combined with the structure and order that man attempts to bring to everything.
Colour
One of my biggest challenges when it comes to weaving is choosing colours. I know the basics of colour theory. Ok, I know about the colour wheel and how to mix the primaries to create the secondary colours. I even know a tiny bit about putting colours together. Weaving however, adds a whole new element. If my warp is red and my weft is blue, those colours will blend when my eyes see them and it will look purple. My two colours give birth to a new colour. And I’m not always sure how it will look , so I play it safe: I use the same colour way for both warp and weft or pick a variegated and pair it with a solid colour that is in the variegated or I stick to neutrals.

One of my biggest challenges when it comes to weaving is choosing colours. I know the basics of colour theory. Ok, I know about the colour wheel and how to mix the primaries to create the secondary colours. I even know a tiny bit about putting colours together. Weaving however, adds a whole new element. If my warp is red and my weft is blue, those colours will blend when my eyes see them and it will look purple. My two colours give birth to a new colour. And I’m not always sure how it will look , so I play it safe: I use the same colour way for both warp and weft or pick a variegated and pair it with a solid colour that is in the variegated or I stick to neutrals.

I recently tried to be a little more adventurous. Rowan Yarns has a lovely yarn called Felted Tweed. The green, yellow and orange were calling my name. I think it had to do with it being the height of fall and all the trees were yellow and green and orange. If nature can pull off those colours, so can I !
At the same time as getting adventurous with colour I decided to figure out how to use two heddles to create double weave only in certain parts of my weaving. And how to bring different colours to the front. And use an extra pick up stick in double weave to add more pattern. Have I told you I never start easy?
I ended up with fabric that holds together, so I guess that is some success. The rest really didn’t come together well. I'll stick to the colour issue for this post. A few things happened.

First, I used tweed. When a tweed yarn is spun, little bits of other fibers in contrasting colours are added to the wool. So my colours weren’t pure colours, they all had flecks of other colours mixed in. I experienced first hand what it means to have “muddy" colours.
Then, some of my patches have all three colours together. It’s not that using three colours is a bad thing, but add the tweed and it really doesn’t work so well. On the orange, the strongest colour, it works pretty well but using only 1 colour, or 2, works even better.


Proportions are important too. Using 3 colours in equal amounts might be ok for some projects, but using 1 colour sparingly can change ok to fabulous. Note in the first picture the primary colour is green, then yellow, and finally just a little bit of orange. All the colours look more distinct and the orange draws the eye. But use mostly orange (second pic) and it over powers the other colours.
I know that sampling is (part of) the solution to my problem but we all know how I feel about sampling! (Actually, this was a sample! I had no plans for the finished product and was ok if it didn’t work!)
Knowledge is also power. I just received a book about colour. It's not specifically a weaving book, but it tells me about colour, colour theory, gives numerous colour combinations and gives proportions as well as grouping them into families (soothing, neutral, bold, dynamic, powerful etc.). I'm looking forward to experimenting with new colour combinations!

Enjoying Every Moment
I spent many years rushing through life, anticipating the next stage when the current stage had barely begun. Many things got done and accomplished but I don’t ever remember standing back and admiring what I had just completed. Before I had time to catch my breath I was onto the next task. I felt like I was living in fast-forward…some days I even felt like I was eating in fast-forward! And I get it, it was a busy time with 2 young children, a husband and a hobby farm. Life was full and tasks had to be completed.

I spent many years rushing through life, anticipating the next stage when the current stage had barely begun. Many things got done and accomplished but I don’t ever remember standing back and admiring what I had just completed. Before I had time to catch my breath I was onto the next task. I felt like I was living in fast-forward…some days I even felt like I was eating in fast-forward! And I get it, it was a busy time with 2 young children, a husband and a hobby farm. Life was full and tasks had to be completed.

When I started weaving I made a conscious decision to take my time and to enjoy every step…including the learning. This is contrary to my nature. I am impatient, eager to see the finished product, notice every mistake, fear making mistakes and therefore am very cautious. At the same time, I’m too impatient to wait to work up to complicated. I never start simple and I’m not much for slowing down and taking the time to learn slowly. This picture is a double-weave blanket after only 3 months of weaving!
I’ve partially succeeded. I do enjoy every step. I love the feel of yarn running through my hands. Seeing all those orderly lines of yarn and winding them onto the back beam is quite satisfying. Threading the heddle allows me to check for mistakes, think about what will be created and catch issues before they happen. It’s slow and rhythmical. Winding a tightly-packed shuttle. A neat, tidy hemstitch. Then finally, the weaving. Side to side with the shuttle, back and forth with the heddle. Many times, the actual weaving time is dwarfed by the time spent preparing the loom and finishing after the project is removed from the loom. A twisted fringe can take hours. (It’s the one part I haven’t convinced myself to love).


This deliberate decision to enjoy every moment weaving has spilled over into the rest of my life. Life is meant to be lived, enjoyed, savoured. I’ve begun to approach life more slowly, with a deliberate decision to enjoy every moment of it. Even the boring bits…laundry (it’s pretty satisfying to see a pile of neatly-folded laundry, or how about the warmth fresh from the dryer, or the smell when it comes in from the line). Or I look at my coffee table, overflowing with books and appreciated the variety (accounting textbooks, cookbooks, carpentry books, Puritan books, Bibles and philosophy books all mingled together!) I still want things tidied up occasionally but what interesting children I have! Even driving has taken on a new meaning. It’s not just about getting from point A to point B it’s a chance to see the glorious world we live in. (And the speed limit forces me to slow down and enjoy it for jut a little bit longer!)

Even a snowy drive becomes something to exclaim over

Sometimes we need to rush. And some stages will be enjoyed more than others. But your weaving is for you. Enjoy it. Stop every so often and just admire what your hands are creating. Take a deep breath and savour the rhythmic thumps and clicks of your loom. And let that peace and satisfaction permeate your whole life!

Mistakes and What to do about Them
Have you ever been so caught up in the actual doing of a project that you aren’t really paying attention to the details? Everything is flowing smoothly. Than you step back to look at what you’ve done, and BAM! There it is. A glaring mistake and you’re thinking “how in the world did I miss that???” Now you must decide what to do with it.
Sometimes Mistakes Happen

Have you ever been so caught up in the actual doing of a project that you aren’t really paying attention to the details? Everything is flowing smoothly. Than you step back to look at what you’ve done, and BAM! There it is. A glaring mistake and you’re thinking “how in the world did I miss that???” Now you must decide what to do with it.

I was very happily weaving away on a scarf and it was going beautifully! I’d figured out how to place the pickup stick so the selvage threads were always picked up, the beat was even, everything was perfect. Until I stopped for a minute and saw THE MISTAKE. It glared at me. I glared back. I called my daughter over and asked if she could see it. She could. If her lovely (but untrained) eyes could find it, so could everyone else. I glared at it some more. I had to make a decision.
Some people say that mistakes are “design features” or they prove that an item really is handmade. Others say if you want perfect buy machine made. So, what are we to do with mistakes? Sometimes I do leave mistakes. 1 extra pick in a log cabin pattern will never be noticed. Sometimes the fibres involved don’t allow for correcting mistakes unless it is caught immediately. Mohair, for example, is very difficult to unweave. Sometimes unweaving will damage the integrity of the finished project. Sometimes the error will be easier to fix after I’ve removed the project from the loom. But mistakes are mistakes. And it’s okay to make them. It’s also okay to decide to leave them. Sometimes though mistakes need to be fixed.

I glared a little more at mine then got out the scissors. I could have unwoven the work and saved the yarn but in this case, given the fineness of the warp, the stickiness of alpaca, and the length of the mistake, I decided that cutting out the weft was the best option. It hurt a little to snip the weft threads. And I was terrified I would accidentally snip the warp.
It was worth it. Mistakes that look small on the loom tend to grow after finishing. This one would have glared at me every time I looked at that scarf.

Double Width Weaving
Some People might think that a rigid heddle loom is just a beginner loom. The loom to get if you can’t get a “real” loom. But a rigid heddle loom, even one that is small, has endless potential. Mine is a 32”. It’s about as big as I think I can comfortably weave on with stick shuttles. But I just recently wove a 48” blanket, in one piece. And the pattern is actually designed for a 24” loom.

What? 48” on a 24” loom? How does that work? It’s really quite simple. All you need are 2 heddles, a double heddle kit and a couple pick up sticks. The trick is to create 2 layers to weave at the same time. On the loom, it looks like one layer, but if you look from the side, you will see 2 layers. One side closed, one side open. When the blanket comes off the loom, you can open it up and voila! A blanket twice the width of the loom! This was actually the first weaving class I taught. The hardest part is setting up the loom. We started at 10 am and finally got to the actual weaving at about 3pm! If that seems a bit daunting, relax, we took breaks and we waited until everyone completed each step before moving on. With practice, it takes just a few hours to get to weaving.


I love working with the Berroco Ultra Wool for double width weaving. It’s 100% superwash wool, it isn’t too stretchy or sticky and it fulls beautifully. Plus there are dozens of colours to choose from. The wash-ability means that it is perfect for baby blankets. But there is no reason to limit this to only a blanket. It makes a great wrap…check out the drape! Or picnic blanket. Take it camping, dress up your living room or carry it in your car for emergencies.
The colours of this blanket were inspired by a trip to Lunenburg, NS. Lunenburg is a beautiful seaside town with the typical brightly painted houses. I was amazed by the number of shades of orange houses. Clementine and orange, orange and purple, orange and green. And they all looked beautiful! I really wanted a tiny bit of yellow/green in this blanket, but we didn’t have it and I was too impatient to wait for it, so orange and rust it is. I took many pictures of the houses though, I’m sure they will inspire other colour combinations in the future.
Want this blanket for yourself? Click here to purchase.