String Heddles
If you follow me, you know I like to push the limits of rigid heddle weaving, but at the same time, I want weaving to be easy and fun. And I love pick-up sticks!!! Often when I use multiple pick-up sticks they slide over each other so need to be inserted only once. However, I also have patterns where one pick-up stick needs to be reinserted each time it is needed. When I first started weaving with multiple sticks, I didn’t mind reinserting the stick each time.
Let’s talk about string heddles, what they are, how to make them and why you might use them.
If you follow me, you know I like to push the limits of rigid heddle weaving, but at the same time, I want weaving to be easy and fun. And I love pick-up sticks!!! Often when I use multiple pick-up sticks they slide over each other so need to be inserted only once. However, I also have patterns where one pick-up stick needs to be reinserted each time it is needed. When I first started weaving with multiple sticks, I didn’t mind reinserting the stick each time. And really, I still don’t most of the time. I put off using string heddles because I didn’t want to stop weaving long enough to make them. Then I didn’t really like them because they sometimes came untied while weaving. But I’ve learned a few things and now I like string heddles!
What are String heddles?
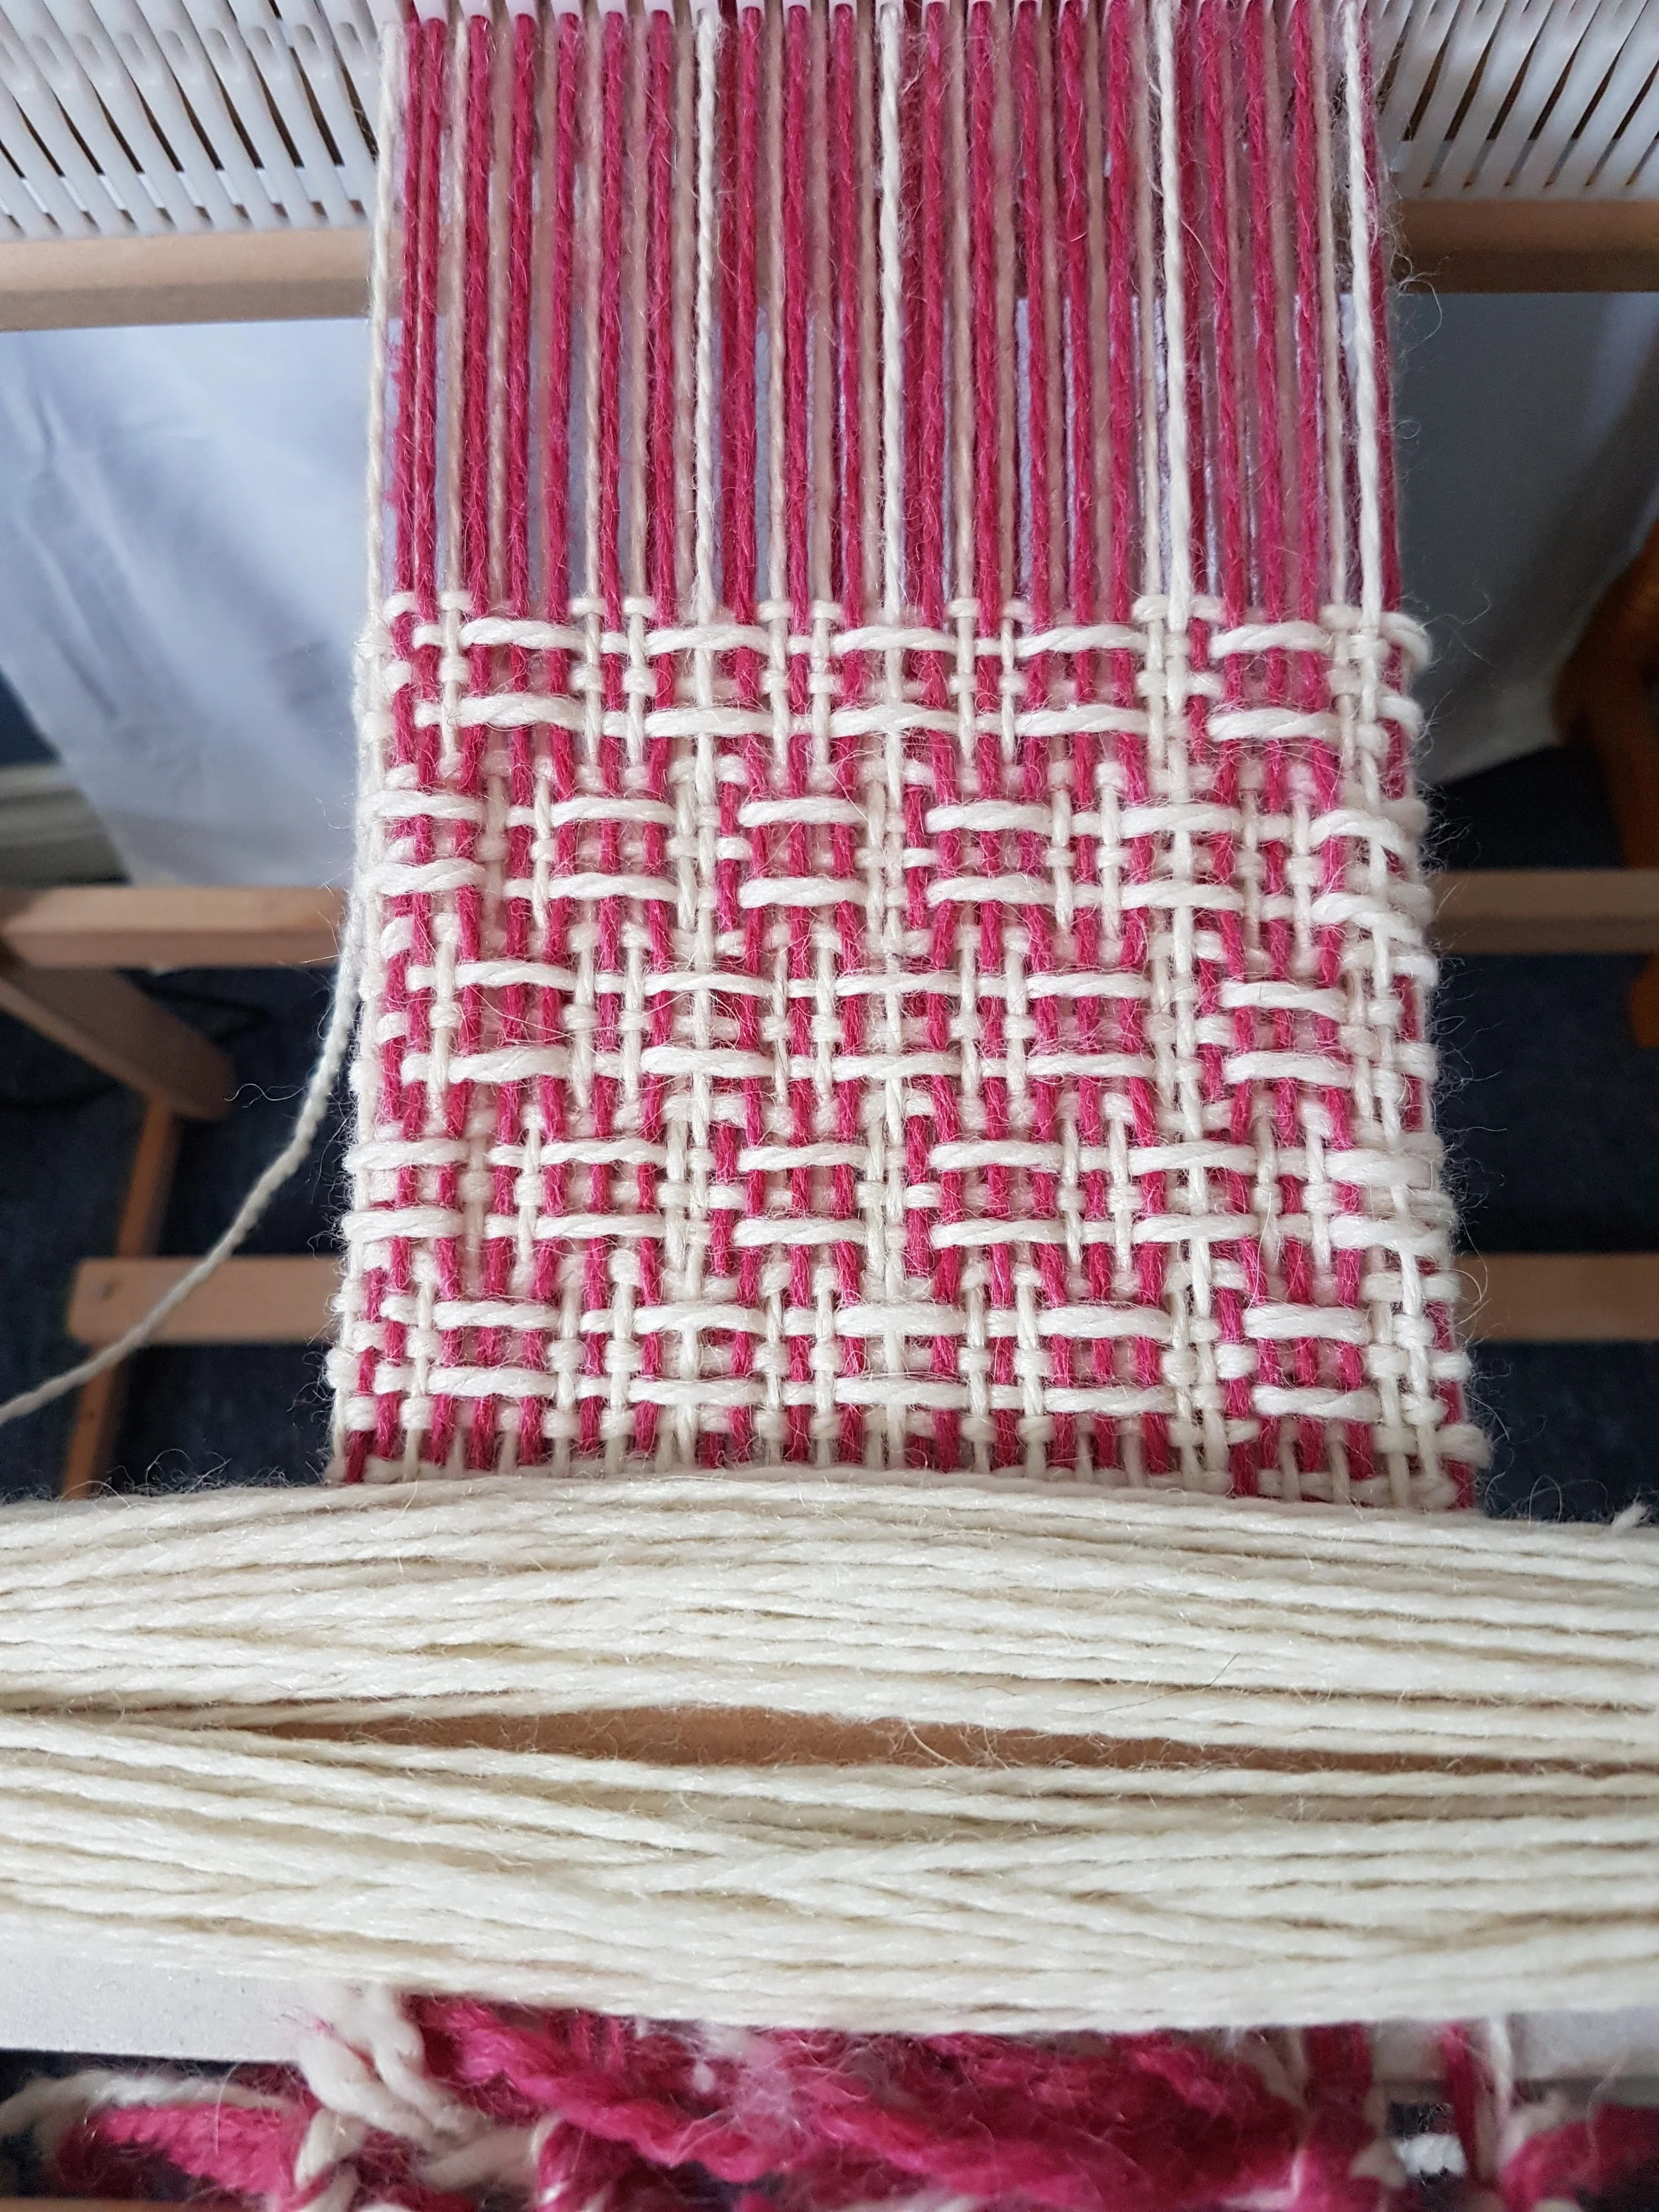
String heddles are exactly what they sound like…string that acts as a heddle around a single warp end. Your rigid heddle has slots and holes. Each warp end is threaded into a slot or hole and the movement of the heddle determines which ends go up and which stay down. When you weave you will notice that the slots stay level and the holes either move up or down. String heddles will only be used on ends that are in slots are used the same way as a pick-up stick adding up to 2 extra sheds!
How to Make String Heddles
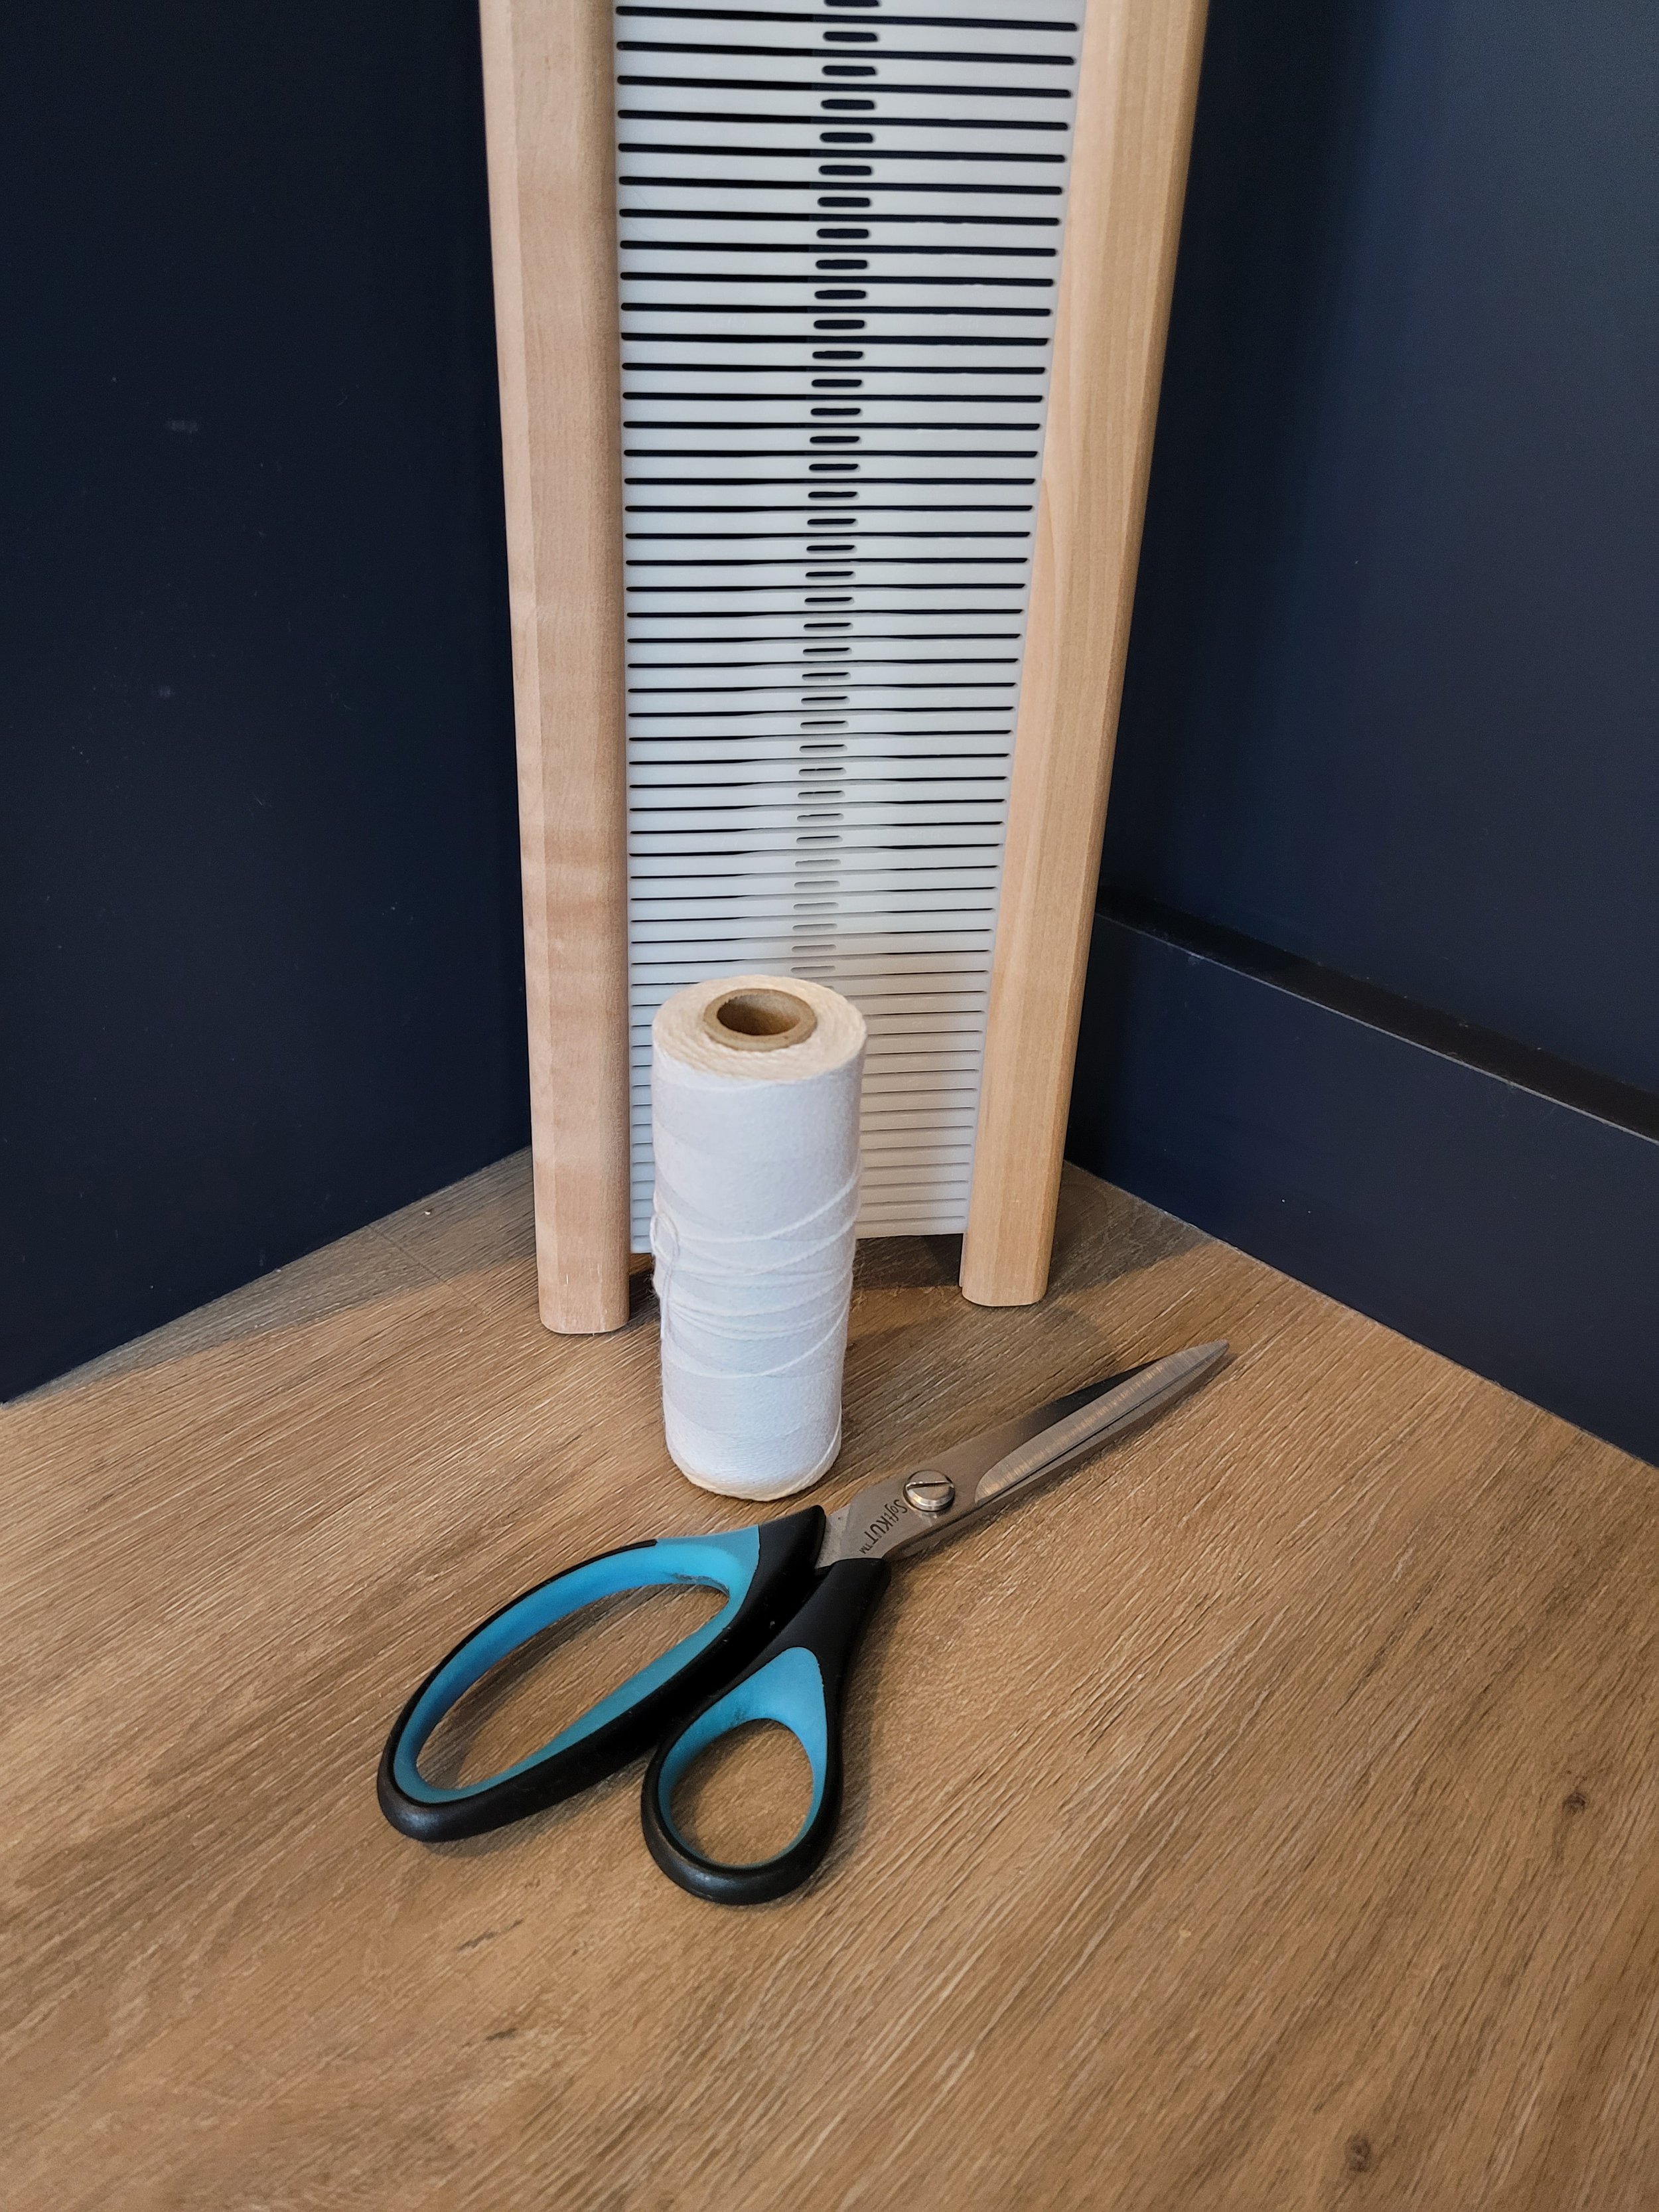
You can make your own string heddles. It really isn’t hard, just time consuming. You will need an extra reed, 8/4 cotton and a pair of scissors.
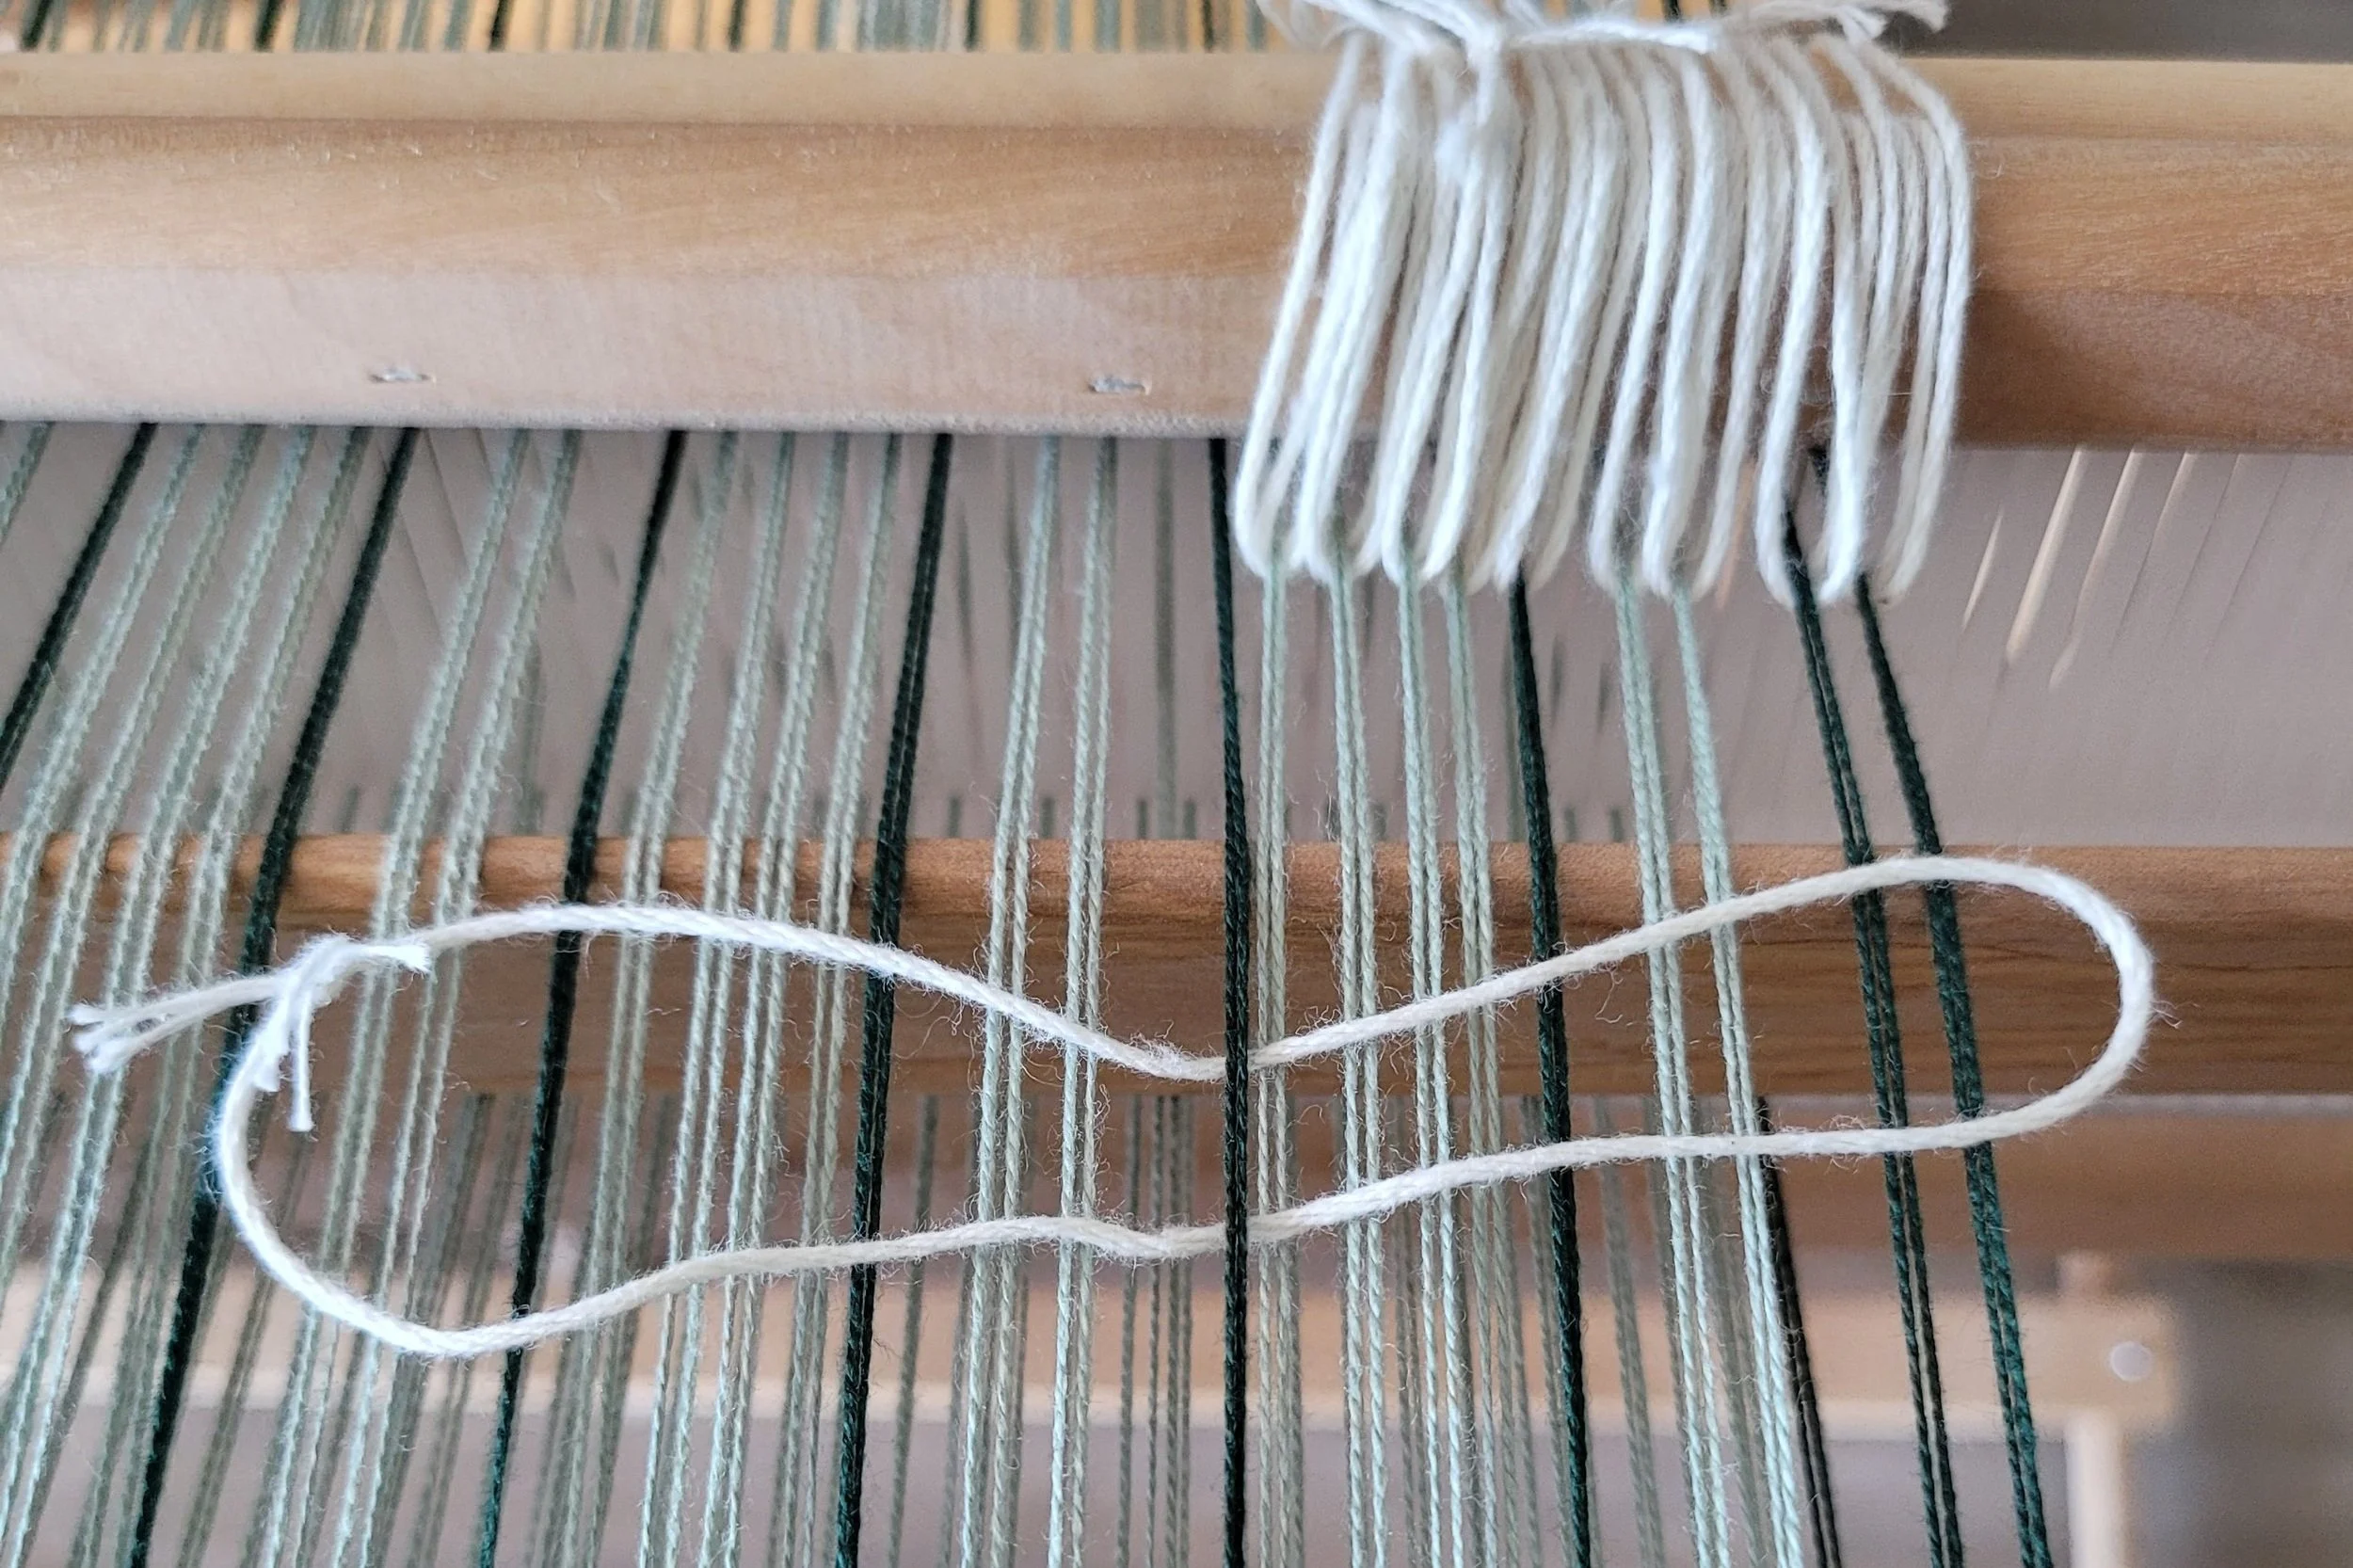
Sitting in a comfortable chair, rest one end of the reed on the floor and hold the reed between your knees. Wrap the cotton once around the reed and tie a square knot. Cut the ends short. Done, you now have 1 string heddle! I leave the heddles on the reed until I have made them all. I keep them in groups of 10 to make counting easier. So after I have 10, I slide them all together down the reed, then make the next 10, slide them down leaving a space between them and the previous 10. Here’s a video: https://youtu.be/MkjMSigjMOs
As I mentioned earlier, I put off using string heddle because I didn’t want to take the time to make them. And I have a solution for that…texsolv heddles!!!! These are premade heddles for floor looms, but they work great as string heddles and have several advantages: they do not come untied, they do not stick or get fuzzy, they are all the same size and best of all, you do not have to tie them!! They are more expensive, I bought the 9.5” heddles from LeClerc for about $27/100. They come as a single long “string” so do need to be cut apart. Be careful when cutting to ensure that you are cutting in the right spot. Switching from handmade cotton heddles to texsolv has definitely improved my weaving life! If you have a choice, buy the shortest heddles available. (Bonus, you can use these on your inkle loom too!)
Inserting String Heddles
If you can insert a pick-up stick, you can insert string heddles. You will need 2 pick-up sticks or shuttles a little longer than the warped width in the reed, string heddles, and painter’s tape.
Insert the pick-up stick as usual. The string heddles will go around the warp ends that are on top of the pick-up stick. Count these ends and count out the right number of heddles (this acts as a check at the end). Starting at one end, add the first string heddle. Put it under the warp end, then fold the heddle up and place both ends on the second pick-up stick. I usually wait until I have a number of string heddles inserted and on my fingers before putting them on the second stick. Here’s a video: https://youtu.be/zw3FRtq5yQ4
Work your way across the loom. If you counted out the right number of heddles before you started, you should have no heddles left. As a second check, place the heddle in neutral and flip the pick-up on edge. Every end on the pick-up should have a heddle. Flip the pick-up flat and pull up the stick with the heddles: it should lift all the ends off the pick-up stick. You can now remove the pick-up stick.
Use painter’s tape to tape the heddles so they can’t slide off the pick-up stick (now called a heddle rod). I run one strip from end to end then wrap tape around each end.
Here’s a few things to note when using string heddles:
If you are using a pick-up stick and string heddles, the string heddles must be inserted in front of the pick-up stick.
When you are using the pick-up stick, the heddle rod will slide forward to the back of the reed. This won’t cause any problem with the shed.
Remember to slide the pick-up stick back to the back of the loom when using the string heddle rod.
If you are getting a small shed in the plain weave sections check to make sure that the string heddles are all moved to the back of the loom.
Why Use String Heddles?
String heddles are best used when there are multiple pick-up sticks in a repeating pattern. You will see in many patterns that when 2 pick-up sticks are used, one is inserted and remains in the project for the entire weaving process. The second needs to be replaced each time it is needed. Every time you inset a stick, there is opportunity for error. Using string heddles means you only need to do it once. I will often weave the first repeat with just pick-up sticks. After examining the cloth and confirmed the pick-up stick is correctly inserted, I will add the string heddles. It’s easier to correct a misplaced pick-up stick than a misplaced string heddle.
It takes time to insert a pick-up stick. We aren’t running a marathon, and weaving should be fun, not time driven, but some patterns can mean more time is spent inserting the pick-up stick than weaving! Once we switch to string heddles things move a little faster.
Finally, string heddles open a whole new range of possibilities for you and your rigid heddle! Complex lace work suddenly becomes very possible!
Looking for some projects to try out string heddles? Check out these patterns:
Pick-Up Sticks will Explode Your World
I’m a big fan of plain weave. It is perfect for so many projects…hand painted warps shine, stripes in tea towels stand out and for a purely meditative weave, nothing beats plain weave. But have you tried pick-up sticks? They will explode your weaving world!
Pick up sticks weaving
I’m a big fan of plain weave. It is perfect for so many projects…hand painted warps shine, stripes in tea towels stand out and for a purely meditative weave, nothing beats plain weave. But have you tried pick-up sticks? They will explode your weaving world!
What are pick-up sticks? Essentially, they are just like stick shuttles except they have rounded ends, or a point. The pointed end makes it easy to pick up some threads and go under others. When inserted pick-up sticks create an extra shed (or 2) so it’s possible to do more than plain weave. (If you don’t have any pick-up sticks shuttles work too)
There are 2 ways to insert pick-up sticks.
1. Place the heddle in the down position, this brings all the ends in slots to the top. Stand behind the loom slide the point over and under the threads as the pattern directs. It might be over 1, under 1; over 2 under 1; over 5, under 5, or any other combination.
2. Place the heddle in the down position. Working in front of the reed place the pick-up stick as the pattern directs. Turn the pick-up stick on its edge to raise up the threads on top, slide a second pick-up stick under the raised threads behind the reed.
I always use method 1 but my books all use method 2. Method 2 works well for those with back or neck problems who don’t want to lean over the back of their loom. Here’s a video because it’s so much easier to see than write!
Sometimes it can be difficult to see exactly which threads to go over and under. If the warp is dark, slide a white piece of paper in the shed after placing the heddle in the down position. If the warp is light, use a dark piece of paper.
Now that the stick is in place you have 2 new sheds to use! (Remember the shed is the space the shuttle slides through).
Weft floats
1. Place the heddle in the neutral position. Slide the pick-up behind the heddle and flip it on its side. When the yarn goes through this shed you will see weft floats.
2. Place the heddle in the up position. Slide the pick-up stick behind the heddle leaving it flat. This will create warp floats.
And that is all there is to weaving with pick-up sticks! And this is only the beginning! You can use multiple pick-up sticks to create incredibly complex patterns. Patterns using only 1 pick-up stick are simple, the stick can stay in place the entire weave. With multiple sticks they usually need to be removed and replaced each repeat. That’s when you might want to start using string heddles. (But that’s for another post!)
If you think you’re ready to try pick-up sticks, here’s a link to a pattern I use to teach beginner pick-up weaving complete with video links. https://www.therogueweaver.com/new-products/malabrigo-waffle-weave-scarf
Happy Weaving!
New Year, New Weavers
Welcome to a New Year! From what I’ve seen on social media many are embarking on weaving! I know you won’t regret it!! As a weaving instructor I see many new weavers and weavers who want to improve their weaving. There is lots of advice I could give, but today I’m going to keep it short and sweet: don’t beat so hard! That’s it.
Welcome to a New Year! From what I’ve seen on social media many are embarking on weaving! I know you won’t regret it!! As a weaving instructor I see many new weavers and weavers who want to improve their weaving. There is lots of advice I could give, but today I’m going to keep it short and sweet: don’t beat so hard! That’s it.
This is a weft-faced fabric-meant to be dense with no warp showing
Experienced weavers know that what they see on the loom is not the fabric that will come off the loom and is not the fabric that will emerge after finishing. New weavers try to make the fabric on the loom look like the fabric they want when it comes off the loom. So they beat. Really hard. The weft is pressed so tight that nothing is getting through that fabric. When it comes off the loom and is finished a very dense stiff fabric results (and they have used way more yarn than they anticipated, or the pattern called for). I know this from personal experience!
Here’s the non-technical theory behind weaving. When you weave, the warp is under tension (stretched out). This allows the fibres to move up and down easily and create nice sheds for the shuttle. When the fabric (it’s actually called a web at this point) is cut off the loom, all the tension is released. So if you wove 80” on the loom, it might only measure 72” off the loom as the fibres go back to their natural relaxed state. This will vary depending on the fibre.
Weaving on the loom-note the holes
After you have taken the work off the loom, it takes a hot bath. This relaxes the fibres even more, and with agitation, fulling can occur. Fulling draws the fibres closer together creating a stable fabric. So now your 72” piece might only measure 65” (again, this will vary depending on the fibre)
In order for this to happen, the fibres need to have room to relax and move.
A ruler works too!
Here’s a couple tips to help you out:
1. Keep a tape measure handy. A balanced weave (good for beginners to practice) will mean that you have the same ppi (picks per inch) as epi (ends per inch). So if I am weaving a scarf on a 7.5 dent reed I should have 7.5 weft threads per inch of weaving. Check you work often with the tape measure. Especially when you are coming back after a break.
This is the same project as above after finishing-no holes!
2. Pay attention to how you draw your heddle forward. If the heddle is tilted towards you, you cannot see the weft being pressed into place. If you tilt it a little away from you, you have a great view of what is going on and have a little more control. You should be able to see through your work easily. Here’s a little video https://www.instagram.com/tv/CI6xZN-JWLQ/?utm_source=ig_web_copy_link
I hope this is helpful to the new weavers out there! Follow me on facebook or Instagram to find out when new blog posts are out. This year I plan to cover some beginner tips (things like edges, pick up sticks, and project planning) as well as delve deep into double heddle weaving, and, just because I can’t control myself, there will be some inkle weaving, tablet weaving and floor loom weaving. I’d also love to cover topics you are interested in, so if there is something you are looking for, please let me know!
Keeping Things Simple
In weaving, as in life, is can be tempting to make things much more complex than they need to be. At least for me. I find keeping things simple can get a little boring. Why do the simple thing when you can do the much more complicated thing? This philosophy has been the primary contributor to numerous unfinished projects in my life. The thing about complicated though, is that as you progress, the complexity can grow exponentially. Especially if you are just working from ideas in your head! It’s taken a long time, but I’m beginning to learn that sometimes, the simplest thing is really the best.
In weaving, as in life, is can be tempting to make things much more complex than they need to be. At least for me. I find keeping things simple can get a little boring. Why do the simple thing when you can do the much more complicated thing? This philosophy has been the primary contributor to numerous unfinished projects in my life. The thing about complicated though, is that as you progress, the complexity can grow exponentially. Especially if you are just working from ideas in your head! It’s taken a long time, but I’m beginning to learn that sometimes, the simplest thing is really the best.
Each summer Interweave puts out a call for submissions for Little Looms, a special edition of Handwoven and a magazine especially for rigid heddle, inkle and pin looms. I’ve submitted a number of pieces and have had three pieces accepted. When I choose which pieces to submit, I think about the complexity of the project. Not because I want to show off but because I want to show what a rigid heddle can do and encourage people push the limits. I was very surprised and pleased to see my Mermaid Wrap on the front cover. Particularly as its’ submission was an after thought.
This past summer I sent in a double weave blanket, a log cabin scarf, a twill poncho and a 3/1 lace checkered scarf. All are rather complex patterns. As I said, submitting the Mermaid Wrap was really an after thought. I love the scarf, it is so beautiful but, I thought, too simple! I didn’t do anything; the yarn did all the work. I was convinced to send it in after seeing the cover of the Handwoven May/June 2018 edition. The front cover features a gorgeous travel wrap by Debra Jarchow…in plain weave. So simple yet so gorgeous. So, I sent it in and was pleasantly surprised when it was chosen (along with my Classy scarf with 3/1 lace).
Quiet Sabri
Lesson: just like people, yarns have voices and personalities. Some yarns want to fade into the background and are happy to let the pattern, texture or another yarn shine. Other yarns have a big personality. They want (or need) to be the centre of attention. This is shown so well in these two patterns. In the classy scarf, the Sabri yarn by Illimani, is lovely. It has an incredible drape but is understated. The texture draws the eye more than the yarn itself. Sabri is a quietly confident yarn, quite content to be the supporting actor to lace. Handmaiden’s Maiden Hair on the other hand, draws every eye as soon as it walks into the room. Trying to pair it with another attention seeker would be disaster!
In a way, a weaver is like a movie director with the yarn as characters. Our job is to cast the right characters and show them to their best advantage so that even complicated looks simple. Sometimes we must be quiet and let the yarn speak.
Maiden Hair steals the show!
How to Nurture a Relationship that Lasts (with your Rigid Heddle) PT 4
This is my last post on this topic. So far we have looked at choosing the right loom, care and feeding of our looms and our own attitudes. This week is about developing ourselves. Our rigid heddles have so much potential but if we don’t develop ourselves, we will never begin to unlock that potential.
This is my last post on this topic. So far we have looked at choosing the right loom, care and feeding of our looms and our own attitudes. This week is about developing ourselves. Our rigid heddles have so much potential but if we don’t develop ourselves, we will never begin to unlock that potential.
How can we develop ourselves?
1. Read books, magazines and articles.
My favourite rigid heddle weaving books are: The Weaver’s Idea Book by Jane Patrick and Inventive Weaving on a Little Loom by Syne Mitchell. Both contain patterns, but what I like best about them is the number of different types of weaving and the pictures. They cover colour and weave, mixing textures, pick up sticks, string heddles, using 2 and even three heddles and so much more!
Interweave puts out a magazine each year Little Looms (My scarf is on the front cover of this year’s edition!!) and it is filled with patterns for rigid heddles, tapestry looms and pin looms.
I love Pinterest! Search rigid heddle and there are tonnes of ideas, articles, blogs, and pictures that come up.
2. Hang out with other Weavers
Your area may have a weaver’s guild. Or maybe there is an informal group that gets together, maybe at a home or your local yarn shop. You can learn so much from talking to other people or just watching. If you can’t find weavers near you, try hanging out online. There are facebook groups that are just for rigid heddle weavers and they are a fount of information! I belong to a group called “Rigid Heddle Looms” and it has 5.5k members who are scattered all over the world. That means that anytime I have a question someone in the world is awake and can give an answer!
Sometimes you will run across people who are very adamant about “right” and “wrong” ways of doing things. Take all advice with a grain of salt. There are always multiple ways of doing the same thing. Take advice, try lots of different things then do what works for you even if it is absolutely the “wrong” way. If it gives you the end result you want, it is the right way for you. There are no weaving police!
3. Take classes
If you have the opportunity to go and take a class with a real live instructor do it! Even if it is project based and you aren’t in love with the project you will learn something. Live instructors will be able to answer your specific questions, see what you are doing and suggest easier ways, new ways or even tell you when you can skip a step! In addition you will meet other weavers, who may live near you, who will now be your friends! And they will have helpful ideas too. Don’t be afraid to ask your local yarn store if they can have a class on a specific topic (pick up sticks, double weave, colour theory…whatever) Chances are if you want it, others do too. Or if you pull a whole group together the store will (probably) happily oblige if there is an able instructor.
Online classes are excellent too. You get to learn from the best instructors. They will endlessly repeat themselves and remain cheerful. Sometimes in person classes can be overwhelming and you forget half of what you learned by the next morning, online classes can be watched over and over again.
4. Don’t be afraid to try new things
Remember, it is just string. If your project doesn’t work, it isn’t the end of the world. If you aren’t sure and can’t afford the loss try new techniques with less expensive yarn first. This helps you learn the skill, but it won’t finish the same so is only good for technique. I often try new patterns with cotton. It’s inexpensive and regardless of how it looks, I will have a usable tea towel! If you are sure of the technique but not sure how the fibre will finish buy a little extra and weave a sample.
In conclusion, developing a lasting relationship with your rigid heddle isn’t much different from developing lasting relationships with people…Take the time to get to know each other, give them what they need to thrive, don’t expect what they are unable to give, adjust your attitude when needed and work on yourself!
How to Nurture a Relationship that Lasts (with your Rigid Heddle) PT 3
We’re continuing my series on How to Nurture a Relationship that Lasts (with your Rigid Heddle). This week we are going to look at attitude and the first thing I want to say is that weaving on a rigid heddle is real weaving! I hear many people say that they have “just” a rigid heddle, like they are somehow “lesser” weavers. This is absolutely not true! A rigid heddle is a real loom that real weavers use to produce real weaving. Never put yourself or your loom down! Now, let’s look at some truths about rigid heddle looms.
We’re continuing my series on How to Nurture a Relationship that Lasts (with your Rigid Heddle). This week we are going to look at attitude and the first thing I want to say is that weaving on a rigid heddle is real weaving! I hear many people say that they have “just” a rigid heddle, like they are somehow “lesser” weavers. This is absolutely not true! A rigid heddle is a real loom that real weavers use to produce real weaving. Never put yourself or your loom down! Now, let’s look at some truths about rigid heddle looms.
1. A Rigid Heddle loom is not a “beginner” loom (although it is perfect for beginners)
While weaving on a rigid heddle may result in you also acquiring a floor loom, getting a rigid heddle because you can’t afford/don’t have the space/want to try weaving before making the investment in a floor loom/ will leave you with a desire that your rigid heddle will never be able to satisfy. Rigid heddles and shaft looms are as different as knitting and crochet. You may love one and hate the other. If a floor loom is what you really want, get one, there is one for every budget and space constraint.
I use both my 32” rigid heddle and my 36” floor loom in a 9’x8’ space.
2. Expect great things from your rigid heddle and it will deliver
This is a double weave using a pick up on the top layer, plain weave on the bottom
Rigid heddles can do far more than plain weave. Add in pick up sticks, string heddles, multiple heddles and varident reeds and the possibilities are endless. A rigid heddle can do patterning that just can’t be done even with a multi-shaft loom as well as twill, deflected double weave, overshot krokbragd, and even tapestry weaving. Additionally, yarns that aren’t suitable for the high tension of a floor loom can work very well on the rigid heddle. Rigid heddles are perfect for single skeins of hand painted yarns as there is so little waste. And you can weave yardage to sew with! Weaving can sometimes take more time than on a floor loom but the ease and speed of warping more than make up for it.
3. Don’t expect the loom to do what you should be doing
Fixing a threading error
It is rarely the fault of the loom when projects don’t turn out as expected. Warped well a rigid heddle has a good shed (big enough to use a boat shuttle with plain weave, though I don’t always recommend using one). Be sure to use the right reed for the yarn (a floor loom allows for flexibility using the reed substitution chart, but not a rigid heddle). If you want nice selvages you will have to practice. Tension is important. Poor tension results in a less than fun weaving experience. As mentioned in a previous post, use the best fibre you can afford…a bad fibre cannot produce good fabric. I’ve only cut off projects before completion twice. Once because I used yarn with too much stretch to get a good tension (because it was cheap enough to experiment with and I didn’t know better) and the second because I had poor tension due to mistakes I made warping. Nothing that has ever gone wrong (fabric too dense, too loose, ugly etc) has ever been the fault of my loom.
To sum up, love your rigid heddle loom for what it is, not what you wish it was. Don’t overlook its’ potential: challenge it and yourself, experiment, and have fun! Below, from left to right: double weave log cabin, plain weave sewn into a shirt, twill sampler using two heddles and rosepath twill using two heddles
Mistakes and What to do about Them
Have you ever been so caught up in the actual doing of a project that you aren’t really paying attention to the details? Everything is flowing smoothly. Than you step back to look at what you’ve done, and BAM! There it is. A glaring mistake and you’re thinking “how in the world did I miss that???” Now you must decide what to do with it.
Sometimes Mistakes Happen
Have you ever been so caught up in the actual doing of a project that you aren’t really paying attention to the details? Everything is flowing smoothly. Than you step back to look at what you’ve done, and BAM! There it is. A glaring mistake and you’re thinking “how in the world did I miss that???” Now you must decide what to do with it.
I was very happily weaving away on a scarf and it was going beautifully! I’d figured out how to place the pickup stick so the selvage threads were always picked up, the beat was even, everything was perfect. Until I stopped for a minute and saw THE MISTAKE. It glared at me. I glared back. I called my daughter over and asked if she could see it. She could. If her lovely (but untrained) eyes could find it, so could everyone else. I glared at it some more. I had to make a decision.
Some people say that mistakes are “design features” or they prove that an item really is handmade. Others say if you want perfect buy machine made. So, what are we to do with mistakes? Sometimes I do leave mistakes. 1 extra pick in a log cabin pattern will never be noticed. Sometimes the fibres involved don’t allow for correcting mistakes unless it is caught immediately. Mohair, for example, is very difficult to unweave. Sometimes unweaving will damage the integrity of the finished project. Sometimes the error will be easier to fix after I’ve removed the project from the loom. But mistakes are mistakes. And it’s okay to make them. It’s also okay to decide to leave them. Sometimes though mistakes need to be fixed.
I glared a little more at mine then got out the scissors. I could have unwoven the work and saved the yarn but in this case, given the fineness of the warp, the stickiness of alpaca, and the length of the mistake, I decided that cutting out the weft was the best option. It hurt a little to snip the weft threads. And I was terrified I would accidentally snip the warp.
It was worth it. Mistakes that look small on the loom tend to grow after finishing. This one would have glared at me every time I looked at that scarf.
The Magic of Finishing
I just finished a project this weekend. The whole time I was weaving I was feeling a little disappointed because it just wasn’t looking the way it ought. I was weaving a traditional hounds tooth pattern for the first time. But the hounds tooth wasn’t looking properly toothy. In my head I knew that once it came off the loom and was properly finished everything would be fine but my eyes were having troubles believing.
Still on the loom…not at all toothy!
I just finished a project this weekend. The whole time I was weaving I was feeling a little disappointed because it just wasn’t looking the way it ought. I was weaving a traditional hounds tooth pattern for the first time. But the hounds tooth wasn’t looking properly toothy. In my head I knew that once it came off the loom and was properly finished everything would be fine but my eyes were having troubles believing.
When a weaver uses the term “finishing” it doesn’t necessarily mean that the project is complete. Finishing (also called fulling) refers to the process of washing/soaking and drying the fabric to allow the fibres to plump up (full) and pull together (this isn’t technically accurate, but a very simple explanation of what it looks like happens). It gives the fabric stability and structural integrity. And it’s a little bit magical. Suddenly a loose weave that your fingers can easily poke through become fabric. A pattern that couldn’t be seen on the loom appears. And reed lines disappear
When I look at my weaving on the loom I can usually see right through the fabric. If the fibres are pressed too tightly in the weaving process then during the finishing process, when the fibres try to move, there is no space and the resulting fabric is very dense and thick. (I discovered this on my very first project). There are times when you want your weaving to be very tight (when making a rug for example) but usually at least a little bit of drape is desired.
When I finish a project I take it off the loom and straight to the washing machine. I fill the tub with hot water, add a little bit of eucalan and agitate just long enough to mix the eucalan. I then very gently add my project and push it under the water to make sure it is fully submerged. Then I leave it alone for about 1/2 hour just to soak. After the 1/2 hour I run the spin cycle. (At no time is the project actually agitated, only soaked and spun—unless I’m using cotton, then I run a regular hot wash cycle) I take it from the washing machine and throw it in the dryer and dry for about 10 minutes. Sometimes it takes a little longer than 10 minutes to get the density I want and I’ll give it a few more minutes.
In the case of my houndstooth scarf, it took 20 minutes in the dryer. Everything pulled together. The teeth are toothy, the scarf is drapy and it was so soft my daughter couldn’t keep her hands off it!


