

Why is my Weaving Crooked?
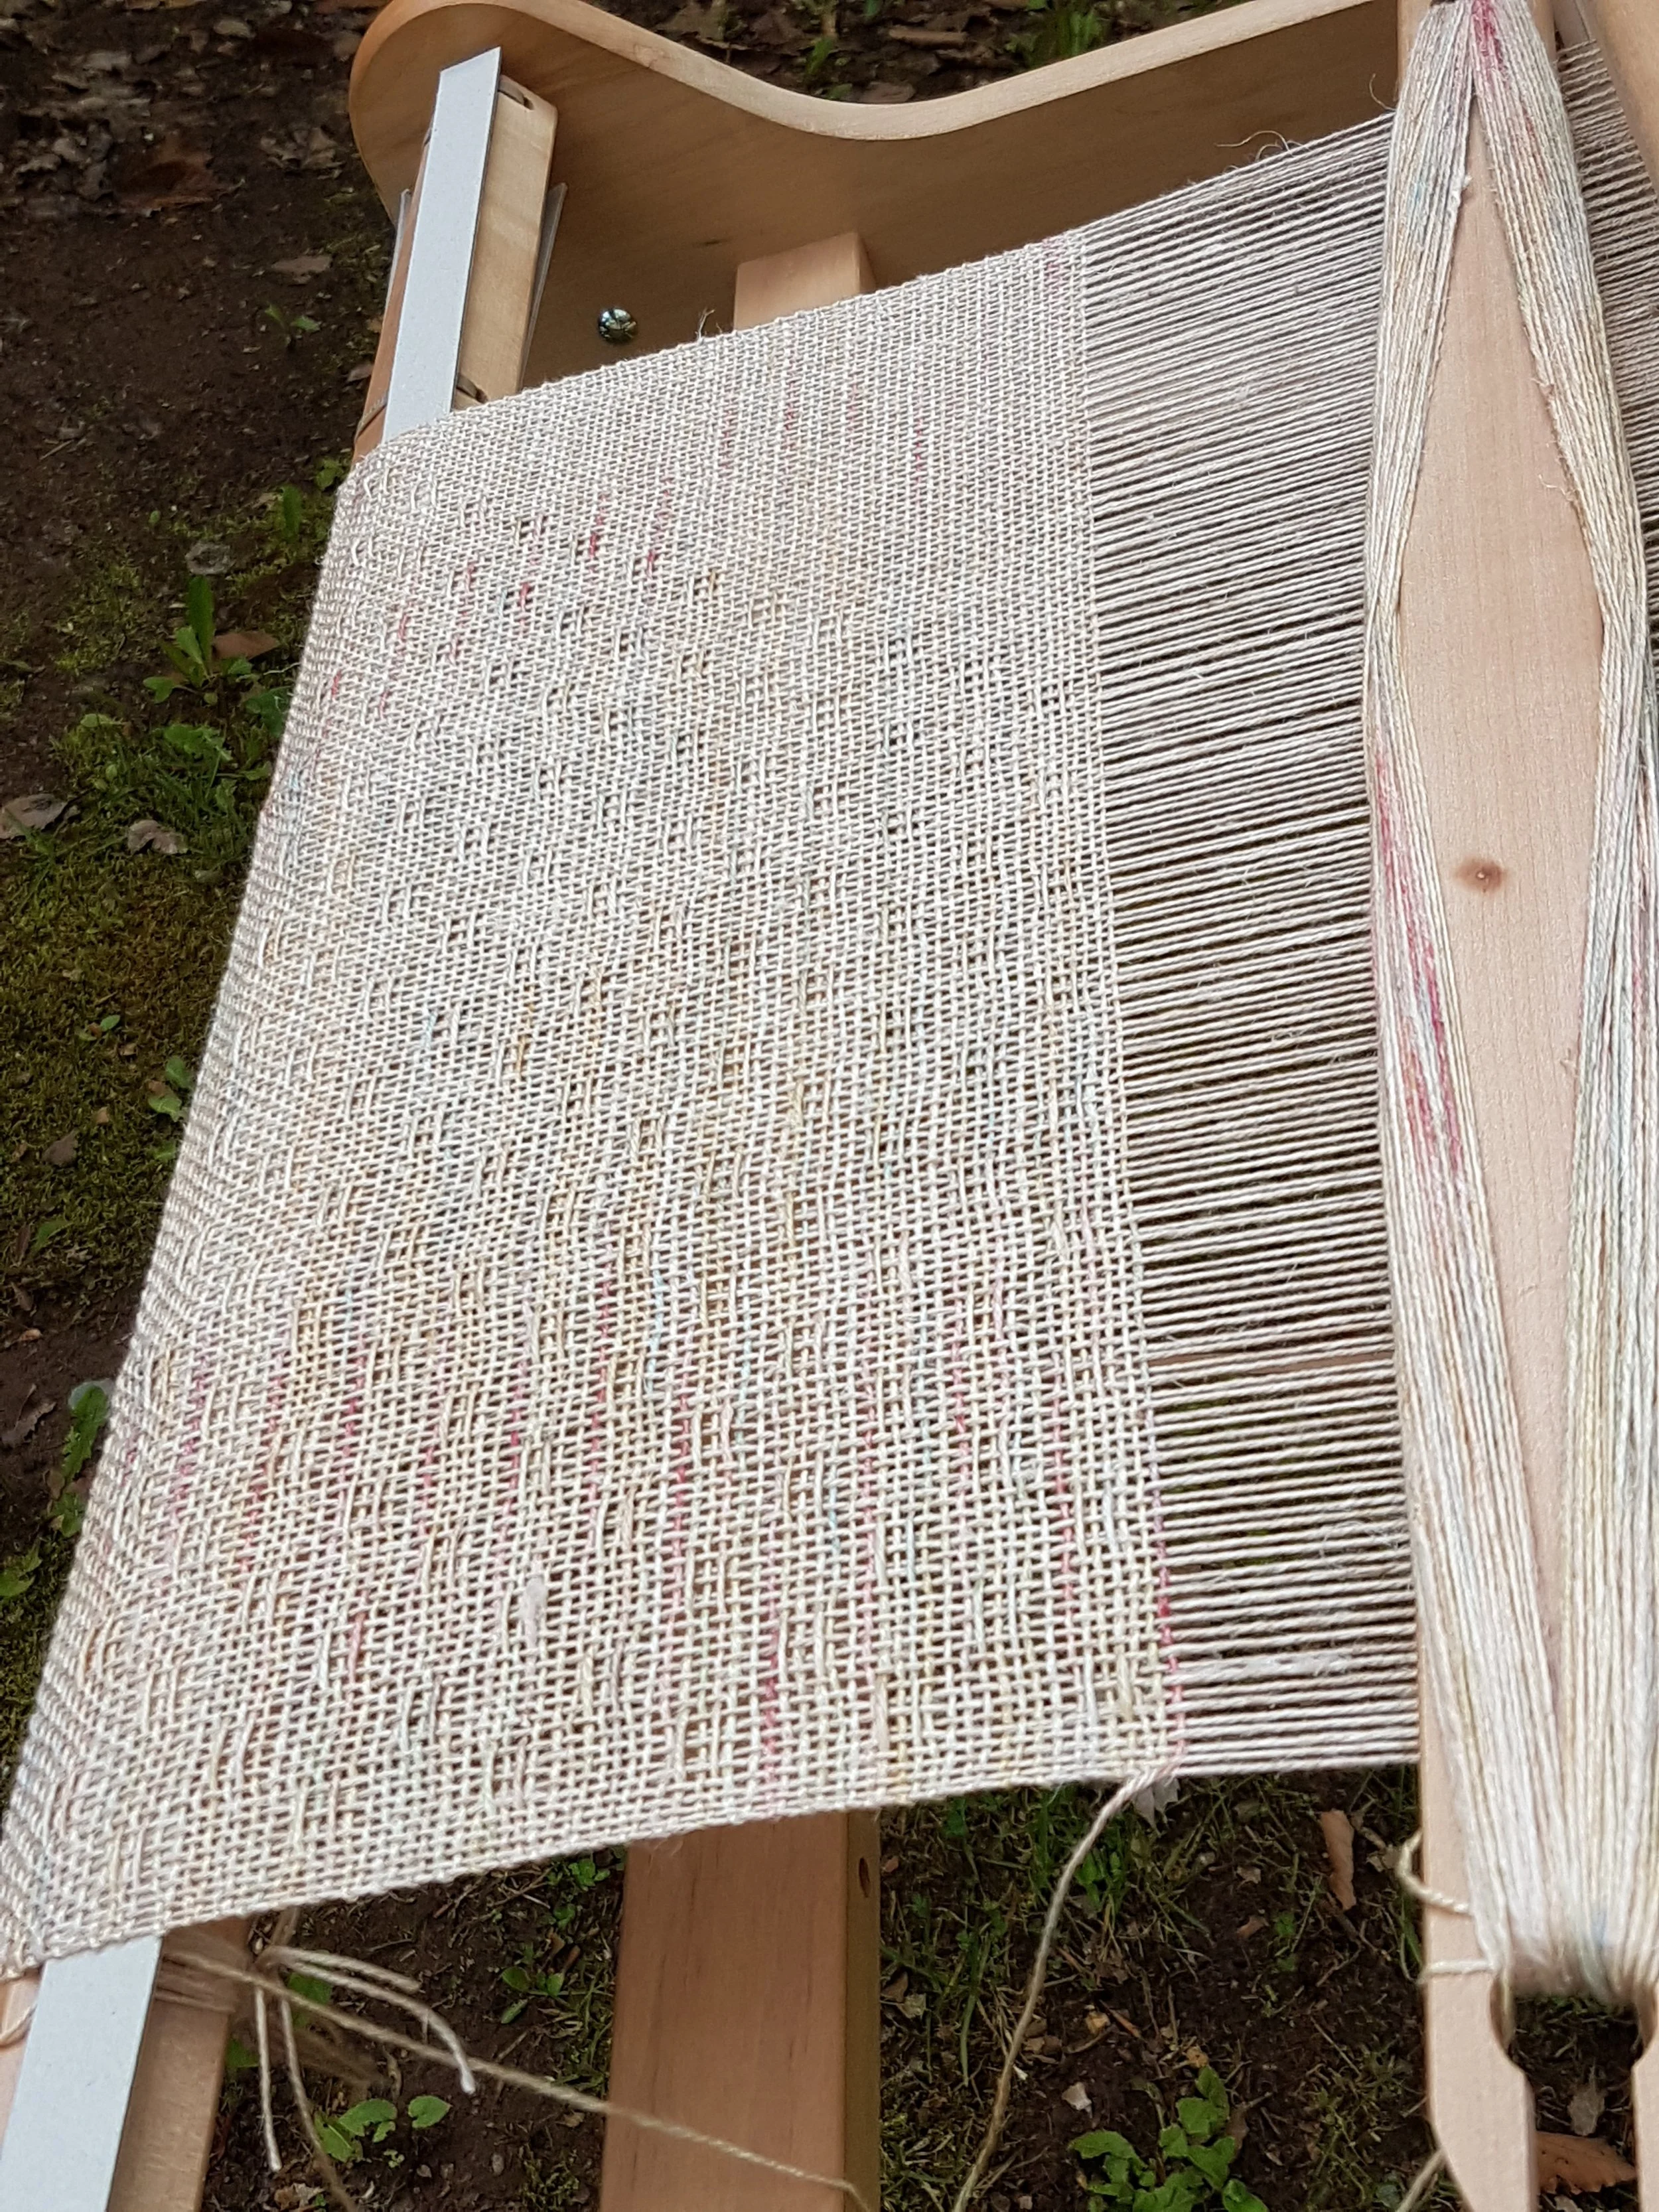
Have you ever been weaving away and suddenly you realize that your weaving is crooked? That one side is way higher than the other? Maybe that happens to you a lot, or maybe on just certain types of projects. For me, this is most likely to happen when I’m working with really fine yarn. Today we’re going to look at possible reasons this happens, how to prevent it, and how to fix it if it does happen.
Have you ever been weaving away and suddenly you realize that your weaving is crooked? That one side is way higher than the other? Maybe that happens to you a lot, or maybe on just certain types of projects. For me, this is most likely to happen when I’m working with really fine yarn. Today we’re going to look at possible reasons this happens, how to prevent it, and how to fix it if it does happen.
If you are in Facebook rigid heddle weaving groups looking for solutions, the most common response is tension. *Maybe* the issue is tension. I’ve rarely found this to be the issue for me; though I strongly recommend spending a little extra time learning to warp and wind well. (If your weaving is smiling or frowning, that IS a tension issue.)
I found the answer browsing through comments on floor loom pages. There, the solution is first to make sure your loom is square and second, check your body.
Make sure your loom is square: since you have a rigid heddle, it is hard for it to get out of square…it does not take the beating (see what I did there) that a floor loom does. However, it’s good to go over your loom regularly and make sure all the screws are tight.
Check your body: this is likely where the problem starts. We each have a dominant side. For most it is likely your right side. That side is stronger and might press just a little harder than the left. This will cause the right side to be lower while the left side is higher. I have three solutions.
a) Make sure you are sitting square to the loom and centered in the middle;
b) Move the dominant hand (the hand on the side that is lower) slightly closer to the middle of the reed. Even an inch can make a difference. This changes how you press putting less pressure on the dominant side;
c) If a and b don’t work, move your body slightly to to the higher side…again, just an inch can make a difference.
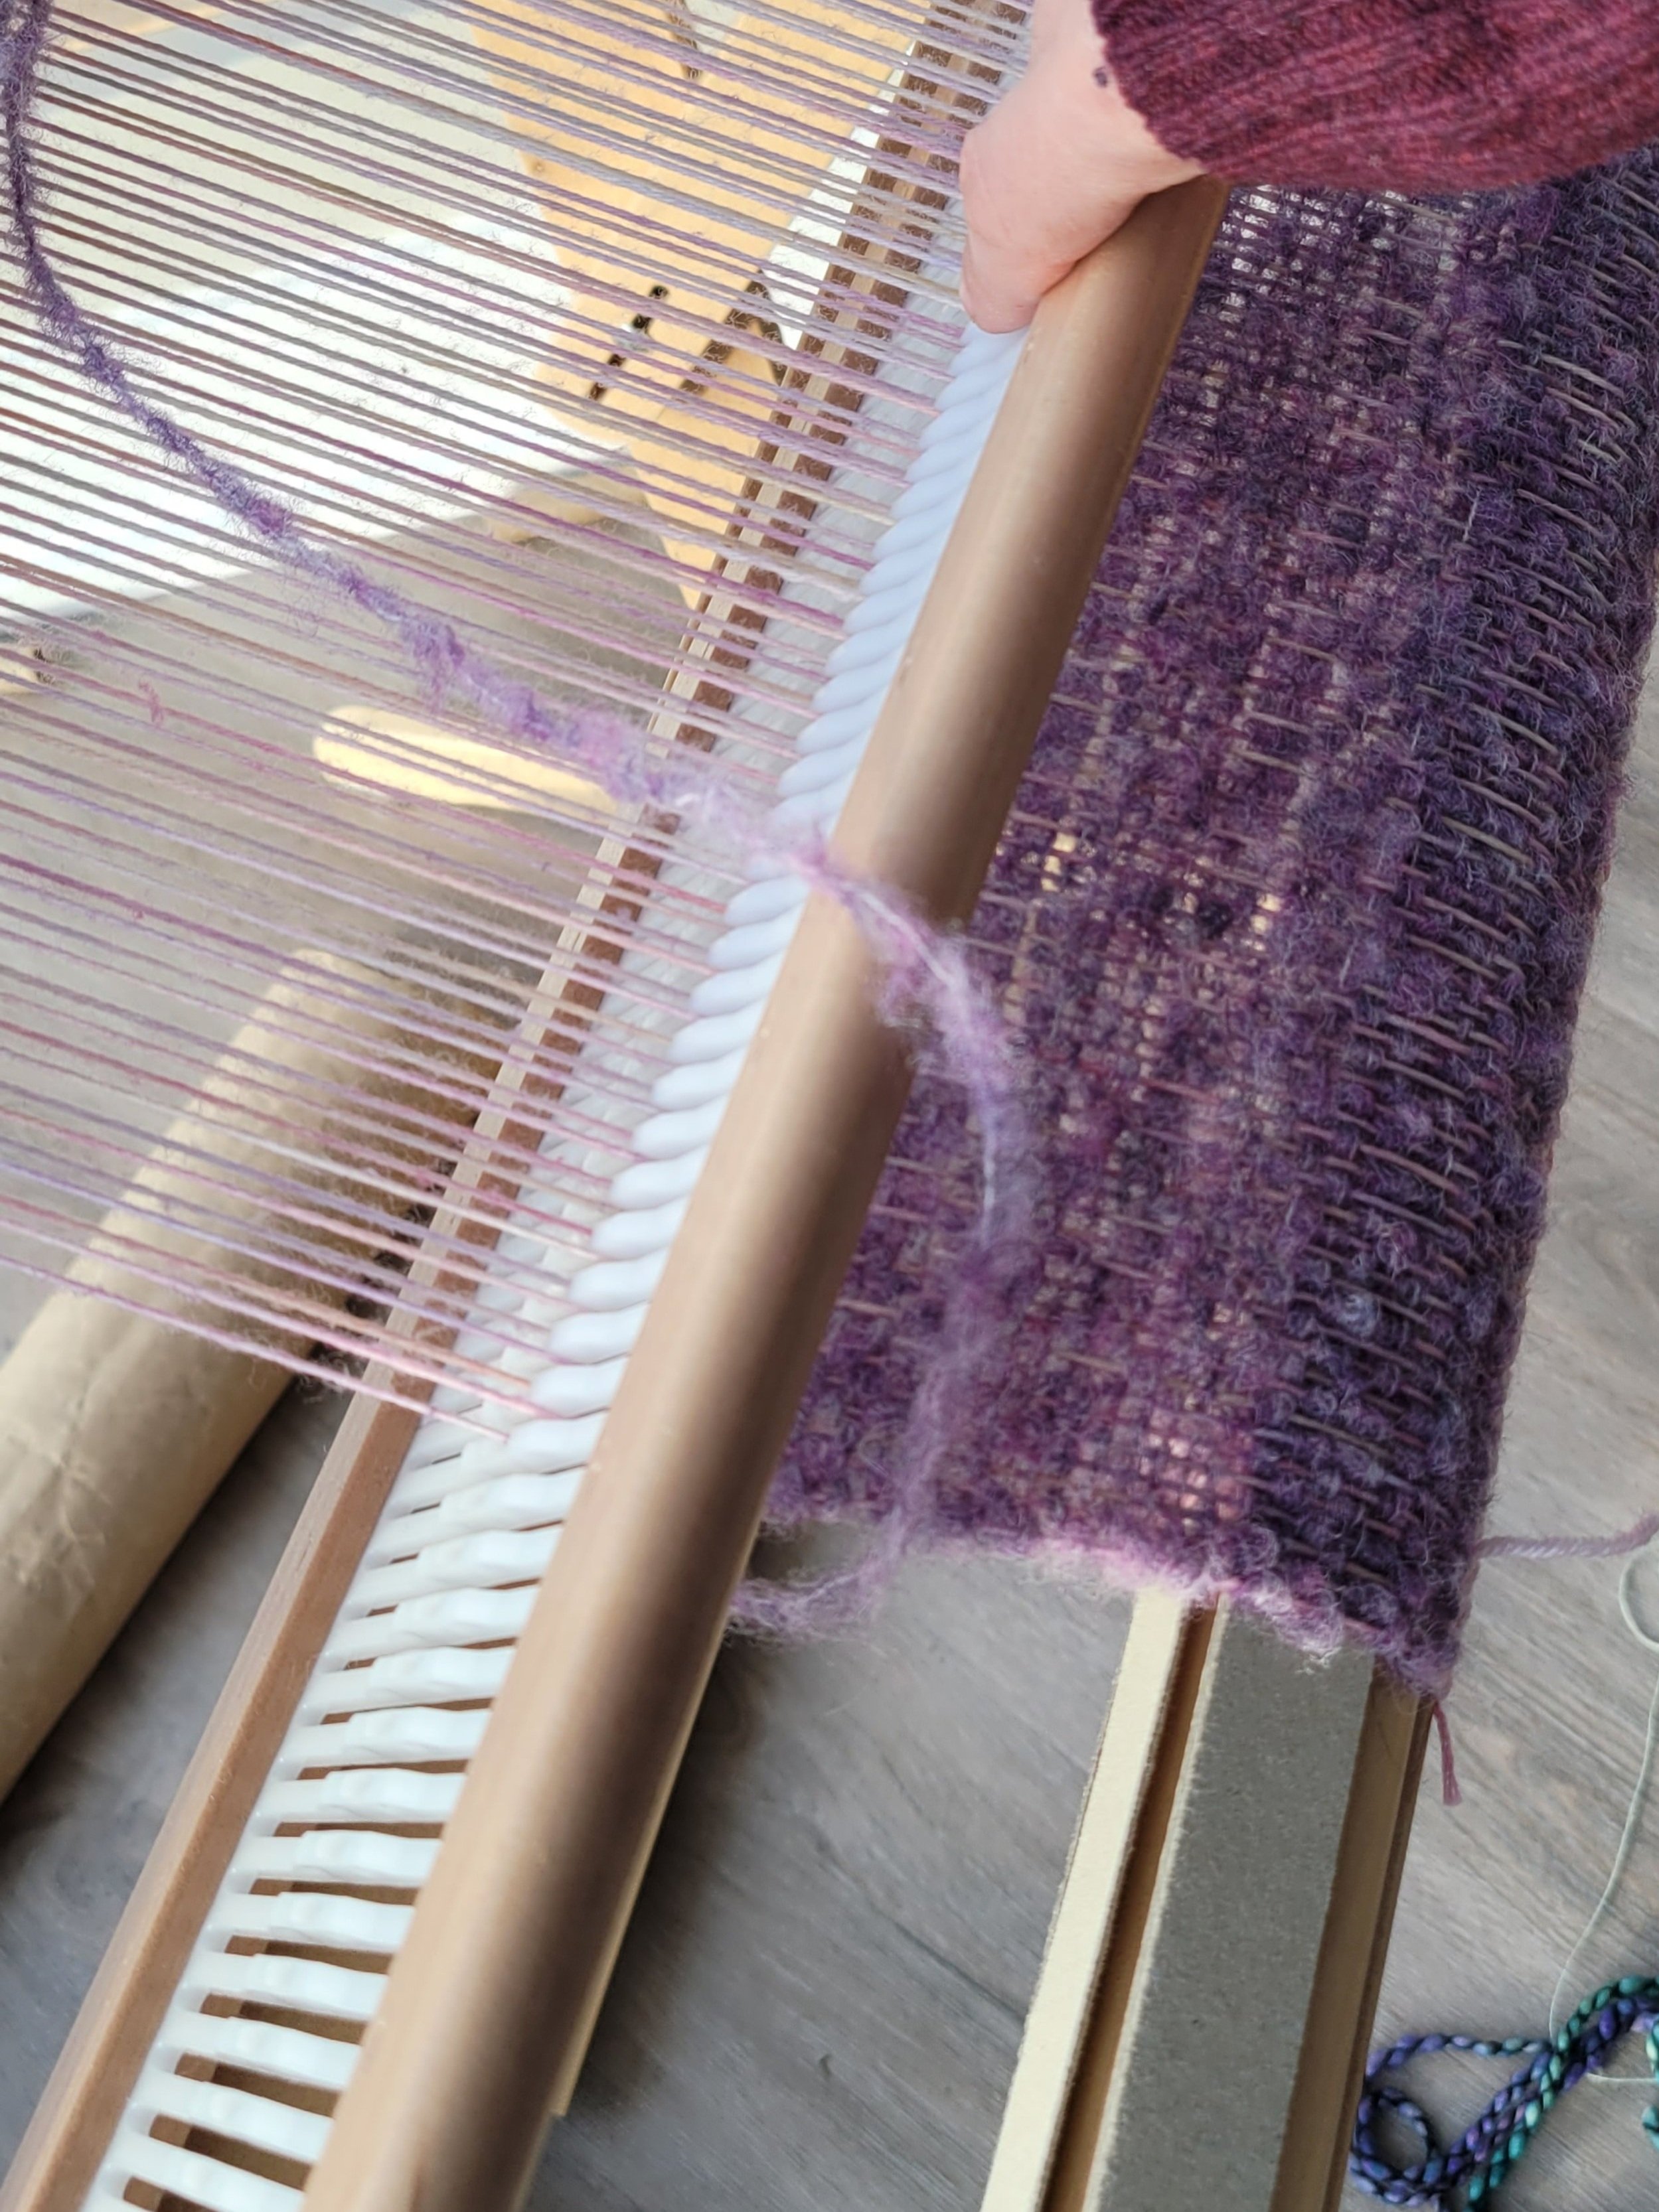
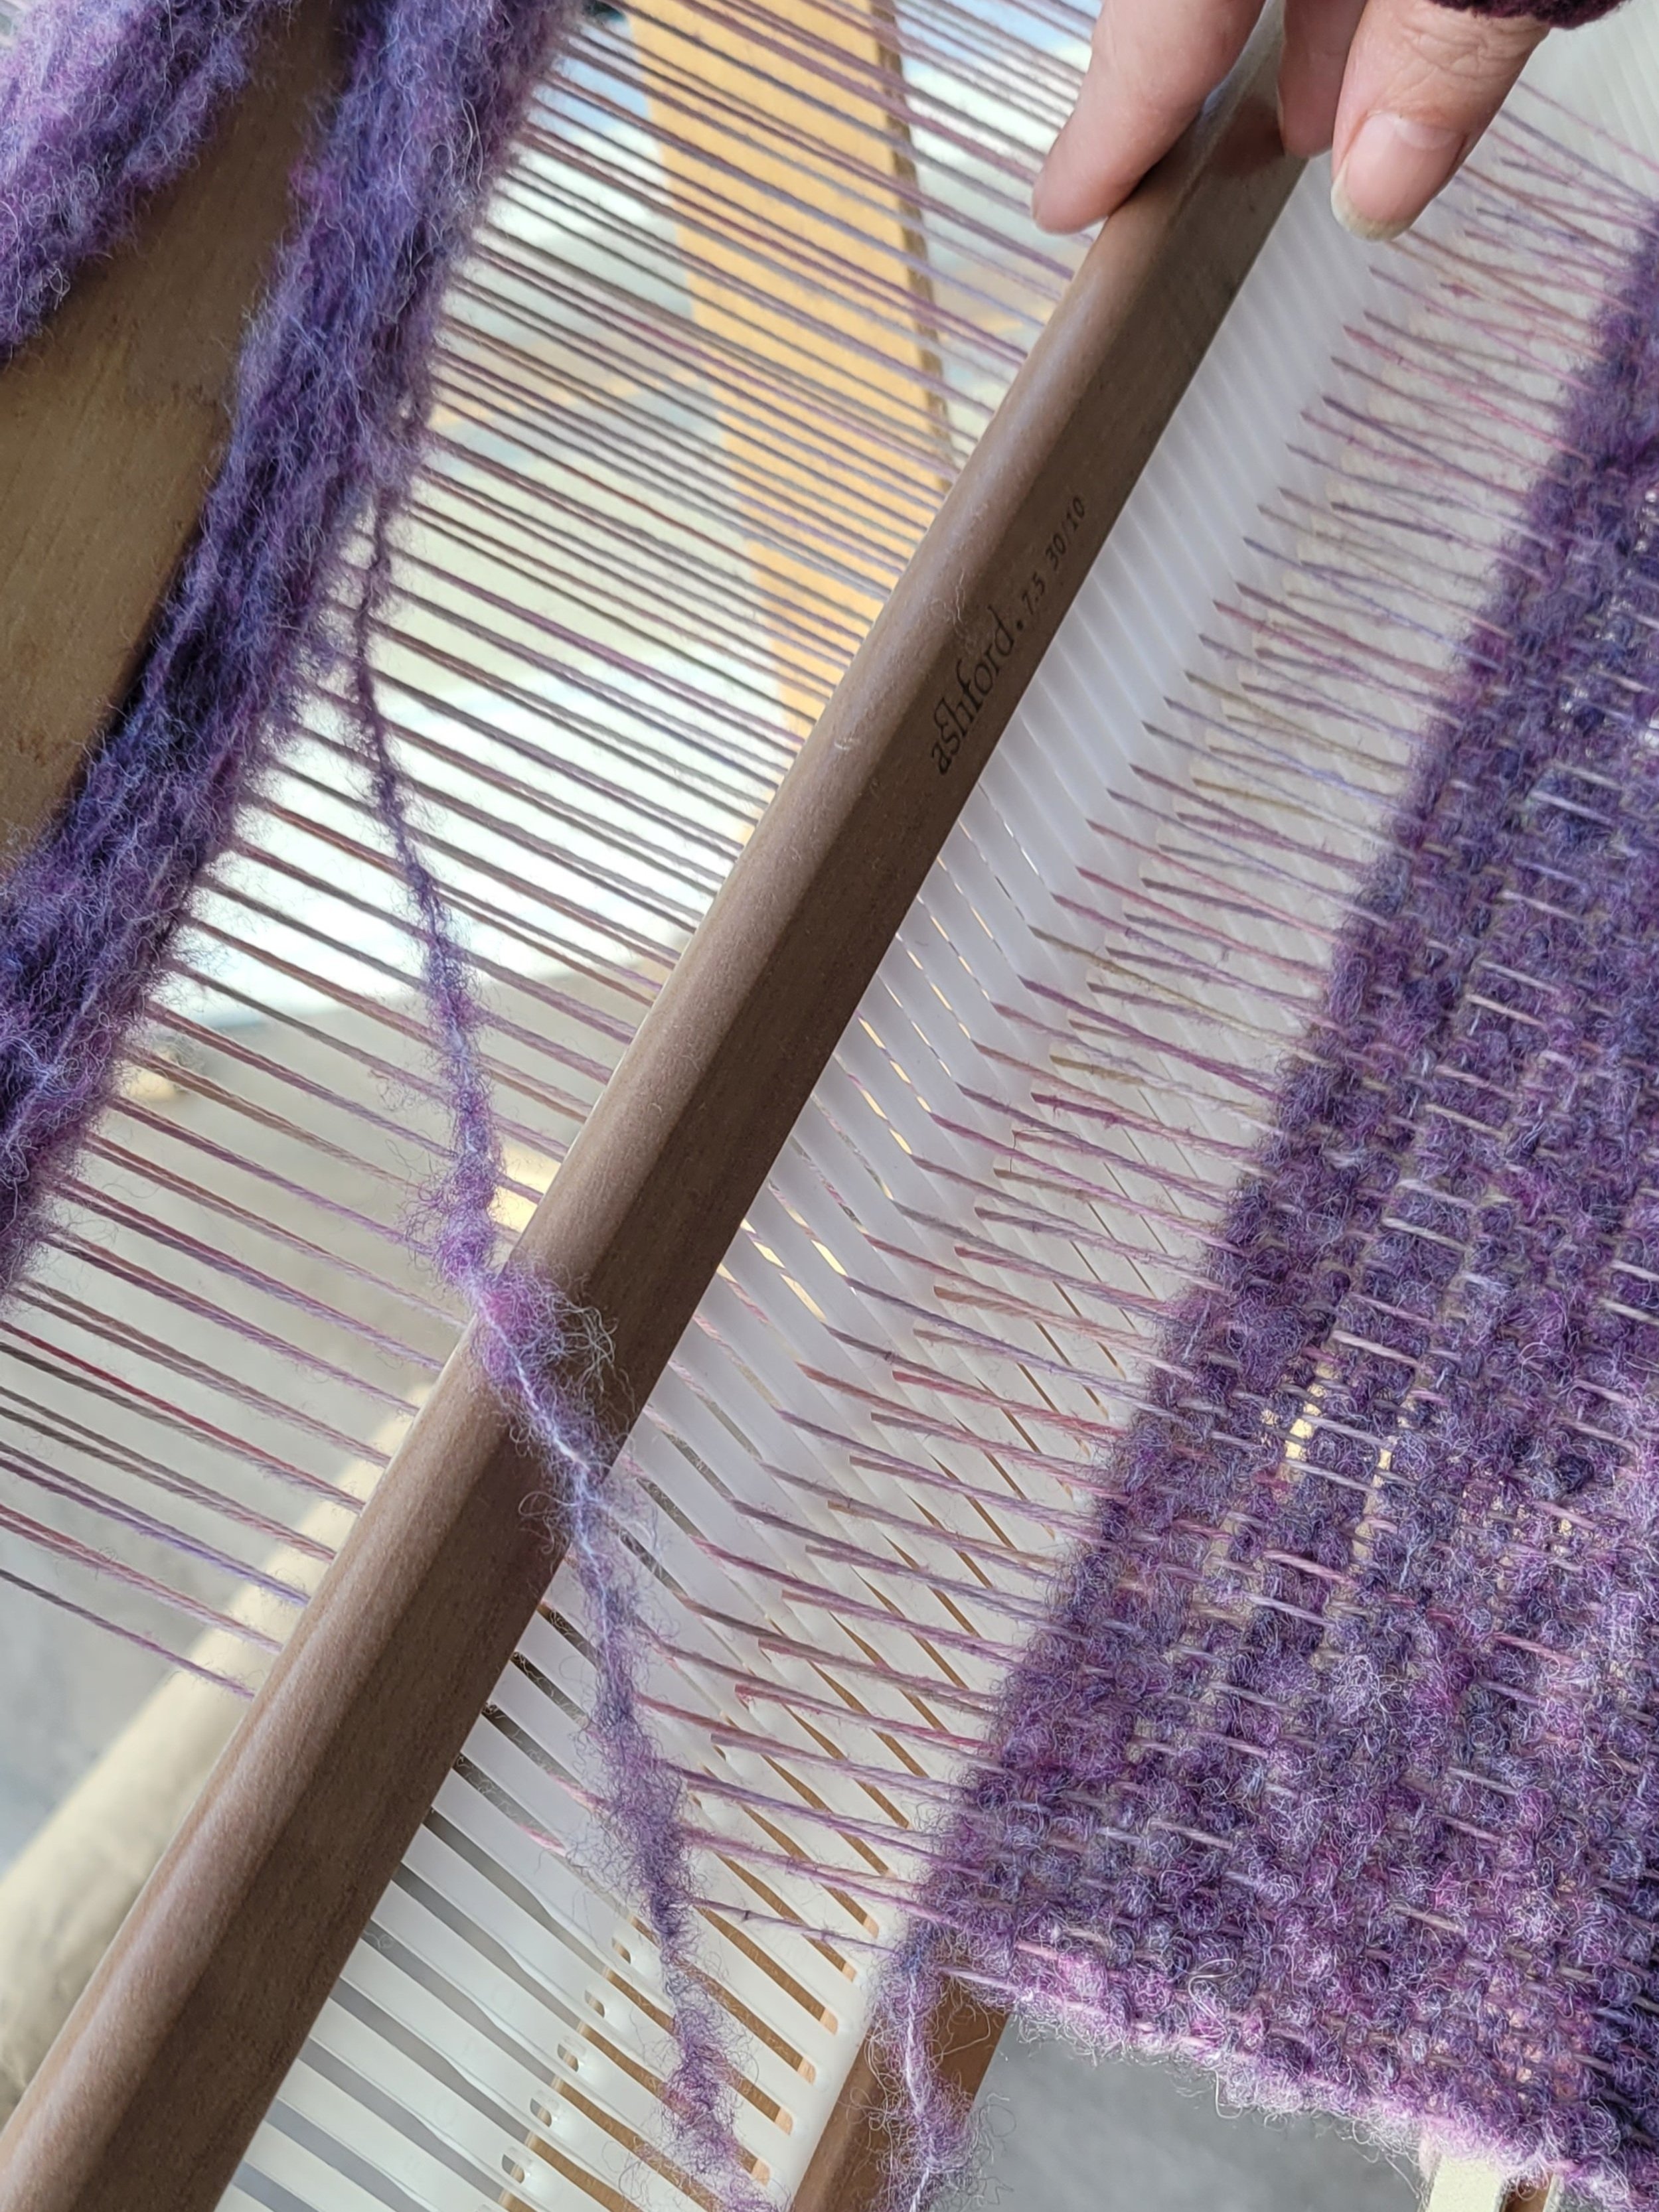
3. Once you have checked and adjusted as per #1 and #2, pay attention to your reed. I often see weavers pull the heddle forward and have it tilted toward the front of the loom. I recommend tilting the reed toward the back of the loom. When the reed is tilted back, you can see exactly what is going on at the fell line (where the new weft meets the woven work) allowing you to place the weft precisely where you want it. Your eye should do a quick run from side to side to make sure the weft is square. I eyeball it with the cross bar under my loom. Others suggest lining it up with lines you have drawn on your loom. Gently press the weft into place with a single, gentle (like a kiss) movement. If possible, try to refrain from a double or triple beating. Three beats means three chances to press harder on one side!
4. Check your work regularly…as you train your eyes, they will learn to catch the slant as soon as it happens! I can see when it is 1/16” off. (I think my students dread when I do a double-take walking by their work!)

There, four ways to prevent the slant from happening! But what if the slant is there? If you’ve caught it early, less than a quarter inch, pay particular attention to the reed. Press slightly harder on the raised side and less hard on the lower side until everything is even again. It won’t be perfect but it will even out in the wet finishing. If it’s between a quarter and a half inch, use a pin to move the threads to even things out. If it’s more than a half inch you should probably unweave until things are even again.
Happy Weaving!

Fringe Twisting
Fringe twisting is just one more step in finishing your weaving. And just like every other thing in the weaving process, you need to think about your fringe before the project ever gets on the loom. Let’s look at fringe generally first.
Why twist? The most important reason is because it looks nice and stays looking nice. An untwisted fringe looks great when it is freshly trimmed and pressed. After that the yarns begin to unravel, shred, tangle and, let’s face it, start looking a bit ratty. If you are making something for baby, a blanket for example, long thin threads can wrap around little fingers and cut off circulation.
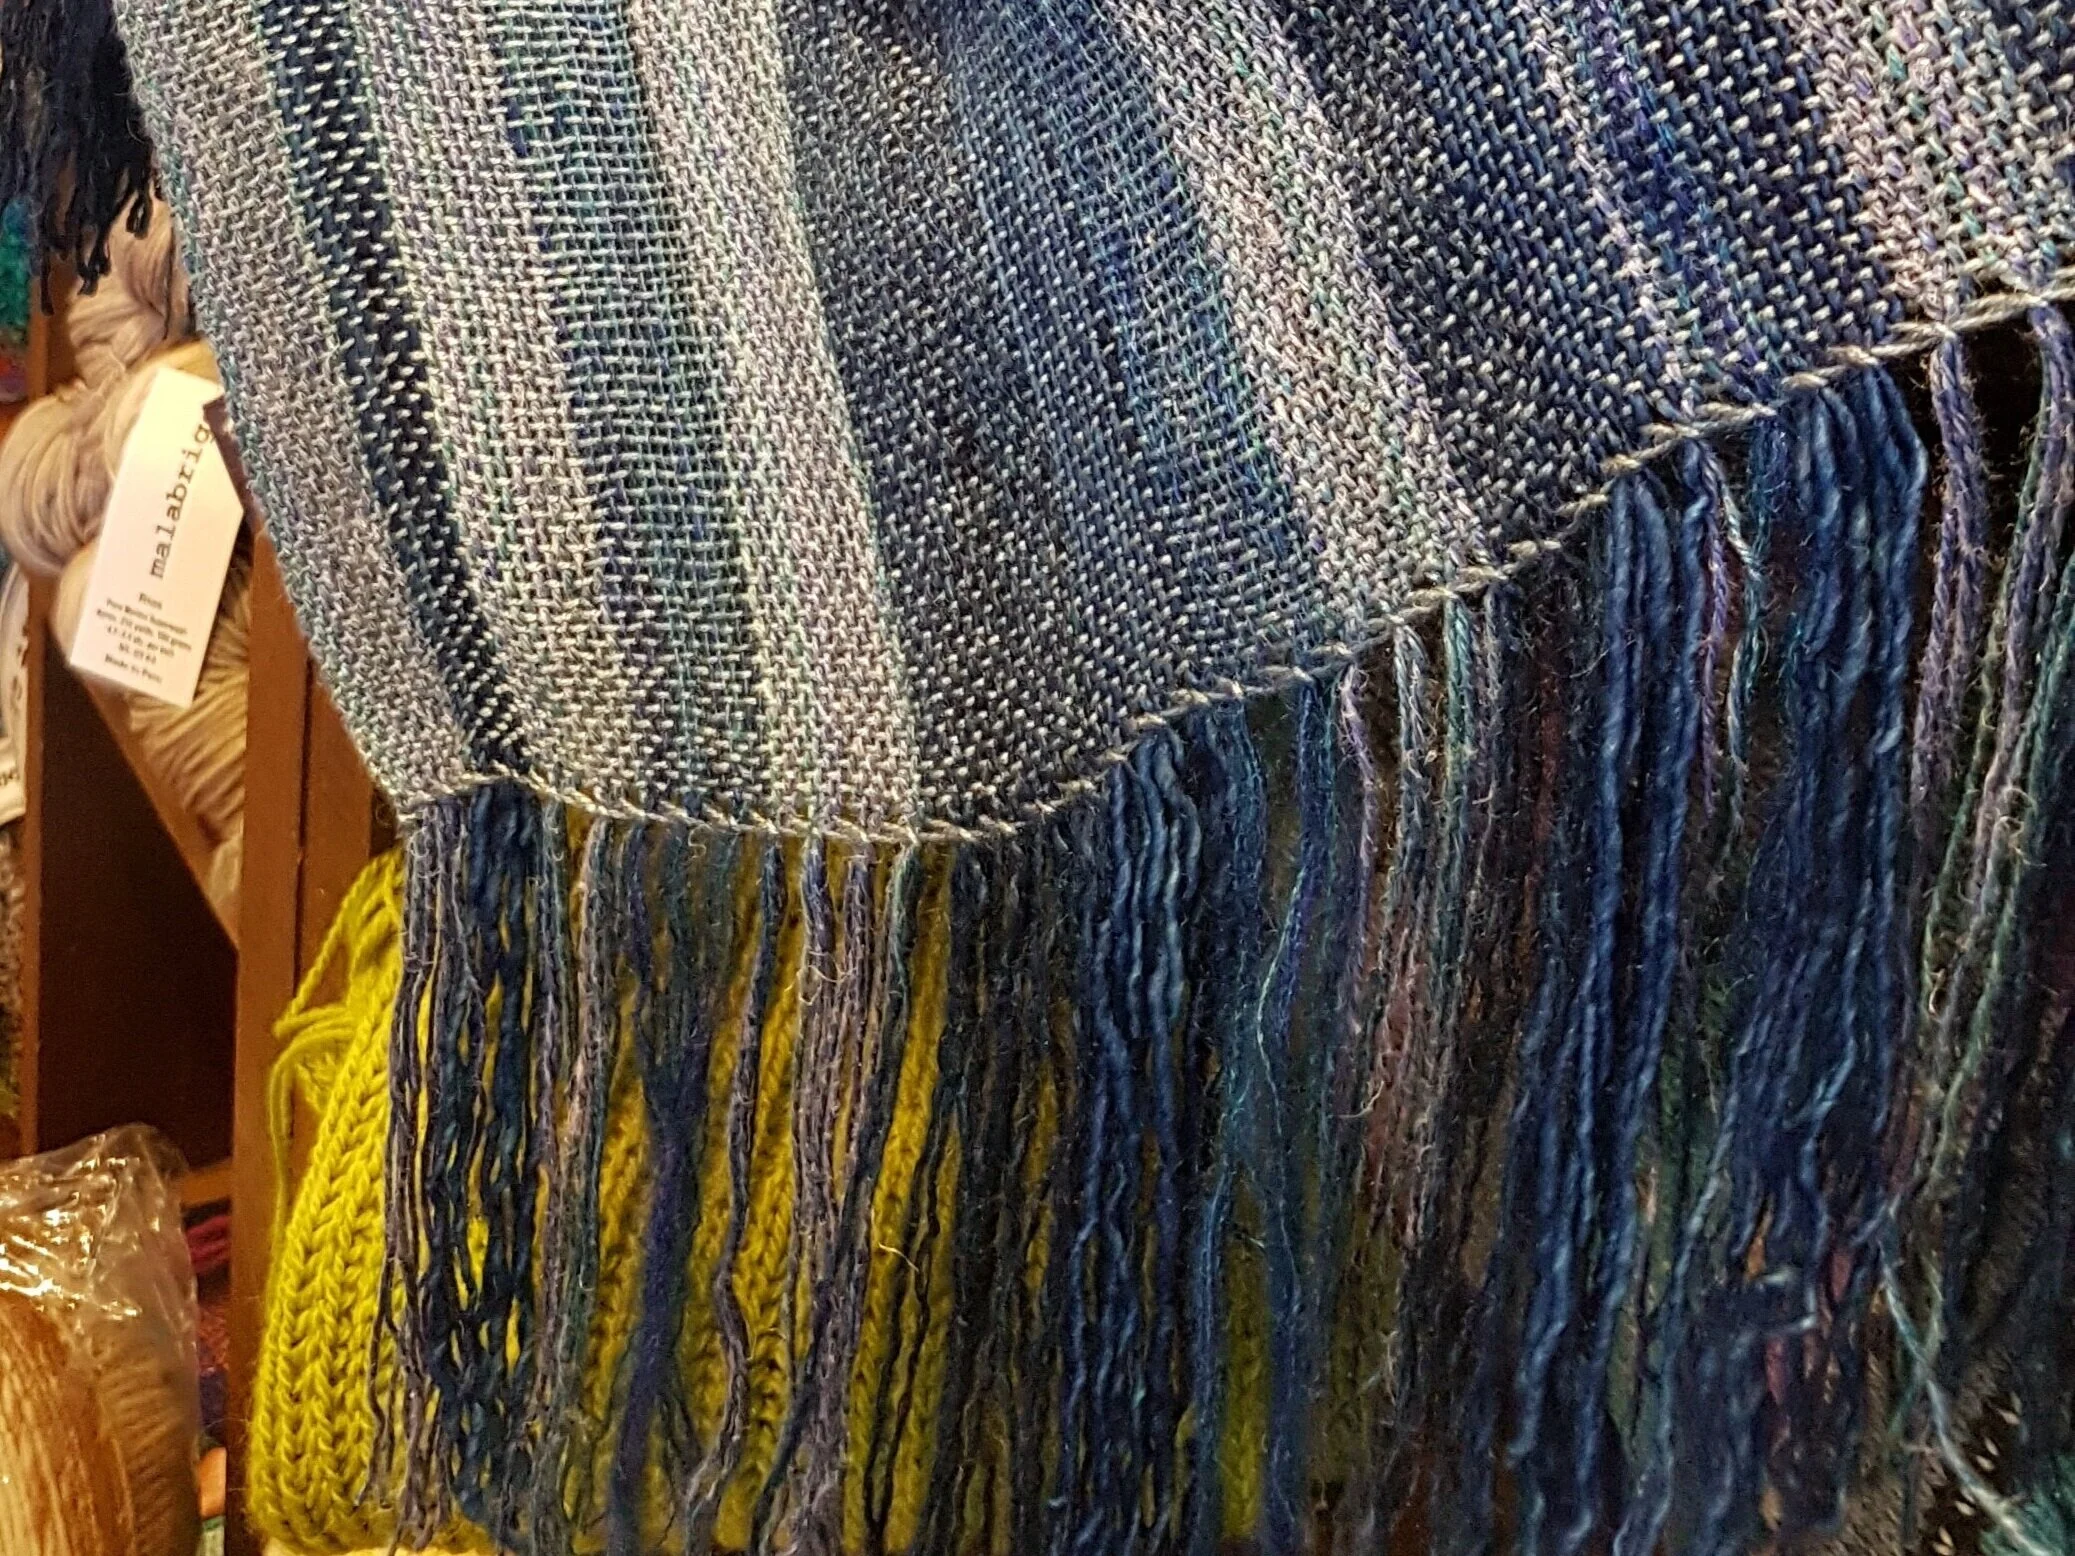
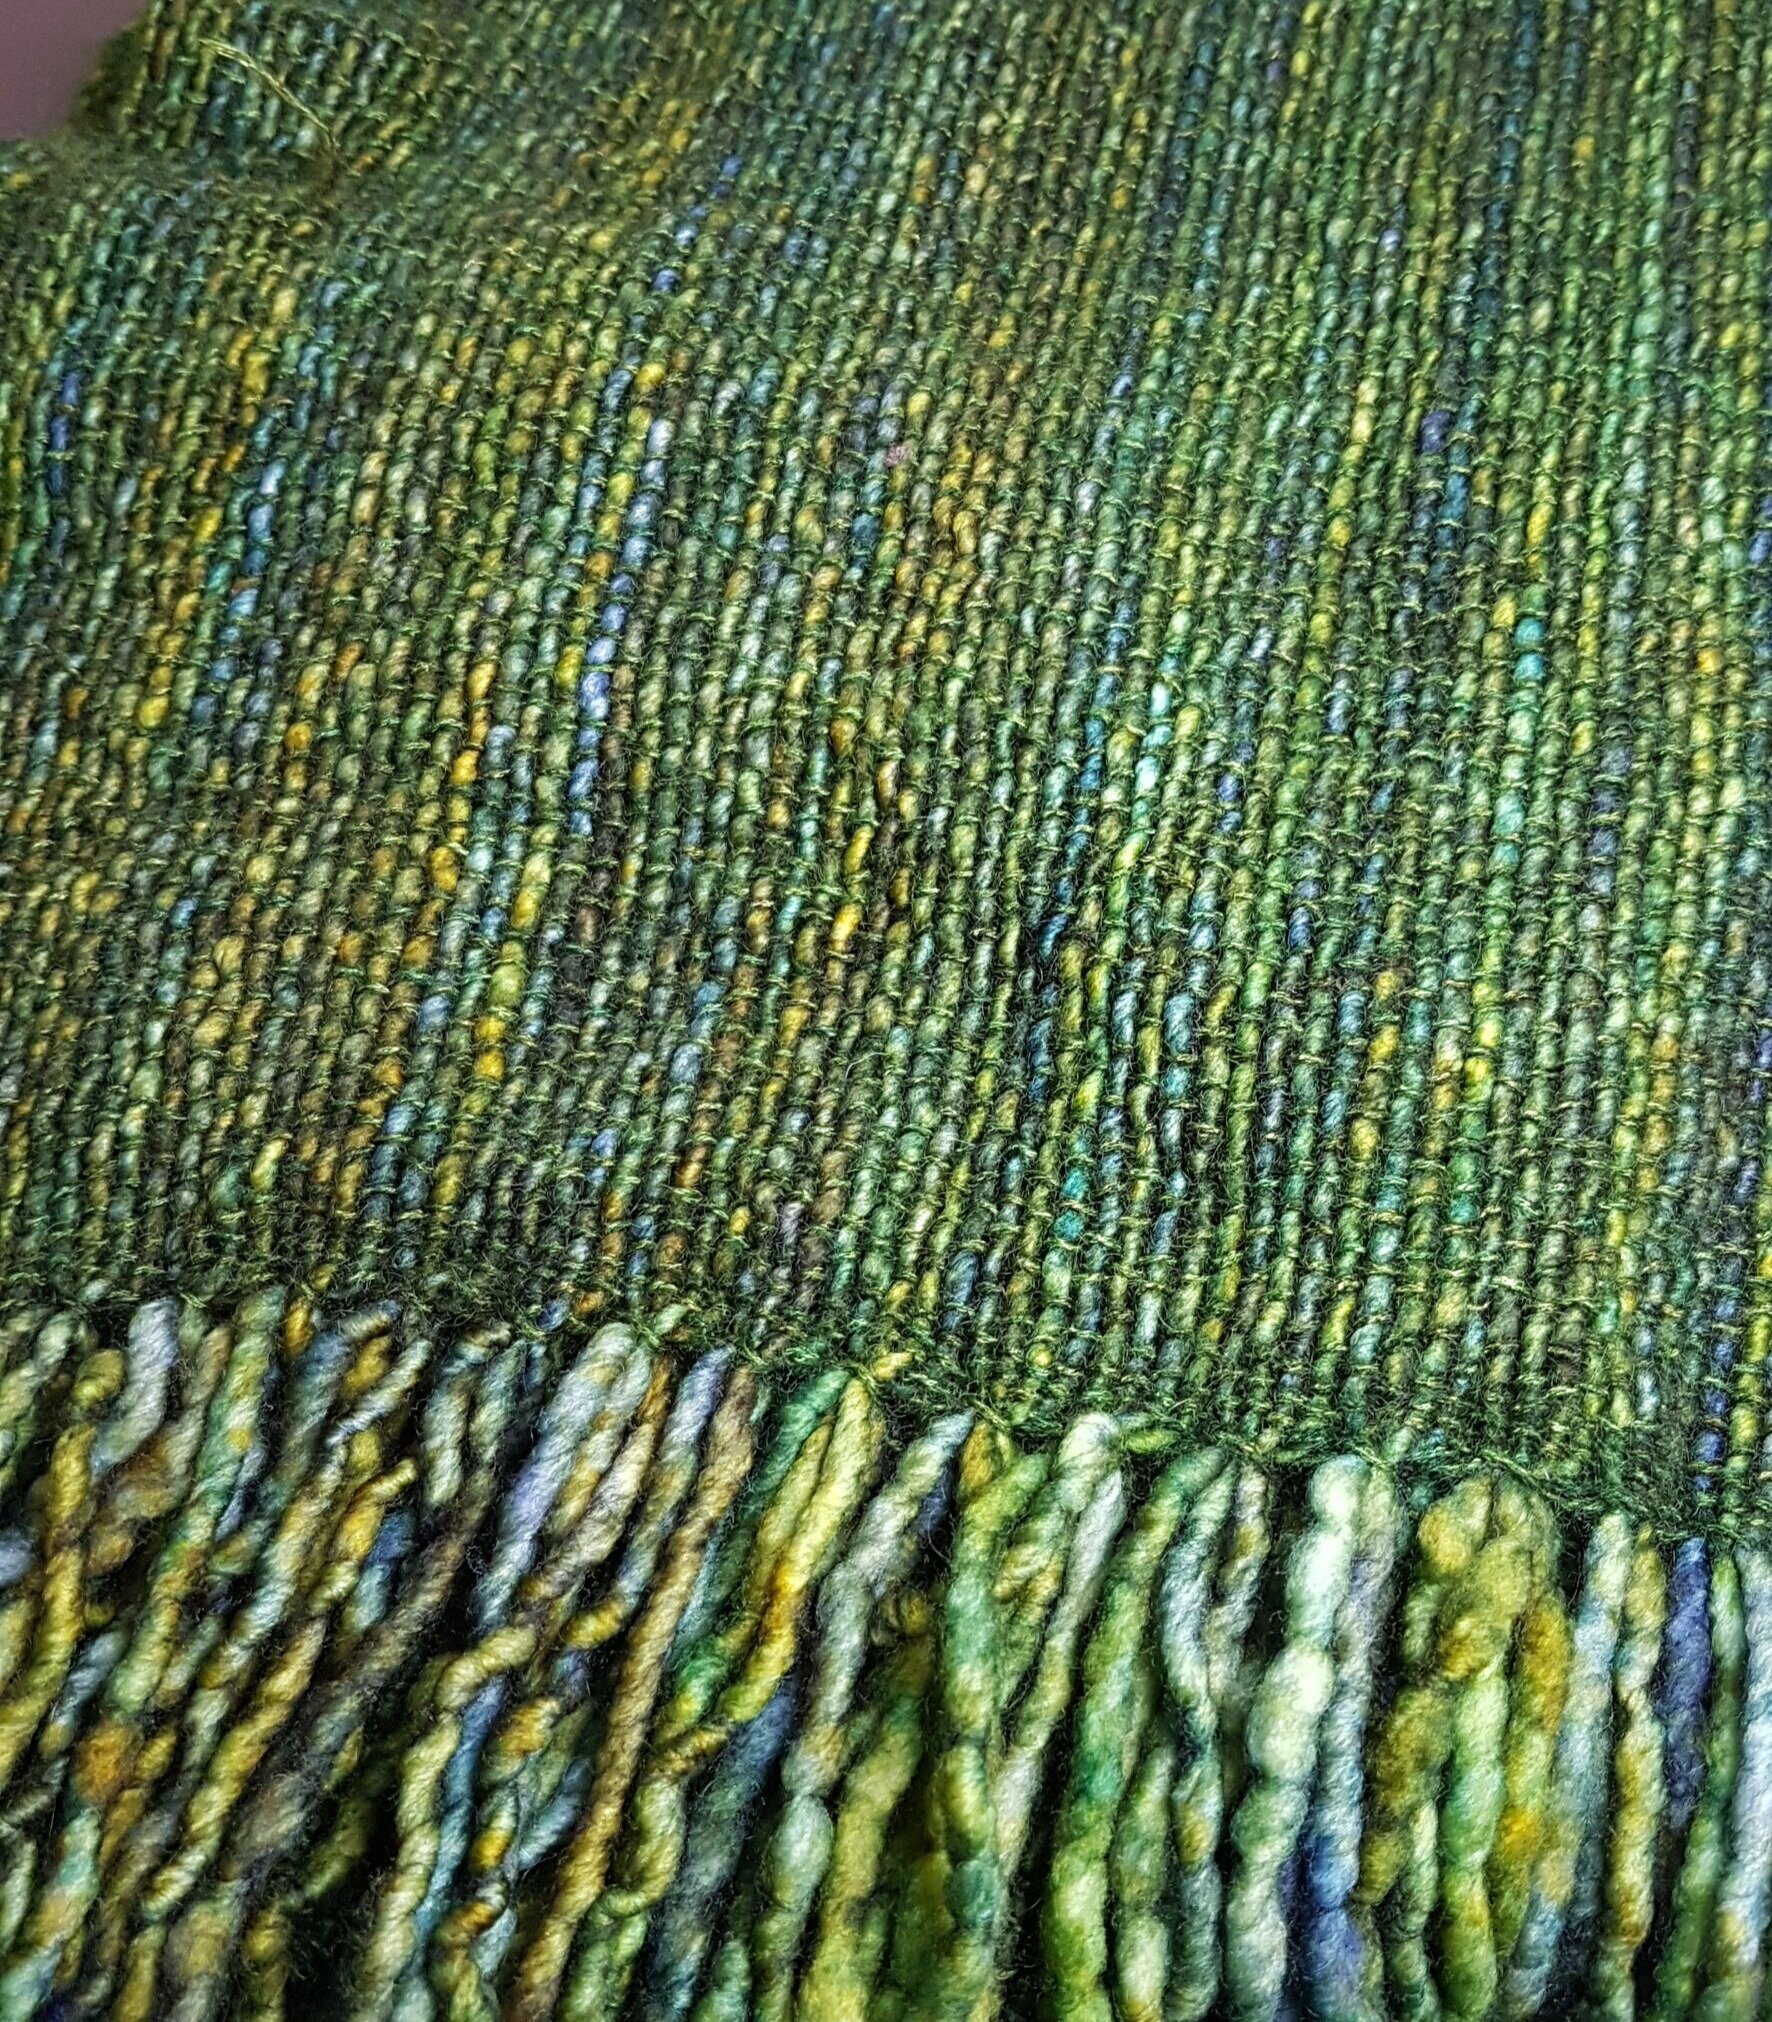
There are times you may decide not to fringe twist. Sometimes the yarn is so beautiful you want the colours to shine (I can’t bear to twist Handmaidens’ Maiden Hair) Or the fringe will look too heavy for the item. When I make loose gauzy mohair wraps, I don’t twist. And of course, there are other ways of finishing a fringe that don’t require twisting…various types of knots for example.
As I said earlier, fringe begins before the yarn goes on the loom. Fringe is made with the loom waste. That means when you are calculating warp you do not have to add extra for fringe but on the other hand, when you tie on, you want to leave enough waste to have the desired length of fringe. This is never and issue for me, I always have enough! Also, be sure that when you cut your work off the loom that you have left enough for fringe.

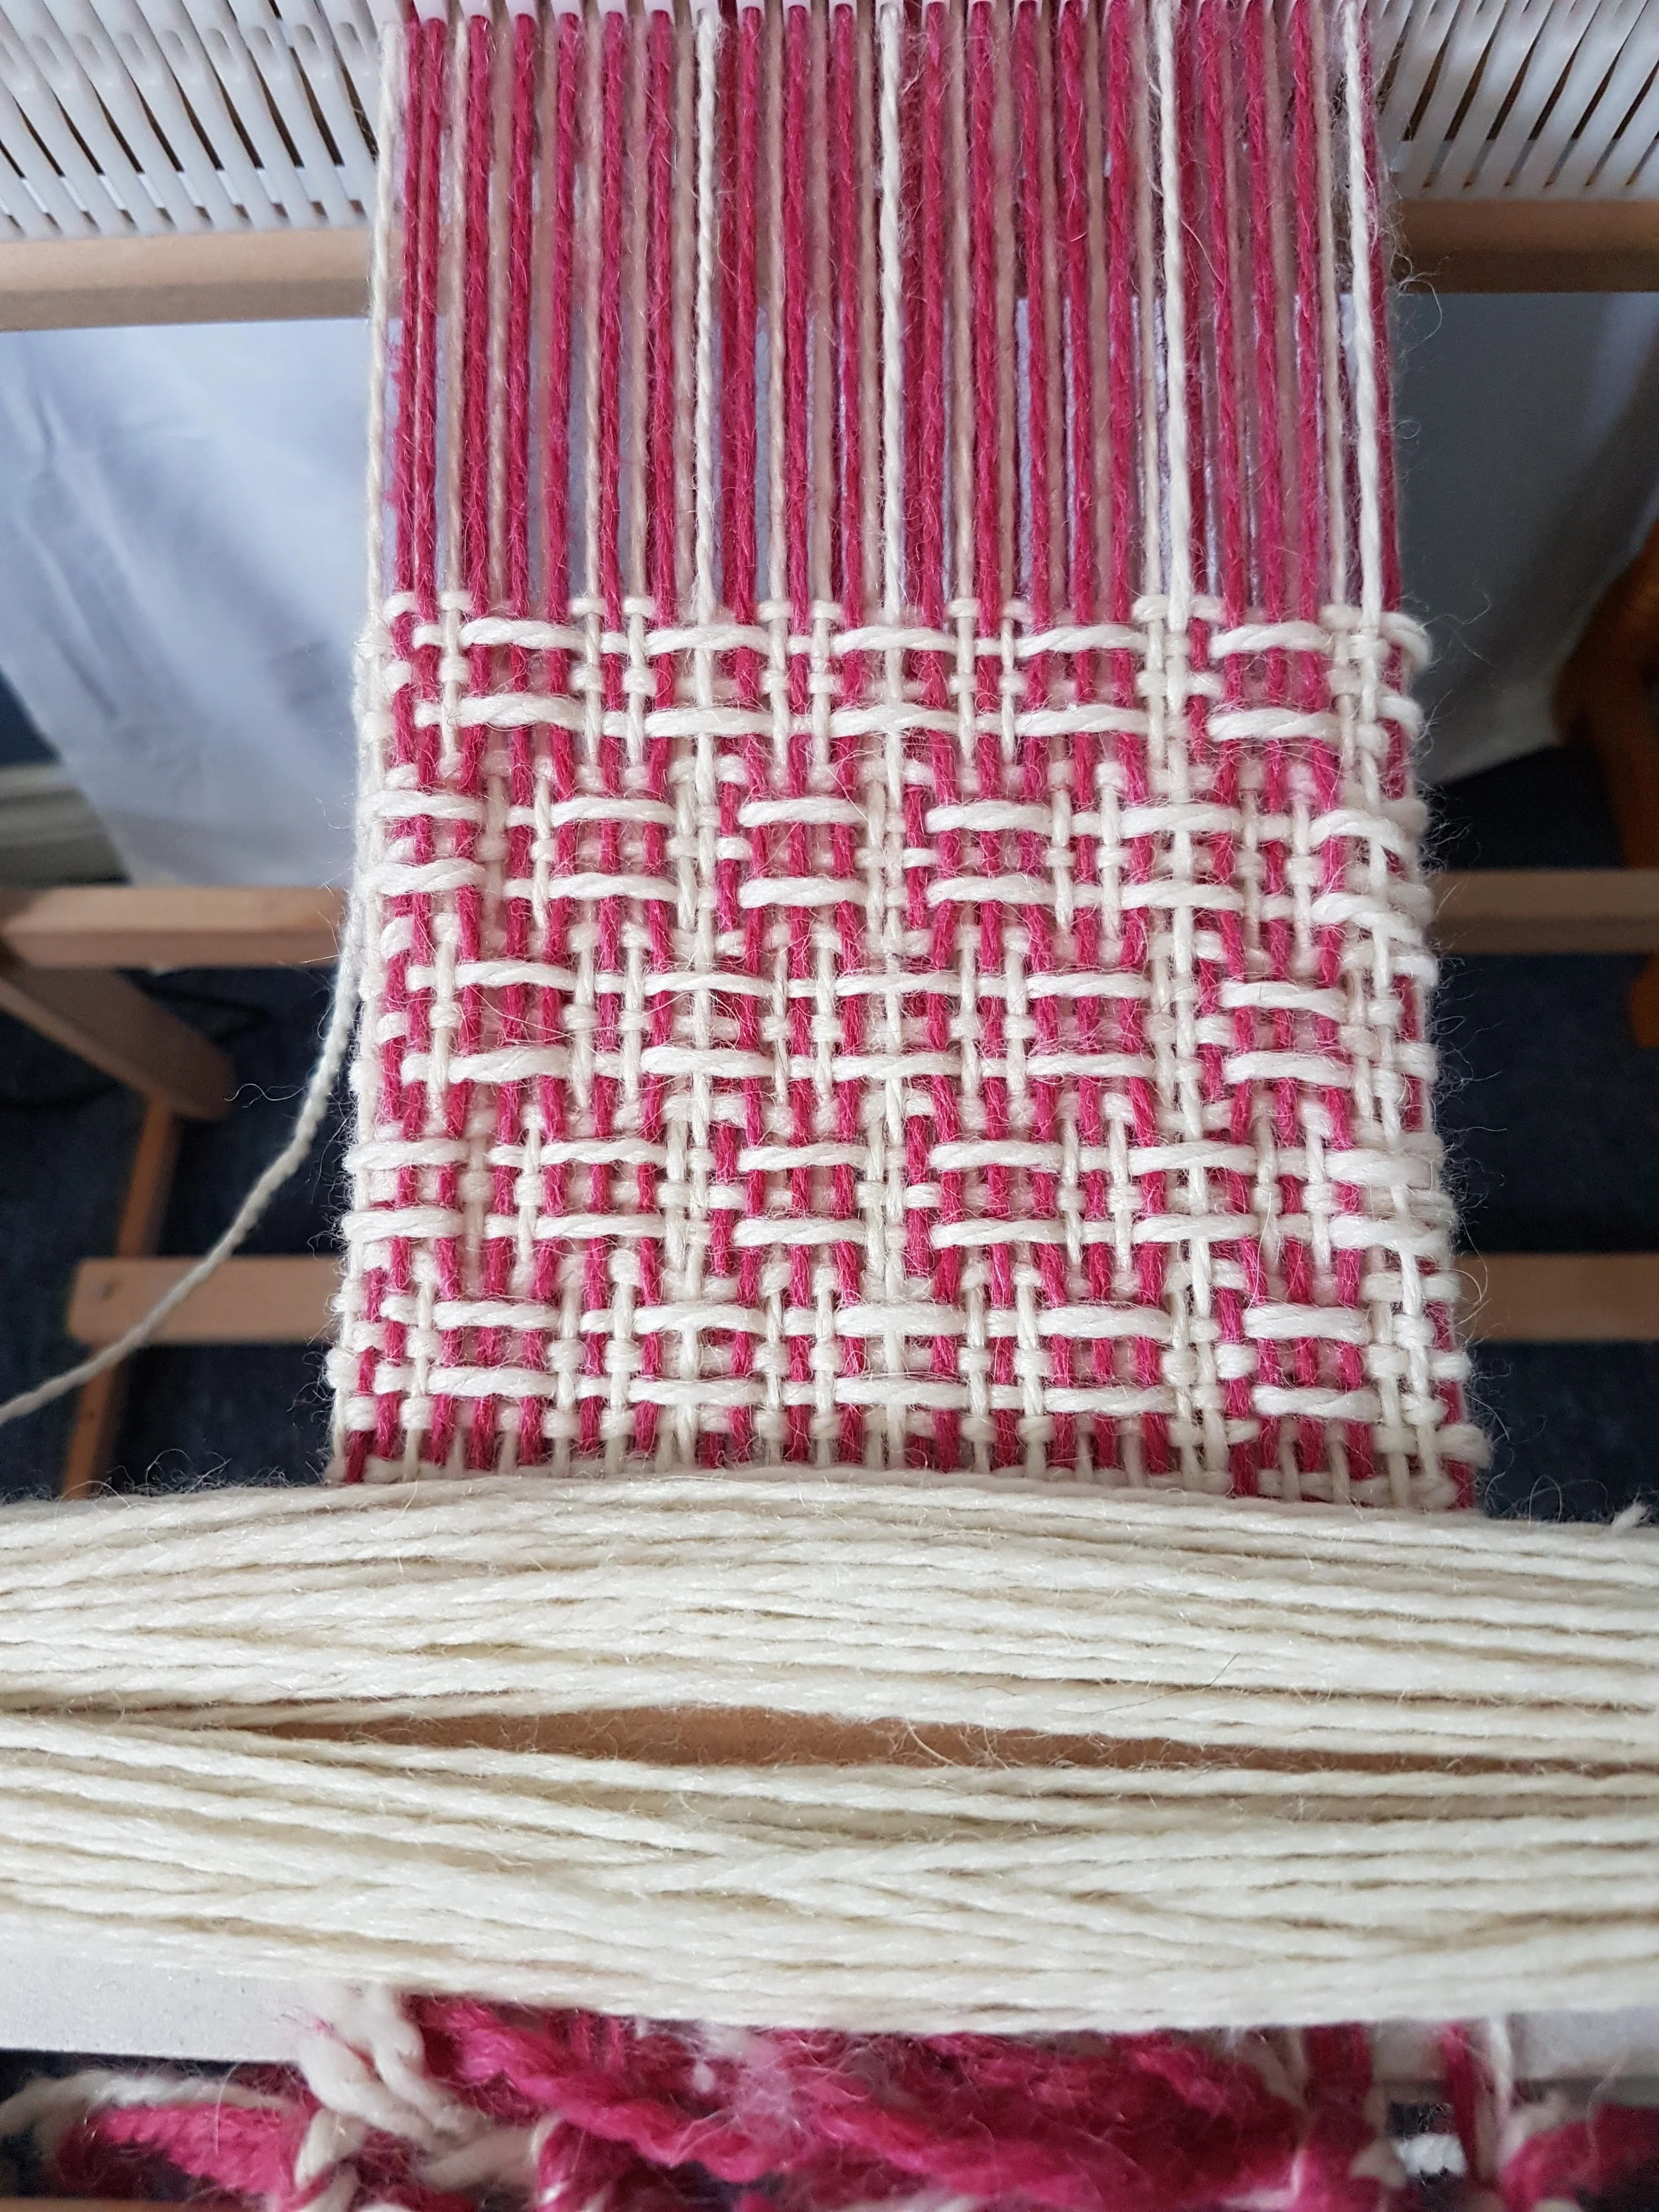
Having a fringe requires a hemstitch. Well, you could do it without a hemstitch, but it will look much better if you have hemstitched. So, when you hemstitch, think about how many ends you want in each bundle and hemstitch accordingly. Fingering weight I usually hemstitch in bundles of 4 and do a 2x2 fringe twist.
And now, what you have all been waiting for…the actual fringe twisting, step by step!

You will need: t-pins, something to stick your pins into (foam blocks work well) a ruler and sharp scissors.
1. Trim your fringe (remember that it will be shorter after twisting so don’t over trim) I use a rotary cutter and mat for this step.
2. It works best if you have your work anchored. Pin the edge of your work to the foam blocks…don’t skimp on the pins!

3. Clip the yarn into your fringe twister (I love my Leclerc quad) If I’m doing a 2x2 fringe I’ll take my first bundle of 4, divide it into 2 groups of 2 and place each group of 2 in one clip. With my quad twister I can do 2 bundles at a time.
4. Start twisting! Count the number of turns (this will vary depending on the yarn and the length of the fringe. Counting will ensure your fringe looks uniform across the work.
5. Hold the ends of 2 bundles and unclip. Tie a knot in the bottom and release. Gaze in awe as the yarn twists around itself.

6. After the first bundle is twisted, have a look. Is it twisted enough? Not enough? Do you like the length? Adjust as needed, then continue across the work . Repeat for the other side. Keep your ruler handy to make sure you are making the fringe the same length. Knotting a little higher or little lower can have a big impact!
7. Check to be sure the fringe is even and knots are tight. Trim close to knot.
You now have a lovely fringe that will keep your scarf, or blanket or table runner, or whatever you have woven, looking beautiful for years of use!


Lessons Learned from Yarn
As many of you know, my 2020 weaving challenge was colour. I needed to use more of it, particularly the bright colours. I didn’t just want more colours though, I wanted confidence to put colours together. I made a ridiculous number of tea towels. 2020 became the year of tea towels. Tea towels act as a perfect palette for mixing colours and if I wove an ugly tea towel, well, that would be one more tea towel for my kitchen! As it turned out, each one was my favourite, until I wove the next one!

As many of you know, my 2020 weaving challenge was colour. I needed to use more of it, particularly the bright colours. I didn’t just want more colours though, I wanted confidence to put colours together. I made a ridiculous number of tea towels. 2020 became the year of tea towels. Tea towels act as a perfect palette for mixing colours and if I wove an ugly tea towel, well, that would be one more tea towel for my kitchen! As it turned out, each one was my favourite, until I wove the next one!
Challenging ourselves is good. There were times however, when I needed a changeI needed something simple yet beautiful. Something I could do without thought and just allow my mind to be filled and soothed by the softness of the yarn and the richness of the colour. The kind of weave that allows me space to think, to process and to just be at peace in the moment. And that’s what we are looking for in our crafts isn’t it? Our craft grounds us so that when we go back into the world we can go peacefully, and bring that peace to others. We may not like what is happening around us but we can face it with calm determination knowing that our outward circumstances cannot rule our hearts. Whatever happens in the world, we can march out and meet it with the same patience we untangle a stubborn knot.
Which leads me to today’s post. I’ve learned a lot from yarn. In fact, weaving, or any craft involving yarn, can teach us much about how to live life.

1. Never fight the yarn
Knots happen. They seem to happen most often in the really expensive yarns. You know, the skeins you bought because you loved them so much but now you’re afraid to use? Those ones, they love to knot. Also, mohair. Untangling knots is a slow, sometimes tedious activity. But we all know that the looser we hold the yarn the easier it is to untangle. Once a knot gets pulled tight to can be impossible to untie. The best way to sort a knotty problem is to patiently, gently, tease the threads apart and always move in the same direction as the yarn. Gradually work away at the little knots, one at a time and the big snarl goes away. Keep your hands and your heart soft.
2. A little tension is good…too little and you create a mess, too much and things begin to crack.

Tension (or stress) is good, but not too much. A yarn under tension will not tangle. That’s why we warp and weave under tension. Just the right tension and everything works the way it should. Let things relax too much and you get a tangled mess; too much and things begin to break. Don’t be afraid of a little tension in your life. It will help keep you moving forward. And when things get to be too much, take a hot bath…hot baths relax everything!
3. Listen to the yarn…you cannot expect yarn to be what it was never meant to be.
Some yarns are stretchy, some are fuzzy, some are a little prickly. Some yarns work as warp and some just won’t. Take time to get to know your yarn. A prickly yarn will always be prickly, don’t try to make it be a soft neck warmer. Definitely don’t make a loose bulky yarn act like warp. Forcing yarns out of their comfort zones a little might yield some fabulous results…taking them too far can ruin something that might have been beautiful. Approach each project with an open mind, willing to listen and try something different if need be.

4. Don’t write off a yarn because of one bad experience.
Some yarns require a little more patience than others. Mohair for example. Mohair makes for delicate, airy wraps but many avoid it as warp. It is sticky, it is a challenge, but treated with just a little extra care it can work. A wider sett and just a little extra patience brings out the best in even the stickiest mohair. Then there’s boucle. Winding boucle on a rigid heddle requires a little more attention: even under tension it likes to tangle. But winding can be done easily by slowing down and “snapping" small bouts of warp as you crank and yank. Just a little bit of the right attention at the right time can make all the difference in the world!
I believe we all learn life lessons from whatever crafts we engage in. What are some of the things you’ve learned from your chosen craft?
How to Nurture a Relationship that Lasts (with your Rigid Heddle) PT 4
This is my last post on this topic. So far we have looked at choosing the right loom, care and feeding of our looms and our own attitudes. This week is about developing ourselves. Our rigid heddles have so much potential but if we don’t develop ourselves, we will never begin to unlock that potential.

This is my last post on this topic. So far we have looked at choosing the right loom, care and feeding of our looms and our own attitudes. This week is about developing ourselves. Our rigid heddles have so much potential but if we don’t develop ourselves, we will never begin to unlock that potential.
How can we develop ourselves?
1. Read books, magazines and articles.

My favourite rigid heddle weaving books are: The Weaver’s Idea Book by Jane Patrick and Inventive Weaving on a Little Loom by Syne Mitchell. Both contain patterns, but what I like best about them is the number of different types of weaving and the pictures. They cover colour and weave, mixing textures, pick up sticks, string heddles, using 2 and even three heddles and so much more!
Interweave puts out a magazine each year Little Looms (My scarf is on the front cover of this year’s edition!!) and it is filled with patterns for rigid heddles, tapestry looms and pin looms.
I love Pinterest! Search rigid heddle and there are tonnes of ideas, articles, blogs, and pictures that come up.
2. Hang out with other Weavers
Your area may have a weaver’s guild. Or maybe there is an informal group that gets together, maybe at a home or your local yarn shop. You can learn so much from talking to other people or just watching. If you can’t find weavers near you, try hanging out online. There are facebook groups that are just for rigid heddle weavers and they are a fount of information! I belong to a group called “Rigid Heddle Looms” and it has 5.5k members who are scattered all over the world. That means that anytime I have a question someone in the world is awake and can give an answer!
Sometimes you will run across people who are very adamant about “right” and “wrong” ways of doing things. Take all advice with a grain of salt. There are always multiple ways of doing the same thing. Take advice, try lots of different things then do what works for you even if it is absolutely the “wrong” way. If it gives you the end result you want, it is the right way for you. There are no weaving police!

3. Take classes
If you have the opportunity to go and take a class with a real live instructor do it! Even if it is project based and you aren’t in love with the project you will learn something. Live instructors will be able to answer your specific questions, see what you are doing and suggest easier ways, new ways or even tell you when you can skip a step! In addition you will meet other weavers, who may live near you, who will now be your friends! And they will have helpful ideas too. Don’t be afraid to ask your local yarn store if they can have a class on a specific topic (pick up sticks, double weave, colour theory…whatever) Chances are if you want it, others do too. Or if you pull a whole group together the store will (probably) happily oblige if there is an able instructor.
Online classes are excellent too. You get to learn from the best instructors. They will endlessly repeat themselves and remain cheerful. Sometimes in person classes can be overwhelming and you forget half of what you learned by the next morning, online classes can be watched over and over again.
4. Don’t be afraid to try new things
Remember, it is just string. If your project doesn’t work, it isn’t the end of the world. If you aren’t sure and can’t afford the loss try new techniques with less expensive yarn first. This helps you learn the skill, but it won’t finish the same so is only good for technique. I often try new patterns with cotton. It’s inexpensive and regardless of how it looks, I will have a usable tea towel! If you are sure of the technique but not sure how the fibre will finish buy a little extra and weave a sample.

In conclusion, developing a lasting relationship with your rigid heddle isn’t much different from developing lasting relationships with people…Take the time to get to know each other, give them what they need to thrive, don’t expect what they are unable to give, adjust your attitude when needed and work on yourself!
How to Nurture a Relationship that Lasts (with your Rigid Heddle) PT 3
We’re continuing my series on How to Nurture a Relationship that Lasts (with your Rigid Heddle). This week we are going to look at attitude and the first thing I want to say is that weaving on a rigid heddle is real weaving! I hear many people say that they have “just” a rigid heddle, like they are somehow “lesser” weavers. This is absolutely not true! A rigid heddle is a real loom that real weavers use to produce real weaving. Never put yourself or your loom down! Now, let’s look at some truths about rigid heddle looms.
We’re continuing my series on How to Nurture a Relationship that Lasts (with your Rigid Heddle). This week we are going to look at attitude and the first thing I want to say is that weaving on a rigid heddle is real weaving! I hear many people say that they have “just” a rigid heddle, like they are somehow “lesser” weavers. This is absolutely not true! A rigid heddle is a real loom that real weavers use to produce real weaving. Never put yourself or your loom down! Now, let’s look at some truths about rigid heddle looms.
1. A Rigid Heddle loom is not a “beginner” loom (although it is perfect for beginners)
While weaving on a rigid heddle may result in you also acquiring a floor loom, getting a rigid heddle because you can’t afford/don’t have the space/want to try weaving before making the investment in a floor loom/ will leave you with a desire that your rigid heddle will never be able to satisfy. Rigid heddles and shaft looms are as different as knitting and crochet. You may love one and hate the other. If a floor loom is what you really want, get one, there is one for every budget and space constraint.

I use both my 32” rigid heddle and my 36” floor loom in a 9’x8’ space.
2. Expect great things from your rigid heddle and it will deliver
This is a double weave using a pick up on the top layer, plain weave on the bottom
Rigid heddles can do far more than plain weave. Add in pick up sticks, string heddles, multiple heddles and varident reeds and the possibilities are endless. A rigid heddle can do patterning that just can’t be done even with a multi-shaft loom as well as twill, deflected double weave, overshot krokbragd, and even tapestry weaving. Additionally, yarns that aren’t suitable for the high tension of a floor loom can work very well on the rigid heddle. Rigid heddles are perfect for single skeins of hand painted yarns as there is so little waste. And you can weave yardage to sew with! Weaving can sometimes take more time than on a floor loom but the ease and speed of warping more than make up for it.
3. Don’t expect the loom to do what you should be doing

Fixing a threading error
It is rarely the fault of the loom when projects don’t turn out as expected. Warped well a rigid heddle has a good shed (big enough to use a boat shuttle with plain weave, though I don’t always recommend using one). Be sure to use the right reed for the yarn (a floor loom allows for flexibility using the reed substitution chart, but not a rigid heddle). If you want nice selvages you will have to practice. Tension is important. Poor tension results in a less than fun weaving experience. As mentioned in a previous post, use the best fibre you can afford…a bad fibre cannot produce good fabric. I’ve only cut off projects before completion twice. Once because I used yarn with too much stretch to get a good tension (because it was cheap enough to experiment with and I didn’t know better) and the second because I had poor tension due to mistakes I made warping. Nothing that has ever gone wrong (fabric too dense, too loose, ugly etc) has ever been the fault of my loom.
To sum up, love your rigid heddle loom for what it is, not what you wish it was. Don’t overlook its’ potential: challenge it and yourself, experiment, and have fun! Below, from left to right: double weave log cabin, plain weave sewn into a shirt, twill sampler using two heddles and rosepath twill using two heddles


How to Nurture a Relationship that Lasts (with your Rigid Heddle) PT 2
Last week we discussed choosing the right loom. This week is about providing your loom with what it needs to thrive. It might be your loom’s responsibility to please you, but it is your responsibility to provide it, and you, with the proper tools and equipment. A new loom package will give you everything you need, except the yarn, to get started with basic weaving.

Care and Feeding
Last week we discussed choosing the right loom. This week is about providing your loom with what it needs to thrive. It might be your loom’s responsibility to please you, but it is your responsibility to provide it, and you, with the proper tools and equipment. A new loom package will give you everything you need, except the yarn, to get started with basic weaving. You will get a loom, a reed (some let you choose the size, most give a 7.5 or 8 dent reed) 2 shuttles, clamps, warping peg and a threading hook.

It can be tempting when starting new hobby to minimize expenses. After all, you may not like it. But I guarantee you won’t like it if you don’t have the right equipment! Trying to weave on a 32” loom without a stand will cause you physical pain and you’ll start to associate weaving with pain. Not getting the size reed to use the yarn you really want to use will leave you feeling dissatisfied with your finished products. And using poor quality fibres can create so many problems that you dread going to your loom. Skimping can sabotage a potentially beautiful relationship. Besides, for most of us it is psychologically less painful to drop $600 in one fell swoop and have everything we want/need than to be continually spending $100-150 while still feeling there is more we need to be really content.
What else should you get?

32” with stand
1. A stand is a must if you are getting a loom bigger than 24”. If you are getting less than 24” I still recommend a stand because it makes warping so much easier. If you or someone you know is handy go ahead and build your own…but remember that the designers of the stand for your loom have had lots of experience and know what height and angle is best and how to balance it so it isn’t prone to tipping!
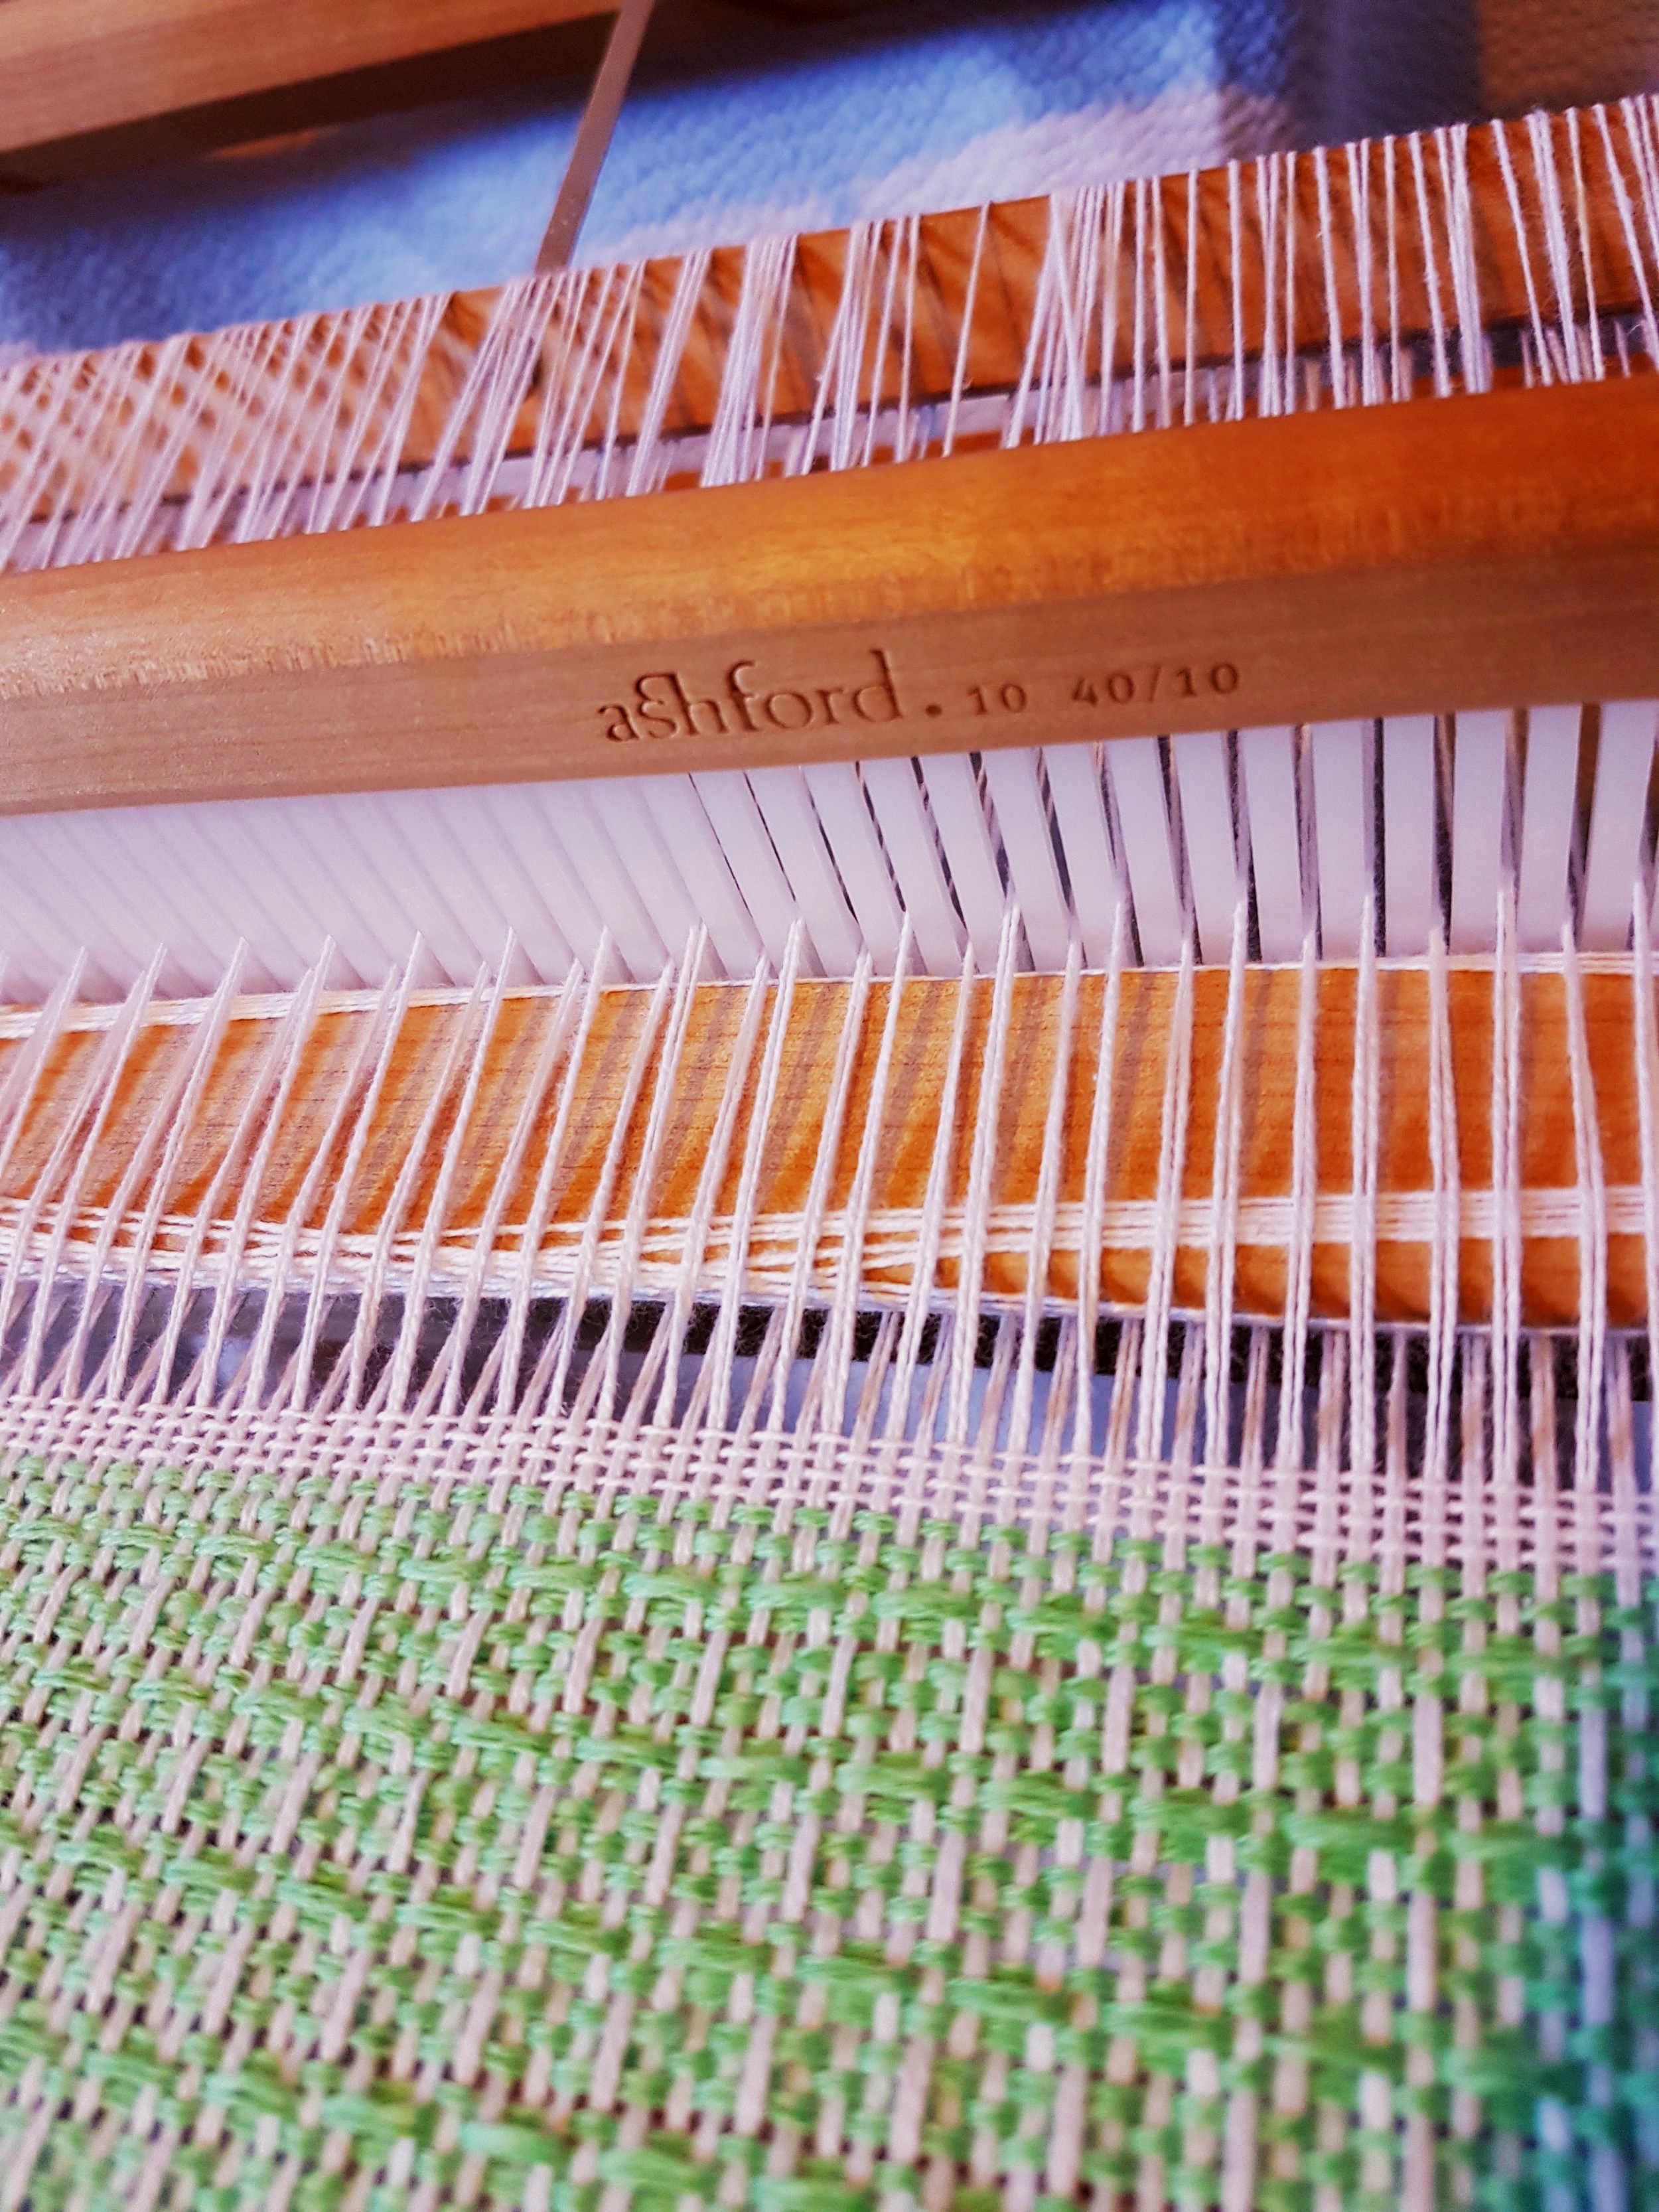
2. Extra reeds. Think about the yarns you want to use and the projects you want to weave and get the right reeds. The 7.5 or 8 dent reeds that many looms come with are great for dk and worsted weight yarns. 10 dent for sport and fingering, 4/8 cotton, or 2/8 cotton doubled; 12.5 for fingering; and 15 for lace. At the other end, a 5 dent is good for aran/bulky and a 2.5 for super bulky. You might also consider getting 2 of the same size so you can learn double weave to either weave wider blankets, get the sett you want (2 10 dent reeds allow you to weave at 20 ends per inch) or weave twill.
3. Extra shuttles of various sizes. Just because you have a 32” loom does not mean all your shuttles should be 32”. The shuttles should be just a little longer than your project is wide. It’s just more comfortable. Using a 32” shuttle takes a lot of shoulder energy and can be tiring so if you are working on a 12” scarf, using a 14” shuttle is much more comfortable.

Pick Up Stick and Shuttle
4. Pick Up sticks…these are like shuttles except with points on the end. They make it very easy to create complex looking patterns.
5. A couple good books and classes. I’m a fan of in person classes over online classes simply because a live instructor can personalize to you specifically. S/he can see what you are doing and give tips specific to you. Plus you will learn from the others in the class and perhaps meet new, local, friends! That being said, online classes do have benefits…you can do them at your convenience, repeat as many times as you want and have very experienced teachers.
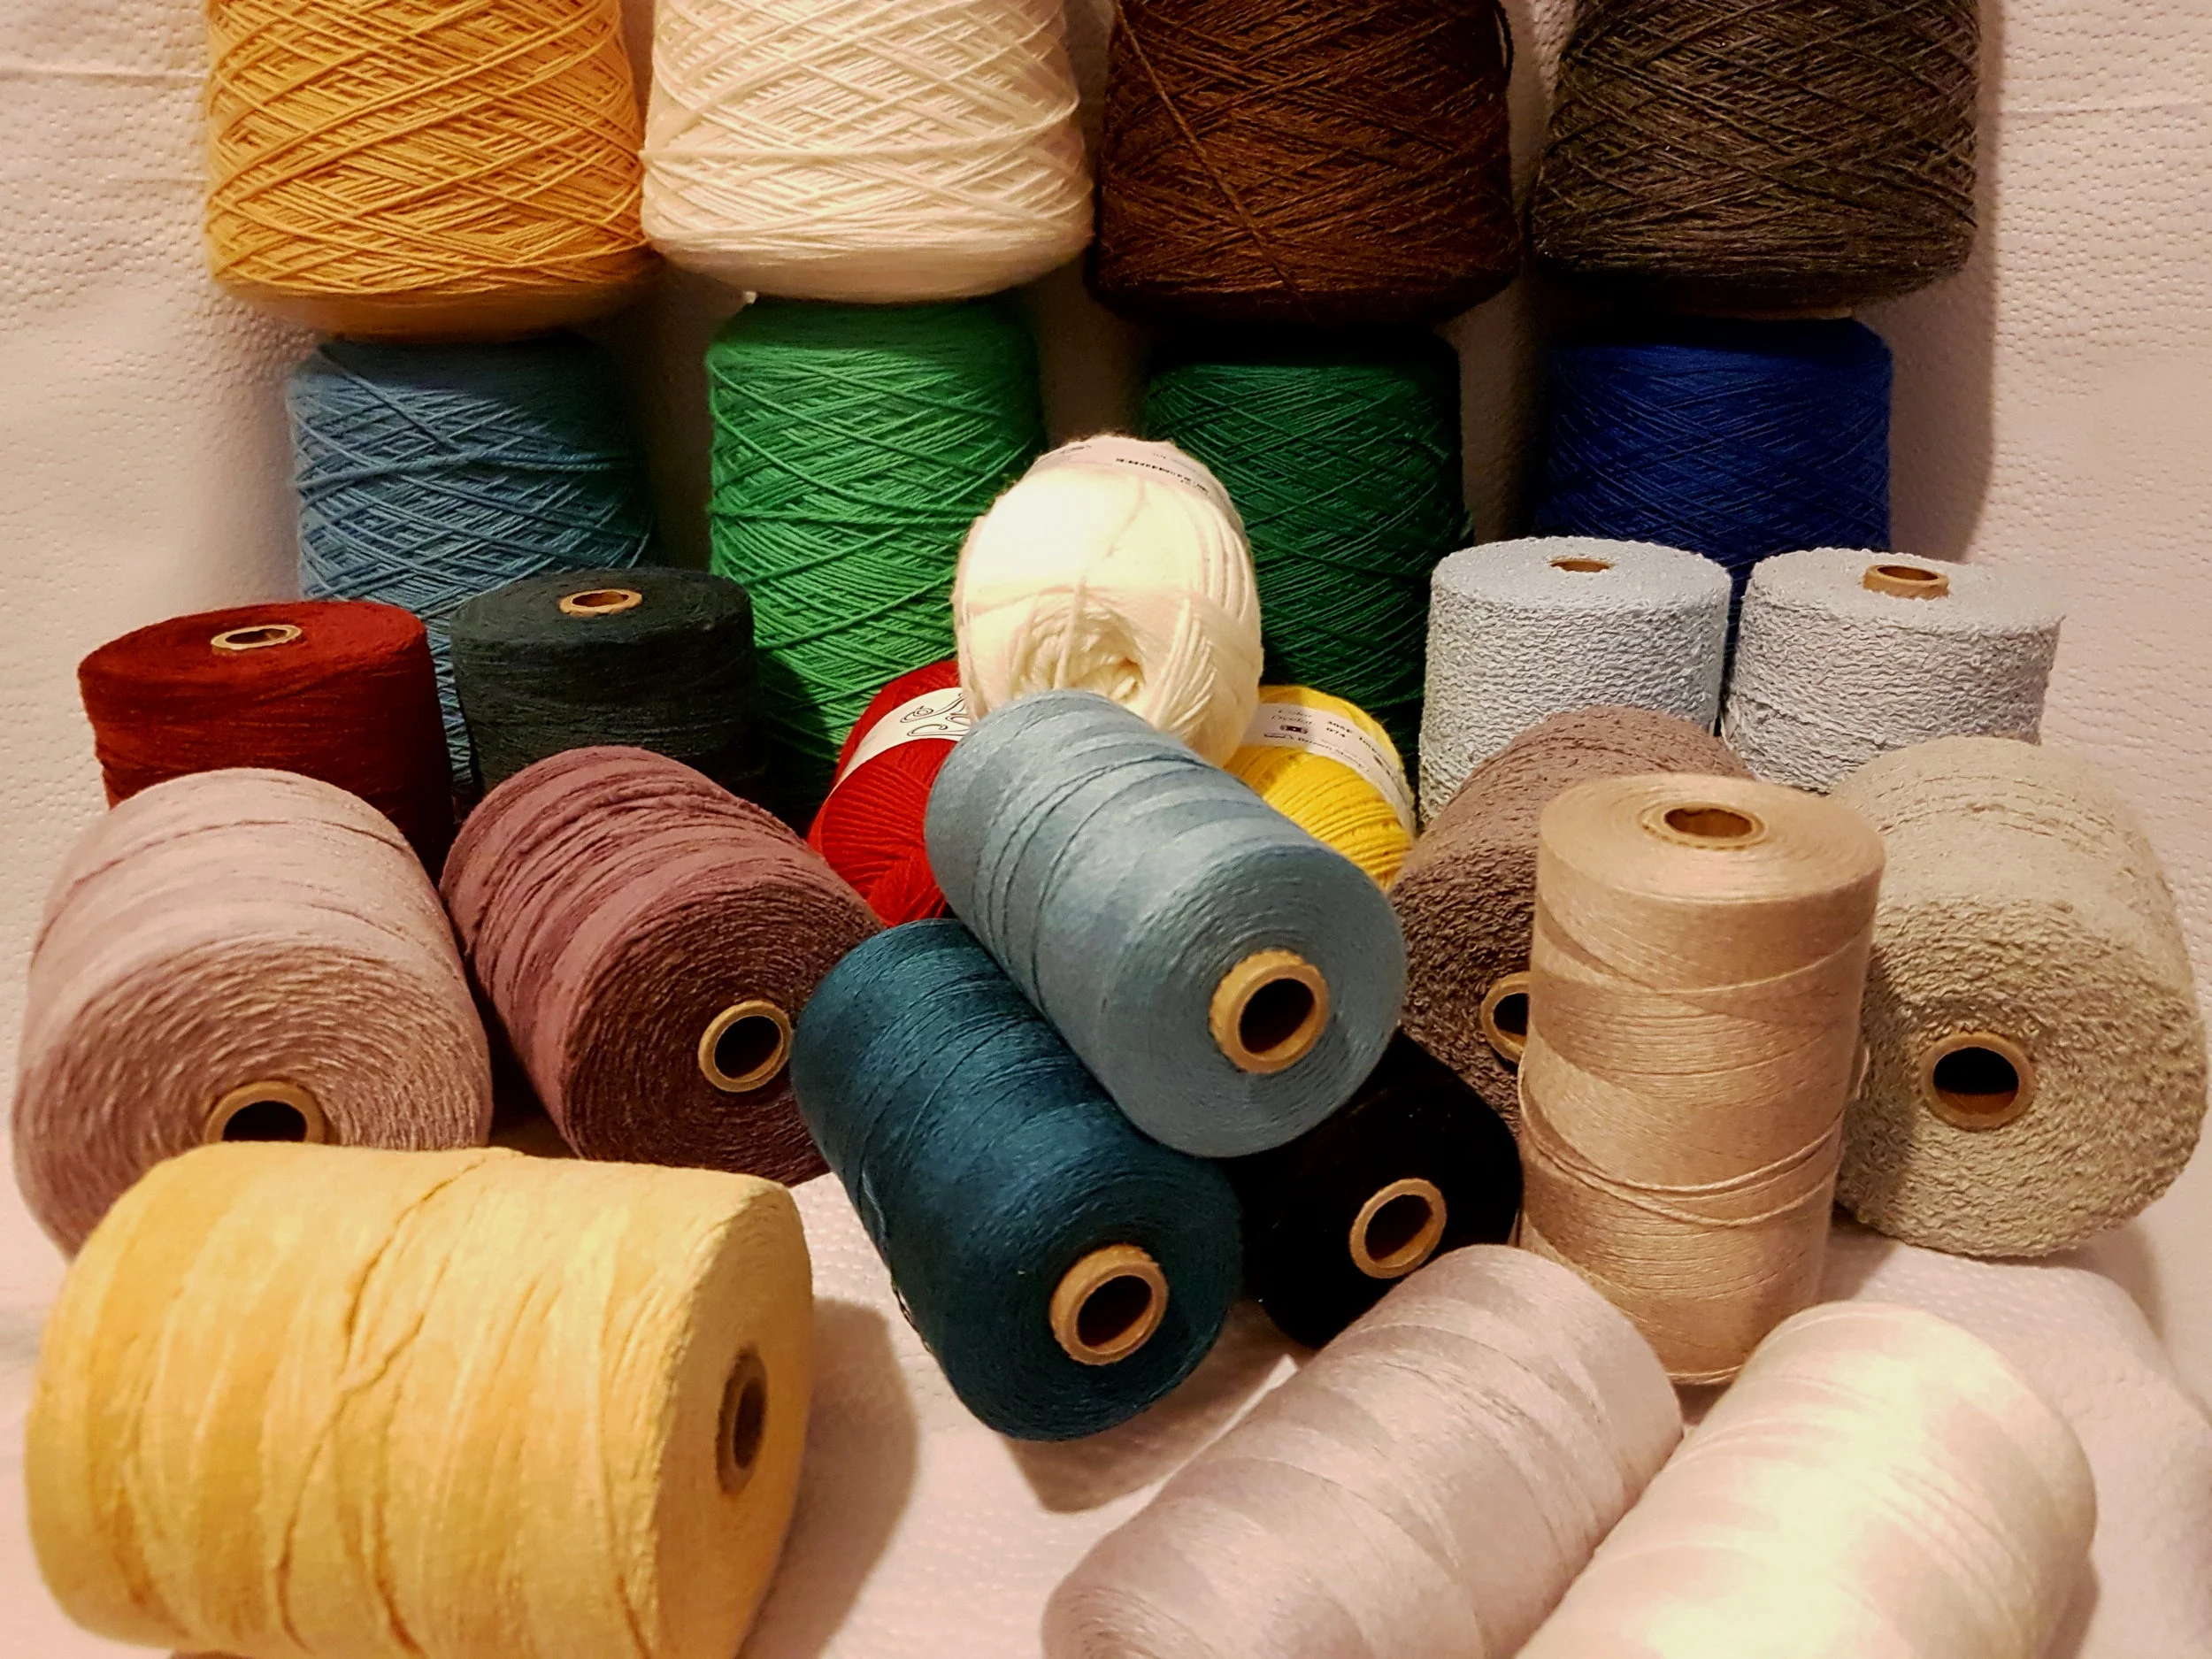
6. Good quality fibres that you love! Life is too short to use ugly yarn. This is your hobby and you should enjoy every moment spent at your loom. Don’t sabotage a potentially beautiful relationship by using poor quality yarn because it’s cheap. Get the best you can afford, something that feels nice in your hands and gives you pleasure just to look at. Even for beginner projects, maybe especially for beginner projects! Your first projects may not be perfect but if you hate the yarn, can’t stand the feel if it or it's a mess on the loom you will begin to associate weaving with negative emotions. First impressions are important!
Fun and Handy Extras
There are always a few things that you don’t really need, but they definitely add to the ease and enjoyment of weaving.

Varident Reed
1. Varident reed: this is pretty cool. It’s a reed with pieces of reeds of all sizes that you can put together in the order you want to use any weight yarn in one project. Great for using up all those little bits of leftover yarn.

Fringe Twister
2. Fringe twister: another very cool gadget. Just clip, turn and tie and you have a beautiful twisted fringe. Untwisted fringes tend to look a little tattered over time.
3. Extra warping sticks: if you plan to weave lots of yardage, these will come in very handy.
4. A portable light that will clamp onto your loom. It’s always nice to have good light!
Just a quick note about buying used looms. This is a great way to get a fantastic deal. Before you buy, make sure all the pieces are there, that the loom holds tension and that you can get parts if you need them (extra reeds, double heddle kit if it isn’t built in, stand if you want one etc). It’s not a deal if you can’t use it.
I hope if you are considering a loom, or are a beginner weaver, you have found this helpful. If you are not a weaver, and you’ve read this far…wow! Thanks! Here’s my words of wisdom for the week: Life is always easier with the right tools (whether it’s a skill to learn or a physical object). It’s worth learning what they are and acquiring them. So many times we “make do” and struggle, but if we used the right tool (or skill) the job would have been done faster and better, with less grief, and we might have enjoyed it! I don’t believe we need to buy everything, on the contrary I believe we should buy less. Borrow when you can, share what you have. But when you do buy, buy the right tool. You will enjoy life more!

My Craft Room
I dream of a ‘ real’ craft room. I think all crafters do. I dream of a big airy space filled with giant windows and sunshine. And sky lights! My dream room has a big center work table, my 32” rigid heddle, room for a 60” 8 shaft loom, a wall of shelves to keep all my skeins and cones and fibres for spinning in view and easy reach. A corner for spinning and a corner for planning, drinking tea and dreaming.
I dream of a ‘ real’ craft room. I think all crafters do. I dream of a big airy space filled with giant windows and sunshine. And sky lights! My dream room has a big center work table, my 32” rigid heddle, room for a 60” 8 shaft loom, a wall of shelves to keep all my skeins and cones and fibres for spinning in view and easy reach. A corner for spinning and a corner for planning, drinking tea and dreaming.

The Rigid Heddle Corner

I’ll bet you also have a dream craft room. But so much can be done without it. I am fortunate enough to have a craft room. It’s pretty tiny, an 8’ x 9’ basement room. (One small window, no sun) Until recently it held a 36” 4-shaft floor loom, a 32” rigid heddle loom, a dresser that acted as storage and sewing station, a warping station, a spinning wheel and a dressmaker’s dummy. I really couldn’t move in it. Both the spinning wheel and the rigid heddle loom needed to move out to be used. So they moved into the rec room. (Come on, be honest, your craft stuff is quietly taking over your house too!) The rec room worked well until my husband’s office moved into it. I may have shed a tear. Then I pulled myself together and redirected my takeover. My rigid heddle temporarily moved into the living room (along with all my rec room furniture, it was a mess!) I didn’t have room to warp so it moved into the kitchen or to the back deck for the warping process.
In the office moving process, we freed up a room in the house (the old office). I seriously considered just taking over that room (in addition to the one I already have) but decided that wasn’t really fair (my kids think they need space too) so I took over the closet instead. It isn’t very wide but it is quite deep. I moved my dresser/sewing station, dressmaker’s dummy and spinning wheel into it. I can close the door and we have a lovely sitting room. I can open up the closet and have a lovely sewing station or pull out my wheel to spin. And my rigid heddle moved back down to the basement craft room. Except when I’m doing a longer warp, then it moves to the kitchen, or I’m using the full width, then it’s back in the living room.

Warping in the kitchen
So don’t let lack of space stop you from weaving. If it weren’t for the floor loom I could quite easily manage without a room altogether. If my house were more open I wouldn’t need a room even with the floor loom. If you really want to do something you can make it happen in the space you have. You get creative, find solutions and weave on.
Do you have a dream craft room? Or have you found ways to manage in small spaces? I’d love to hear about them!