
Twill On A Rigid Heddle Part 2
Today we’re going to look at how to warp and thread your rigid heddle for a basic twill.
Before we get there though, a few words of encouragement. Weaving should be fun. When you go to your loom you should look forward to it find it relaxing. If you find yourself forcing yourself to the loom figure out why that is. Is it the project, the yarn, the colour? Is the project too challenging so you can’t relax? Is it because you feel like you “should” do something? Plain weave is beautiful, and if that is what you love, don’t let someone make you feel less because you haven’t “moved past” the beginner stage. There is so much beauty to be found in plain weave, and if you plain weave for the rest of your weaving life, you are a successful weaver!
Ok, back to twill…
Warping is easy…warp just like you would for any other single heddle project. Two threads for every slot. I don’t recommend trying to double the ends when you are first beginning, stick to 1 thread equals 1 slot.
The interesting (challenging!) part comes in the threading. How you thread the slots and holes creates the pattern. For the purposes of this post (and all my patterns!) here’s how I write the patterns.
0 = the hole in the reed
| = the slot of the reed
When I use the symbols, the first symbol always matches the back reed (the reed closest to the back of the loom). The second symbol always refers to the front heddle, the heddle that is closest to the weaver.
So, 0 | means that the yarn is going through the hole in the back reed and the slot in the front reed.
There are three ways that a yarn can go through the 2 reeds. Each represents 1 shaft.
Shaft 1: | 0 back slot, front hole
Shaft 2: 0 | back hole, front slot
Shaft 3: | | back slot, front slot
Pay attention to these things:
When threading from slot to slot, thread to the slot immediately in front of the back slot.
Some slots will have more than 1 end.

Note the crossed threads. I had to undo and rethread this section.
Sometimes slots and holes will be skipped.
As you thread, keep an eye on what is happening between the reeds. The threads should not be crossed and they should travel in a relatively straight line…of course when going from a slot to a hole there will be a slight angle, but only very slight. If you are repeating a pattern across the loom, you should see a regular pattern in the front and the back heddle. For example, a basic 1, 2, 3, you will see a pattern on the front heddle…2 holes, empty hole, 2 holes, empty hole across the reed. The slots will also have a repeating pattern. Seeing this pattern will help you as you check your work.
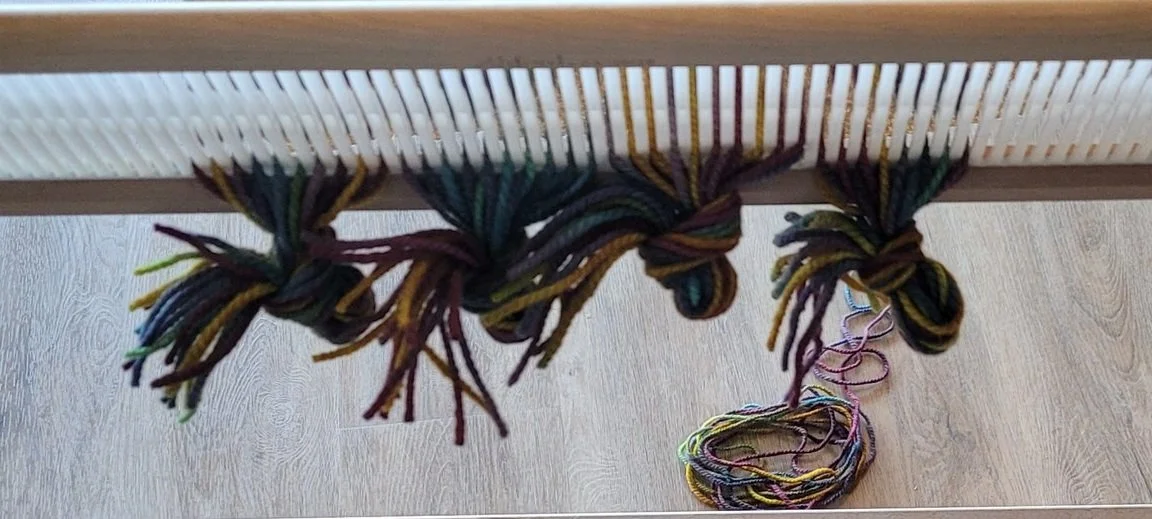
I always tie my warp so it can’t fall out of the heddle!
I work in small bundles. For a 1, 2, 3 threading I will work with 6 ends at a time (3 slots). After I have threaded those 6 ends, I tie a slip knot and move to the next 6 ends. This makes it easier for me to know where I am in the pattern as well as protects my work if a reed gets knocked loose!
A basic straight twill is threaded 1, 2, 3, repeat or 3, 2, 1, repeat
For weaving there are 3 positions for the reed. Each represents 1 shed. Here is how to read my symbols. Each shed is shown using 2 symbols. The first symbol refers to the front reed, the second symbol to the back reed.
Shed 1: 🡩-- front heddle up, back heddle in neutral
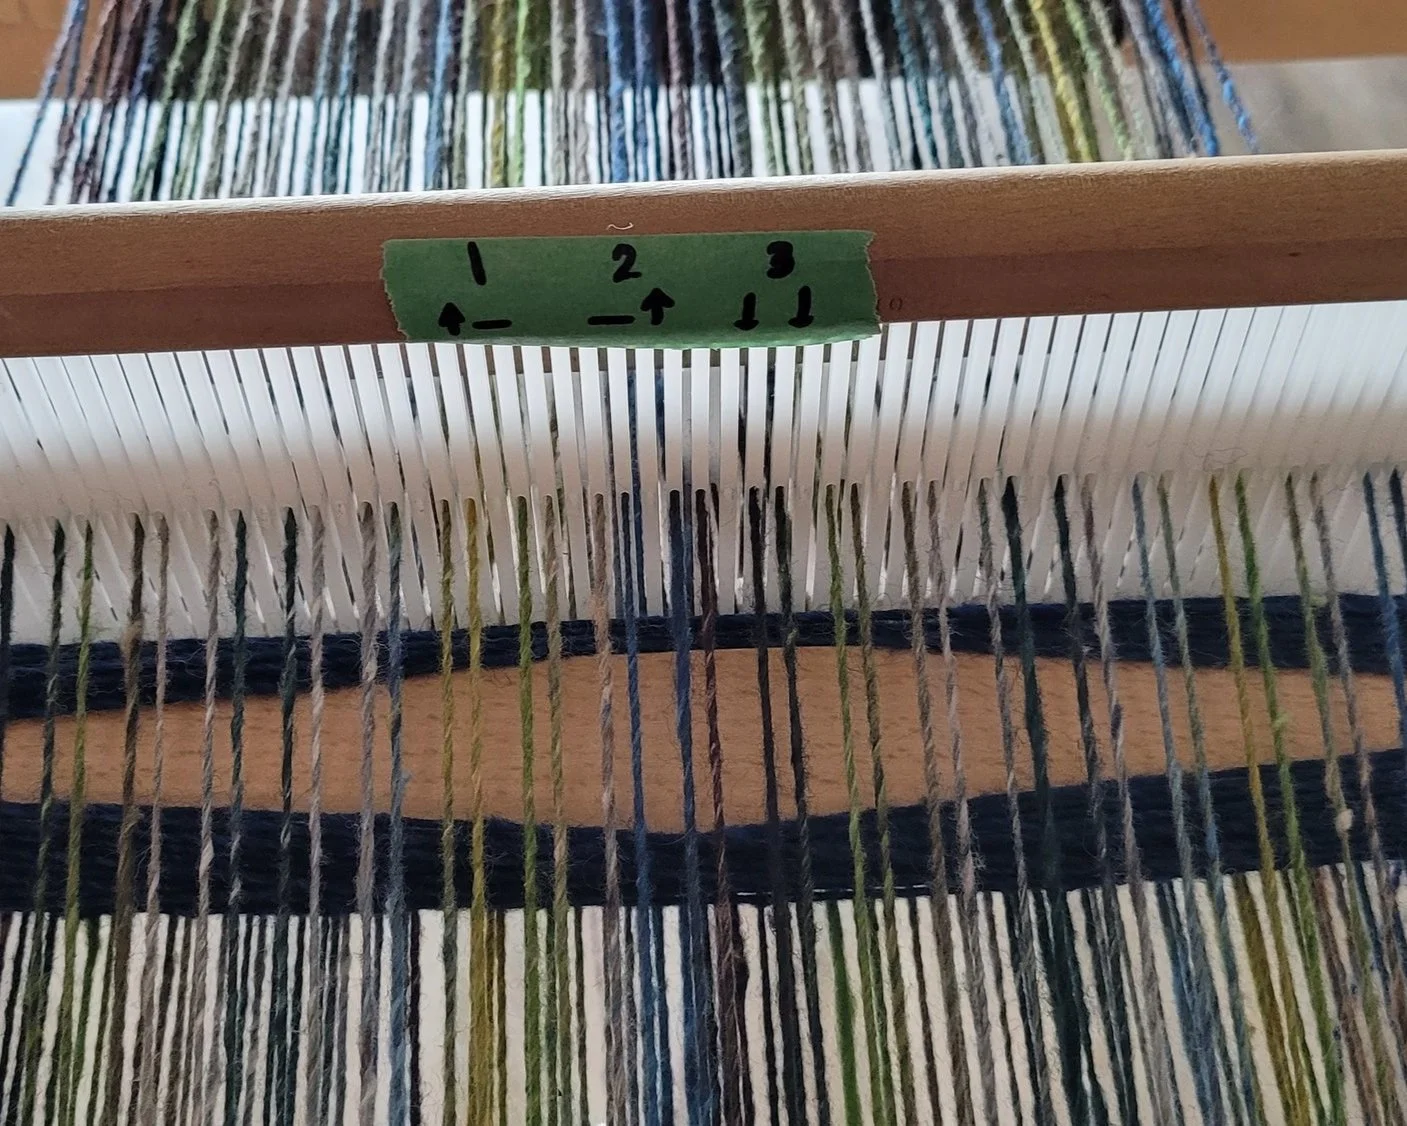
Shed 2: --🡩 front heddle neutral, back heddle up
Shed 3: 🡫🡫both heddles down
A basic twill is woven 1, 2, 3 repeat or 3, 2, 1 repeat.
To weave, begin in shed 1, slide the weft through. Use the front heddle to press the weft into place. Set the front heddle in the neutral position;
Lift the back heddle into the up shed, pass the weft through, use the front heddle to press the weft into place, let the front heddle hang on the warp;
Place the back heddle in the down position, place the front heddle in the down position, pass the weft through and use the front heddle to press into place, Let the front heddle hang;
Place the back heddle in the neutral position and the front heddle in the up position.
And that is how to weave a basic twill. Here’s a video to help: https://youtu.be/Bo6yKNvyVEw and another one here: https://youtu.be/awN1tQSAdho
Next up we’ll look at creating different patterns (herringbone and point twill I hope 😊).