
Two Heddles For Sett
If you’ve been following me on social media you will know that I spent the summer playing with 2 heddles. I updated my double width blanket pattern, improved my twill skills and worked on 2 heddles for proper sett which is what I’m going to focus on today.
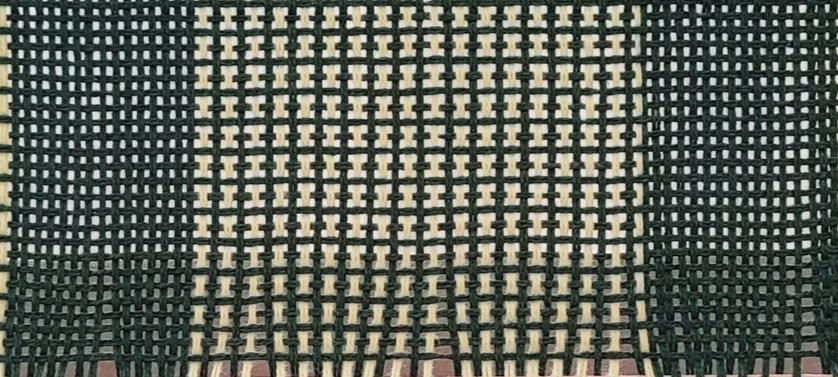
First, let’s talk about sett. Sett refers to how many threads are in an inch of warp. This is determined by your reed size. So if you are using a 7.5 dent reed and have one end in each slot and hole, your sett is 7.5. We can play with this little and most of us do this when we weave tea towels with 8/2 cotton doubled on a 10 dent reed. In this case, there are 2 ends in each slot and hole giving us technically 20 ends per inch (EPI), or a sett of 20. Since the pairs of threads move together as 1 end giving us more of a basket weave look than plain weave (even though we, as rigid heddle weavers still call this plain weave). And, we count the pairs as 1 end and put the sett at 10epi.
If we want a traditional 1 end up, one end down plain weave (also called Tabby in the floor loom world) we need to use 2 10 dent heddles. Tea towels with 2 heddles will give us a lighter feeling fabric…but because there are the same number of threads, they are just as absorbent. Plus, with 2 heddles, we can weave some interesting effects without needing to use pick-up sticks!

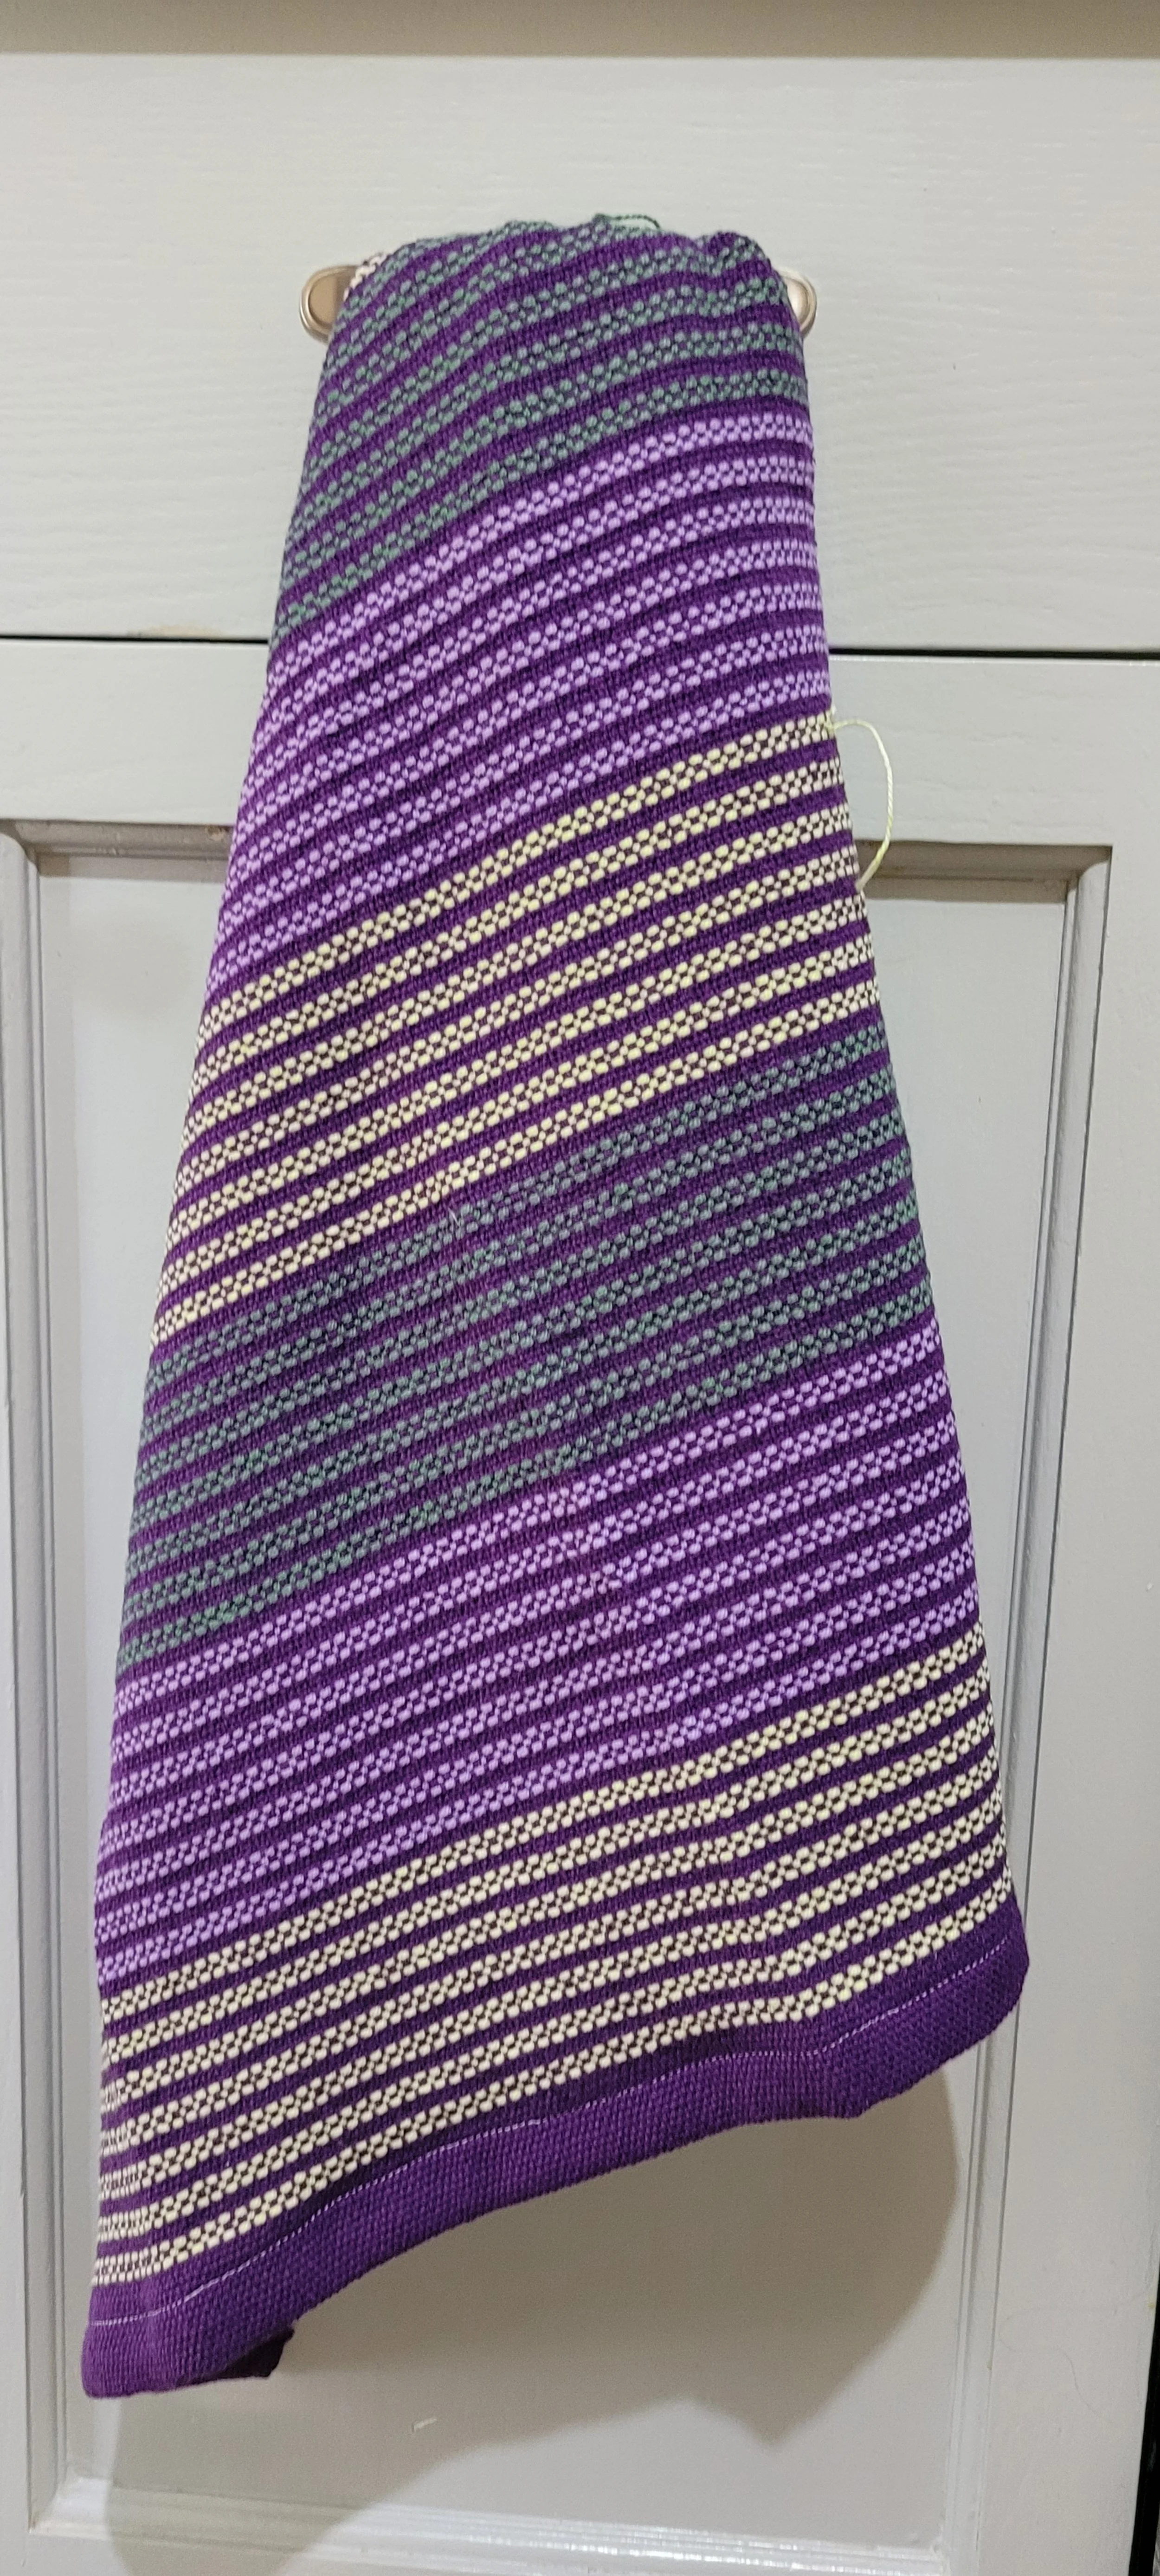
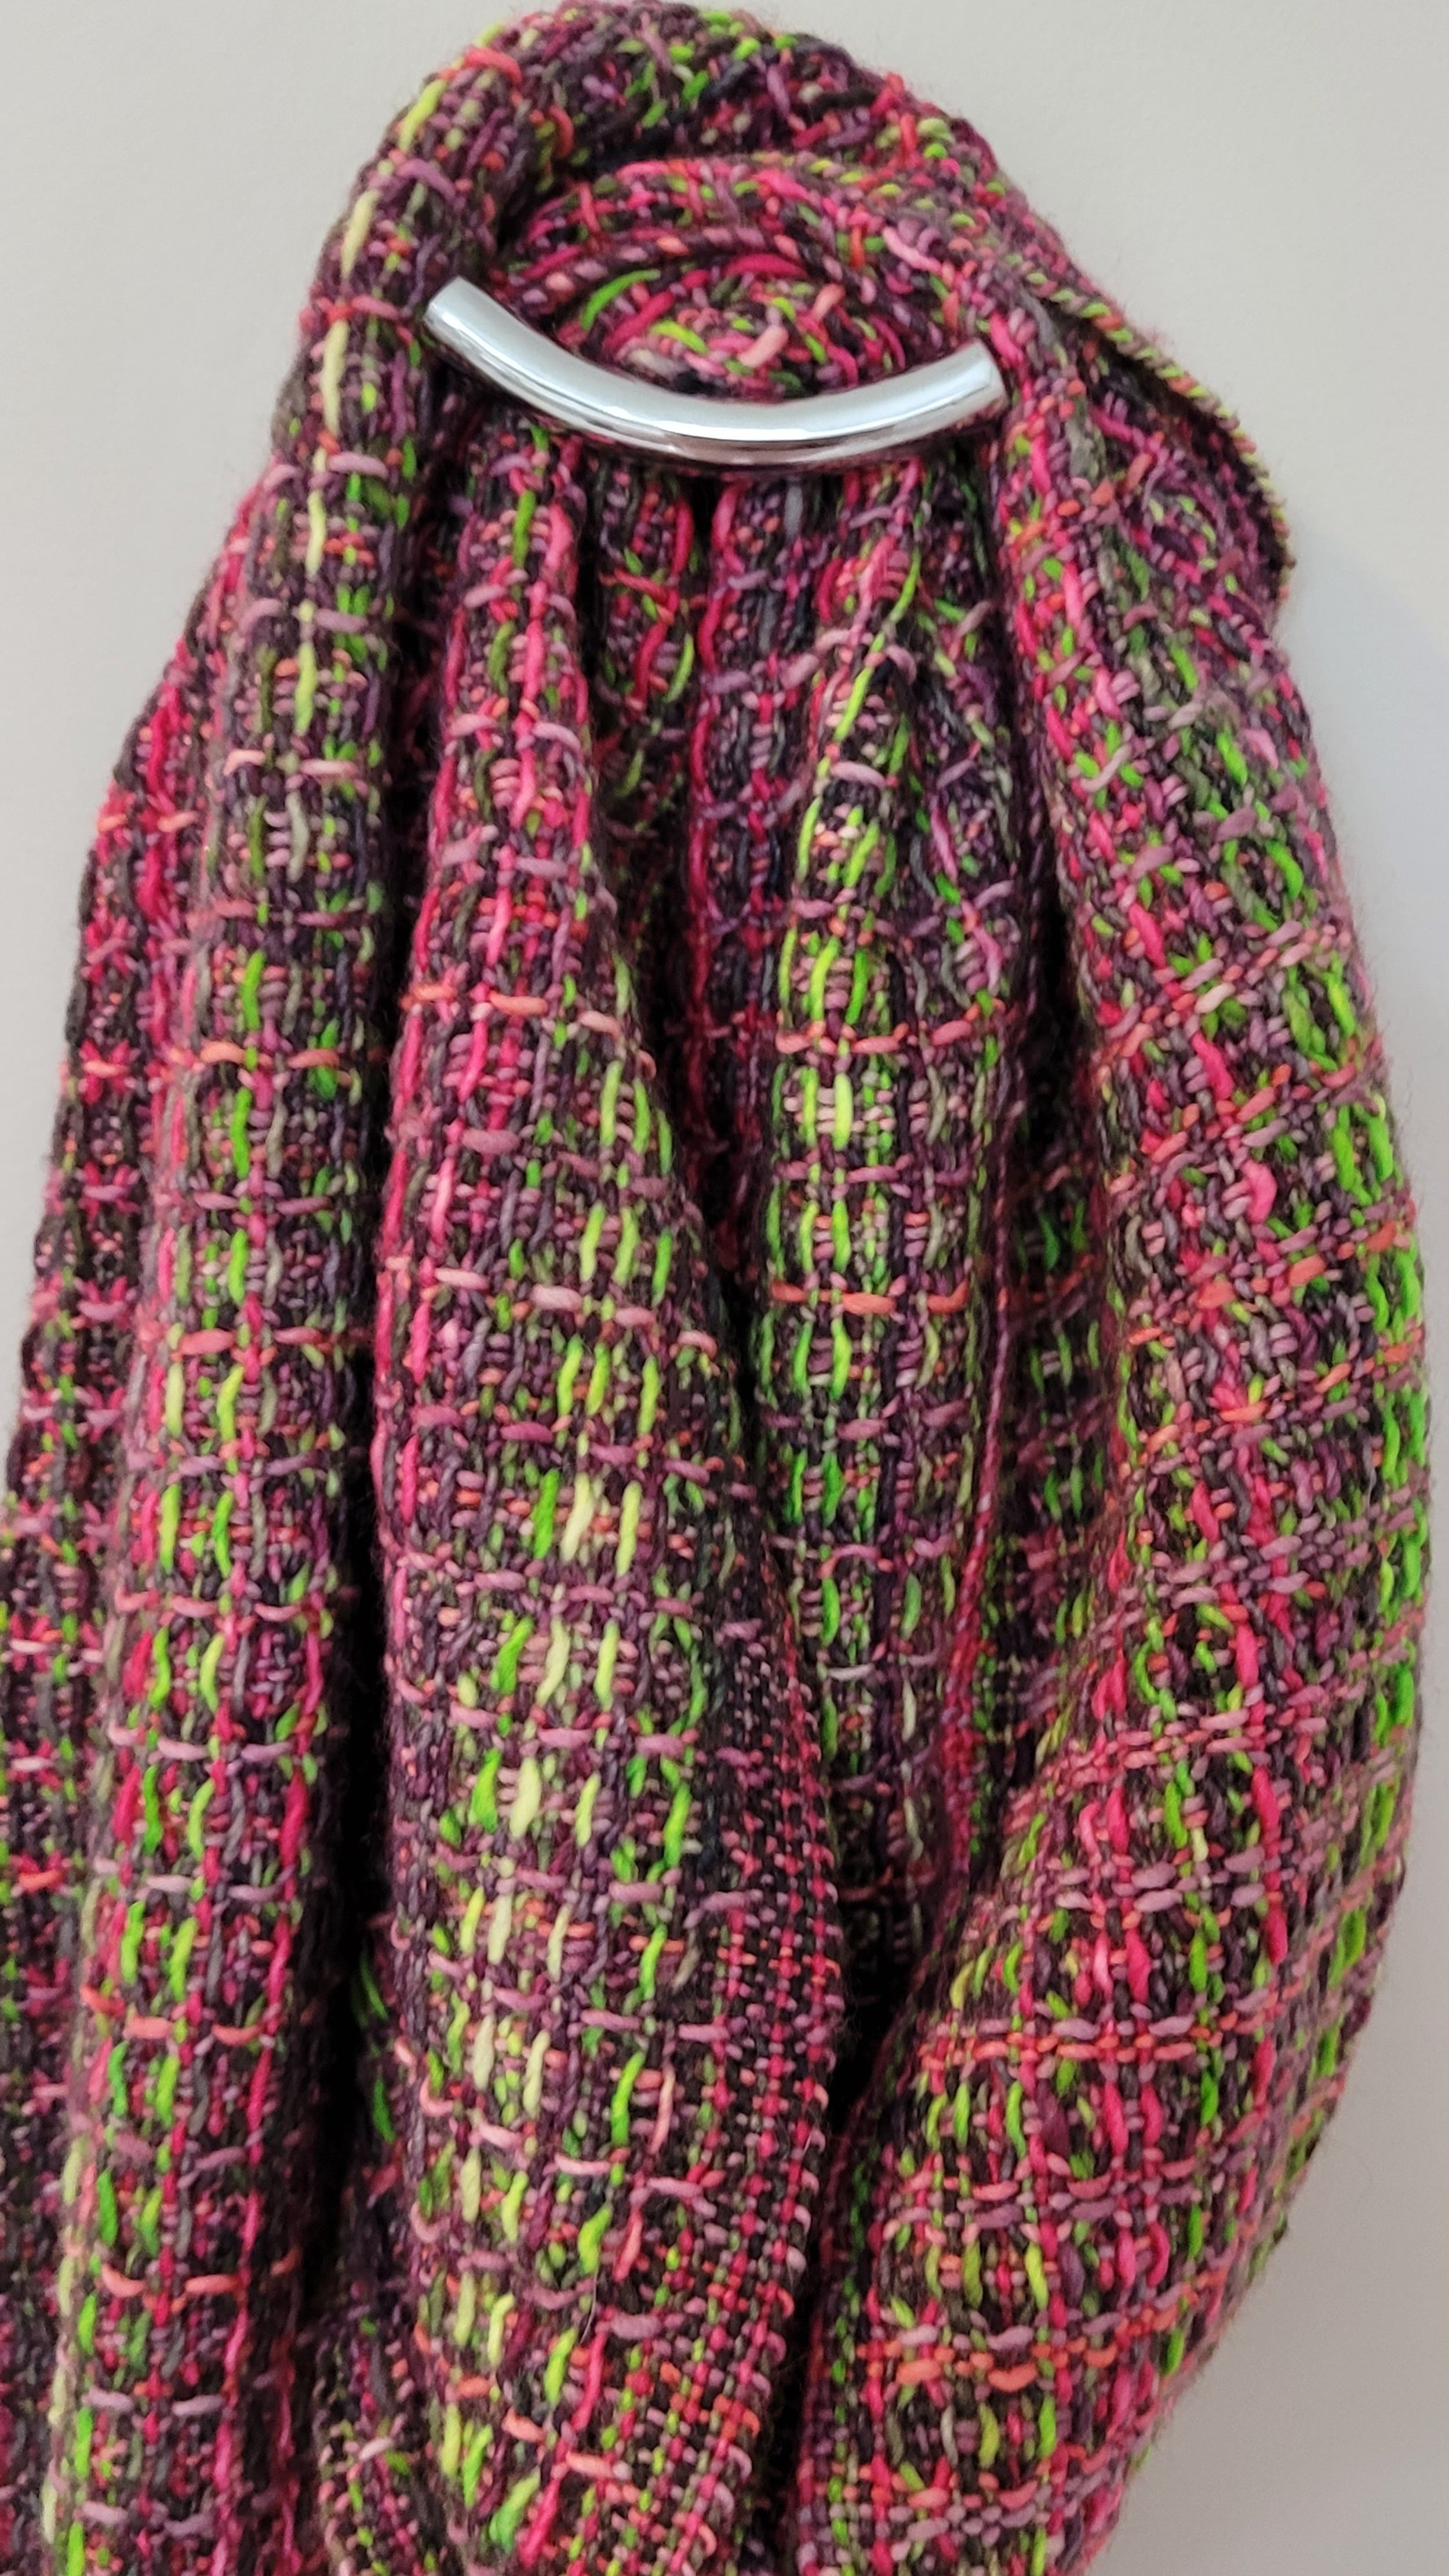
There are other reasons to use 2 heddles though. Sometimes a yarn looks like it will be great for weaving, but when you do the abrasion test, it fails! Using 2 heddles might solve this problem. When the yarn rubs in the heddles it can fuzz or fray and even break. Using a larger reed gives the yarn more space and it will fray less. But then the sett is too big. Two reeds can fix this! This scarf is set at 15epi. If I tried to thread this yarn in a 15 dent reed it would not work: the yarn would get jammed in the holes and become terribly fuzzy and likely break. It will work nicely in a 10 dent if you are careful. But for a heavier, warmer scarf, 2 7.5 dent reeds worked beautifully. The slots and holes are big enough to allow the yarn to move freely and I had no fuzzing at all (while I did have some on a 10 dent).
Now we know why you might want to use 2 heddles. What about warping and threading? Don’t be intimidated. Take your time and follow the instructions and it will be ok. It will take more time, and initially, much more concentration, but like everything, it gets easier as you practise.
Warping
You will need a double heddle block. These are standard with all newer Ashford and Schacht looms


Place the reed in the loom. It doesn’t matter if it is in the front of the back heddle block.
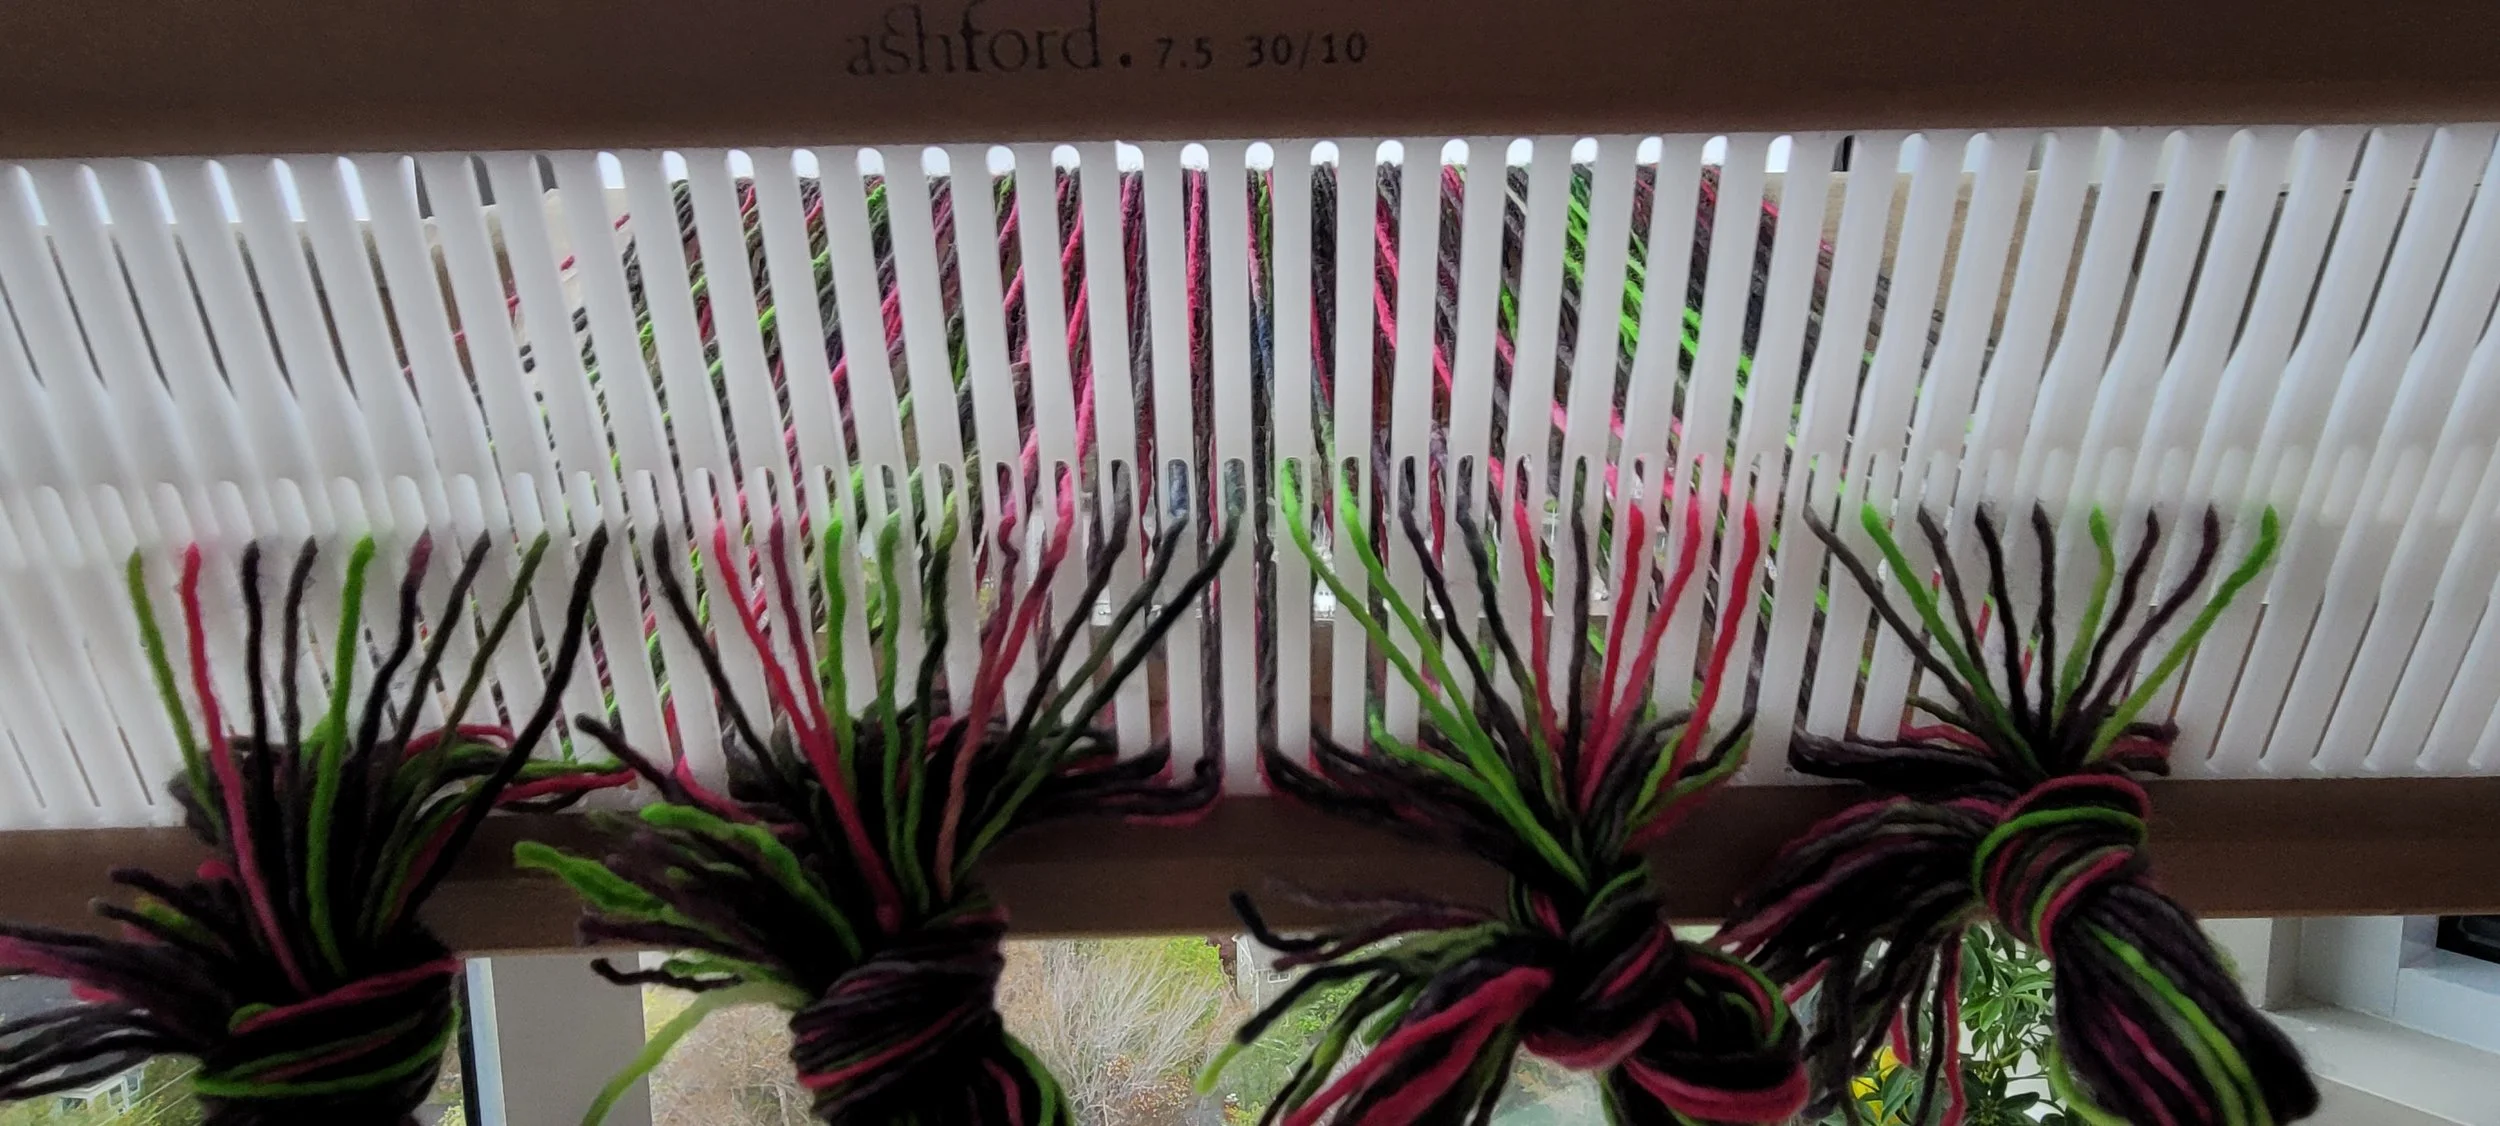
Thread each slot twice. This means there will be 4 ends in every slot. These 4 make one group and will be worked as a single group when threading the heddles.
Wind as usual. Tie slip knots in the warp after winding to ensure that if the reed falls off the loom, you haven’t lost all your threads!
Threading the Back Heddle
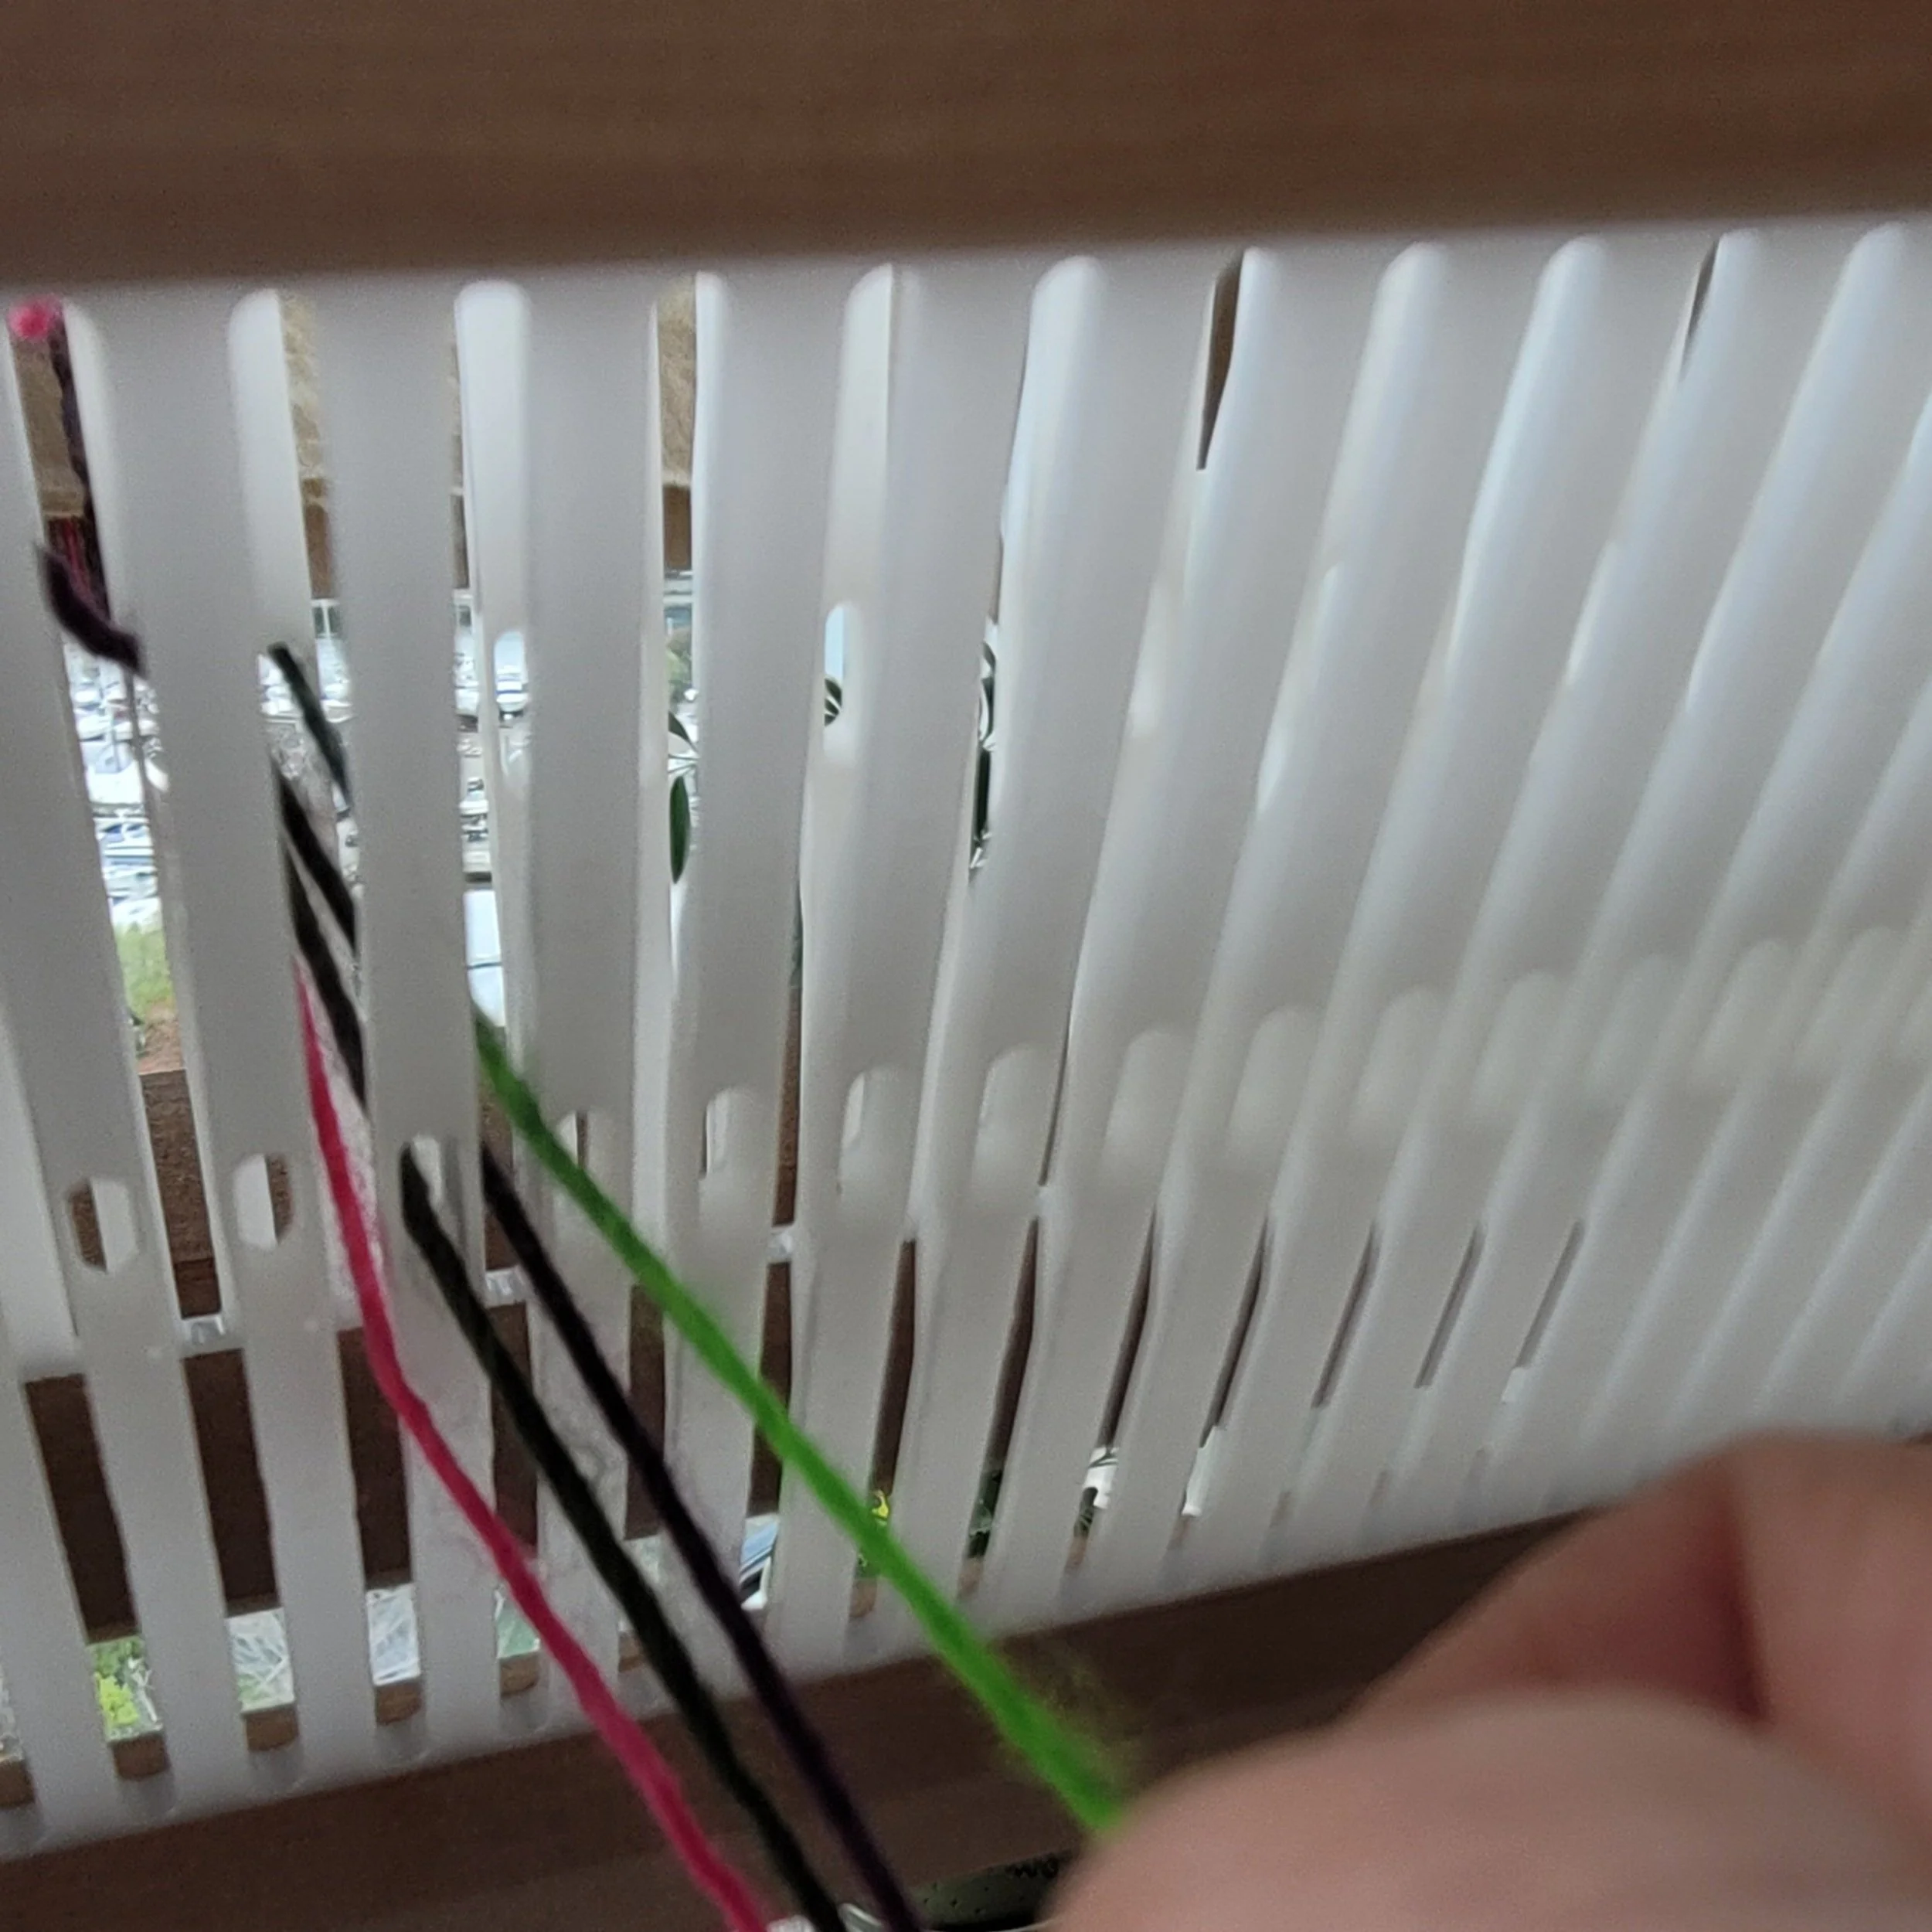
Place the heddle in the back position. Take 1 end from each slot and thread it through the hole to the right. Do this across the loom. When you are done, there should be 3 threads in every slot and 1 in every hole. The 3 threads in the slot and the thread in the hole to the right are 1 group. This will be important in the next step. As you work your way across the loom, remember to tie slip knots to protect the warp! (I have knocked the reed and lost all my threading, trust me, tie the slip knots!)
Threading The front Heddle
This one is a little more challenging. Take your time and remember to tie slip knots after every 3-4 groups. This way, if you make a mistake, you will know which 4 ends make 1 group.
Place the second heddle in the front block.
For the first bundle, take the three ends from the slot and thread them directly into the slot directly in front. (I count the slots to be sure, this is important as you don’t want the threads to be too angled from the back heddle to the front)
Now, take the 4th end of this group (the one in the back hole) and thread it through the slot to the right of the slot with 3 ends.
Take the 3 ends and thread 1 to the slot on the right (the one that has the thread from the back hole), 1 in the hole to the right and leave the last thread in the slot.
In the front reed you should now have, from right to left, 2 ends in 1 slot, 1 end in a hole and 1 end in a slot. This is the set up, and the hardest part. The rest is smooth sailing!
Grab the next group of 4 in the back heddle. Thread the end from the hole to the slot in front (the slot with 1 end). Take the next three ends and thread them slot, hole, slot. So the same slot you just threaded (It now has 3 ends) the hole to the left, and the slot to the left (that slot now has a single end)
Work your way across the loom. You should see 3 ends in every slot (except the first and last) and 1 end in each hole.
Done!
After tying on you will want to check for crossed threads between the heddles. If you find crosses, untie the relevant bundle and rethread the crossed ends (they will go back into the same slot or hole)
Writing this makes it seem very complicated. Here’s a couple videos that hopefully will make everything clear!
https://youtu.be/yj6i_TA2D4g Threading the back heddle
https://youtu.be/egaN-ru2Br8 Threading the front heddle
Weaving is easy! For plain weave, the heddles work together…both heddles up. both heddles down. If you are using a pick-up stick, insert it the same way as usual, and use as you normally would. There are a few things to remember when adding pick-up sticks, I’ll get them written out in a separate post.
Looking for a project? This is a scarf I did as a weaving class (so the pattern has been test woven and approved!). This is geared to the weaver that has experience with pick-up sticks and wants to add an extra heddle to the mix!
https://www.therogueweaver.com/new-products/2cubedscarfrigidheddlepattern
PS Are you interested in test weaving? Stay tuned for more details!